If you have ever wondered how to add a transparent background to your images, you have come to the right place. Whether you are a web designer, a graphic designer, or simply someone who wants to make their images stand out, understanding how to achieve transparency can be incredibly useful.
When working with image files, one of the key questions to ask yourself is what do you want to use the image for? There may be different reasons why you want to add a transparent background: for overlaying the image on top of another element, for creating a logo, or simply for design purposes.
There are several ways to achieve this effect, but one of the most common methods involves using a mask. A mask is essentially a selection that you create to determine which areas of the image will be transparent and which areas will remain opaque. In this article, we will walk you through a step-by-step answer to this question.
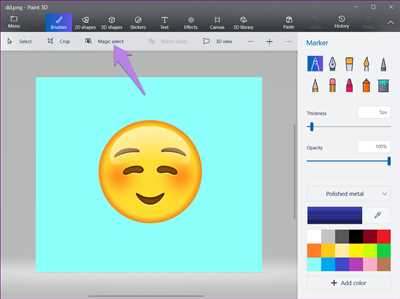
Before we dive into the process, it is important to know that there are tools available to help you add a transparent background. One popular tool is “EraseBG” which will allow you to quickly and easily remove the background from your image. Another tool you can use is the Magic Wand tool in Adobe Photoshop, which can be used to make a selection based on similar colors in the image.
To get started, open the image file that you want to work with in a photo editing software, such as Photoshop or GIMP. Save the file in a format that supports transparency, such as PNG or GIF. Open the file and select the area that you want to make transparent using the magic wand or any other selection tool.
Once you have made the selection, go to the background-color option in the toolbar and choose the “transparent” option. This will make the selected area transparent, allowing you to see the elements below the image.
Remember to save your image with a transparent background. When using the image on your site or in your designs, the transparency will be maintained. Now you know how to add a transparent background to your images using HTML and CSS.
Transparent Background – Image Opacity in CSS and HTML
When it comes to web design, having the ability to create transparent backgrounds can greatly enhance your designs. Whether you want to overlay text on an image or create unique visual effects, using transparency in your HTML and CSS can be a quick and effective way to achieve your desired look.
There are several ways to add transparency to elements in HTML and CSS, but one of the most common methods is through the use of opacity. Opacity is a CSS property that allows you to adjust the transparency of an element, making it partially or fully transparent.
To add opacity to an element in CSS, simply use the “opacity” property and set a value between 0 and 1. A value of 0 makes the element completely transparent, while a value of 1 makes it fully opaque.
For example, if you have an image with a white background and you want to make the background transparent, you can add the following CSS code:
background-color: rgba(255, 255, 255, 0);
This code sets the background color of the element to white (RGB values of 255, 255, 255) with an opacity of 0, effectively making it transparent.
In addition to using opacity, there are other tools and techniques you can use to create transparent backgrounds. One popular tool is Adobe Photoshop, which allows you to easily erase backgrounds from images and save them with transparency.
If you don’t have access to Photoshop or prefer a quick and easy online solution, there are also websites like “erasebg” that offer background removal services. These tools allow you to upload your image and select the areas you want to erase, leaving you with a transparent background.
Another way to achieve transparency is by using a separate image file with a transparent background. Instead of using a regular image file format like JPEG or PNG, you can use a format like GIF or SVG that supports transparency. This way, you can have parts of the image that are opaque and parts that are transparent, creating interesting design effects.
Regardless of the method you choose, adding transparency to your web design can be an important tool when working with backgrounds, headers, or any other elements on your site. By using opacity, background removal tools, or transparent image formats, you can easily create visually appealing designs that make use of transparency.
Quick Selection and Magic Wand Tools
The wand tool and the quick selection tool are commonly used to select specific areas in an image or design. These tools allow you to quickly select or subtract areas with a similar background color, making it easier to separate elements and create transparent backgrounds.
Here is a quick step-by-step guide on how to use these tools:
- Open the image or design file you want to work with.
- Select the wand or quick selection tool from the toolbar.
- Click on the background areas you want to select or erase.
- If needed, hold down the Shift key to add to the selection, or hold down the Alt key to subtract from the selection.
- When you have made the desired selection, go to the “File” menu and save the image in a format that supports transparency, such as PNG.
Using these tools, you can easily make the background of your images or designs transparent. This is particularly important when you want to overlay the image on a different background, or when you want to use the image as a header or an element on a website.
Remember that creating transparent backgrounds works in different ways depending on the software or platform you are using. The magic wand and quick selection tools are just two options among many that can be used to achieve transparency. Experiment with different tools and settings to find the best method for your specific needs.
To summarize, the magic wand and quick selection tools are valuable tools for selecting specific areas and creating transparent backgrounds. When used correctly, these tools can help you achieve the desired transparency and save your designs with the appropriate opacity.
For more advanced editing and masking techniques, you may also consider using dedicated image editing software or online tools like Erase.bg.
| The wand tool and quick selection tool can be used to select specific areas with similar backgrounds. |
| Using these tools, you can create transparent backgrounds for images or designs. |
| The transparency can be saved in formats such as PNG. |
| Experiment with different tools and settings to find the best method that works for you. |
| For more advanced editing and masking techniques, consider using dedicated image editing software or online tools. |
Reasons to make your Image Backgrounds Transparent with Erasebg
When designing your website or working on a graphic design project, it is important to have the ability to create images with transparent backgrounds. This allows you to easily integrate your designs into different layouts or backgrounds without any distracting or clashing colors.
One of the tools that can help you achieve this is Erasebg. It works like magic, allowing you to remove the background of your images with just a few simple steps. Here’s how it works:
- Select the image you want to make transparent and upload it to Erasebg.
- Use the Erasebg tool, such as the magic wand or selection tools, to mark the areas you want to keep or subtract from the transparent background.
- Save the file with a transparent background. Erasebg will provide the image with the transparency you need.
- In your HTML or CSS, set the background-color or background-image property to the desired transparent background color or image. This will allow the transparency of your image to show through.
There are several reasons why you would want to make your image backgrounds transparent using Erasebg:
- Design flexibility: Transparent backgrounds give you the flexibility to easily integrate your designs into different layouts or backgrounds without any clashing colors.
- Separate elements: Transparent backgrounds allow you to separate elements within your design, such as a header or heading, from the background. This can make your content more visually appealing and easier to read.
- Quick and easy: Erasebg provides a quick and easy way to remove the background from your images. You can achieve transparent backgrounds with just a few simple steps.
- Enhance transparency: By making your image backgrounds transparent, you can enhance the overall transparency of your design. This can create a more cohesive and professional look.
- Multiple uses: Transparent backgrounds can be used in various design projects, such as websites, advertisements, social media posts, and more. It allows for greater versatility and creativity.
So, if you want to add transparency to your image backgrounds, Erasebg is the perfect tool to use. Its easy-to-use interface and powerful features make it a valuable asset for any designer. Start creating transparent backgrounds for your images today and enhance the overall look and feel of your designs!
1 Answer 1
When designing a website, there may be times when you want to add transparency to the background of your elements. This can be achieved using CSS and HTML. Here are 5 ways you can make a background transparent:
- Using the opacity property: You can set the opacity of an element’s background-color to a value between 0 and 1. This will make the background transparent to some degree.
- Using RGBA values: RGBA allows you to define a color using red, green, blue, and alpha channels. The alpha channel specifies the transparency level. For example, rgba(255, 255, 255, 0.5) will create a semi-transparent white background.
- Using a transparent PNG image: If you have a PNG image file with a transparent background, you can use it as the background for your element.
- Using the CSS background-image property: You can use the URL of an image file as the value for the background-image property. If the image file has a transparent background, it will be used as the element’s background.
- Using masking tools like the Magic Wand tool: There are various image editing tools that allow you to select and subtract the background color or make it transparent. This works well when you want to separate the foreground from the background.
Before applying any of these methods to your design, it’s important to select the right tool or technique based on your specific requirements. Some tools, like erasebg or the Magic Wand tool, will allow you to quickly remove the background of an image. Other tools may require more steps and manual selection of important areas before making the background transparent.
In conclusion, there are several ways to make a background transparent in your HTML and CSS designs. The method you choose will depend on the specific elements and design you want to achieve.
Step 5 Save your file

After you have finished making your background transparent, it is important to save your file to preserve your changes. Here are the steps to save your file:
- Click on the “File” menu option in your design tool.
- Open the “Save” or “Save As” option.
- Select the location on your computer where you want to save the file.
- Choose a name for your file that is descriptive and easy to remember.
- Select the file format as HTML (.html) to save your design as an HTML document.
- Click the “Save” button to save your file.
Once your file is saved, you can use it on your website or any other platform that allows you to upload HTML files. This will ensure that the transparent background is preserved and displayed correctly.