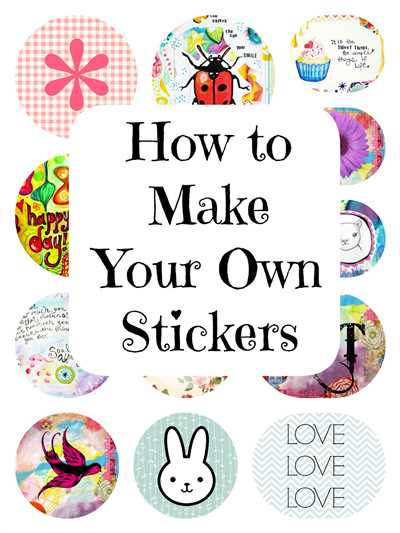
If you’ve ever wanted to take your design skills to the next level, printing stickers can be a fun and rewarding project. Whether you want to create custom labels for your home, design unique stickers for your laptop, or even start your own sticker business, this guide will show you how to bring your designs to life.
Before diving into the process, it’s important to understand the different types of stickers available. Regular vinyl stickers are self-adhesive and can be easily stuck to various surfaces. They are great for indoor use, but won’t hold up as well outdoors. On the other hand, outdoor stickers are made with materials that are more durable and weather-resistant. They’re perfect for using on your car, bike, or any other outdoor surface.
Once you’ve decided on the type of sticker you want to print, the next step is to design your artwork. This is the fun part! Use a design software or an online tool to create your sticker design. Depending on the shape and size of your stickers, you may need to create multiple designs to fit them all on one sheet.
When your designs are ready, it’s time to print! Make sure you have a printer that is capable of printing on self-adhesive sticker paper. If you’re unsure, check the printer’s specifications or consult the manufacturer. Load the sticker paper into the printer, making sure the printable side is facing up. It’s always a good idea to calibrate your print settings to ensure the best quality print.
Once the printing is done, the next step is to cut out the stickers. If you have ordered rectangular sticker sheets, you can use a ruler and a sharp knife or a paper cutter to cut the stickers into individual pieces. For round or irregular shapes, you can use scissors or a craft knife to carefully cut along the edges. Take your time to make sure your cuts are precise and clean.
If you want to add an extra layer of protection to your stickers, laminating them can be a good option. This will make them more durable and resistant to fading, scratches, and water damage. There are two main types of lamination you can choose from: matt or glossy. Matt lamination gives your stickers a smooth, non-reflective finish, while glossy lamination adds a shiny, reflective look.
Lastly, if you want to give your stickers a unique 3D effect, you can consider doming. This process involves applying a special resin to the surface of the stickers, giving them a raised and glossy appearance. Domed stickers are commonly used for branding purposes, as they add a high-end, professional touch.
Now that you know the step-by-step process of printing stickers, you can unleash your creativity and start designing! Whether you want to showcase your artistic skills, promote your business, or simply decorate your belongings, stickers are a great way to express yourself and make a statement. So go ahead and give it a try – you’ll be amazed at what you can create!
- How to Print Stickers at Home Step-by-Step Guide
- Step 1: Designing Your Stickers
- Step 2: Choose the Right Sticker Materials
- Step 3: Get Your Printer Ready
- Step 4: Print Your Stickers
- Step 5: Finish Your Stickers
- How to make stickers on a thermal label printer
- Step 3 Print your sticker designs
- Printing stickers and labels at Printcom
- What Are The Different Types Of Stickers
- Paper Stickers Vs Vinyl Stickers
- What Are Laminated Stickers
- What Is The Difference Between Die Cut And Kiss Cut Stickers
- Video:
- How To Make Stickers
How to Print Stickers at Home Step-by-Step Guide
Printing stickers at home can be a fun and creative way to personalize your belongings, create gifts, or start a small business. With the right materials and equipment, you can easily print stickers from the comfort of your own home. Follow this step-by-step guide to learn how:
| Step 1: | Designing Your Stickers |
| Step 2: | Choose the Right Sticker Materials |
| Step 3: | Get Your Printer Ready |
| Step 4: | Print Your Stickers |
| Step 5: | Finish Your Stickers |
Step 1: Designing Your Stickers
Before you start printing, you need to design your stickers. There are many software programs available that allow you to create custom designs, such as Adobe Illustrator or Canva. Make sure to consider the shape, size, and colour of your stickers. You can choose between rectangular, round, or other shapes depending on your preference. Remember to leave a margin around your designs for printing.
Step 2: Choose the Right Sticker Materials
There are different types of sticker materials available, so you need to decide whether you want to use self-adhesive paper or vinyl. Self-adhesive paper is a regular sticker material that is easy to print on with a standard printer. Vinyl stickers, on the other hand, are more durable and suitable for outdoor use. They come with a backing and are often laminated for extra protection.
Step 3: Get Your Printer Ready
Before printing, make sure your printer is calibrated and has enough ink. Also, check the specifications of your printer to see what size and type of sticker paper it can handle. If you’re unsure, it’s always a good idea to consult the printer’s manual or contact the manufacturer for guidance. Also, it is recommended to print a test page first to ensure your designs will show up correctly.
Step 4: Print Your Stickers
Once you have your designs and sticker materials ready, it’s time to print! Load the sticker paper into your printer according to the manufacturer’s instructions. Make sure the paper is loaded properly to avoid any jamming or misalignment issues. If you’re printing vinyl stickers, you may need to adjust the print settings to accommodate the thicker material.
Step 5: Finish Your Stickers
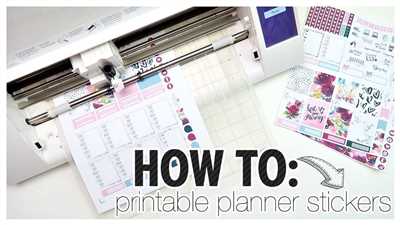
After printing, you may want to add a finishing touch to your stickers. This can be done by applying a clear laminate or using a doming kit to give them a glossy and three-dimensional look. Depending on the materials you’ve chosen, there may be different finishing options available, so make sure to research and decide what suits your needs best.
With this step-by-step guide, you now know how to print stickers at home. Whether you’re printing for fun or business purposes, make sure to experiment with different designs, shapes, and materials to create unique and eye-catching stickers.
How to make stickers on a thermal label printer
If you want to make stickers on a thermal label printer, you’re in luck! This guide will show you step-by-step how to create your very own stickers using this type of printer.
First, you’ll need to decide on the design for your sticker. Whether you want a rectangular, round, or die-cut shape, the choice is yours. Keep in mind that the design should be suitable for printing on a thermal label printer.
Next, you’ll need to order the materials. You can choose from different types of vinyl or paper sheets, depending on whether you want the stickers to be more for indoor or outdoor use. We recommend using laminated sheets for added durability.
Once you have your materials ready, you can start the printing process. Make sure that your thermal label printer is full of ink and that the labels are properly loaded. You can print one sticker at a time or print multiple stickers on a sheet.
The next step is to cut out the stickers. If you have a standard-size sticker, you can simply cut around the design. If you have a die-cut sticker, you’ll need to carefully follow the shape of the design. A good tip is to use a ruler or a template to guide your cutting.
After cutting the stickers, you may want to add some finishing touches. If you want a glossy look, you can use a doming process to add a thick, clear layer on top of the sticker. This will give it a 3D effect. If you prefer a more matte look, you can simply laminate the sticker with a matt laminate.
Finally, you’re ready to use your stickers! You can stick them onto any surface you like – walls, windows, or even your suitcase. The adhesive backing on the sticker will hold it in place. Now you have your very own custom-made stickers made with a thermal label printer!
To summarize, making stickers on a thermal label printer is a simple and fun process. You just need to design your sticker, order the materials, print, cut, and apply. Whether you need a few or many stickers, this method is a great way to create professional-looking stickers at home.
Step 3 Print your sticker designs
Once you have your vinyl sticker designs ready, it’s time to print them out. Printing stickers is a relatively straightforward process that can be done at home or through a professional printcom.
There are different materials available for printing stickers, such as self-adhesive vinyl or label sheets. Vinyl stickers are more durable and water-resistant, making them suitable for outdoor use. Label sheets, on the other hand, are standard paper with a self-adhesive backing.
Before printing, make sure your printer is calibrated and set to the right settings. For best results, it’s recommended to use a printer with large colour gamut and high-resolution capabilities.
Depending on the shape of your stickers, you can choose between rectangular, round, or die-cut shapes. If you’re designing your own stickers, it’s important to know the dimensions of each sticker so you can accurately design them. If you’re ordering stickers from a printing business, they will show you the available shapes and sizes to choose from.
If you want your stickers to have a professional finish, you can opt for additional features such as laminated or doming. Laminated stickers have a thin protective layer that enhances their durability and UV resistance. Doming adds a 3D effect to your stickers, making them stand out even more.
When you’re ready to print, load the sticker sheets into the printer following the printer’s instructions. Make sure to print a test page to ensure the colours and design look as expected before printing a large batch.
Once your stickers are printed, you can cut them out using scissors or a cutting machine, depending on the quantity and complexity of your designs. Peel off the backing of each sticker and they’re ready to use!
Printing your own stickers is a great way to add a personal touch to your business or creative projects. Whether you’re making labels for your products or decorating your walls, knowing how to print stickers gives you the freedom to create and customize to your heart’s content.
Now that you know the step-by-step process of printing stickers, you can start turning your ideas into reality!
Printing stickers and labels at Printcom
If you’re looking to print stickers or labels, Printcom is the place to go. Printcom offers a wide variety of printing services, including sticker and label printing. Whether you need stickers for your personal use or labels for your business, Printcom can help you get the job done.
First, you’ll need to decide what type of sticker or label you want. Printcom offers a range of options, including self-adhesive stickers, thermal labels, and vinyl labels. Each type of material has its own advantages and it’s important to choose the one that will best suit your needs.
If you’re not sure which material to choose, Printcom’s knowledgeable staff can guide you through the decision-making process. They can show you samples of each material and explain the differences between them, so you can make an informed choice.
Once you’ve decided on the material, you’ll need to know the size and shape of your sticker or label. Printcom offers a variety of sizes and shapes, including rectangular, round, and custom shapes. They can also print stickers and labels in different finishes, such as gloss or matt.
If you already have a design for your sticker or label, you can simply upload it to Printcom’s website. If you’re not confident in your design skills, Printcom also offers a design service. Their team of designers can create a custom design for you, based on your specifications.
Before printing, Printcom will calibrate their printers to make sure that each sticker or label is printed accurately. This ensures that the colours on your design are vibrant and that the image is clear and sharp. Printcom uses high-quality ink and printing techniques, so you can be sure that your stickers and labels will look professional.
Once your stickers or labels are printed, Printcom can also laminate them for you. Laminating adds a layer of protection to your stickers or labels, making them more durable and long-lasting. Printcom uses a high-quality laminating material that won’t peel or bubble.
When it comes time to affix your stickers or labels, Printcom makes it easy. Their stickers and labels come with a self-adhesive backing, so you can simply peel and stick them to the desired surface. Whether you want to put them on a wall, a window, or any other smooth surface, Printcom’s stickers and labels will hold fast.
In conclusion, if you need stickers or labels, Printcom is the go-to printing service. They offer a wide range of materials, sizes, and shapes to choose from. Their step-by-step process ensures that your stickers or labels will be printed accurately and professionally. Plus, their design service and laminating options add an extra level of customization and durability to your stickers or labels. So why wait? Order your stickers or labels from Printcom today!
What Are The Different Types Of Stickers
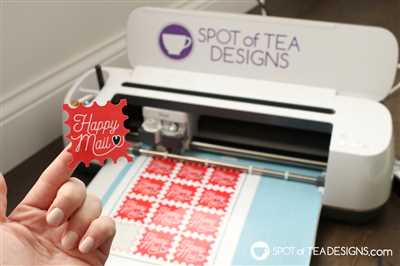
1. Regular Stickers:
Regular stickers are the most common type of stickers that you will come across. They are printed on a rectangular or round sheet of self-adhesive paper or vinyl. Regular stickers are often used for labelling, designing merchandise, or simply for decorative purposes.
2. Die-Cut Stickers:
Unlike regular stickers, die-cut stickers are individually cut in custom shapes according to your design. This means that you can have your stickers in any shape you want, whether it’s a logo, an object, or a specific image. Die-cut stickers are great for adding a unique touch to your products, packaging, or promotional materials.
3. Waterproof Stickers:
If you need stickers that can withstand exposure to water or other liquids, then waterproof stickers are the way to go. These stickers are made with water-resistant materials and a laminated finish that ensures they won’t fade or smudge when exposed to moisture.
4. Outdoor Stickers:
Outdoor stickers are designed to endure harsh weather conditions, such as rain, wind, and sunlight. They are printed on durable materials that are UV-resistant and can withstand fading and cracking. Outdoor stickers are ideal for displaying your business logo, contact information, or promotional messages on windows, walls, vehicles, or any outdoor surface.
5. Domed Stickers:
Domed stickers, also known as 3D stickers, add a unique visual appeal to your designs. With a domed finish, these stickers give a raised and rounded appearance to your logos, images, or text. Domed stickers are commonly used for branding purposes, and their glossy and vibrant look can make your products or promotional materials stand out.
6. Thermal Stickers:
Thermal stickers are a type of self-adhesive sticker that doesn’t require any ink or toner to print. Instead, they are printed using a thermal printer that applies heat to the sticker material, creating the desired design. Thermal stickers are commonly used for labels, receipts, barcodes, and other applications where fast printing and durability are important.
7. Matt or Glossy Finish:
When choosing stickers, you can choose between a matt or glossy finish. A matt finish gives stickers a non-shiny and muted appearance, while a glossy finish adds a shiny and polished look to your designs. The choice between the two depends on the desired aesthetic and the application of the stickers.
Before you print stickers, make sure to calibrate your printer for accurate color representation. You can print a test sheet and compare the colors to your original design to ensure the best results. Additionally, consider the size and quantity of stickers you need, as well as the material that suits your intended use, whether it’s for personal, home, or business purposes.
By understanding the different types of stickers available, you can make informed decisions when designing and ordering your stickers. Remember to choose the type of sticker that aligns with your design goals and suits your specific needs.
Paper Stickers Vs Vinyl Stickers
When it comes to printing stickers, one of the first decisions you’ll need to make is what material to use for your stickers. The two main options are paper stickers and vinyl stickers, and both have their own advantages and disadvantages.
Paper Stickers:
Paper stickers are a popular choice for those who are looking to print labels or stickers for indoor use. They are available in a variety of shapes, sizes, and colours, making them a versatile option for your printing needs. Paper stickers are also generally less expensive than vinyl stickers, making them a great choice if you’re on a budget.
However, paper stickers are not water-resistant, so they may not be suitable for outdoor use or in environments where they may come into contact with moisture. Additionally, paper stickers may not be as durable as vinyl stickers, as they won’t hold up as well to wear and tear.
Vinyl Stickers:
Vinyl stickers, on the other hand, are a more durable and long-lasting option. They are waterproof and can withstand exposure to the elements, making them ideal for outdoor use. If you want your stickers to last and remain in good condition for a long time, vinyl stickers are the way to go.
When it comes to design, vinyl stickers offer more options than paper stickers. They can be printed in full colour and can even be die-cut to any shape or size you desire. Vinyl stickers are also available with a glossy or matt laminate, which adds an extra layer of protection to your design.
However, it’s important to note that vinyl stickers tend to be more expensive than their paper counterparts. If you’re looking to print a large quantity of stickers, the cost can quickly add up. But if you want high-quality, durable stickers that can withstand outdoor use, vinyl stickers are worth the investment.
In conclusion, when deciding between paper stickers and vinyl stickers, it’s important to consider your specific needs and the purpose of your stickers. If you’re looking for an affordable option for indoor use or a short-term project, paper stickers may be the way to go. However, if you need long-lasting, water-resistant stickers for outdoor use or a higher-end product, vinyl stickers are recommended.
Now that you know the difference between paper stickers and vinyl stickers, you can make an informed decision on which material will be the best fit for your printing needs!
What Are Laminated Stickers
Laminated stickers are a type of self-adhesive label that is printed on a sheet and then cut into individual pieces. They are essentially stickers that have an extra layer of protection added to them to make them more durable and long-lasting.
The lamination process involves applying a thin layer of transparent material, such as matt or gloss film, to the top of the printed sticker. This layer acts as a barrier that helps to protect the sticker from water, UV rays, and general wear and tear. The lamination also gives the sticker a nice finish, making it look more professional and high-quality.
There are several benefits to using laminated stickers. First of all, they are much more durable compared to regular stickers. They can withstand exposure to outdoor elements, such as rain and sunlight, without fading or peeling. This makes them perfect for outdoor applications like bumper stickers, window decals, or labels for products that will be used outside.
The lamination also makes the stickers water-resistant, which means that they won’t smudge or run if they get wet. This is especially important if you plan on using the stickers on items that may come into contact with water, such as water bottles or food containers.
Another advantage of laminated stickers is that they are easier to handle during the printing process. The lamination helps to hold the individual sticker pieces together, preventing them from getting damaged or misaligned. This is especially useful when printing large quantities of stickers.
When designing your laminated stickers, you have the freedom to choose from various shapes, sizes, and materials. The most common shapes are rectangular and round, but you can also have custom die-cut shapes if you want something more unique. The sizes range from small labels to large wall decals, so you can find something that suits your needs.
Before ordering laminated stickers, make sure you know what materials and sizes are available. Some printing companies offer different types of laminated materials, such as gloss or matt finishes. You should also decide on the size and shape of the stickers and whether you want them on a sheet or as individual pieces.
If you’re not sure how to design your laminated stickers, many printing companies offer a step-by-step guide or templates that you can use. This will help you calibrate your designs and ensure that they are printed correctly. Some companies even have online design tools that allow you to create your sticker designs right from your own home.
In conclusion, laminated stickers are a great option for businesses or individuals who need durable, water-resistant stickers. They are easy to print, cut, and apply, and they offer a professional and high-quality finish. Whether you need stickers for outdoor use, products, or simply to decorate your belongings, laminated stickers are a reliable and attractive choice.
What Is The Difference Between Die Cut And Kiss Cut Stickers
If you’re in the sticker printing business, you’ll want to know the difference between die cut and kiss cut stickers. Both types of stickers serve different purposes, so it’s important to understand their characteristics before deciding which one to use for your labels. Whether you’re printing stickers for a round of home business or for a large-scale order, it’s crucial to understand the key differences between these two types of stickers.
The main difference between die cut and kiss cut stickers lies in the cutting process. Die cut stickers are individually cut pieces with rounded corners, whereas kiss cut stickers are cut through the top layer of the sticker with a backing sheet that holds the sticker pieces in place. The die cut process is more precise and recommended for designs with regular shapes, while kiss cut stickers are a great option for more complex or irregular designs.
When it comes to materials, die cut stickers are often made with matt or gloss vinyl, while kiss cut stickers can be made with a variety of materials, including vinyl, paper, and more. Die cut stickers are usually laminated for a sleek finish, while kiss cut stickers can be both laminated and non-laminated, depending on the desired effect.
Another difference is the availability of sizes for each type of sticker. Die cut stickers are available in standard sizes and can be ordered in custom sizes as well. Kiss cut stickers, on the other hand, can be ordered in various sizes and shapes, making them a versatile choice for any design.
Before you print your stickers, it’s important to make sure your design is ready. Whether you’re designing the stickers yourself or working with a print company, make sure your files are set up properly. Check with the printing company to see if they have any specific requirements before submitting your artwork.
In terms of printing, die cut stickers can be printed through various printing processes, including thermal and regular printer, while kiss cut stickers are typically printed using digital printing methods.
Lastly, the application process for each type of sticker is different. Die cut stickers are usually self-adhesive and can be applied to any smooth surface, such as walls, windows, or even your suitcase. Kiss cut stickers, on the other hand, are typically used as labels and have a backing sheet that needs to be peeled off before sticking them onto a surface.
In summary, the main differences between die cut and kiss cut stickers lie in the cutting process, materials, sizes, printing process, and application. Understanding these differences will help you decide which type of sticker is best suited for your needs. Whether you choose die cut or kiss cut stickers, both options offer great design possibilities and can help you achieve the desired look for your labels or business branding.


