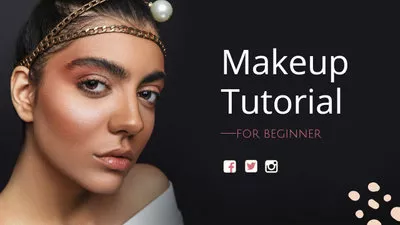
Creating your own makeup can be a fun and rewarding project. Whether you’re a makeup artist looking to expand your skills or just an individual looking to try something new, learning how to create makeup allows you to have full control over the colours and products you use. In this tutorial, we will guide you through the steps to create a glowy, no-makeup makeup look.
Firstly, you must have a desktop setup or an iPhone handy. Having a desktop or an iPhone enables you to easily access resources such as YouTube tutorials or makeup blogs. These platforms are filled with countless makeup tutorials and tips, making them an excellent starting point for beginners. You can also categorize and organize your favourite tutorial links in a grid on your desktop or iPhone homepage for easy access.
When making your own makeup, it’s important to have the right tools and ingredients. A good starting point is to gather the essential items such as foundation, concealer, blush, highlighter, and lip colour. You can purchase these items from a makeup supplier or make them yourself using natural ingredients. Adding a step-by-step guide or tutorial video can be an optional but helpful resource for those who are new to creating makeup.
Before you begin, you may want to give yourself a mini intro and take some before and after photos for your makeup gallery. This way, you can track your progress and see the transformation that occurs with each new creation. Once you’re ready, start by applying a small amount of foundation onto your cheeks and blend it outwards using a makeup sponge or brush.
To achieve a natural glow, highlight your cheekbones, brow bone, and the bridge of your nose with a highlighter. Gently apply the highlighter using a brush or your fingertips, focusing on the areas that catch the light naturally. Use a small amount to avoid an overly shimmery look, and remember to blend it well to achieve a seamless finish.
For the final touch, add a touch of colour to your lips using a lip colour of your choice. You can go for a natural nude or a bold red, depending on the look you want to achieve. Don’t be afraid to experiment and find what works best for you.
There’s no limit to what you can create with your own makeup. From creating a natural everyday look to experimenting with bold and colourful looks, the possibilities are endless. So go ahead, gather your tools and ingredients, and start creating your own makeup masterpieces!
- Makeup Video: How to Film and Create Makeup Tutorial Videos for YouTube and Instagram by iPhone
- Step 1: Add an intro on your homepage
- Optional alternative to the Gallery Grid: Creating projects to categorize
- Add some colour to your cheeks
- Final setup
- Video:
- How To Launch A Makeup Brand & Sell Online: The Ultimate Guide
Makeup Video: How to Film and Create Makeup Tutorial Videos for YouTube and Instagram by iPhone
If you’re a makeup enthusiast and want to share your talent with the world, creating makeup tutorial videos is a must! In this article, we’ll show you how to film and create stunning makeup tutorial videos for YouTube and Instagram using just your iPhone.
Step 1: Setup Your Makeup Space
Before you start filming, make sure you have a clean and organized space for your makeup projects. This will give your video a professional and polished look. Set up your makeup products on a desktop or a table, and make sure you have good lighting to capture all the details.
Step 2: Choose the Right Amount of Makeup
When creating a tutorial, it’s essential to use the right amount of makeup. You want to showcase the products effectively without overwhelming your face. Apply foundation, concealer, blush, highlighter, and any other products in the right order to achieve the desired look.
Step 3: Film Yourself Applying Makeup
Once you’re ready, use your iPhone to film yourself applying the makeup. You can either film in front of a well-lit mirror or get creative with different camera angles. Make sure to film each step of your makeup routine in detail, so your audience can follow along.
Step 4: Add Photos or Videos to Enhance Your Tutorial
If you want to give your tutorial an extra boost, you can add photos or videos to showcase before-and-after results or close-ups of specific techniques. This will help your audience see the transformation and get a better understanding of the makeup application process.
Step 5: Categorize and Categorize Your Videos on YouTube and Instagram
When uploading your tutorial videos, categorize them accordingly. On YouTube, you can create playlists or use tags to make it easier for viewers to find what they’re looking for. On Instagram, use relevant hashtags and categorize your videos into highlights on your profile so that they’re easy to navigate.
Step 6: Create an Eye-Catching Thumbnail
The thumbnail is the first thing that grabs your viewers’ attention. Create a captivating thumbnail that represents the content of your tutorial. Use bright and attractive colors to make it stand out on YouTube and Instagram.
Step 7: Film an Engaging Introduction
When starting your tutorial video, it’s essential to film an engaging introduction. Introduce yourself and mention what the video is about. This will help grab your viewers’ attention from the beginning and make them want to watch the entire tutorial.
Step 8: Give Your Video a Final Touch with Editing
Once you’ve filmed your tutorial, it’s time to give it a final touch with editing. Trim any unnecessary footage and enhance the colors and brightness if needed. You can use video editing apps like iMovie or Adobe Premiere Rush to make your video look more professional.
Step 9: Create a Grid or Gallery on Instagram
If you’re creating makeup tutorials for Instagram, consider organizing your videos into a grid or gallery. This will allow your viewers to browse through your content easily and find specific makeup looks.
Step 10: Add a Glow to Your Cheeks and Glow!
To make your makeup tutorial videos more captivating, add a final touch of glow to your cheeks. Use a highlighter or an alternative product to create a radiant and glowing effect. This will make your makeup look even more stunning on camera.
By following these steps, you’ll be ready to film and create makeup tutorial videos with your iPhone. Whether you’re sharing your expertise on YouTube or Instagram, remember to categorize your videos, create engaging thumbnails, and add a final touch of glow to become a makeup tutorial sensation!
Step 1: Add an intro on your homepage
The first step in creating a makeup tutorial is to add an intro on your homepage. This is the first thing that your visitors will see when they come to your website or blog, so it’s important to make a good impression. Your intro should give an overview of what your makeup tutorials are about and what they can expect to learn from them.
Start by creating a grid of photos or videos that highlight some of your best makeup looks. You can categorize them by the type of makeup tutorial, such as “Everyday Makeup” or “Smokey Eye Tutorial.” This will make it easier for your visitors to find the specific tutorial they are looking for.
If you have a lot of photos or videos, you may want to create a slideshow or carousel on your homepage to display them. This will give your visitors a preview of the different makeup looks they can learn to recreate.
In addition to the visual elements, you should also include a short description of yourself and your makeup expertise. This can include information such as how long you’ve been doing makeup, any professional training you’ve received, and any certifications or awards you have earned.
Finally, make sure to include links to your social media profiles, such as Instagram and YouTube. This will allow your visitors to easily find and follow you on these platforms, where you may have additional makeup tutorials or behind-the-scenes content.
Remember, the goal of your homepage intro is to entice visitors to explore your website further and watch your makeup tutorials. So, make sure to create a visually appealing and informative intro that highlights your expertise and showcases the amazing makeup looks you can help others create.
Optional alternative to the Gallery Grid: Creating projects to categorize
If you’re an makeup enthusiast, you know the importance of showcasing your skill and creativity on platforms like Instagram or YouTube. One way to make your makeup looks stand out is to add a stunning glow to your cheeks. With just a simple step, you can achieve a beautiful and radiant look that will make heads turn!
When it comes to makeup, highlighting is an essential step to create a full face and add dimension to your features. While most people reach for a traditional highlighter to achieve that glowing effect, there’s an alternative method that can give you a similar result.
An optional alternative to using a highlighter is to apply a small amount of blush on the highest points of your cheeks. This technique is perfect for those who prefer a more natural and subtle glow. By using a blush in a shade that complements your skin tone, you can achieve a lit-from-within look.
In order to create a project to categorize your makeup looks, you must first have a gallery grid on your website or homepage. This grid will serve as a visual representation of all your makeup creations. Each makeup look will have its own thumbnail that visitors can click on to see the full tutorial or video.
Creating a gallery grid is simple if you follow these steps:
- Start by selecting the photos or videos you want to include in your grid.
- Upload them onto your desktop or iPhone.
- In order to categorize your makeup looks, you can create folders or albums on your device to separate them.
- When you’re ready to create the gallery grid, go to your website’s backend or CMS.
- Find the option to add a new page or section and select the gallery grid template.
- Follow the setup instructions to link your folders or albums to the grid.
- Customize the grid layout and design to fit your aesthetic.
- After finalizing the setup, the gallery grid will be ready for visitors to browse through.
This alternative method of categorizing your makeup looks can be a great addition to your website or social media profiles. It allows your audience to easily find and navigate through your content, whether they’re looking for a specific tutorial or just want some inspiration.
So, next time you’re making a no-makeup makeup look or a full glam transformation, consider adding a touch of blush to your cheeks. With this optional alternative to using a highlighter and the gallery grid setup, you’ll be ready to showcase your skills and creativity to the world!
Add some colour to your cheeks
When it comes to makeup, adding some colour to your cheeks can make a big difference in your overall look. With just a few simple steps, you can achieve a natural flush or a more dramatic pop of colour. Here is a step-by-step guide on how to create the perfect blush look.
- Start with a clean and moisturized face: Before applying any makeup, make sure your face is clean and well-hydrated. This will ensure a smooth canvas for the blush.
- Choose the right blush: There are many different types of blush available, such as powder, cream, and liquid. Choose the one that works best for your skin type and desired finish.
- Apply foundation or base makeup: Before applying blush, it’s a good idea to create an even base for your makeup. Apply foundation or any other base makeup you prefer.
- Use a brush or your fingers: Depending on the type of blush you’re using, you can either use a brush or your fingers to apply it. Brushes provide a more precise application, while fingers can give a more natural and blended look.
- Apply blush to the apples of your cheeks: Smile and apply the blush onto the apples of your cheeks, blending it towards your temples. This will create a youthful and natural-looking flush.
- Blend for a seamless finish: Use a clean brush or your fingers to blend the blush into your skin for a seamless and natural finish. This will help to avoid any harsh lines or patches.
- Finish with a highlighter (optional): If you want to add some extra glow to your cheeks, you can apply a highlighter on the highest points of your cheeks. This will create a subtle shine and enhance the overall look.
Now you’re ready to show off your rosy cheeks! Whether you’re going for a natural look or something more bold and vibrant, adding some colour to your cheeks is a must-have step in any makeup routine.
For more tutorial videos on how to create makeup looks, check out our YouTube channel. We have a wide range of videos that will guide you through the process of creating different makeup looks, including how to apply blush and highlighter.
If you’re looking for some inspiration, be sure to visit our Instagram page. We regularly post photos of makeup looks created by our team and our community. Follow the link in our bio to discover a world of makeup possibilities!
In order to categorize our tutorials and makeup looks, we have created a handy grid on our homepage. You can easily filter and find the looks you’re interested in, whether it’s a no-makeup makeup look or a full-blown glam look.
So, don’t be afraid to experiment and have fun with your makeup. Just remember to start with a good setup, whether you’re filming for YouTube or just taking some Instagram photos. The final result will be worth it!
Final setup
Once you have completed all the steps in creating your makeup look, it’s time to finalize your setup. Here are some final touches you can add to give your makeup that extra glow:
- Using a blush, apply a small amount to the apples of your cheeks.
- If desired, add a highlighter to the high points of your face, such as the cheekbones, bridge of the nose, and cupid’s bow.
- In order to categorize your makeup projects, create a gallery on your Instagram or homepage where you can showcase your final looks.
- If you’re using a film or iPhone to create your makeup tutorial, place it on a desktop stand or tripod for stability.
- Drop a link to your tutorial on YouTube or any other platform you prefer, so that others can easily access and watch your makeup tutorial.
When you’re ready to take photos or film a video of your final makeup look:
- Make sure you have good lighting. Natural light or a ring light can help ensure your makeup is properly showcased.
- Place a white background behind yourself to create a clean and professional look.
- Add some colour and depth to your photos or videos by using props or different backgrounds.
- Remember to smile and have fun! Your enthusiasm will translate into your photos and videos.
With these final steps, you’re now ready to share your makeup creations with the world. Whether you’re just starting out or have become an expert in makeup artistry, there’s always room for more creativity and improvement. Don’t forget to have fun and explore different techniques and styles!