
Adhesive stickers can be a great way to add a personal touch to your belongings or promote your business. Whether you’re looking to create custom stickers for marketing purposes or simply want to add some fun designs to your walls or windows, making adhesive stickers is a relatively easy process that can yield impressive results.
The first step in creating adhesive stickers is to design your artwork. You can do this using design software like Adobe Photoshop (PS) or by hand-drawing your designs. When designing your artwork, keep in mind that the size of the final sticker will determine the level of detail you can include. If you’re creating stickers with small or intricate designs, it’s important to use high-resolution images to ensure the clarity of the final product.
Once your artwork is complete, you can proceed to print your stickers. There are various options available for printing adhesive stickers, from industrial printers to home printers. If you’re looking for a professional and high-quality finish, it’s recommended to use a printing service that specializes in adhesive stickers. These services can provide a wide range of colour options and ensure that your design is represented accurately.
Before applying your adhesive stickers, it’s important to prepare the surfaces they will be adhered to. Clean the surfaces thoroughly to remove any dirt or dust that could interfere with the adhesive bond. If you’re applying stickers to walls or windows, ensure that the surfaces are smooth and non-porous for optimal adhesion. Follow any specific instructions provided by the adhesive sticker manufacturer for best results.
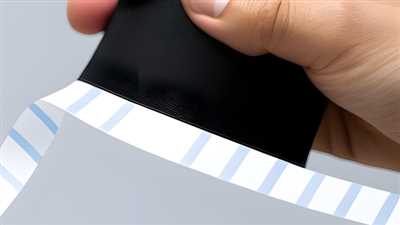
When it comes time to apply the adhesive stickers, be sure to carefully follow the instructions provided. Start by removing any backing or protective sheets and then gently press the adhesive side of the sticker onto the desired surface. Use a clean, dry cloth or squeegee to smooth out any air bubbles or wrinkles. If you encounter any difficulty during the application process, using a heat source such as a hairdryer can help to soften the adhesive and make it easier to work with.
Once your adhesive stickers are applied, it’s important to give them a period of time to bond to the surface before handling or cleaning them. The length of this period will vary depending on the type of adhesive used, so be sure to consult the manufacturer’s instructions. After the bonding period is complete, your adhesive stickers should be securely in place and ready to be enjoyed.
In conclusion, adhesive stickers are a versatile tool for personalising your belongings, promoting your business, or adding some visual interest to your surroundings. By following the proper steps and using high-quality materials, you can create adhesive stickers that are durable, attractive, and long-lasting. Whether you’re creating custom stickers for a business or simply decorating your living space, adhesive stickers offer a fun and effective means of self-expression.
What Is the Best Glue for Stickers
When it comes to making adhesive stickers, the choice of glue is crucial. The right glue ensures that your stickers will stick firmly and remain in place for a long time. There are several options available for sticker glue, each with its own advantages and considerations. Below are some of the best glue options to consider for making your own stickers.
- Double-sided adhesive sheets: These sheets are the most commonly used option for stickers. They provide a strong adhesive that sticks well to various surfaces, making them suitable for both indoor and outdoor use. Double-sided adhesive sheets are easy to apply and provide a long-lasting bond.
- Industrial glue: If you need a more durable and heavy-duty adhesive, industrial glue is a great option. It provides a stronger bond, making it suitable for stickers that will be exposed to extreme conditions or frequent handling. However, keep in mind that industrial glue may be harder to remove if needed.
- Water-based glue: Water-based glue is a popular choice for DIY sticker makers. It is non-toxic and easy to work with. However, water-based glue may not provide as strong of a bond as other types of glue, so it is better suited for stickers that will be used indoors or in low-impact applications.
When ordering custom stickers, it is important to choose a supplier that uses high-quality glue to ensure the best results. Some suppliers may offer low-cost stickers, but their adhesive may not be as reliable. Always ask about the glue used before placing an order.
When applying stickers, it is important to prepare the surface properly and use the right tools. Clean the surface and ensure it is free from dust or other particles. Use a squeegee or a flat tool to press the sticker firmly onto the surface, starting from the center and working your way outwards. This will help remove any air bubbles and ensure a smooth application.
If you ever need to remove a sticker, be careful not to damage the surface. Applying heat using a hairdryer or heat gun can help soften the adhesive and make removal easier. Use a knife or other sharp tool to gently lift the sticker from the surface, taking care not to leave any residue behind.
In conclusion, the best glue for stickers depends on your specific needs and preferences. Double-sided adhesive sheets are generally a reliable option for most applications. However, if you require a more durable or specialized adhesive, industrial glue or water-based glue may be a better choice. Remember to work carefully and follow the instructions provided to achieve the best results.
How to make stickers with Cricut

Making personalised stickers with Cricut is a relatively easy and fun process that allows you to create customised decals for a variety of purposes. Whether you want to make stickers for your car, laptop, walls, or any other space, Cricut can help you bring your design ideas to life.
To start, you will need a Cricut machine, adhesive sheets, and a design you would like to use for your stickers. If you don’t have a design in mind, there are many pre-designed sticker files available online that you can find and use for free or for a small charge.
Once you have your design ready, proceed to load the adhesive sheet into your Cricut machine. Make sure the adhesive side is facing up, and use the Cricut machine software to select your desired settings, such as size and cutting instructions. Follow the software’s instructions to start the cutting process.
After the machine has finished cutting, gently peel the backing off the adhesive sheet to reveal your stickers. Make sure to take your time and be careful to avoid tearing or damaging the stickers.
If you’re using pre-designed sticker files, you can apply the adhesive sheet onto the printed side of the sticker and then cut around the design using a sharp knife or scissors. This will give your stickers a double-sided look.
To apply the stickers, clean the surface where you want to stick them and make sure it is smooth and free of dust. Carefully remove the backing from the sticker and apply it at the desired angle. Use a squeegee or your fingers to smooth out any air bubbles or wrinkles.
Depending on the type of adhesive you used, your stickers can be semi-permanent or designed to be easily removable. If you want them to be more permanent, make sure to press down firmly on the stickers to create a strong bond with the surface.
After the application, let the stickers sit for some time to allow them to fully bond with the surface. This will ensure a better and longer-lasting result.
Overall, making stickers with Cricut is a fun and creative way to personalize your belongings or create unique gifts for your friends and family. The process is relatively easy, and with a little practice, you can start customizing almost anything with your own designs.
Personalised Sticker Fitting Instructions
When it comes to fitting your personalised stickers, it is important to start with a clean and relatively smooth surface. Make sure to remove any dirt or dust from the area where the sticker will be applied.
In order to ensure an accurate fit, it is best to measure and mark the desired location before applying the sticker. You can use a ruler or measuring tape to make sure the sticker is placed exactly where you want it.
Before applying the sticker, it is critical to make sure that the surface is dry. If there is any moisture or water on the surface, the adhesive may not bond properly and the sticker could peel off over time.
Once you are ready to apply the sticker, gently peel off the backing and carefully place it on the desired surface. Start by applying the sticker to one side and then gradually press down on the rest, smoothing out any air bubbles as you go.
If you are applying a larger sticker, it may be helpful to use a squeegee or a credit card to help smooth out the sticker and ensure it is properly adhered to the surface.
If you need to reposition the sticker, it is best to do so before the adhesive fully sets. You can gently peel off the sticker and reapply it in the desired location. However, be careful not to overstretch the sticker as it may lose its adhesive properties.
When it comes to removing the sticker, you can use heat to soften the adhesive. A hairdryer or heat gun can be used to gently warm up the sticker, making it easier to peel off. Be cautious not to use too much heat as it can damage the surface underneath.
For semi-permanent stickers, such as those applied to walls or belongings, it is important to note that they may leave a residue upon removal. You can use a mild adhesive remover or a solution of warm water and soap to gently remove any leftover adhesive.
Whether you are making custom stickers for personal use or as a gift, it is important to find a reliable supplier who offers high-quality products at a good price. Many online vendors and local print shops offer custom sticker printing services, so be sure to do your research and compare quotes to find the best option for you.
When creating your artwork or design for the stickers, it is best to use a high-resolution file and choose colors that will print accurately. Some printers may require a specific color representation, such as CMYK, so make sure to check with your printer or supplier for any specific requirements.
In addition, if you are using a Cricut or other vinyl cutting machine to create your stickers, make sure to select the right type and size of vinyl for your project. Different vinyl types have varying degrees of tackiness and durability, so choose the one that best suits your needs.
Overall, fitting personalised stickers is a relatively straightforward process. With a few simple steps and careful application, you can transform any space or belonging with your own custom designs.
Monichem Adhesives Private Limited
Monichem Adhesives Private Limited is a leading supplier of adhesive stickers. Whether you are looking to create custom stickers or need adhesive stickers for your business, Monichem Adhesives has got you covered. Our adhesive stickers are designed to provide easy application and a long-lasting bond.
When it comes to creating adhesive stickers, it is important to follow certain instructions to ensure the best results. First and foremost, make sure the surface is clean and free from any dust or debris. This will help the sticker adhere properly and prevent any delays in the application process.
Depending on what type of adhesive sticker you are making, whether it’s for walls or carboy, you may need to provide accurate measurements or a drawing of the design. Monichem Adhesives offers a free design service, so if you’re unsure about the fit or design, our team can assist you in creating the perfect sticker.
For printing adhesive stickers, we use high-quality printers that can print sharp and vibrant images. Our printers provide accurate color matching, so you can be sure that the printed sticker will match your desired design. Additionally, we offer a wide range of materials for stickers, including paper, non-porous, and custom materials. This allows you to choose the best material for your specific needs.
Once the adhesive sticker is ready, it is important to make sure the edges are clean and free from any excess adhesive. To achieve this, use a squeegee or a knife to carefully peel off any sticky residue. This will help ensure a smooth and professional finish.
When it comes to sticker removal, our adhesive stickers are relatively easy to remove. Simply peel them off from one corner, making sure to apply even pressure. If any residue is left behind, you can easily remove it using rubbing alcohol or a mild adhesive remover.
If you’re looking for adhesive stickers, Monichem Adhesives Private Limited is the supplier for you. We offer a wide range of sticker options, including customizing services, and provide accurate quotes so you know exactly what to expect. Plus, our adhesive stickers are designed to be long-lasting and resistant to wear and tear.
So don’t wait any longer, send us your requirements and let us help you create the perfect adhesive stickers for your needs!
Sealofix PS Sticker Adhesive Carboy

Sealofix PS Sticker Adhesive Carboy is a specially designed adhesive for creating adhesive stickers. It is a high-quality, water-based adhesive that is perfect for use on a wide range of surfaces, including walls, glass, plastic, and more. It provides a strong bond and is suitable for both indoor and outdoor use.
When working with Sealofix PS Sticker Adhesive Carboy, you will need to start by preparing the surface that you want to apply the sticker to. Make sure that the surface is clean, dry, and free from any dust or debris. This will ensure that the adhesive can properly bond to the surface.
To produce adhesive stickers, you will need to have a design ready. You can either design the stickers yourself or find a supplier who can provide you with pre-made designs. If you are creating your own design, make sure to use a design software that supports CMYK color format, as this will ensure the best print quality.
Next, you will need to print your design onto a suitable sticker material. Sealofix PS Sticker Adhesive Carboy is compatible with a wide range of sticker materials, including monomeric vinyl and static cling vinyl. Make sure that your printer is able to handle the sticker material that you are using.
Once your design is printed, carefully cut it out using a sharp knife or scissors. Make sure to leave a minimum amount of backing material around the edges of the design. This will make it easier to handle and apply the sticker.
Before applying the sticker, make sure that the surface is clean and free from any dirt or oils. You can use a cleaning solution or simply wipe the surface with a damp cloth. This will ensure that the adhesive can properly bond to the surface.
To apply the sticker, carefully peel off the backing material from one side of the sticker. Stick the exposed adhesive side onto the desired surface, making sure to align it properly. Use a squeegee or a flat tool to smooth out any air bubbles and ensure that the sticker is properly adhered to the surface.
If you need to reposition the sticker, carefully peel it off and reapply it. However, keep in mind that the adhesive may lose its stickiness after being applied multiple times, so it is always best to get it right the first time.
Sealofix PS Sticker Adhesive Carboy is a high-quality adhesive that is designed to provide a long-lasting bond. It can withstand exposure to water, making it suitable for use on items that may get wet, such as car windows or outdoor signage.
In conclusion, Sealofix PS Sticker Adhesive Carboy is a reliable and versatile adhesive that is perfect for creating adhesive stickers. Its wide compatibility with different sticker materials and its strong bond make it a cost-effective choice for both private and industrial use. Whether you need to create stickers for personal use or for your business, Sealofix PS Sticker Adhesive Carboy is sure to deliver excellent results.
Sources
When it comes to making adhesive stickers, there are many sources you can rely on to get the materials you need. Here are some options:
- From suppliers: You can order adhesive sticker materials from various suppliers. They offer a wide range of options, from monomeric vinyl sheets to more durable and long-lasting options.
- From printers: If you’re working on a larger project or need a specific design or color, you can send your artwork to a professional printer who will convert it into adhesive sticker sheets for you. They can also provide you with technical instructions on how to make the stickers stick better.
- Cricut: This is a popular brand that specializes in cutting machines. Cricut machines can be used to create adhesive stickers by cutting out the desired shapes from vinyl sheets. You can then peel off the backing and apply the stickers to any clean, non-porous surface.
It’s always a good idea to follow the supplier’s instructions when working with adhesive stickers. They will provide you with information on the application process, such as whether you need to use heat or a squeegee for better adhesion.
One important thing to note is that adhesive stickers are not meant to be used as a permanent solution. Their lifespan is relatively limited, especially when used outdoors or in industrial settings. However, they can still serve as a semi-permanent representation of your artwork or message.
When making adhesive stickers, you need to consider factors such as the size of the stickers, the type of surface they will be applied to, and the color scheme you want to use. All these elements will have an impact on the final result.
Keep in mind that the removal of adhesive stickers can sometimes be tricky, and it may require some extra effort to ensure that no residue is left behind. Always follow the instructions provided by the supplier to minimize any damage to your belongings or surfaces.
In Chennai, there are many suppliers and printers that offer adhesive sticker materials and services. You can request a quote from them to get an idea of the costs involved.
So, whether you are creating adhesive stickers for personal use, to promote your business, or as a gift for someone, it’s important to choose the right materials and follow the instructions to ensure that your stickers turn out exactly how you want them to.