
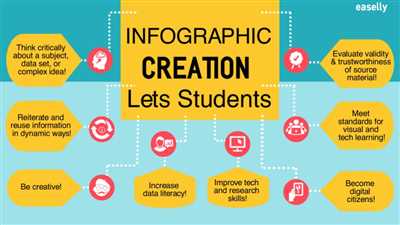

Infographics have become an essential part of the digital space, demystifying complex subjects and presenting information with clarity. If you’re looking to create your own successful infographics, here are some key tips to consider.
- 1. Select the Right Topic and Purpose
- 2. Gather and Organize Information
- 3. Create an Engaging Design Layout
- 4. Add Graphics and Visuals to Enhance the Message
- 5. Refine and Review
- Insights from the ClientsFirst team
- Gather Your Information and Data
- What are Good Subjects for an Infographic
- Demystifying the Infographic Creation Process
- Step 1: Define Your Purpose and Audience
- Step 2: Gather and Organize Your Data
- Step 3: Choose a Compelling Visual Narrative
- Step 4: Review the Raw Content and Highlight the Key Elements
- Step 5: Extract the Key Elements
- Step 6: Organize the Key Elements Into Logical Groups
- Step 7 Find Data
- Step 8 Add Graphics
- Step 9: Incorporate Engaging Visual Elements
- Step 10: Maintain Visual Hierarchy
- Step 11: Ensure Clarity and Readability
- Step 12: Test and Refine
- Frequently Asked Questions (FAQs)
1. Select the Right Topic and Purpose
The first step in creating an infographic is to choose a topic that will capture the attention of your intended audience. Consider your clients’ interests and needs first and foremost. Once you have identified a subject, determine the purpose of your infographic. Is it to inform, educate, or entertain? This will help guide your overall creation process.
2. Gather and Organize Information
Next, gather all the necessary information and data you will need for your infographic. Conduct thorough research and take notes from reliable sources. When organizing this information, keep in mind the hierarchy and logical flow of the narrative you want to convey. Group related facts and insights together, and ensure that your information is accurate and up-to-date.
3. Create an Engaging Design Layout
Once you have your information, it’s time to create the visual layout of your infographic. Think about the overall design and how you can best utilize the space available. Use colours and visual elements that will highlight important points and capture the attention of users. Make sure that your layout is mobile-friendly for optimal display across different devices.
4. Add Graphics and Visuals to Enhance the Message
To make your infographic more engaging, incorporate graphics, illustrations, charts, and icons that are relevant to your topic. These visuals will help users understand and retain information more easily. Use colour strategically to highlight key points and create visual interest. Be mindful of using consistent fonts and sizes for readability purposes.
5. Refine and Review
Once your initial design is complete, take the time to refine and review your infographic. Check for any spelling or grammatical errors, ensure that the information is accurate, and review the overall flow and clarity of the narrative. Seek feedback from others, both within your team and from a test audience if possible. Incorporate any necessary changes to create the best possible version of your infographic.
By following these tips, you can create digital infographics that are informative, engaging, and visually appealing. Remember to always keep your audience in mind, and use the power of visuals to convey complex information in a clear and memorable way.
Insights from the ClientsFirst team
When it comes to creating digital infographics, the layout is crucial. From our experience, we have found that starting with a defined structure helps organize the information and maintain overall coherence. It is important to define the hierarchy and space allocation to highlight the most important subjects.
To make infographics engaging and visually appealing, choose colours and visuals that will draw attention and tell a compelling story. Using Visme, a popular infographic maker, you can add variables and data from different sources to create informative and visually appealing content.
One of the most common challenges we’ve encountered is the process of gathering business insights and content to include in the infographic. To overcome this, we recommend asking clients for feedback and gathering any existing data or information they may already have. This will help identify the key goals and target audience for the infographic.
Step 1: Define the purpose and goals of the infographic. What do you want to achieve with it? Is it to inform, educate, or promote a product or service?
Step 2: Identify the key data, statistics, or information that will support your goals. The information should be relevant, up-to-date, and accurate.
Step 3: Choose the layout and hierarchy of the infographic. This will determine the flow and structure of the information.
Step 4: Use visuals and colours to make the infographic more appealing and easy to understand. A good balance between text and visuals is crucial.
Step 5: Add interactive elements if appropriate. This could be clickable links, downloadable content, or social media sharing buttons.
Step 6: Test the infographic on different devices and platforms to ensure compatibility and optimal display.
By following these methods, the ClientsFirst team has successfully created many infographics that have generated good feedback and results. Remember to maintain a demystifying approach by breaking down complex information into digestible chunks. This will make the infographic more accessible to users and help them understand the content more easily.
Overall, infographics are a powerful tool for businesses to display information in an appealing and informative way. With the right planning and execution, infographics can be an effective way to highlight key content and engage target audiences. So, next time you want to convey a lot of information in a visually engaging way, consider using infographics as part of your content creation strategy.
Gather Your Information and Data

When you are ready to create a digital infographic, the first step is to gather all the information and data you will need. This is a crucial step as it will define the overall layout and content of your infographic.
One of the most important tips to keep in mind when gathering information is to be aware of your target audience and their interests. You want to capture their attention and maintain their engagement throughout the infographic.
Start by defining the main topic or subjects you want to cover in your infographic. This will help you organize the information and ensure a logical flow in your presentation.
Once you have a clear idea of what information you want to incorporate, it’s time to find reliable sources to gather your data from. Make sure to use credible sources that provide accurate and up-to-date information.
Use text, graphics, and visuals to convey your message. A good infographic maker will offer a variety of visual elements and templates that you can use to create engaging and compelling visuals.
When selecting colors for your infographic, consider the overall theme and the emotions you want to evoke in your audience. Use colors that complement each other and create a balanced visual experience.
Another important aspect is the readability of your infographic. Make sure to use fonts that are easy to read on different devices and maintain a consistent font size throughout the infographic.
Once you have gathered all the necessary information and data, it’s time to refine and review your content. Ask yourself if there are any questions or FAQs that your audience may have and make sure to incorporate them into your infographic.
Group related information and data together to create a logical flow. Use headings, subheadings, and bullet points to help users navigate through the infographic and find the information they are looking for.
Consider using icons or symbols to link different sections of your infographic. This will make it easier for users to understand the connections between different pieces of information.
To ensure the success of your infographic, it’s important to engage your audience. Add interactive elements or downloadable content that users can access to learn more about the topic.
Finally, don’t forget to align your infographic with your overall goals and objectives. Think about how your infographic can contribute to your website’s profitability or help raise awareness on a particular subject.
Gathering information and data is a crucial step in the process of creating a digital infographic. By following these tips and guidelines, you can ensure that your infographic is informative, engaging, and visually appealing to your target audience.
What are Good Subjects for an Infographic
When creating a digital infographic, selecting a good subject is crucial to capturing the reader’s attention and conveying information effectively. Here are some tips to consider when choosing a subject for an infographic:
- Identify your target audience: Before selecting a subject, think about the specific group of people you want to reach. Consider their interests, needs, and demographic characteristics.
- Define the purpose: Clearly define the objectives of your infographic. Do you want to inform, educate, or entertain? Understanding the purpose will help guide your subject selection.
- Select a topic with compelling content: The subject should have enough relevant and interesting information to fill the infographic. Research and gather data that will provide valuable insights to your readers.
- Choose a topic with existing data: To save time and effort, consider selecting a subject that already has a good amount of available data. This will enable you to add your own unique perspective to the information.
- Capture data with visuals: Infographics are meant to present information visually. Choose a subject that can be effectively represented through charts, graphs, and images.
- Ensure readability: Keep in mind the overall readability of the infographic. Use clear, concise language and organize the content in a logical manner. Consider using color and font size variations to highlight important elements.
- Consider mobile devices: With the increasing use of mobile devices, design your infographic to be mobile-friendly. Optimize the layout and make sure it is easy to view and navigate on smaller screens.
- Incorporate social media: To maximize the reach of your infographic, think about how it can be easily shared on social media platforms. Use visually appealing graphics that will catch the attention of social media users.
- Link your infographic: Provide a space within your infographic to incorporate links to additional resources or related content. This will allow readers to explore further and dive deeper into the subject.
- Ask your team: Collaborate with your team and gather their input on potential subjects. They may have valuable insights or ideas that can help you choose the most suitable topic.
By considering these tips and selecting a subject that aligns with your goals and target audience, you can create a successful and informative infographic that will demystify complex topics, answer common questions, and maintain the attention of your readers.
Demystifying the Infographic Creation Process
Creating digital infographics can be an effective way to present complex information in a visually engaging way. By using graphics, colours, and text, you can make your data more understandable and memorable. In this article, we will dive into the step-by-step process of creating an infographic.
Step 1: Define your topic and audience: Before you start designing your infographic, it’s essential to identify the topic you want to cover and the target audience you want to reach. This will help you determine the most relevant and useful content to include in your infographic.
Step 2: Gather data and review: Collect all the data and information related to your topic. Review and analyse the data to extract the most significant insights and key points that you want to highlight in your infographic. Be sure to only use accurate and reliable sources.
Step 3: Organize and structure your content: Once you have identified the main points, it’s time to arrange them in a logical and clear manner. Create an outline or storyboard to map out the flow of information and determine the proper order for presenting your content.
Step 4: Select a suitable infographic maker: There are various online tools available, such as Visme, that provide templates and resources to create infographics. Choose a tool that aligns with your skills, preferences, and design goals.
Step 5: Design the layout: Use the infographic maker to select a layout that suits your content. Incorporate graphics, colours, and proper spacing to make your infographic visually appealing and easy to read.
Step 6: Incorporate visuals and text: Add relevant graphics, icons, and illustrations to complement your data. Use concise and informative text to explain the main points and provide context to your visuals.
Step 7: Test, refine, and review: Once you have created the initial version of your infographic, test it on different devices and platforms to ensure it looks good and functions well. Seek feedback from others to identify areas that may need improvement.
Step 8: Make it shareable: To increase awareness and engagement with your infographic, make sure it is easily shareable on social media platforms. Incorporate social media icons and provide an option for viewers to share your infographic with others.
Step 9: Analyze the results: After you have shared your infographic, monitor the analytics and track the performance. Determine which elements were most successful in capturing attention and conveying the message effectively.
Frequently Asked Questions (FAQs):
- What makes a good infographic?
- How do I create engaging infographics?
- How can I incorporate data visualization into my infographics?
- What are some tips for using Visme infographic maker?
A good infographic is visually appealing, concise, and informative. It effectively presents data in a clear and engaging way, making it easy for the audience to understand and remember.
To create engaging infographics, use captivating visuals, appropriate colours, and a compelling story. Incorporate relevant and interesting data that your target audience will find useful and interesting.
Data visualization is essential for making complex information easier to understand. Use charts, graphs, and diagrams to represent data visually and enhance its clarity.
To make the most of Visme infographic maker, keep your design simple and focused on the main message. Use the platform’s features to add interactive elements, such as clickable icons or animated effects.
By following these steps and keeping these insights in mind, you can demystify the infographic creation process and create visually appealing and informative infographics that effectively convey your message.
Step 1: Define Your Purpose and Audience
Before you start creating your digital infographic, it’s important to have a clear understanding of your purpose and target audience. These two factors will drive the direction and design choices you make throughout the process.
1. Define Your Purpose: Determine why you want to create an infographic. Are you trying to present data, explain a complex concept, or promote your business? By defining your purpose, you can focus your efforts and ensure that your infographic effectively conveys the message you want to communicate.
2. Identify Your Audience: Think about who your audience is and what they are looking for. Consider their preferences, level of knowledge, and their expectations. By understanding your audience, you can tailor your infographic to be more appealing and engaging to them.
3. Capture the Narrative: Collect all the raw text and data that you want to include in your infographic. This could be statistics, quotes, or any other information that supports your purpose and engages your audience.
4. Refine the Story: Once you have gathered all the necessary information, review and refine it to create a logical and coherent narrative. Ensure that the story flows well and conveys your message effectively. Remove any unnecessary or redundant information.
5. Select Proper Graphics: Choose the graphics that will best complement your narrative and help convey your message. Consider using icons, charts, graphs, or images that are visually appealing and easy for your audience to understand.
6. Incorporate Visual Appeal: Use color, space, and other visual elements to make your infographic visually appealing. Remember to use an appropriate color palette and organize the layout in a way that is easy to read and understand.
7. Keep Clarity in Mind: Ensure that your infographic is clear and easy to follow. Avoid using too much text or cluttering your design with unnecessary elements. Your audience should be able to grasp the main points of your infographic at a glance.
8. Test and Gather Feedback: Before finalizing your infographic, review it with a critical eye and seek feedback from others. This feedback can help you identify any areas that may need improvement or clarification.
9. Make it Downloadable: Consider making your infographic available for download on your website or any other platform where it can be easily accessed and shared. This will allow your audience to refer to it later and help increase its reach.
By following these tips and methods, you can demystify the process of creating digital infographics and ensure that they effectively convey the insights and information you want to present. Remember to always keep your purpose and audience in mind throughout the entire process.
Step 2: Gather and Organize Your Data
Gathering and organizing your data is a crucial step in creating digital infographics. It involves identifying the variables that are relevant to your website’s goals and content, and organizing them in a way that tells a clear and engaging story.
Start by reviewing the data you already have. Look for key insights and areas that need improvement. This will guide your efforts in gathering the right data to create impactful infographics.
When gathering data, keep in mind the target audience and the goals of your infographics. Determine what information is most important to capture their attention and highlight the profitability of your business or the impact of your efforts. This will help you refine your data collection methods.
There are various methods you can use to gather data. Search for relevant sources, extract the raw data, and review feedback from your website or social media channels. These insights will help you make informed decisions and ensure the proper display of data in your infographics.
Once you have gathered your data, it’s time to organize it in a way that makes it easy to understand and memorable for your audience. Consider using a narrative or story to structure your data and create a hierarchy of information. This will guide your audience through the infographic, ensuring they find the most important information.
When organizing your data, be concise and selective. Avoid overwhelming your audience with too much information. Choose the most relevant and impactful data points to include in your infographics.
Using a data visualization tool like Visme can greatly simplify the data organization process. It provides pre-designed graphics and templates that you can simply drag and drop your data into. This makes the creation of graphics and layout much easier and saves you time.
Keep in mind the mobile experience when organizing your data. Ensure that your infographics are responsive and can be easily viewed on different devices. Pay attention to the readability of your text and the legibility of your graphics to make sure they are easily understood on small screens.
In summary, gathering and organizing your data is a crucial step in creating engaging and effective infographics. Review the data you already have, refine your data collection methods, and choose the most relevant and impactful data points. Organize your data in a concise and memorable way, ensuring proper display and readability. Use tools like Visme to simplify the process and make your infographics standout.
Step 3: Choose a Compelling Visual Narrative
Once you have gathered all the necessary information and organized your thoughts, it’s time to choose a visual narrative that will convey your message effectively. A successful infographic should capture attention, be visually appealing, and memorable.
First, start by asking yourself what the main goals of your infographic are. Do you want to educate, entertain, or promote a product or service? Keep your target audience in mind and tailor your narrative to their interests and preferences.
Next, consider the overall topic or subject of your infographic. What insights or insights you want to share? Look for the most important points and find ways to visually represent them clearly and concisely.
It’s also important to maintain clarity in your infographic. Ask yourself what questions your audience is likely to have and ensure that the visual elements and text provide clear answers. Consider using a visual “FAQs” section to address frequently asked questions and provide valuable information.
Choose a visual style that is not only engaging but also aligns with the purpose and tone of your infographic. Use colors, graphics, and other design elements strategically to convey your message effectively. Keep in mind that simplicity is key – avoid overwhelming your audience with too much information or cluttered visuals.
If you are working with a team, collaborate and gather feedback from them. Review their suggestions and make necessary changes to improve the overall quality and clarity of your infographic.
Once you have a draft version of your infographic, test it with a small group of users or clients. Gather feedback and make any necessary adjustments based on their responses. This will help ensure that your infographic is as effective as possible.
Furthermore, be aware of the different devices and media platforms your infographic will be viewed on. Make sure it is responsive, so it looks and functions well on various screen sizes and orientations.
Finally, add your branding elements, such as a logo or website URL, to increase brand awareness. Also, consider adding social media sharing buttons to make it easier for users to share your infographic and increase its reach.
By following these tips and steps, you can create a compelling visual narrative for your infographic that effectively conveys your message, captures attention, and engages your target audience.
Step 4: Review the Raw Content and Highlight the Key Elements
Once you’ve gathered all the raw content for your infographic, it’s important to review it and identify the key elements that will drive your visual storytelling. This step is crucial because it helps you refine your message and determine the proper flow of information.
Start by reading through all the text, data, and statistics you’ve collected. Look for the main ideas and insights that will make your infographic more engaging and memorable for your audience. Highlight or extract these key elements, as they will form the backbone of your infographic’s narrative.
As you review the raw content, keep in mind the overall purpose and audience of your infographic. The key elements you select should align with the topic and the target audience’s interests. Consider what information will be most valuable and interesting to your users.
Incorporate visual elements, such as graphics and icons, to enhance the readability and visual appeal of your infographic. Use methods like color-coding, charts, and graphs to help demystify complex concepts or data sets. Ensure that the visuals you choose effectively communicate the main points and support the story you’re trying to tell.
Organize your key elements in a logical and coherent way. Create a clear flow between sections, making it easy for your audience to follow the narrative. Use proper headings and subheadings to guide readers through the infographic’s content.
Once you have a version of your infographic with the key elements and a logical structure, it’s time to test it. Share it with others and gather feedback. Ask questions to ensure that your infographic effectively communicates your message and resonates with your target audience.
Refine your infographic based on the feedback you receive. Make any necessary adjustments to improve readability, clarity, and overall design. Keep in mind that infographics should be visually appealing, but also easy to understand and navigate.
Finally, consider creating different versions of your infographic to cater to different devices and media platforms. Optimize it for mobile devices, ensuring that it displays and functions properly on smaller screens. Also, think about creating a downloadable version that users can save and share.
By following these tips, you’ll be able to create successful infographics that grab attention, communicate key information, and leave a lasting impression on your audience.
Step 5: Extract the Key Elements
Once you’re clear on your goals, target audience, and overall topic, it’s time to identify the key elements you want to include in your infographic. Extracting the key elements will help you create a visual hierarchy and make sure your infographic effectively conveys your story.
Start by reviewing your content and identifying the most important data, facts, and information related to your topic. These key elements will form the backbone of your infographic and help you craft a compelling narrative.
When selecting the key elements, keep in mind the readability and readability. You want to choose elements that will be visually appealing and easy to understand for your audience. By using Visme, an infographic maker, you can add graphics, text, and media elements to your content to make it more engaging.
Also, consider using visual variables such as size, color, and shape to capture your audience’s attention and guide them through your infographic. This will ensure that important information is easy to find and understand.
Next, link the key elements together in a logical manner to create a clear and cohesive flow for your infographic. This will help your audience follow the narrative and fully understand the message you’re trying to convey.
During this process, it’s essential to review your infographic and refine it as needed. Make sure that the key elements support your goals and that the overall presentation is visually appealing.
When creating an infographic, it’s also important to be aware of the platform and medium where it will be displayed. Consider if it will be viewed on a desktop or mobile device, as this may impact the layout and overall design.
Lastly, don’t forget to test your infographic with a focus group or clients. Their feedback can help you make any necessary adjustments and ensure that your infographic is effective in capturing the attention and interest of your target audience.
By following this step-by-step process, you can extract the key elements from your content and create a visually appealing and effective infographic that conveys your message in an engaging way.
Step 6: Organize the Key Elements Into Logical Groups
Once you have extracted the key information and determined the purpose of your infographic, it’s time to organize the elements into logical groups. This step is essential to maintain readability and guide the reader through the narrative of your infographic.
Start by identifying the main points or insights you want to convey to your audience. These will serve as the anchor points for your infographic’s organization. Open a new document in your chosen infographic maker, such as Visme, or use an existing template if you already have one.
Next, create groups or sections for each main point. For example, if your infographic is about “10 Tips for Creating Engaging Infographics,” you may have sections for each of the 10 tips. You can add an attention-grabbing headline to each group to highlight its purpose and capture the readers’ interest.
Within each group, determine the key elements that will support and reinforce your main point. These could include statistics, graphics, charts, or even frequently asked questions. Be concise and choose only the most compelling elements that will help convey your message effectively.
Keep in mind that visuals are an essential part of infographics, so be sure to choose graphics that are visually appealing and align with your message. You can search for relevant graphics or use icons to add visual interest to your infographic.
Also, be aware of the layout and readability of your infographic. Arrange the elements in a way that flows logically and makes it easy for the reader to follow the information. If there are multiple sections or groups, consider creating a visual hierarchy to guide the reader’s eye through the infographic.
As you organize the elements, keep in mind the purpose of your infographic and the target audience. Are you trying to inform, persuade, or raise awareness? Tailor your infographic’s content and design accordingly.
Once you have organized the key elements into logical groups, you can refine them further by adding any additional insights or feedback you have received from your team or clients. This will help ensure that your infographic is comprehensive and compelling.
Remember to consider the platform on which your infographic will be displayed. If it will be viewed on a website, make sure it is mobile-friendly and responsive to different screen sizes. If you plan to create a downloadable version, ensure that the file size is not too large, and the format is accessible to your target audience.
In the next step, we will look at how to maintain consistency and coherence throughout your infographic as we explore Step 7: Add the Finishing Touches.
Step 7 Find Data
Once you have defined your goals and identified the key elements and subjects for your infographic, the next step is to find the data that will support your message. Without reliable data, your infographic might not convey the right message and the information presented may not be accurate.
There are several methods and sources you can use to find data for your infographic. One of the most common sources is the internet, where you can search for existing data on websites, blogs, and social media platforms. Search engines are also a good way to find data, as they can provide you with a wide range of information on your chosen topic.
When searching for data, it’s important to think about the purpose of your infographic and the goals you want to achieve. You should also keep in mind the readability and engagement of your infographic, as well as the logical flow of information. Highlighting the most important data and organizing it into groups can make your infographic more compelling and easier to understand.
Another important aspect when finding data for your infographic is to ensure that the information you use is trustworthy and reliable. It’s essential to review the sources you extract data from and check the credibility of the information. This will help you avoid any potential misinformation and uphold the integrity of your infographic.
You may also want to consider feedback from your team or clients. Getting different perspectives on the data you’ve chosen can help you refine your infographic and ensure that it aligns with your goals and objectives.
Once you have gathered the necessary data, it’s time to link it with the visual elements of your infographic. Determine the best way to display the data, whether it’s through charts, graphs, or other visual representations. Remember to keep the style and layout of your infographic in mind, making sure it is visually appealing and easy to read.
In summary, finding data for your infographic is an essential step in the creation process. It is important to extract data from reliable sources, organize it in a logical and engaging manner, and ensure its accuracy. By following these steps, you can create a compelling and informative infographic that effectively conveys your message to your audience.
Step 8 Add Graphics
Graphics play a crucial role in making your infographic visually appealing and engaging. They help convey information in a more concise and memorable way. When adding graphics to your digital infographic, there are some key factors to consider:
1. Determine the layout and hierarchy of your graphics: Think about what the most important data or content is and make sure to highlight it in a visually prominent way.
2. Select proper colours: Colour variables can help organize and link different sections of your infographic. Use colours that are visually appealing and also align with the branding or goals of your clients.
3. Refine the graphics: Review and test the graphics to ensure they are visually appealing, logically organized, and effectively convey the desired information.
4. Use appropriate visuals: When adding graphics, think about what type of visuals (such as charts, icons, illustrations, or images) would best support the narrative of your infographic.
5. Make it responsive for mobile devices: With an increasing number of users accessing information on their mobile devices, it’s essential to ensure that your infographic displays well on smaller screens. Consider making your infographic downloadable or using responsive design methods.
By following these tips, you can effectively add graphics to your digital infographic and create an appealing visual display. Furthermore, using graphics can help demystify complex information, making it easier for users to understand and retain. This step is one of the most crucial ones in the infographic-making process. Finally, don’t forget to gather feedback from users or clients to refine and improve the graphics for the best possible results.
Here is an example of how visually appealing graphics enhance the overall display of an infographic:
|
|
| Example of an appealing visual display in an infographic |

Step 9: Incorporate Engaging Visual Elements
Visual elements play a crucial role in creating successful infographics. They not only make your infographic more appealing, but also help convey information in a memorable and engaging way. Here are some key points to keep in mind when incorporating visual elements into your infographics:
- Define your purpose and goals: Before you start creating your infographics, think about what you want to achieve with them. Define your target audience, gather insights about their preferences, and think about the overall message you want to convey.
- Choose the right visual elements: Once you have identified your goals and target audience, select visual elements that align with your purpose. Use images, icons, charts, graphs, and other visual aids that are relevant to your subject matter.
- Create an appealing layout: The layout of your infographics plays a crucial role in its overall effectiveness. Think about the hierarchy of information and organize it in a way that is easy to follow and understand. Use proper spacing and make sure there is enough white space to guide the reader’s eye through the content.
- Use colours strategically: Colour can help create a visual hierarchy and make your infographics more visually appealing. Choose a colour scheme that aligns with your brand or the purpose of your infographics. Use contrasting colours to highlight important information and make it stand out.
- Make it mobile-friendly: With more and more people accessing information on mobile devices, it’s important to create infographics that are responsive and mobile-friendly. Test your infographics on different devices and make sure they are easily accessible and readable on smaller screens.
- Incorporate original and high-quality media: Using high-quality and original images, videos, and other media will make your infographics more visually appealing and credible. Avoid using stock photos or generic images that may not resonate with your target audience.
- Link to your sources: In order to establish credibility, provide links to the sources you used to gather information for your infographics. This will also allow your audience to learn more about the topic if they find it interesting.
- Solicit feedback: Once you have created your infographics, be open to receiving feedback from your audience or clients. Their insights can help you improve the overall quality and effectiveness of your infographics.
- Think about social media: Infographics are highly shareable on social media platforms. Keep in mind the dimensions and requirements of different platforms when creating your infographics. Also, think about how you can optimize your infographics for social media sharing and engagement.
By incorporating these engaging visual elements into your infographics, you can create informative and visually appealing content that effectively conveys your message and captures the attention of your target audience.
Step 10: Maintain Visual Hierarchy
When creating an infographic, it’s important to maintain a logical and organized layout to ensure that your audience can easily understand the information you want to convey. One way to achieve this is by maintaining visual hierarchy.
Visual hierarchy refers to the arrangement and organization of elements on the infographic to guide the viewer’s attention. Here are some tips to maintain visual hierarchy in your infographic:
- Define the purpose and narrative of your infographic. What do you want to highlight or inform your audience about?
- Gather all the necessary data, information, and insights that you want to display in your infographic. Take into account the overall theme or topic of your infographic.
- Once you have all the content, review and refine it. Make sure it makes sense and flows well.
- Choose a layout that is visually appealing and informative. Make use of space, color, and typography to guide the viewer’s attention.
- Add elements such as headings, subheadings, bullet points, icons, and images to break down the information and make it easier to understand.
- Organize the elements in a logical and hierarchical order. Start with the most important or attention-grabbing information and then gradually move on to the less significant ones.
- Test your infographic on different devices, such as mobile phones and tablets, to ensure that it is optimized for various screen sizes and platforms.
- Ensure that the colors and fonts you choose are visually appealing and easy to read. Use contrast to highlight certain elements and make them stand out.
- Ask for feedback from your clients or target audience. Their opinions can help you refine and improve your infographic further.
- Maintain consistency throughout your infographic. Use similar styles and visual elements to create a cohesive and unified look.
By following these steps, you can create a visually appealing and successful infographic that effectively communicates your message to your target audience. Remember to always keep the purpose of your infographic in mind and link the information to your overall narrative.
Step 11: Ensure Clarity and Readability
When creating digital infographics, it’s essential to keep clarity and readability in mind. Your clients and target audience will want to quickly gather information from your infographic, so it’s important to make it easy for them to understand.
To ensure clarity and readability, follow these tips:
- Start by determining the purpose and goals of your infographic. What story do you want to tell? What insights do you want to highlight? Once you have a clear purpose in mind, it will be easier to select the most compelling elements and organize them effectively.
- Think about your target audience and what they are likely to search for or find engaging. Consider their frequently asked questions and the variables they may be interested in learning more about.
- Use a hierarchy of information to guide the reader’s attention. Start with the most important or interesting information and gradually add details as the reader moves through the infographic.
- Keep the text concise and to the point. Avoid using too much text that can overwhelm the reader. Use headings, subheadings, and bullet points to break up the text and make it easier to scan.
- Make good use of color and visual elements to add clarity and appeal to your infographic. Use contrasting colors to create a visual separation between different sections or elements. Consider using icons or illustrations to help demystify complex concepts.
- Ensure that the overall design of your infographic is visually compelling and engaging. Use appropriate fonts and font sizes to make the text readable on different devices and screen sizes.
- Test the readability of your infographic by asking others to review it and provide feedback. Make sure that the information is easy to understand, and the overall message is clear.
- Incorporate insights and feedback from your clients or stakeholders to make sure that the infographic aligns with their goals and expectations.
- Review and refine your infographic, making any necessary changes or improvements. It’s an iterative process, so be open to making adjustments based on feedback and insights.
- Once you have a final version of your infographic, consider how you will promote it. Share it on your website, social media channels, or through email marketing efforts. The more you can publicize your infographic, the more likely it is to capture attention and drive traffic to your website.
- Finally, learn from the process. Gather insights on the effectiveness of your infographic, and use that knowledge to improve future infographic projects.
By following these methods for clarity and readability, you can create digital infographics that effectively communicate your business or ideas to your target audience.
Step 12: Test and Refine
Once you have completed your digital infographic, it’s time to test and refine it to ensure that it effectively conveys your message and captures the attention of your target audience.
Start by selecting a few key members of your team to review and provide feedback on the infographic. They can offer fresh perspectives and identify any areas that need improvement or clarification.
As you test the infographic, be aware of the overall layout and organization of the content. Ensure that the data is displayed clearly and in a visually appealing manner. Use proper color and font choices to highlight important information and maintain clarity throughout the visualization.
Make sure that your infographic is also mobile-friendly, as many users are likely to view it on their smartphones or tablets. Open it on various devices and screen sizes to ensure that all elements are displayed properly.
Next, incorporate any feedback and refine your infographic accordingly. Make any necessary adjustments to improve the layout, readability, and overall visual appeal. Remember to keep the story and purpose of the infographic in mind as you make these refinements.
Once you are satisfied with the updated version, it’s time to download the final infographic. Save it in a format that is compatible with your website or preferred sharing methods. You may also consider creating a downloadable PDF version for users to access and share.
Before publishing or sharing your infographic, it’s a good idea to test it with a small group of users, such as friends or colleagues. Ask for their feedback and make any final tweaks based on their suggestions. This will help ensure that your infographic is well-received and effectively conveys your intended message.
Remember, the goal of your infographic is to attract attention, convey information, and ultimately achieve your business objectives. By following this step-by-step guide, you can create a compelling and visually appealing infographic that highlights your key data and tells a captivating story.
So there you have it– the process of creating a good digital infographic is complete! By using the right methods and tools like Visme, you can easily create original and visually appealing infographics that will grab the attention of your target audience on social media, website, or any other platform you choose to display it on.
Now that you’ve learned the proper steps to create an effective infographic, you can confidently leverage this powerful tool to enhance your business’s online presence, increase brand awareness, and even convey complex concepts with clarity. With proper testing and refinement, your infographics will be a key driver in conveying your message and driving profitability.
Frequently Asked Questions (FAQs)
Below, you will find some frequently asked questions about creating digital infographics.
1. What is the purpose of an infographic?
An infographic is a visual representation of data or information that is designed to convey a story, highlight key insights, and engage users. The purpose of an infographic is to make complex information more digestible and visually appealing.
2. What is the key to an effective infographic layout?
The key to an effective infographic layout is to think about the hierarchy of the information and how it will be displayed across different devices. Maintain a logical flow between sections and use visuals, such as icons or graphics, to help convey your message.
3. How do I choose the right color scheme for my infographic?
When choosing a color scheme for your infographic, think about the overall purpose and tone you want to convey. Use colors that are visually appealing and create a good contrast for readability. You can also use color to highlight important variables or sections.
4. What are some good sources for data and information?
There are many good sources for data and information, such as government websites, academic journals, and trusted news organizations. It’s important to use reliable and up-to-date sources to ensure the accuracy of your infographic.
5. How do I determine the target audience for my infographic?
To determine the target audience for your infographic, think about who you want to reach and what their interests or needs may be. Consider factors such as demographics, interests, and knowledge level. This will help you tailor your content and design to resonate with your intended audience.
6. What are some key tips for creating a memorable infographic?
To create a memorable infographic, define a clear purpose and narrative, use compelling visuals and graphics, organize your content in a logical way, and maintain a consistent theme or style throughout. Also, remember to refine and test your infographic based on feedback from clients or users.
7. Should I create a mobile-friendly version of my infographic?
Yes, it is important to create a mobile-friendly version of your infographic to ensure it can be easily viewed and interacted with on smaller screens. Consider the layout, font sizes, and navigation when adapting your infographic for mobile devices.
8. How do I demystify complex data or information in an infographic?
To demystify complex data or information in an infographic, break it down into smaller, more digestible chunks. Use visuals, such as charts or graphs, to extract key insights and present them in a clear and concise way. Also, provide explanations or annotations to help users understand the data.
9. Can I include downloadable content in my infographic?
Yes, you can include downloadable content in your infographic by providing links to additional resources or files. This can enhance the overall user experience and allow them to explore the topic in more depth.
10. How can I ensure the profitability of my infographic?
To ensure the profitability of your infographic, consider its purpose and how it aligns with your business goals. Use analytics to track its performance and identify areas for improvement. Additionally, you can offer infographic creation services to clients or use infographics as a lead generation tool.
These FAQs should provide you with a good starting point for creating your own digital infographics. Remember to always think about your target audience, define a clear purpose, and refine your infographic based on feedback and insights from users.


