
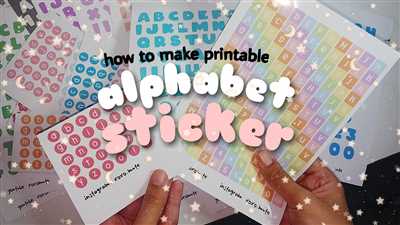

If you’re looking to add a personal touch to your belongings or want to create unique gifts for your loved ones, making printable stickers can be a fun and creative project. Whether you want to make custom labels for your products or just want to decorate your notebooks or laptops, printable stickers allow you to express your creativity and add a personal touch to any item.
There are different types of printable stickers you can make, such as die-cut stickers or kiss-cut stickers. Die-cut stickers are made by cutting the sticker into a specific shape, while kiss-cut stickers have a sticker layer on top of a backing layer, allowing you to peel and stick them easily. Depending on what you want to achieve with your stickers, you can choose the type that suits your needs.
To make printable stickers, you will need a few supplies. The first step is to select the artwork or design you want to use for your stickers. You can either create your own design using graphic design software or choose from the many templates available online. Make sure your artwork is in the correct file format, such as JPEG or PDF, and that it has the right resolution for printing.
Once your artwork is ready, you can print it onto sticker paper using a printer. Sticker paper is a special type of paper that is specially made for printing stickers. It comes in different finishes, such as gloss or matt, and can also be laminated for added durability. If you want your stickers to be water-resistant and to last longer, it’s recommended to use vinyl sticker paper and laminate it.
Before printing your stickers, make sure to set the printer settings correctly. You need to choose the right paper type and adjust the print quality settings accordingly. Also, make sure there is no bleed between the different stickers on the sheet to avoid any overlapping or misalignment.
Once your stickers are printed, the next step is cutting them out. If you have selected die-cut stickers, you can use a cutting machine or a craft knife to cut out the stickers according to the shape. If you have chosen kiss-cut stickers, you can use scissors or a paper trimmer to cut them along the border of each sticker. Be careful not to cut through the backing layer if you’re making kiss-cut stickers.
After the cutting is done, your printable stickers are ready to be used. From labeling jars and containers to decorating your laptop or phone, the possibilities are endless. With the right supplies and a bit of creativity, you can make beautiful and personalized stickers that will make your items stand out.
In conclusion, making printable stickers is a fun and easy way to add a personal touch to your belongings or create unique gifts. By selecting the right artwork, printing onto sticker paper, and cutting them out, you can create custom stickers that will showcase your creativity and style. So why not give it a try and start making your own stickers today?
How To Make Stickers
Stickers are a fun and creative way to personalize your belongings or promote your brand. Whether you want to make custom labels for your products or simply create decorative stickers for fun, here is a step-by-step guide on how to make stickers.
| Step 1: | Choose the type of sticker you want to make. Stickers can be made from various materials, such as paper or vinyl. The choice of material will depend on your specific needs and preferences. |
| Step 2: | Create or select the artwork for your sticker. You can use design software like Adobe Photoshop or even Microsoft Word to design your sticker. Make sure the dimensions and resolution of your artwork match the size and quality you want for your stickers. |
| Step 3: | If you have chosen a die-cut sticker, set up the cutting file with a bleed and cut lines. The bleed ensures that when the sticker is cut, there is no white border around it. The cut lines indicate where the sticker will be cut. If you are using a printer and cutting it manually, skip this step. |
| Step 4: | Select the right type of printer for your stickers. Inkjet printers are suitable for printing on paper stickers, while laser printers work better for vinyl stickers. Make sure your printer is capable of handling the type of material you are using. |
| Step 5: | Print your stickers. Load the sticker sheets into your printer, making sure they are aligned properly. Set the print settings according to your preferences, such as color, quality, and paper type. Once done, allow the printed stickers to dry completely. |
| Step 6: | If desired, laminate your stickers to make them more durable and water-resistant. You can choose between a gloss or matt laminate, depending on the look you want for your stickers. Apply the laminate carefully and evenly onto the printed stickers. |
| Step 7: | Cut out your stickers using scissors, a craft knife, or a cutting machine, depending on the quantity and complexity of your cuts. Take your time to ensure precise and clean cuts, especially if your stickers have intricate designs. |
| Step 8: | Peel off the backing of your stickers, and they are ready to be used or applied onto your desired surface. |
Making stickers is a creative process that allows you to explore your artistic skills and showcase your personal style. Have fun experimenting with different materials, designs, and techniques to create unique and eye-catching stickers!
Step 1: Set Up Your File
Before you can make printable stickers, you need to set up your file properly. This is an essential step in ensuring that your stickers are printed correctly and look their best. Here’s what you need to do:
1. Select the type of sticker you want to make: There are many different kinds of printable stickers to choose from, such as vinyl, gloss, matt, or laminated. Each type has its own unique qualities, so select the one that best suits your needs.
– Vinyl stickers: These are durable and water-resistant, making them suitable for outdoor use.
– Gloss stickers: These have a shiny, reflective finish that is eye-catching and vibrant.
– Matt stickers: These have a non-shiny, muted finish that is more subtle and sophisticated.
– Laminated stickers: These stickers have a layer of plastic laminate on top, which adds durability and protects the artwork from fading or scratching.
2. Set up your file: Open your chosen design software (such as Adobe Illustrator, Photoshop, or Microsoft Word). Create a new document with the dimensions of your sticker. To ensure that your stickers will be printed properly, it’s important to set up your file with the correct bleed and cut lines.
– Bleed: A bleed is the extra area beyond the sticker’s edge that is used to account for any slight movement during printing or cutting. It is essential to include a bleed in your file to avoid any white borders around the sticker.
– Cut lines: These are the lines that indicate where the sticker should be cut. Make sure to create your cut lines as a separate layer in your file, using a different stroke color or a specific naming convention (such as “CUT” or “Die Line”).
3. Select the right template: If there are existing templates available for the type of sticker you are making, it’s recommended to use them. Templates provide the correct dimensions and guidelines for printing and cutting. You can usually find templates online or provided by the printing company you plan to use.
4. Place your artwork onto the template: Once you have your template set up, you can now place your artwork onto it. Make sure your artwork is aligned within the template and that all important elements are within the safe zone (the area between the cut lines and the bleed).
5. Make sure everything is set correctly: Double-check that your file is set up correctly, with the right dimensions, bleed, cut lines, and artwork placement. Review it thoroughly to ensure that everything looks as it should.
6. Save your file: Once you are done setting up your file, save it in a compatible format (such as PDF or high-resolution image formats) that can be easily printed by your selected printer or printing service.
Now you are ready for the next step! In the following steps, you will learn how to print and cut your stickers, so they are ready to be used or sold.
What kind of stickers can I make

When it comes to stickers, the possibilities are endless. You can make a wide variety of stickers for any product or occasion. Whether you want to label your homemade jams or create custom stickers for your business, there is a sticker type that will suit your needs.
Stickers can be made from different materials, each with their own unique qualities. One popular type of sticker is a vinyl sticker. Vinyl stickers are water-resistant, making them perfect for outdoor use. They can also be easily applied to surfaces like glass or metal.
If you want a more professional look, you can choose to make stickers using a glossy laminate. This type of sticker has a shiny finish that gives a polished appearance. Glossy stickers are commonly used for product labeling and packaging.
Another option is to make matte stickers. These stickers have a non-reflective finish and are often used for personal or creative purposes. They can be printed on paper or vinyl and are a great choice if you want a more subtle or rustic look.
If you’re looking to create custom-shaped stickers, die-cut stickers are a fantastic option. These stickers are cut to a specific shape or design, allowing you to create unique and eye-catching stickers. Die-cut stickers can be made from various materials, including vinyl and paper.
When it comes to printing your stickers, there are two main methods: traditional printing and digital printing. Traditional printing involves creating an artwork file and sending it to a printing company. This method is typically used for large quantities and more complex designs.
On the other hand, digital printing allows you to print your stickers at home or in a local print shop. This method is great for smaller quantities and simpler designs. Digital printing gives you more control over the printing process and allows you to make adjustments quickly.
Regardless of the type of sticker you choose, it’s important to make sure your artwork file is set up correctly. Make sure your artwork has a bleed area and is in the appropriate file format (such as PDF or JPEG). This ensures that your stickers will be printed accurately.
Now that you know what kind of stickers you can make, it’s time to get started! Select a sticker template or create your own, and begin the process of designing and printing your stickers. Whether you’re making labels, decals, or custom stickers, the possibilities are endless.
Set up and print a page of the same label
When it comes to making printable stickers, one important step is to set up and print a page of the same label. This process ensures that all the stickers on the page are uniform in size and design.
To get started, you will need the artwork or design of the sticker you want to print. This can be created using graphic design software or downloaded from online sources. Make sure the file is in a format that can be printed, such as PDF or JPEG.
Next, select the type of sticker paper you want to use. There are many options available, including vinyl, glossy, matte, and water-resistant labels. Choose the one that suits your needs and printer capabilities.
Once you have selected the sticker paper, open your preferred word processing software, such as Microsoft Word. Create a new document and set the paper size to match the kind of sticker paper you are using.
Now it’s time to set up your page with the label template. Most word processors have pre-made label templates that you can select and customize. Choose the template that matches the size and shape of your stickers.
After selecting the template, you will see a page with a grid of empty label spaces. This is where you will place your artwork or design. Copy and paste the artwork onto each label space on the page.
Once your artwork is in place, you can make any necessary adjustments, such as resizing or rotating the image. You can also add text or other elements to the stickers if desired.
Before printing, it’s important to ensure that your stickers will be printed without any unwanted cuts or bleed. In some cases, you may need to select a specific printing option called “kiss cuts” or “die cuts” to achieve this. Make sure to consult your printer’s manual or support resources to know how to set this up.
| The difference between kiss cuts and die cuts: |
| Die cuts are when the entire sticker is cut out, including the backing paper. This type of cutting is commonly used for sticker sheets where each sticker is meant to be used individually. |
| Kiss cuts, on the other hand, only cut through the vinyl layer of the sticker and not the backing paper. This allows the stickers to be easily peeled off and used one at a time. |
Once you have reviewed and made sure everything is set up correctly, you can proceed with printing. Load the sticker paper into your printer and choose the appropriate printing settings, such as color and quality.
Click on the print button, and your printer will start printing the page of stickers. Depending on the number of stickers and the size of the page, this process may take some time.
Once the printing is done, let the stickers dry completely before handling them. This will prevent any smudging or smearing of the ink.
If you want to make your stickers more durable and long-lasting, you can laminate them. Laminating adds a protective layer to the stickers, making them resistant to water and other damage. However, keep in mind that this step is optional and may add some extra cost.
Finally, use a cutting tool, such as scissors or a paper cutter, to cut out each sticker along the designated edges. Take your time and make sure the cuts are precise, especially if you have different shapes and sizes on the same page.
Now you have a page of printed stickers that are ready to be used! Whether for personal or professional use, this step-by-step process will help you create custom-made sticker sheets with ease.
What Are The Different Types Of Stickers
When it comes to stickers, there are a variety of types to choose from, each with its own set of characteristics and uses. Here are some of the most commonly used sticker types:
- Vinyl Stickers: Vinyl stickers are a popular choice for many different applications. They are made from a durable and water-resistant material, which allows them to withstand outdoor conditions. Vinyl stickers are commonly used for car decals, bumper stickers, and more. They can be printed in full color and can be cut into any shape or size you want.
- Die Cut Stickers: Die cut stickers are custom-made stickers that are cut into a specific shape or design. These stickers are printed on a sheet of vinyl, and then a die is used to cut out the shape of the sticker. Die cut stickers are popular for product labels, custom logos, and more.
- Kiss Cut Stickers: Kiss cut stickers are similar to die cut stickers, but they are not cut all the way through the backing sheet. Instead, only the top layer of the sticker is cut, leaving the backing intact. This allows the sticker to be easily peeled off the backing. Kiss cut stickers are commonly used for laptop stickers, wall decals, and more.
- Matte vs. Gloss Stickers: The main difference between matte and gloss stickers is the finish. Matte stickers have a non-shiny finish, while gloss stickers have a shiny, reflective finish. Matte stickers are often preferred for a more subtle and low-key look, while gloss stickers offer a vibrant and eye-catching appearance.
- Clear Stickers: Clear stickers are made from a transparent material, which allows the sticker to blend seamlessly into any surface. These stickers are commonly used for window decals, glass displays, and more.
- Laminated Stickers: Laminated stickers have an extra layer of protection in the form of a laminate coating. This coating helps to protect the sticker from fading and prolongs its lifespan. Laminated stickers are commonly used for outdoor applications, as they are more resistant to water and UV rays.
When choosing the type of sticker for your artwork or design, consider the intended use and the desired look you want to achieve. Each type of sticker has its own unique characteristics and can be tailored to suit your specific needs.
Paper Stickers Vs Vinyl Stickers
When it comes to choosing the right type of sticker for your needs, it’s important to be sure of what you want. Essentially, paper stickers and vinyl stickers are two different kinds of materials used for printing custom stickers. Both have their own advantages and considerations, and understanding the difference between them will help you make an informed decision.
Paper Stickers: Paper stickers are made by printing your desired artwork onto sheets of paper. They can then be cut into any shape or size using a die-cut process. Paper stickers are commonly used for labels, product packaging, and other printable materials. They are usually water-resistant and can be either matte or glossy.
Vinyl Stickers: Vinyl stickers, on the other hand, are made by printing your artwork onto sheets of vinyl material. They are also die-cut to create custom shapes and sizes. Vinyl stickers offer more durability and are generally more resistant to wear and tear. They can withstand exposure to the elements, making them suitable for outdoor use. Vinyl stickers also have a strong adhesive, ensuring that they will stay in place once applied.
The main difference between paper stickers and vinyl stickers lies in their material properties. Paper stickers are generally more affordable and are a popular choice for indoor applications. However, they may not hold up as well in outdoor environments or areas with more wear and tear. Vinyl stickers offer a higher level of durability and water resistance, making them ideal for long-lasting outdoor applications.
When selecting between paper stickers and vinyl stickers, consider the intended use and environment. If you need a sticker that will last a long time and withstand harsh conditions, vinyl stickers are the way to go. However, if you’re looking for a more cost-effective option for indoor use, paper stickers may be a better choice.
In summary, the choice between paper stickers and vinyl stickers depends on your specific needs. Consider factors such as durability, water resistance, and budget to select the right kind of sticker for your project.
What Are Laminated Stickers

Laminated stickers are a type of sticker that has a layer of laminate applied to it, providing added durability and protection. The laminate acts as a clear, glossy or matt coating that helps to protect the sticker from wear and tear, making it water-resistant and longer lasting.
When a sticker is laminated, it is essentially being sealed with a protective layer. This layer can be made from a variety of materials, but vinyl is commonly used because of its durability and flexibility. The laminated layer is applied to the top of the printed sticker, sealing it between the adhesive and the laminate layer itself.
One of the main benefits of laminated stickers is that they are more resistant to fading, scratching, and damage from UV rays. The laminate layer helps to preserve the colors and design of the sticker for a longer period of time, making it a popular choice for outdoor use or products that may come into contact with water. Additionally, laminated stickers can be easily wiped clean, ensuring that they maintain their appearance over time.
Laminated stickers can be made through either a traditional die-cutting method or by using a kiss-cut method. In die-cutting, the sticker is cut along the outline of the design, resulting in a sticker that is the exact shape of the artwork. On the other hand, kiss-cutting involves cutting through the sticker layer without cutting the backing paper, creating a sticker that can easily be peeled off the sheet.
When creating laminated stickers, you can choose between a gloss or matt laminate finish. Gloss adds a shiny, reflective surface to the sticker, while matt provides a more subdued, non-reflective appearance. The type of laminate finish you choose will depend on the look and feel you want to achieve with your stickers.
In terms of printing, laminated stickers can be printed on a variety of materials, including paper, vinyl, and other synthetic materials. If you are printing your stickers at home, make sure to select a printer that is compatible with the type of material you are using. Additionally, it’s important to set up your artwork file with bleed and cut lines so that the printer knows where to cut the stickers.
When using laminated stickers, you can also choose between custom or template-based designs. Custom designs allow you to create unique stickers with your own artwork and text, while template-based designs provide pre-designed sticker layouts that you can customize with your own information. Both options offer flexibility and customization, depending on your needs.
In conclusion, laminated stickers are a popular choice for those looking to create durable, water-resistant, and long-lasting stickers. The difference between laminated and non-laminated stickers is the additional layer of laminate that provides protection and enhances the appearance of the sticker. Whether you’re printing your stickers at home or using a professional printing service, laminated stickers are a great way to make your designs stand out.
What Is The Difference Between Die Cut And Kiss Cut Stickers
When it comes to making printable stickers, there are various types and cuts available to choose from. Two popular options are die cut stickers and kiss cut stickers. While both of these options serve the same purpose of creating custom stickers, there are some key differences between them.
Die Cut Stickers:
- Die cut stickers are made by cutting the vinyl sheets into the desired shape using a die. A die is a specialized tool that cuts through the material to create intricate and precise shapes.
- These stickers have a backing paper that is usually colored or patterned, making them visually appealing even when not applied.
- Die cut stickers are cut all the way through the vinyl and backing paper, creating individual stickers that can be easily removed from the sheet.
- They are perfect for complex shapes, logos, and designs that require specific details.
- Die cut stickers can be made with a matte or gloss finish and can also be laminated for added durability.
Kiss Cut Stickers:
- Kiss cut stickers are similar to die cut stickers in terms of being made on vinyl sheets, but they are not cut all the way through.
- Instead, a kiss cut sticker has the vinyl cut without going through the backing paper, leaving it intact.
- This allows the stickers to remain on the sheet until they are peeled off and applied.
- Kiss cut stickers are often used for sheet labels or sticker sets where multiple designs are placed on one sheet.
- They are also popular for planner stickers, decorative labels, and other applications that require easy organization and storage.
- Like die cut stickers, kiss cut stickers can be printed with different colors and laminated for added protection.
When selecting the type of sticker cut for your project, it is important to consider the specific requirements and purpose of your stickers. Die cut stickers are ideal for intricate designs and individual labels, while kiss cut stickers are great for sticker sheets and sets.
Whatever type of sticker you choose, make sure that your artwork is set up correctly with the correct bleed and cutting strokes. This will ensure that your printed stickers come out exactly as you desire.


