

Are you looking for a fun and creative way to display your favorite photographs and artwork? Look no further! In this step-by-step tutorial, we will show you how to easily make your own picture frames. Whether you want to add a custom touch to your home decor or create a one-of-a-kind gift for a loved one, this DIY project is perfect for you!
Step 1: Gather the Materials
To make your own picture frames, you will need a few basic materials. Here’s a list of what you’ll need:
- Wood boards
- Ruler or measuring tape
- Hand saw or miter saw
- Miter box or miter gauge (optional, but helpful for making precision cuts)
- Sandpaper
- Wood glue
- Clamp
- Paint or stain (optional)
- Paper or cardboard
- Picture hanging hardware
Step 2: Measure and Cut the Wood
Start by measuring and marking the length and width of your desired frame on the wood boards. Use a ruler or measuring tape to ensure precise measurements. Then, using a hand saw or miter saw, make the necessary cuts. If you’re using a miter box or miter gauge, it will help you make accurate angled cuts.
Step 3: Sand the Edges
After making the cuts, use sandpaper to smooth out the edges of the frame. This will ensure that your frame looks clean and professional. Be sure to sand lightly and evenly to avoid removing too much wood.
Step 4: Assemble the Frame
Apply wood glue to the joint where two pieces of wood will meet. Then, press the pieces together and use a clamp to hold them in place. Allow the glue to dry according to the instructions on the glue bottle. This will ensure a strong and secure frame.
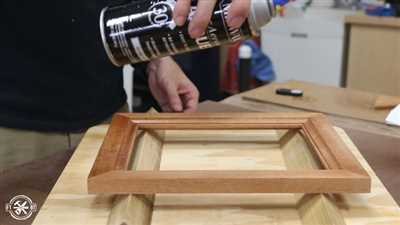
Step 5: Add a Finish
If you want to add a pop of color or enhance the natural beauty of the wood, you can paint or stain your frame. Simply apply the paint or stain evenly over the entire frame and let it dry. This step is optional, but it can make your frame stand out even more.
Step 6: Mount Your Picture
Once your frame is dry, place your picture or artwork inside the frame. You may need to cut a piece of paper or cardboard to fit the frame if your picture is smaller than the frame opening. Use tape or other mounting methods to secure the picture in place.
Now you have a beautiful and custom-made picture frame! Whether you’re looking to display family photos, artwork, or prints you’ve found, this DIY project is a great way to showcase your favorite pieces. Plus, you’ll have the satisfaction of knowing that you made it yourself!
So, why wait? Start making your own picture frames today and share your creations with others. It’s a fun and rewarding process that will add a personal touch to your home decor. Happy framing!
How to Make a Custom DIY Picture Frame
Are you looking to add a personal touch to your photos or artwork? Making a custom DIY picture frame is a great way to showcase your creativity and add a unique touch to any space. With a few simple steps and some basic materials, you can easily build your own custom picture frame.
Step 1: Gather the necessary materials
To make a custom DIY picture frame, you will need the following components:
- Wooden boards
- Sandpaper
- Saw
- Glue
- Clamp
- Tape measure
- Yarn or twine
- Picture frame hardware
Step 2: Measure and cut the boards
Start by measuring the dimensions of the picture or artwork that you want to frame. Add 1 inch to each side to allow for the rabbet, which is the groove where the picture will sit. Mark these measurements on the wooden boards and use a saw to make the cuts.
Step 3: Sand the edges
Using sandpaper, lightly sand the edges of the wooden boards to smooth out any roughness or splinters. This will ensure a clean and professional finish for your picture frame.
Step 4: Assemble the frame
Apply a small amount of glue to the joint where two boards will come together. Use a clamp to hold the boards in place while the glue dries. Repeat this process for all four sides of the frame. Make sure the corners are squared and the frame is aligned properly.
Step 5: Add the rabbet
Using a rabbet bit on a router, cut a groove along the inside edges of the frame boards. This will create the rabbet where the picture or artwork will sit. Make sure you measure the depth of the groove to ensure a perfect fit for your picture.
Step 6: Finish the frame
If desired, you can paint or stain the frame to add a pop of color or match your decor. Allow the paint or stain to dry completely before moving on to the next step.
Step 7: Mount your picture
Place your picture or artwork into the frame, making sure it fits properly within the rabbet. Use picture frame hardware to secure the picture in place.
Step 8: Hang and enjoy!
With your custom DIY picture frame complete, you can now hang it on the wall and admire your handiwork. Whether you’re displaying a cherished photograph or a piece of art, your custom frame will add a personal touch to any space.
By following this step-by-step guide, you can easily create a custom DIY picture frame that perfectly fits your needs. So why not give it a try and start showcasing your favorite memories or artwork in a frame that you made yourself?
Step 1
To start making your own custom picture frames, you’ll need a few key components. First, gather the necessary materials and tools:
- Wood boards (at least 1 inch thick)
- Picture frame hardware (clamps, tape measure, ruler, etc.)
- Glue
- Screws or nails
- Sandpaper
- Yarn or tape
- Paint or finish
Once you have all the materials ready, you can move on to the process of making your picture frames. Follow these instructions:
- Measure the size of the picture you want to frame. Take note of the width and height measurements.
- Cut the wood boards to the desired length, adding a few inches to each side to account for the frame’s width.
- Create a rabbet joint by cutting a groove along the inner edge of each wood board. This will hold the glass, picture, and backing in place. Make sure the rabbet is the same width as the thickness of the materials you’ll be inserting.
- Sand the cut pieces of wood to smooth out any rough edges. Start with rough sandpaper and gradually move to finer grits for a polished finish.
- Apply glue to the joints and clamp the wood boards together. Wipe away any excess glue that may seep out during the drying process.
- Let the glue dry for the recommended time specified on the glue’s packaging.
- Once the frame is dry, sand lightly to remove any imperfections and create a smooth finish.
- If desired, paint or finish the frame with your chosen color or stain. Follow the instructions on the paint or finish’s packaging for best results.
- Add the picture, glass, and backing to the frame. Use tape, yarn, or mounting hardware to secure everything in place.
By following these instructions, you can easily make your own custom picture frames. Stay tuned for more steps in this DIY tutorial series on how to make picture frames.
3 Open a window
Once you have all the components ready, it’s time to open a window and start building your custom picture frame. This step is crucial because it allows you to easily view and adjust the frame as you work on it.
To open a window, simply find a space where you can comfortably work with the frame. It could be a table, a workbench, or any other flat surface. Make sure the area has enough room for you to move around and manipulate the frame without any obstructions.
When opening the window, be careful not to scratch or damage the frame or any other surfaces around it. You can use soft cloth or padding to protect the edges of the frame from scratching against the table or work surface.
Once the window is open, place the frame components in front of you. This will allow you to easily access all the pieces you need for the frame construction.
If you have a guide or instructions on how to make a picture frame, it’s a good idea to keep it handy and refer to it as needed. This will ensure that you follow the correct procedures and measurements while building your frame.
Before you start assembling the frame, it’s also a good idea to lightly sand the edges of the wood boards. This will help smooth out any roughness or splinters and ensure a better finish when the frame is completed.
Make sure to measure and cut the wood pieces with precision according to the instructions or tutorial you are following. You can use a tape measure and a pencil to mark the measurements on the wood before making the cuts.
When cutting the wood, remember to take into account the width of the saw blade. This will ensure that the cuts are made accurately and the pieces fit together properly.
Once the cuts are made, you can start assembling the frame. Apply a small amount of wood glue to the joint areas and carefully press the pieces together. Use clamps or yarn to hold the pieces in place while the glue dries.
If you want to add more color or finish to the frame, you can paint or stain it at this point. Make sure to follow the instructions on the paint or stain can for the best results.
After the paint or stain has dried, you can insert the picture into the frame and mount it on the wall or display it on a shelf.
By following these steps, you can easily open a window and start building your own custom picture frame. Enjoy the process and have fun decorating your space with your DIY frames!
Instructions
Here is a step-by-step guide on how to make picture frames easily:
- Gather all the materials you will need for this DIY project. These include wood boards, sandpaper, paint, glue, tape, clamp, and picture frame hardware.
- Start by measuring and cutting the wood boards to the desired size. Make sure to cut four pieces for the sides of the frame and one additional piece for the back.
- Sand the cut pieces of wood lightly to smooth out any rough edges or splinters.
- Assemble the frame components by inserting the side pieces into the back piece. Use glue to secure the joints and tape to hold them together while the glue dries.
- After the glue has dried, remove the tape and clamp the frame together to ensure a tight fit.
- Next, paint the frame in your desired color. You can also add custom designs or patterns to make it more unique.
- Once the paint is dry, lightly sand the frame to achieve a smooth finish.
- Attach the picture frame hardware to the back of the frame for mounting.
- You can now insert your picture into the frame and display your finished piece!
These instructions provide a basic overview of how to build a picture frame from wood. For more precise measurements and specific techniques, you can find tutorials online or consult with a seller at a hardware store for guidance. Remember to take your time and have fun while making your own picture frames!
Cut Boards

When it comes to making picture frames, the first step is to cut the boards to the right size. This step is crucial for ensuring that your frame is aligned and fits together perfectly.
First, you will need to measure the dimensions of your picture or artwork that you want to frame. Take precise measurements, making sure to account for any margins or borders you want around the picture.
Using a tape measure or ruler, mark the measurements on the board that you will be using for the frame. Make sure to mark the measurements on the side of the board that will be facing the outside of the frame.
Once you have marked the measurements, it’s time to make the cuts. You can use a hand saw or a miter saw for this step, depending on your comfort level with different tools. If you’re using a miter saw, it’s a good idea to clamp the boards in place to ensure precision cuts.
Start by making a 45-degree angle cut on one end of the board. This cut will create a miter joint, which will allow the frame pieces to fit together at the corners. Repeat this process for all four pieces of the frame.
If you’re using a hand saw, make sure to use a straight edge or a guide to keep your cuts straight and accurate. Take your time with the cuts and make sure to follow your marked measurements.
Once all the cuts are made, use sandpaper to lightly sand the edges of the boards to smooth out any rough spots or splinters. Sand the edges in the same direction as the wood grain for the best finish.
Now that your boards are cut, sanded, and ready to go, you can move on to the next step in the process – assembling the frame. This will involve adding glue to the cut edges and joining the pieces together.
If you want to add a custom finish or color to your frame, this is the time to do it. You can paint or stain the boards before assembling the frame to create the desired look.
Once the glue dries, you can insert the picture or artwork into the frame and mount it in place. You may need to use hardware or mounting tape to secure the picture in the frame.
That’s it! With these step-by-step instructions, you can easily make your own DIY picture frames. Remember to take your time and be precise with your measurements and cuts for a professional-looking frame.
Now you’re ready to showcase your favorite pictures or artwork with beautiful, handmade frames.
Tip
When making custom picture frames, precision is key. One tip to ensure that your frames are cut with the same precision is to lightly sand the edges of the boards before cutting them to size. This will remove any roughness or splinters that may interfere with the cutting process.
Another tip is to use a piece of yarn or string to measure the distance between the window frame and the edge of the frame. Simply clamp one end of the yarn to the window frame and insert the other end into the rabbet joint of the frame. This will give you an accurate measurement of how much wood needs to be cut.
Before assembling the frame, it’s a good idea to paint or finish the individual pieces. This allows you to easily reach all the corners and edges without having to worry about paint getting on the glass or mounting hardware.
When gluing the pieces together, use tape to hold them in place while the glue dries. This will prevent any shifting or movement of the components and ensure a strong joint.
If you’re unsure about the assembly process, there are many DIY tutorials and guides available online that can provide more detailed instructions.
Once the frame has been assembled, you can mount your picture by simply inserting it into the frame and securing it with mounting hardware. Be sure to double-check the measurements to ensure a perfect fit.
When sanding the finished frame, use a fine-grit sandpaper to smooth out any rough spots or imperfections. Be careful not to sand too aggressively, as this can remove the paint or finish.
With these tips, you can easily build your own picture frames and add a personalized touch to your home decor. Happy framing!
Cut the Rabbet
Once you have all the necessary components for your picture frame, it’s time to cut the rabbet. The rabbet is a groove or recess cut into the inside edge of the frame that will hold the glass, picture, and backing securely in place.
To cut the rabbet, start by measuring the width and depth of the glass, picture, and backing. Add 1/8 inch to both measurements to allow for clearance. Mark these measurements on the inside edges of your frame boards.
Next, using a saw, make the rabbet cuts on each board. Make sure to cut along the lines you marked earlier with precision. Use a guide to ensure straight cuts. Take your time and be careful when cutting the rabbet, as it will determine how well your frame components fit together.
After the rabbet cuts have been made, use sandpaper to smooth the inside edges of the frame boards. This will ensure a clean finish and prevent any splinters or rough edges from damaging the glass or picture. Sand lightly and check the fit of the components as you go.
When you’re satisfied with the smoothness of the rabbet cuts and the fit of the components, you can proceed to paint or finish the frame according to your desired color or style. Use a paintbrush or spray paint to apply the paint or finish, following the instructions provided by the paint manufacturer. Allow the frame to dry completely before moving on to the next step.
Once the frame is dry, it’s time to assemble the picture frame. Lay the frame boards on a flat surface with the rabbet side facing up. Apply wood glue to the mitered joints and carefully press the boards together. Use a clamp to hold the joints in place while the glue dries. Be sure to wipe away any excess glue with a damp cloth.
With the frame assembled, you can now insert the glass, picture, and backing into the rabbet. Open the back of the frame and gently insert the glass first, followed by the picture and backing. Make sure all the components fit securely and are centered within the frame.
To finish the framing process, close the back of the frame and secure it with the appropriate hardware. This can be small screws, brackets, or nails, depending on the type of frame and mounting options you prefer. Follow the hardware manufacturer’s instructions for proper installation.
With the rabbet cut, the frame painted, and the components securely in place, your custom picture frame is now complete. Hang it on the wall or display it on a shelf to showcase your favorite artwork or photograph. Enjoy your beautiful handmade frame!
Remember, this tutorial is simply a guide on how to make picture frames. There are many more DIY instructions and tips available online, so keep exploring and sharing your knowledge with others.
Lightly Sand Boards
Before you begin making your picture frames, it’s important to properly prepare the wood boards. One important step in the process is to lightly sand the boards. This will ensure a smooth and even finish once the frame is complete.
To start, gather all the necessary materials including sandpaper, preferably a fine grit, and a sanding block or tool. Begin by checking the edges of the boards for any rough spots or splinters. Use the sandpaper to carefully sand away any imperfections, making sure to sand in the same direction as the wood grain.
Next, use the sandpaper or sanding block to lightly sand the entire surface of the boards. This will help to remove any blemishes or inconsistencies in the wood, resulting in a more polished finish. Take your time and be thorough, making sure to sand all sides and edges of each board.
Once you have finished sanding, use a clean cloth or brush to remove any dust or debris from the boards. This will ensure a clean surface for the next steps in the frame-making process.
Lightly sanding the boards is an important step in the DIY picture frame making process. It helps to prepare the wood for painting or staining, and it creates a smooth surface for the frame components to be joined together.
Remember, precision and attention to detail are key when making picture frames. Take your time and ensure that all cuts and measurements are accurate. This will result in a high-quality, custom-made frame that you can be proud to display.
For more tips and instructions on how to make picture frames, there are many online tutorials and DIY guides available. You can also check with your local hardware store or woodworking supplier for additional resources and support.
Glue Frame Together
Once you have made all the necessary cuts and sanded the edges of your picture frame components, it’s time to glue them together. Gluing the frame is a crucial step in the frame-making process, as it ensures that all the pieces are securely joined and the frame is sturdy.
Before gluing, make sure to dry fit the frame together to double-check that all the pieces align properly. Once you are satisfied, apply a small amount of wood glue to the end of one of the frame’s side pieces.
Next, join the side piece with the corresponding end piece, making sure that they form a 90-degree angle. Use a clamp to hold the joint together tightly while the glue sets. Repeat this process for the other side of the frame.
When gluing the joints, it is important to apply enough pressure to ensure a strong bond but not so much that the glue oozes out and creates a mess. You can use a piece of scrap wood or a straight edge to remove excess glue if it does squeeze out.
After gluing all the joints, let the frame sit clamped for at least an hour, or according to the instructions on the glue bottle. This allows the glue to fully dry and form a strong bond between the frame components.
Once the glue has dried, you may choose to further strengthen the frame by adding additional hardware such as corner braces or metal brackets. These can be easily found at your local home improvement store or online seller.
If you plan on painting or staining your frame, now is the time to do so. Lightly sand the entire frame surface to create a smooth finish, and then apply the desired color or finish following the instructions on the paint or stain can.
Finally, insert your picture into the frame and secure it with a backing board, tape, or clips. If you want to hang the frame on a wall, attach a hanging hardware or wire to the back of the frame. Your custom-made picture frame is now ready to be displayed!
Clamp the Frame
Once you have cut all the boards for your picture frame and sanded them down with sandpaper, it’s time to start assembling the frame. This step will ensure that your frame is held together securely while you finish and paint it.
Start by laying out the four board pieces that make up the frame. Line them up so that the edges align perfectly. If you need to make any adjustments or sand down any cuts for a more precise fit, now is the time to do it.
Next, add a line of glue along the joint where two of the frame components meet. Use a clamp to hold the pieces together tightly while the glue dries. Make sure to wipe away any excess glue that may seep out using a damp cloth.
If you want a more permanent and sturdy joint, you can also use screws or nails to secure the frame pieces together. Simply drill pilot holes through the side of one board and into the end of the other, then insert screws or nails into the holes.
Another option is to use a rabbet joint, which involves cutting a groove or notch into one board and fitting the other board into it. This creates a flush and seamless joint. If you’re not familiar with this technique, there are many tutorials available online that can guide you through the process.
Once the glue has dried and the frame pieces are securely held together, you can proceed with finishing and painting the frame to your desired color. Make sure to tape off any areas that you don’t want to get paint on, such as the window where the picture will be inserted.
When you’re finished, you can add mounting hardware to the back of the frame if you plan on hanging it on a wall. Simply follow the instructions provided with the hardware you’ve chosen.
Now that you’ve completed the steps outlined in this guide, you should have a custom picture frame that is ready to display your favorite print or artwork. Whether you’re making a frame to keep or selling it as a DIY project, you can be proud of the time and precision that has gone into building it.
Finish the Frame
After you have made all the cuts and assembled the frame according to the instructions in the previous steps, it’s time to finish the frame and add a custom touch to it. Here is a step-by-step guide on how to do that:
- Sanding: Start by lightly sanding the edges of the frame to remove any rough spots or splinters. This will also prepare the surface for painting or staining.
- Paint or Stain: Choose a color or finish that matches your style and the room where the picture frame will be displayed. Apply the paint or stain evenly on all sides of the frame using a brush or a roller. Let it dry according to the instructions on the paint or stain can.
- Mounting: When the frame is completely dry, you can mount your picture or artwork inside it. Use a guide or measuring tape to ensure precision when placing the picture in the frame.
- Glue and Clamp: Apply a small amount of wood glue to the inside edges of the frame’s rabbet (the groove where the picture will be inserted). Carefully place the picture over the glue and press it down. Use clamps or tape to hold the frame and picture together as the glue dries.
- Protective Film: If you are selling the frames or want to add a protective layer, you can cover the front of the frame with a clear protective film or acrylic sheet. Simply cut it to the same size as the frame opening and insert it.
- Add Hardware: To hang the picture frame on the wall, attach a sawtooth hanger or D-ring to the back of the frame. Make sure it is mounted securely and can support the weight of the frame.
- Adding Yarn: For a decorative touch, you can add a piece of yarn or ribbon along one side of the frame. This can be done by gluing or taping the yarn in place.
By following these steps, you can easily complete the process of making a picture frame. Whether you are building a frame for your own home or sharing them as DIY gifts, these finishing touches will add charm and personalized style to your frames.
Remember to take your time and measure twice before making any cuts. The precision of your measurements will ensure that the frame fits together perfectly and looks professional.
With the instructions and tips provided in this tutorial, you can confidently make your own custom picture frames, whether you are a beginner or an experienced woodworker. Happy framing!
Insert Frame Components
Once you have the wood cuts ready for your picture frame, it’s time to start assembling the frame components. Before you begin, make sure you have sanded all the pieces to smooth out any rough edges.
If you haven’t already, determine the measurement for the rabbet in the back piece of the frame. This rabbet will allow the glazing and mounting of your picture. Measure the thickness of your window or artwork, and subtract 1/8 of an inch to allow for easy insertion and removal.
With the measurement in hand, use a router or table saw to cut the rabbet along the inside edge of the back piece. Be sure to clamp the piece securely and make precise cuts for a clean joint.
Once the rabbet has been cut, lightly sand the inside edges to make sure they are smooth. This will prevent any damage to your artwork or window when you insert them into the frame.
Now, it’s time to assemble the frame components. Take one of the side pieces and apply wood glue to the end. Align the glued end with one corner of the back piece, making sure they are flush. Use a clamp or tape to hold them together while the glue dries.
Repeat the process for the other side piece, making sure that your measurements are consistent and the frame is square. Allow the glue to dry completely before moving on to the next step.
If you want to paint or finish your frame, now is the time to do it. Use a custom cut with DIY instructions or simply follow the process provided by the seller. Sand the frame lightly between coats for a smooth finish.
When the paint or finish has dried, you can add any additional hardware for mounting your frame, such as a hanging wire or D-rings. Follow the instructions provided with the hardware, or consult online tutorials for guidance.
With the frame complete, you’re now ready to insert your picture or artwork. Open up the back of the frame and place your picture inside. If necessary, use a piece of yarn or tape to secure it in place.
Finally, close the back of the frame and ensure that it fits snugly. If there are any gaps, make small adjustments to the frame components as needed.
That’s it! You’ve successfully inserted the frame components and completed your picture frame. Now you can proudly display your artwork or give it as a thoughtful gift.
Add Mounting Hardware
Once your picture frame has been assembled, it’s time to add the mounting hardware. This step is crucial for ensuring that your frame hangs securely on the wall.
Here’s a step-by-step guide on how to add mounting hardware to your picture frame:
- Measure and mark the desired location for your hardware. Typically, these will be in the top corners of the frame.
- Using a clamp, hold the two sides of the frame tightly together at the marked locations.
- Drill pilot holes through the frame using the marks as a guide. Make sure the holes go through both sides of the joint.
- Remove the clamp, and apply some wood glue to the holes.
- Insert the screw or hanging hardware into the holes, making sure they are securely fastened.
- If you plan to paint or stain your frame, now is the time to do so. You can also add any custom finishes or touches to personalize your frame.
- Once the paint or stain has dried, lightly sand the edges and corners of the frame with sandpaper to achieve a smoother finish.
- Finally, wipe away any dust or debris left from the sanding process and your picture frame is ready to hang!
Making your own picture frames can be a fun and rewarding DIY project. By following these instructions and adding the necessary mounting hardware, you can create beautiful frames that will showcase your artwork or photos with precision and style.
Remember to measure twice and cut once, as accuracy and attention to detail are key. Whether you’re framing a print, a photograph, or even a piece of yarn art, the process is the same. By sharing your finished frames, you can inspire others to try their hand at making their own custom picture frames. Happy framing!
Sources
When it comes to making picture frames, there are several sources you can turn to for the materials and information you need. Here are some popular sources:
- Hardware Stores: Hardware stores are a great place to find the boards and wood you need to build your frame. They often have a variety of options to choose from, including different types of wood and finishes.
- Online Guides and Tutorials: The internet is filled with helpful tutorials and guides on how to make picture frames. You can find step-by-step instructions, tips and tricks, and even video tutorials that walk you through the entire process.
- Specialty Wood Shops: If you’re looking for more unique or high-quality wood, consider checking out specialty wood shops. These stores often have a wider selection of wood types and can provide expert advice on choosing the right materials for your project.
- DIY Blogs and Websites: Many DIY bloggers and websites share their experiences and tips for making picture frames. These can be great resources for inspiration and ideas, as well as detailed instructions and measurements.
- Local Craft Stores: Craft stores often carry picture frame components, such as frames, hinges, and mounting hardware. They may also have a selection of pre-made picture frames if you’re looking for a quick and easy option.
Remember to measure twice and cut once when building your picture frame. Precision and attention to detail are key to ensuring a professional-looking result. Don’t be afraid to experiment with different colors and finishes to add your own personal touch to the frame. And most importantly, have fun!


