If you have a creative sense and want to add a special touch to your belongings, making colored decals can be a fun and fulfilling activity. Whether you’re into crafts or just want to personalize your items, colored decals are a great way to do so. Luckily, there’s nothing complicated about the process, and with a few simple steps, you’ll be able to create your own unique stickers.
First, you’ll need some materials. The most important item is vinyl, which comes in various colors and sizes. The color you choose will depend on your personal preference or the specific design you have in mind. If you’re unsure about which color to pick, keep in mind that bright and bold colors usually make decals more eye-catching. Additionally, you’ll also need a pair of scissors or a cutting tool to cut out your design once it’s printed.
Next, you’ll want to prepare your design. Using a computer program like Adobe Illustrator or CorelDRAW, you can create your own design or download pre-made templates from the internet. One thing to keep in mind is the color mode you’re working in. While CMYK is the preferred color mode for printing, it’s important to note that the colors may look different when applied to vinyl. So, to get the most accurate result, it’s recommended to work in RGB or use the Pantone color system.
- Are there any preferred vinyl letter colors
- Full Color Printing Methods Make Colorful Vinyl Decals and Stickers Affordable for Smaller Companies
- CMYK vs Pantone Printing
- “CMYK values under 10 can get lost on the screen. Ideally, they should be kept at either 0 or 10”
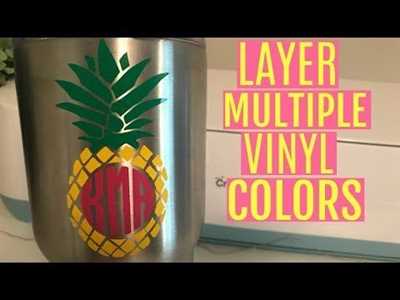
- Preparing Your Decal To Cut Multi Colors
- Video:
- Full Colour Sign in TF2 – Latest Guide (Decal Tool & Conscientious Objector)
Are there any preferred vinyl letter colors
When it comes to vinyl decals, there are no specific preferred vinyl letter colors that you have to use. You have the flexibility to choose any color that suits your personal preference or the needs of your project.
However, there are a few factors you should keep in mind when selecting vinyl letter colors for your decals. Generally, lighter colors tend to stand out more on windows and other glass surfaces, while darker colors may be more visible on lighter backgrounds or when applied to non-transparent surfaces.
Another important consideration is the color format you choose. Vinyl printing methods usually use CMYK (Cyan, Magenta, Yellow, and Key) or Pantone values to create colors. If you’re working with full-color decals or multi-color designs, CMYK values are typically used. On the other hand, if you want precise color matching or work with special colors, Pantone values may be preferred.
Keep in mind that the colors you see on your screen or on paper overlays may not always be an exact match for the final vinyl decal. Different devices and printing methods can cause slight variations in color, so it’s important to be aware of this when preparing your design.
Additionally, be mindful of the size of your vinyl lettering. If the letters are too small, certain colors may appear blurry or lost when the decal is applied. For small lettering, it’s best to stick with high-contrast colors that will show up well against the background.
In some cases, there may be certain letter colors that are more commonly used. For example, white lettering is often preferred for its versatility and ability to stand out on various surfaces. Black lettering is also a popular choice as it provides a bold contrast on light-colored backgrounds.
Ultimately, the choice of vinyl letter colors depends on your personal preference, the intended purpose of the decal, and any specific requirements or branding guidelines you may have. As long as you carefully consider these factors and select colors that will work well with your design and the application surface, you’ll be able to create eye-catching vinyl decals.
Full Color Printing Methods Make Colorful Vinyl Decals and Stickers Affordable for Smaller Companies
Colorful decals and stickers are a great way for smaller companies to add a pop of color to their branding materials without breaking the bank. With special printing methods, these companies can now achieve full color printing on vinyl decals and stickers at affordable prices.
When it comes to printing colored decals, a preferred method is using the CMYK (Cyan, Magenta, Yellow, Black) color model. This model mixes different percentages of these four colors to create a wide range of colors. It works well for decals because it can accurately reproduce most colors and is cost-effective for smaller quantities.
To create colorful vinyl decals, the first step is to design the artwork in software such as Adobe Illustrator or CorelDRAW. The artwork should ideally be in CMYK color mode, as this will ensure that the colors are accurately represented in the final print.
Once the artwork is ready, it can be exported as a high-resolution PDF or EPS file. This file can then be sent to a printing company or downloaded to a desktop printer that supports full color printing. If using a professional printing company, it is important to specify that the decals should be printed in CMYK colors.
When the decals are printed, they will be cut to the desired shape using a plotter or cutter. This process is done automatically by following the path or outline of the decals in the design file. The decals can either be cut individually or kept on a sheet with multiple decals, depending on the order and quantities required.
After the decals are cut, a paper overlay is applied to protect the adhesive side and to make it easier to navigate and position the decals when applying them. The paper overlay is typically removed once the decal is in place, allowing the adhesive to stick to the desired surface.
Full color printing methods allow for vibrant and eye-catching decals that can be used on various surfaces, such as windows, vehicles, or other promotional items. They can also be used for lettering or adding exact color matches to company logos or branding materials.
Whether it’s a small order of colored decals or a larger quantity, full color printing methods make it possible for smaller companies to affordably create colorful vinyl decals and stickers that will showcase their brand in a memorable way.
CMYK vs Pantone Printing
Pantone printing is a popular choice for companies that want to achieve exact color values for their decals. Pantone colors are specific shades that can be defined using a Pantone Color Matching System (PMS). This system ensures that the colors will be consistent across different printing processes and materials. Pantone colors can be downloaded and used in design software or provided to printing companies for precise color reproduction.
On the other hand, CMYK printing uses a combination of cyan, magenta, yellow, and black inks to create a wide range of colors. CMYK is the preferred method for full-color decals and works well for small quantities or when cost is a factor. However, it may not be able to reproduce certain colors as accurately as Pantone printing.
When preparing decals for printing, both CMYK and Pantone values can be used. If you prefer Pantone printing, it’s important to convert your designs from CMYK to Pantone colors. Some design programs have this feature built-in while others may require using scripts or special software.
While Pantone printing is ideal for achieving exact colors, CMYK printing is more affordable and widely available. Additionally, decals printed using CMYK will typically still look great and have vibrant colors.
Another important consideration is the type of material you are using for your decals. Vinyl is a popular choice for decals and works well with both CMYK and Pantone printing. However, if you’re planning to apply decals to windows or other transparent surfaces, you may want to consider using a special type of vinyl that allows light to pass through – this is known as window vinyl.
Additionally, CMYK and Pantone printing can be done on paper or other materials like vinyl. Decals can be printed on transparent vinyl or on paper overlay to achieve different effects. The choice of material will depend on the desired outcome and the surface on which the decals will be applied.
In summary, when it comes to making colored decals, both CMYK and Pantone printing have their advantages and disadvantages. Pantone printing is ideal for achieving exact colors and is often used by companies that require consistency in their brand colors. On the other hand, CMYK printing is more affordable and widely available, making it a popular choice for small quantities or when cost is a factor. Ultimately, the choice between CMYK and Pantone printing will depend on your specific needs and budget.
“CMYK values under 10 can get lost on the screen. Ideally, they should be kept at either 0 or 10”
When it comes to making colored decals, understanding CMYK values is important. CMYK stands for cyan, magenta, yellow, and key (black), and it is the color model most commonly used in printing. The CMYK values represent the percentages of each ink color used to create a specific color.
CMYK values under 10 can often get lost on the screen or when applying the decals. It is preferred to keep these values at either 0 or 10. This ensures that the color will show up and be vibrant, even when applied to different surfaces.
Some companies still use the CMYK color model for decals, but there are other methods available as well. Pantone colors, for example, offer a wider range of shades and can be used depending on the requirements of the project. However, using Pantone colors may be more expensive.
Preparing your design for printing is crucial in achieving the desired colors. You can download scripts and tools for Windows that help with color management, ensuring accurate and consistent results.
When making colored decals, it’s essential to consider the type of material you’re applying them to. For light-colored surfaces, using CMYK values around 0 will provide a better outcome, while darker surfaces may require values closer to 10.
If you want your decals to be colorful and vibrant, it’s crucial to pay attention to the CMYK values. A mix of low CMYK values (0 or 10) and higher values will help create a more dynamic design.
Keep in mind that the CMYK color model is different from the RGB color model used for screens. Colors may appear slightly different between print and screen due to the different color systems involved.
Overall, when making colored decals, paying attention to CMYK values is important. Keeping values at either 0 or 10 ensures that the colors will stand out and provide the desired effect. By taking the necessary steps to manage color effectively, you can create stunning and visually appealing decals that will stick in people’s minds.
Preparing Your Decal To Cut Multi Colors
When it comes to making colored decals, it makes sense to prepare your decal before cutting it into multiple colors. This ensures that you don’t run into any issues later on when applying the decal.
If you want to cut multi colors, the first step is to download the decal file. Many companies offer pre-made decal files that can be downloaded and used for your project. These files typically come in the CMYK color format, which is preferred for printing full-color items.
Once you have the decal file downloaded, you can start preparing it for cutting. The first thing you’ll want to do is navigate to the part of the decal where you want to cut a different color. Typically, this will be letters or other objects that you want to stand out in a different color.
Depending on the design of the decal, you may need to create a separate path for each color. This is especially important if you’re working with small or detailed decals. Creating separate paths ensures that each color will be cut out exactly as you want it.
After you’ve created the separate paths, you can start assigning the colors for each cut. In the CMYK color model, each color is represented by a combination of percentages of cyan, magenta, yellow, and black. The values for each color can be adjusted to get the exact color you’re looking for.
Once you have your colors assigned, it’s important to make sure that each color stays within its assigned path. This is done by using a special paper overlay that keeps the colors separate while cutting. This way, when you apply the decal to a window or any other surface, the colors won’t bleed into each other and stay exactly where they’re supposed to be.
When preparing your decal, it’s also important to consider the color values you’re using. While CMYK is the preferred color model for printing, some colors may look different when printed in vinyl. It’s always a good idea to do a test print before printing in larger quantities to make sure the colors come out as expected.
Finally, when applying the decal, make sure the surface is clean and free of any dirt or dust. This will ensure that the decal sticks properly and stays in place for a long time. If you’re applying the decal to a window, it’s especially important to clean the window thoroughly before applying.
With these steps in mind, you can prepare your decal to cut multi colors with confidence, knowing that your colors will stay true and your decal will look exactly as you want it to.