Stickers are a fun and creative way to personalize your belongings, whether it’s your laptop, water bottle, or even your car. While professionally made stickers can be purchased from sticker shops, today we will show you how to easily create your own homemade stickers from the comfort of your own home.
There are several methods you can choose from to make your own stickers, each with its own pros and cons. One popular choice is to print your stickers onto a sheet of self-adhesive vinyl. This allows you to design and print custom stickers using your own inkjet or laser printer. Another option is to use a cutting machine, such as a Cricut, which can cut out intricate designs from various materials.
If you choose the printing method, here’s what you’ll need: a printer (such as the Canon PIXMA), printable sticker paper, and a laminating machine (optional). To start, design your stickers using any professional design software or even Microsoft Word. Once you have your design ready, print it onto the printable sticker paper. If you want your stickers to be waterproof, you can also laminate them using a laminating machine.
Before you get started, it’s important to note that not all printers are suitable for printing stickers. Inkjet printers are generally the best choice, as they produce high-quality prints with vibrant colors. Additionally, you’ll want to choose a sticker paper that is compatible with your printer, such as a matte or non-gloss finish.
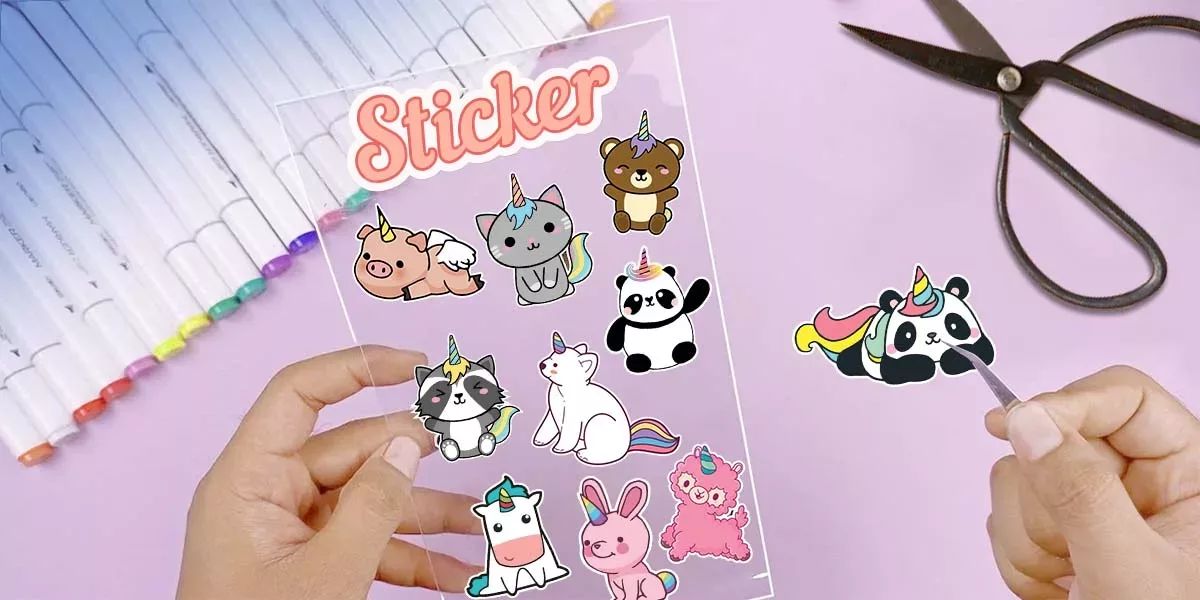
Once your stickers are printed and ready, it’s time to cut them out. You can use scissors to cut them manually, but if you want a more professional look, consider investing in a cutting machine. These machines can cut out your stickers with precision, leaving clean edges and a polished finish.
Now that you have your homemade stickers, you can stick them on any surface you want. Simply peel off the backing, choose the perfect spot, and press the sticker down firmly. When applying the sticker, it’s important to clean the surface beforehand to ensure it adheres well and lasts longer.
So why spend money on professionally made stickers when you can easily create your own at home? With just a few materials and some creativity, you can make the stickers you’ve always wanted. Whether you’re looking to add a personal touch to your belongings or create custom stickers for a project or event, homemade stickers are a great choice.
- Materials You Need to Make Waterproof Vinyl Stickers at Home
- Step 2: Choose your design
- Step 1
- Step 5: The Last Step is to Lick the Sticker or Put Spit on the Back of the Sticker
- Home printing vs professional sticker printing
- Related posts from the StickerShop experts
- Video:
- EASY DIY STICKERS! NO WAX PAPER NEEDED!
Materials You Need to Make Waterproof Vinyl Stickers at Home
When it comes to making homemade stickers, there are a few materials you’ll need to ensure your stickers come out professional-looking and waterproof. Here are the most important materials:
| Material | Description |
| Non-gloss or matte paper | This type of paper is ideal for printing your designs onto. It provides a smooth surface for the ink to adhere to, and it won’t smudge easily. |
| Permanent self-adhesive vinyl sheets | These sheets will be the backing for your stickers. It’s important to choose a waterproof vinyl material so your stickers won’t be damaged by moisture. |
| A printer | A printer that can handle the thickness of the vinyl sheets is essential. The Canon PIXMA series printers are a great choice for homemade stickers. |
| A scanner | If you’re looking to create custom stickers from existing designs, a scanner will help you get the design onto your computer. |
| Glue or adhesive | If you don’t have a printer that can print directly onto vinyl sheets, you’ll need adhesive to stick the printed designs onto the vinyl. |
| Laminate sheet | If you want your stickers to last longer, you can choose to laminate them. This will protect the design and make them more durable. |
| Cutting machine or scissors | To cut out your stickers, you’ll need a cutting machine like a Cricut or a pair of scissors. |
These materials will help you create professional-looking waterproof vinyl stickers at home. Whether you choose to print directly onto the vinyl or use adhesive, make sure to follow the steps carefully, leaving no room for mistakes. With the right materials and a little creativity, you can make your homemade stickers stand out!
Step 2: Choose your design
Now that you have all the materials you’ll need for your homemade stickers, it’s time to choose the design you want to create. This is an important step, so take your time and make sure you’re happy with your choice before moving forward.
If you’re looking for a professionally designed sticker, you could hire experts or get one from a sticker shop. But if you want to make your own custom sticker at home, there are great options as well.
One option is to use pre-designed sticker sheets that you can find online or in craft stores. These sheets come with different designs printed on them, so you just need to cut them out and stick them wherever you want. This is a quick and easy way to get stickers, but the downside is that you won’t have much flexibility in terms of customization.
If you’re a creative person and want to design your own stickers, the possibilities are endless. You can use graphic design software like Adobe Photoshop or Illustrator to create your designs digitally, or you can draw them by hand and then scan them into your computer. Look for inspiration in related posts or by looking at professional sticker designs to get ideas.
Once you have your design ready, it’s time to print it. If you have a printer at home, make sure to use self-adhesive sticker paper that is compatible with your printer. You can find this type of paper in most office supply stores or online.
If you want your stickers to be waterproof, you can also choose to print them on vinyl sticker paper. This material is more durable and will withstand water and moisture better than regular sticker paper. However, keep in mind that vinyl sticker paper is more expensive and may not be suitable for all printers.
Before printing, make sure to adjust the settings on your printer accordingly. For example, if you want a matte finish for your stickers, select the appropriate printing option on your printer settings. This will give your stickers a non-glossy look.
Once you have everything set up, simply hit the print button and let the printer work its magic. Make sure to use high-quality settings for the best results. If you’re using a photo printer like the Canon PIXMA, you can expect great color quality and sharpness.
After your stickers are printed, they’re almost ready to use. The last step is to cut them out. You can do this by hand if you have neat scissor skills, or you can use cutting machines like the Cricut or Silhouette Cameo for more precise cuts.
Now that your homemade stickers are ready, put them to use wherever you want. Stick them on your notebooks, laptop, water bottle, or anything else you can think of. Just make sure to clean the surface before sticking the sticker, as any dust or dirt can prevent it from adhering properly.
If you want your stickers to last longer, you can also laminate them. This will give them an extra layer of protection and make them more resistant to wear and tear. You can either use a laminating machine or get laminating pouches for this purpose.
Now that you know how to choose your design and make your own homemade stickers, you’re well on your way to becoming a sticker-making pro. Have fun and let your creativity shine!
Step 1
Before you begin making homemade stickers, it’s important to choose the right materials. One of the most popular choices for homemade stickers is self-adhesive vinyl sheets. These sheets can be easily printed on using your home printer.
If you want your stickers to be waterproof and more durable, you can choose a matte or non-gloss vinyl sheet. This will help protect your stickers from water and other elements.
Once you have your vinyl sheets, you’ll need to design your stickers. You can use a design software like Adobe Photoshop or find free templates online. If you’re not a design expert, don’t worry! There are many related websites and blog posts that offer pre-made sticker designs.
After you’ve created or chosen your design, you’ll need to get it ready for printing. If you have a scanner, you can easily scan your design into your computer. If not, you can take a high-quality photo of your design. Make sure to scan or take a photo in a well-lit area to ensure good image quality.
Before printing, it’s important to check that your printer is compatible with the vinyl sheets. Some printers may require special settings or different types of ink cartridges. A popular choice for printing homemade stickers is the Canon Pixma series of printers, which are known for their high-quality print output.
Once you’ve verified the compatibility, you can start printing your stickers. Make sure to load the vinyl sheets properly, and choose the appropriate print settings to get the best results. It’s also important to let the ink dry completely before moving on to the next step.
Now that your stickers are printed, you’ll need to cut them out. You can use scissors or a craft knife to carefully cut along the edges of each sticker. Take your time and be careful not to damage the design.
If you want your stickers to have a professional look, you can choose to laminate them. Laminating adds a layer of protection and gives your stickers a glossy finish. There are many laminating machines available for home use that can help you achieve this professional look.
After cutting and laminating (if desired), your homemade stickers are now ready to stick! You can easily peel off the backing sheet and then stick the stickers onto any clean and dry surface. Make sure to press firmly to ensure a strong bond between the sticker and the surface.
That’s it for Step 1! With these simple steps, you’ll be well on your way to creating your own homemade stickers.
Step 5: The Last Step is to Lick the Sticker or Put Spit on the Back of the Sticker
Once your stickers have been printed out using a professional printer like the PIXMA series, it’s time to get them ready for sticking. Before you lick that sticker or put spit on the back, you’ll need to make sure you have the right materials.
Experts recommend using a non-gloss, matte paper for your homemade stickers. This type of paper allows the ink to stick better and creates a more professional look. You can find a great selection of matte paper at your local office supply store or online at platforms like StickerShop.
If you’re looking for a waterproof option, you can also choose to laminate your stickers after they have been printed. This will help protect them from water damage and ensure they last longer.
Now, let’s move on to the final step – licking the sticker or putting spit on the back. This step is important as it activates the self-adhesive glue on the back of the sticker, making it ready to stick to any surface. If you’re not comfortable with licking the sticker, you can also put a small amount of saliva on the back using your finger or a wet cloth.
Once you’ve applied the saliva, press the sticker firmly onto the desired surface. Make sure you line it up properly and avoid air bubbles or creases by starting from one side and slowly smoothing it down.
That’s it! Now you have your own homemade sticker, ready to be displayed or shared with others. Remember to wash your hands after handling saliva to maintain hygiene.
Creating custom stickers at home is a fun and cost-effective way to express your creativity. Follow this step-by-step guide, and you’ll be making your own professional-looking stickers in no time.
Home printing vs professional sticker printing
When it comes to making homemade stickers, you have two main options: home printing or professional sticker printing. Both options have their own advantages and considerations to keep in mind.
If you choose to go with home printing, you’ll need a good quality printer that can handle the materials you plan to use. Inkjet printers, such as the Canon Pixma series, are often recommended by experts for their high-quality printing capabilities. You’ll also need sticker paper, which can be purchased from a variety of online retailers or office supply stores. One important thing to consider is that home-printed stickers may not be as durable as professionally printed ones. The ink and paper used in home printers can be less resistant to fading, water, and wear over time.
On the other hand, professional sticker printing can offer you a higher quality and more durable result. Professional printers use high-quality materials and printing techniques to create stickers that can withstand various conditions. They have access to a wider range of materials, including vinyl and non-gloss paper, which can give you more options in terms of your sticker’s look and feel. Professional printers also often offer additional services, such as laminating or die-cutting, which can enhance the final look of your stickers.
However, professional sticker printing can be more expensive than home printing. If you’re looking to make a large number of stickers or need them to last for a long time, then professional printing may be the better choice. On the other hand, if you’re just making a few stickers for personal use or want to experiment with different designs, then home printing can be a cost-effective option.
Before making your choice, it’s important to consider your specific needs and budget. If you opt for home printing, make sure to do some research on the best printer and sticker paper options for your project. Take some time to test print your designs before cutting them out to make sure they turn out the way you want. If you choose professional sticker printing, look for a reputable printing company or online print shop that specializes in stickers. Make sure to provide them with the necessary design files and any specific requirements you have.
| Home Printing | Professional Printing |
|---|---|
| Can be more cost-effective | Higher quality and durability |
| Requires a good quality printer | Access to a wider range of materials |
| May not be as durable | Additional services available |
| Less resistant to fading and wear | Can be more expensive |
Ultimately, the choice between home printing and professional sticker printing depends on your personal preferences, budget, and the specific needs of your project. Consider both options carefully before making a decision, and remember that there are pros and cons to each approach.
Related posts from the StickerShop experts
If you’re looking to make homemade stickers easily, you’ll need the right materials. StickerShop experts recommend using non-gloss, self-adhesive vinyl sheets for printing your stickers. You’ll also need a printer, such as the Canon Pixma, that can handle vinyl printing.
Once you have your materials ready, you’ll need to design your stickers. If you’re not confident in your design abilities, you can use a scanner to scan any images or designs you like and then use graphic design software to refine them.
Before you print, it’s important to choose the right settings on your printer. StickerShop experts recommend using matte settings to get the best quality for your homemade stickers. This will ensure that the ink adheres well to the vinyl sheet.
After printing, you’ll need to let your stickers dry for a few minutes before you move on to the next step. If you want your stickers to be waterproof and last longer, you can choose to laminate them. StickerShop experts suggest using a matte laminate for a professional look.
Once your stickers are ready, you can start cutting them. StickerShop experts recommend using a cutting machine if you have one, as it will give you precise and clean cuts. However, if you don’t have a cutting machine, you can still cut your stickers by hand with a pair of scissors.
Getting your homemade stickers to stick well is important. StickerShop experts suggest applying a thin layer of glue to the back of your stickers before sticking them. This will help the stickers adhere better to different surfaces.
Lastly, don’t forget to lick your stickers! StickerShop experts say that licking the back of the sticker can activate the adhesive and improve stickiness.
For more great tips and advice on making homemade stickers, check out the related posts from the StickerShop experts on their blog. You’ll find step-by-step guides, design inspiration, and much more to help you create the custom stickers you’ve always wanted.