
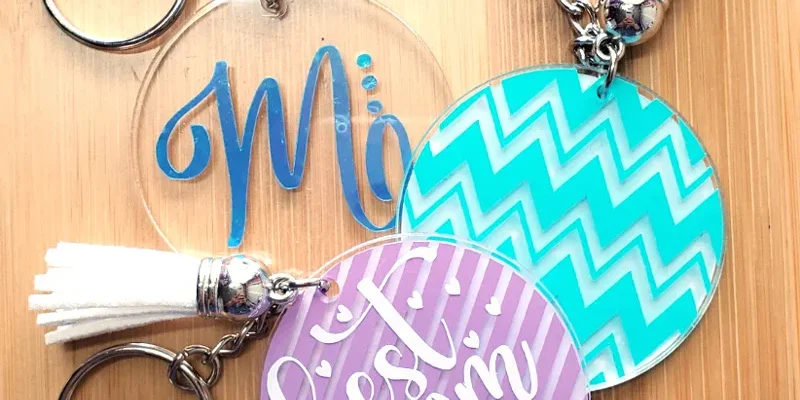

If you are looking for a fun and creative way to accessorize your keys, making keychains with polymer clay is a great option. Polymer clay is a versatile material that you can mold into any shape you want, making it perfect for creating unique and personalized keychains.
To make your own keychains, you’ll need a few basic supplies. First, gather some polymer clay in different colors. You can find polymer clay in craft stores or online. You’ll also need a jump ring or keychain ring, a small rolling pin or glass bottle, a sharp knife or clay cutter, and some parchment paper.
Once you have all your materials, start by preheating your oven to the temperature specified on the clay packaging. Then, take a small piece of clay and knead it in your hands to soften it. You can mix different colors together to create unique patterns and designs.
Next, roll out the clay into a flat surface. You can use a rolling pin or a glass bottle for this. Make sure the clay is evenly flattened and about a quarter-inch thick. Then, use your knife or clay cutter to cut the shape you want for your keychain. You can go for a simple shape like a circle or square, or get more creative and try making a flower or an animal.
After you’ve cut the shape, poke a hole at the top using a toothpick or a small stick. This is where you’ll attach the jump ring or keychain ring later. Then, carefully place your clay keychain on a piece of parchment paper and bake it in the oven according to the instructions on the clay packaging. Most polymer clays will require baking at a temperature between 250 and 275 degrees Fahrenheit for about 20-30 minutes.
Once your keychain is baked and cooled, you can start decorating it. You can add more clay details, like small shapes or snakes, by attaching them with a bit of liquid polymer clay or clear drying glue. You can also paint your keychain with acrylic paints or decorate it with mod podge and glitter. Let your creativity flow, and make your keychain truly unique!
Finally, attach the jump ring or keychain ring through the hole in your keychain. You can open the jump ring or keychain ring with pliers, thread it through the hole, and then close it again. Now your keychain is ready to be used!
Keychains made with polymer clay are not only fun and easy to make, but they can also be a great source of income. You can sell your creations online or at craft fairs, or give them as personalized gifts to your friends and family. So, grab your clay and start making your own unique keychains today!
- DIY Resin Flower Keychains
- How to Make Keychains with your Art
- Mod Podge Resin Beach Keychain
- How to Create a Polymer Clay Keychain
- 1 Preheat Your Oven and Separate the Clay
- 2 Mash All the Clays Together
- 3 Roll Out and Cut the Clay
- 4 Make the Hole
- 5 Bake the Clay
- 6 Put the Shape on the Jump Ring
- 7 Attach to the Keychain
- 8 Accessorize the Keychain
- Sources
DIY Resin Flower Keychains
If you’re looking for a fun and unique way to accessorize your keys, making your own DIY resin flower keychains is a great option. Not only will you have a one-of-a-kind piece of art to show off, but it can also be a source of income if you want to sell them.
To make these keychains, you’ll need a few materials: polymer clay, resin, mod podge, jump rings, a keychain ring, and some parchment paper.
Here’s a step-by-step guide on how to create your own DIY resin flower keychains:
1. Prepare your materials: Gather all the materials you’ll need, including your polymer clay in different colors, resin, mod podge, jump rings, and keychain rings.
2. Shape the flowers: Roll out each color of polymer clay into thin snakes and then mash them all together. Roll and shape the clay into a flower shape that you like.
3. Bake the clay: Preheat your oven according to the instructions on the polymer clay package, and then bake your flowers for the recommended time. Once they’re dried and hardened, let them cool.
4. Attach the jump rings: Using pliers, attach jump rings to the back of each flower. These rings will be used to attach the flowers to the keychain rings.
5. Mix the resin: Follow the instructions on the resin package to mix it properly. Pour a small amount of clear resin into each flower, making sure to cover the entire shape. Let it dry according to the instructions.
6. Apply mod podge: Once the resin has dried, apply a coat of mod podge to the front and sides of the flowers. This will give them a glossy finish and protect the resin.
7. Attach the keychain rings: Finally, attach the keychain rings to the jump rings on the back of the flowers. You can use pliers to open and close the jump rings while attaching the keychain rings.
And there you have it – your very own DIY resin flower keychains! You can make as many as you like, experimenting with different flower shapes, colors, and designs. They make wonderful gifts or even a unique accessory for yourself. Check out some online sources for more inspiration and ideas on how to make keychains.
How to Make Keychains with your Art
If you’re an artist or have a knack for creating beautiful things, why not turn your art into a practical and stylish accessory? Making keychains with your own artwork is a fun and fulfilling way to showcase your creativity and make personalized gifts for yourself or loved ones.
Here’s a step-by-step guide to help you create your own keychains:
- Gather your materials: You’ll need polymer clay, a rolling pin, parchment paper, a shape cutter, a small jump ring, a keychain ring, and any decorative elements you want to add like dried flowers or small trinkets.
- Preheat your oven: Follow the instructions on your clay package to determine the correct temperature.
- Roll out the clay: Flatten the clay into a sheet on a clean surface. Use a border shape cutter to create your desired keychain shape.
- Add your art: Use a clay tool or your fingers to carefully place your art onto the clay shape.
- Create a hole: Use a small stick or the end of a paintbrush to create a hole near the top of the clay shape. This is where you will attach the jump ring later.
- Bake the clay: Place the clay shape with your art onto a parchment paper-lined tray, and bake it according to the instructions on the clay package. Make sure to let it cool completely before moving on to the next step.
- Attach the jump ring: Open the jump ring using pliers, and slide it through the hole in the clay shape. Close the jump ring securely.
- Add the keychain ring: Open the keychain ring and attach it to the jump ring. Close it tightly to ensure the keychain won’t come apart.
- Accessorize and personalize: This is where you can get creative! Add any extra decorative elements like dried flowers, small trinkets, or charms to make your keychain unique.
And there you have it – your own personalized keychain featuring your artwork! You can make as many keychains as you want using different art pieces or designs. They make great gifts, party favors, or even a source of income if you decide to sell them.
So, why wait? Get started on your keychain-making obsession and show off your art wherever you go!
Mod Podge Resin Beach Keychain

Do you want to create your own unique beach keychain? With just a few simple steps, you can make a beautiful Mod Podge Resin Beach Keychain that will add a touch of the ocean to your everyday life. Here’s how:
- First, gather all the materials you will need. This includes Mod Podge, resin, a jump ring, a keychain hook, parchment paper, a flower or other small beach-themed object, and polymer clay in different colors.
- Preheat your oven according to the instructions on the polymer clay packaging. While the oven is preheating, you can start working on the clay.
- Take a small piece of clay and roll it into a ball. Then, shape it into a flat round disc, making sure to smooth out any rough edges.
- Next, cut out a small shape from another color of clay, such as a star or a seashell. Press this shape onto the front of the clay disc, creating a border around it.
- Make a small hole at the top of the clay disc using a toothpick or a small stick. This is where the jump ring will later be attached.
- Place the clay disc onto a piece of parchment paper and bake it in the preheated oven according to the clay’s instructions. Once it has cooled, you can attach the jump ring to the hole at the top.
- Pour some resin onto the surface of the clay disc, making sure to cover it completely. Use a toothpick or a small stick to spread the resin evenly and eliminate any air bubbles.
- While the resin is still wet, place the flower or other beach-themed object on top, positioning it to your liking. Let the resin dry completely.
- Attach the jump ring to the keychain hook, and your Mod Podge Resin Beach Keychain is ready to be used or gifted.
These DIY keychains make great gifts or can be used to accessorize your own set of keys. You can create different shapes and designs by combining different colors of clay and adding various beach-themed objects. The possibilities are endless!
Remember, when working with resin and polymer clay, always check the instructions and safety precautions on the packaging. Make sure to work in a well-ventilated area and protect yourself and your work surface as needed.
Now that you know how to make a Mod Podge Resin Beach Keychain, there’s no need to spend money on store-bought keychains. With a little creativity and a few materials, you can make your own unique keychains that reflect your personal style and add a touch of the beach to your everyday life.
How to Create a Polymer Clay Keychain
If you are looking for a fun and creative way to make your own keychains, polymer clay keychains are a great option. Polymer clay is a versatile material that can be molded into different shapes and designs, making it perfect for creating unique and personalized keychains. In this guide, we will walk you through the step-by-step process of making a polymer clay keychain.
Materials You Will Need:
- Polymer clay in different colors
- Rolling pin
- Knife or clay cutter
- Parchment paper
- Baking sheet
- Oven
- Jump rings
- Jewelry pliers
- Keychain ring
Step 1: Preheat the Oven
Before you start working with polymer clay, preheat your oven according to the instructions on the clay packaging. Typically, the oven should be preheated to around 275°F (130°C).
Step 2: Roll and Cut the Clay
Take one of your polymer clay colors and roll it into a snake-like shape. Do the same with the other colors, creating snakes of the same length. Next, twist the snakes together to create a marbled effect. Use a rolling pin to flatten the twisted clay, creating a border around the edges.
Step 3: Shape and Add a Hole
Now, use your knife or clay cutter to cut out the shape you want for your keychain. It can be any shape or design that you prefer. Make sure to leave a small hole at the top for attaching the jump ring later on.
Step 4: Place on Parchment Paper
Transfer your clay shape onto a baking sheet lined with parchment paper. This will prevent the clay from sticking to the baking sheet during the baking process.
Step 5: Bake the Clay
Place the baking sheet with the clay in the preheated oven and bake according to the clay manufacturer’s instructions. Typically, polymer clay needs to bake for about 15-20 minutes for each 1/4 inch (6 mm) of thickness. Make sure to check the clay periodically to prevent over-baking.
Step 6: Attach Jump Ring and Keychain Ring
After the clay has dried and cooled down, take your jump ring and use jewelry pliers to open it. Insert the jump ring through the hole in your clay shape and close it tightly. Then, attach the keychain ring to the jump ring.
Step 7: Accessorize Your Keychain
If you want to add more flair to your keychain, you can attach beads, charms, or other small accessories to the jump ring before closing it. Get creative and personalize your keychain to your liking!
Step 8: Enjoy Your DIY Polymer Clay Keychain
Once your keychain is complete, it’s ready to be used or gifted. Attach it to your keys, a bag, or give it to someone special. Polymer clay keychains are not only a practical way to keep your keys organized, but they also serve as a unique piece of handmade art.
Now that you know how to create a polymer clay keychain, it’s time to get creative and start making your own. The possibilities are endless, so let your imagination be your guide. Have fun and enjoy the process of making handmade keychains that are truly one-of-a-kind!
Sources: The Spruce Crafts, Happiness is Homemade, Pinterest
1 Preheat Your Oven and Separate the Clay

Before you start making your keychains, it’s important to preheat your oven. You will be baking the clay, so you want to make sure the temperature is set correctly. Follow the instructions on the package of polymer clay for the recommended temperature and baking time. Always check the instructions, as different brands and types of clay may have different requirements.
Once your oven is preheating, it’s time to separate the clay. You may want to use different colors of clay or create designs with multiple colors. Take a small amount of clay from each color you want to use and separate them into individual pieces.
If you don’t have access to pre-colored clay, you can always mix different colors together to create your own unique shade. Just take small amounts of the clays you want to mix and knead them together until the colors are fully combined. This is a great DIY art project where you can let your creativity jump out!
After you have separated the clay into individual pieces, roll each piece out into a snake-like shape. This will make it easier to work with and create the shapes you want. You can make multiple snakes out of each color to create different keychains or other jewelry pieces.
Once you have your snakes, you can start shaping them into different forms. You can create flower shapes, beach-inspired designs, or just a simple round shape for your keychain. Remember to keep the thickness of the clay consistent throughout, so your keychain will be sturdy and durable.
Next, you can create a hole for the keychain hook. Use a small tool or a toothpick to carefully make a hole at the top of each clay shape. This is where you will attach the keychain hook later on.
After you have shaped all your clay pieces and created the holes, place them on a parchment-lined baking sheet. Make sure to leave enough space between each piece, so they don’t stick to each other while baking.
Now, you’re ready to bake the clay. Place the baking sheet in the preheated oven and let the clay bake according to the instructions on the package. Keep a close eye on them to make sure they don’t overbake.
Once the clay pieces are baked and cooled, you can remove them from the oven. They should be hard and dried out. Let them cool completely before handling them.
Now, it’s time to accessorize your keychain. You can add a clear resin or mod podge to the surface of the clay to give it a shiny finish. You can also add more clay pieces or other decorative elements to the front to create a border or add more visual interest.
Finally, attach the keychain hook to the hole you made earlier. Make sure it’s secure and closed tightly, so you don’t lose your keychain.
And there you have it! With just a few simple steps, you can create unique and personalized keychains using polymer clay. Get creative and have fun with different shapes, colors, and designs!
2 Mash All the Clays Together
To create a unique and personalized keychain, you will need to mash all the different clays together. This step is important because it ensures that the colors and patterns are evenly distributed throughout the keychain.
Start by rolling out each clay color into a long snake-like shape. Once you have all the colors rolled out, place them next to each other and gently press them together. Use your fingers to smooth out any gaps or rough edges.
After the clays are pressed together, roll the combined snake shape into a ball. The goal is to create a marbled effect, so don’t worry about mixing the colors too much.
Once you have a ball of mixed clay, place it on a flat surface such as parchment paper or a worktable. Use your hands to flatten the ball into a round shape. You can also use a rolling pin if desired.
Next, use a cookie cutter or a shaped template to cut out the desired shape for your keychain. You can choose a simple geometric shape or get creative with flowers, animals, or any other design you like.
Before baking the clay, don’t forget to make a hole for the keychain ring. You can use a toothpick or a small straw to create a hole in the top center of the shape.
Once you have cut out your shape and created a hole, carefully lift the clay off the surface and place it on a baking sheet. Preheat your oven according to the instructions on the clay packaging, but generally, polymer clay needs to be baked at around 275°F (135°C) for 15-20 minutes.
After the clay is baked and completely dried, take it out of the oven and let it cool down. Once it has cooled, you can attach the keychain ring by placing it through the hole you created earlier.
If you want to add additional details or a border to your keychain, you can use clear resin or Mod Podge. Pour a small amount of resin or Mod Podge onto the surface of the keychain and spread it out evenly using a brush or your fingers. Let it dry according to the instructions on the resin or Mod Podge packaging.
Now your unique DIY keychain is ready to be used or given as a gift. Always check that the keychain is securely attached and the clay is hardened before using it.
| Materials Needed: | Tools Needed: |
|---|---|
| – Polymer clay in various colors | – Rolling pin (optional) |
| – Parchment paper or worktable | – Cookie cutter or shaped template |
| – Keychain ring | – Toothpick or small straw |
| – Clear resin or Mod Podge (optional) | – Baking sheet |
| – Brush or fingers |
3 Roll Out and Cut the Clay
After you’ve preheated the oven, it’s time to roll out your polymer clay and start making your keychains. Roll out your clay on a clean surface, like parchment paper or a clear work mat. You can use a rolling pin or your hands to flatten the clay into a thin, even sheet.
Next, use a cookie cutter or a knife to cut the clay into your desired shapes for the keychains. You can get creative and make different shapes and sizes – from simple circles to intricate flowers or animals. If you want to add a hole for a jump ring or a hook, carefully pierce the clay before baking.
Remember to always check the instructions on the clay packaging for the recommended baking temperature and time. Generally, polymer clays bake at around 275°F (135°C) for about 15-30 minutes, depending on the thickness of your creations. Make sure to follow these guidelines to ensure that your keychains come out perfectly.
Once your clay keychains have dried and cooled down after baking, you can start accessorizing them. You can attach rings, beads, or any other small charms to make your keychains unique. Get creative with embellishments and experiment with different techniques.
As a DIY enthusiast, making keychains can be a fun and rewarding hobby. You can create personalized gifts for friends and family or even start selling your handmade keychains to make some extra income. The possibilities are endless, and the only limit is your imagination!
4 Make the Hole
After your clay has dried in the oven, it’s time to make a hole for the keychain ring. You can use a small round object like a jump ring or a small piece of clay to create a hole in your keychain. Here’s how to do it:
- Preheat your oven to the temperature specified on your clay’s packaging.
- Take out your dried clay from the oven and let it cool down.
- Use a sharp tool, like a needle or a toothpick, to mark the spot where you want the hole to be.
- Gradually push the tool into the clay, rotating it gently, until you reach the other side. Be careful not to break the clay.
- Next, take a small piece of clay and roll it into a snake shape.
- Place the snake shape around the hole, on both sides of the clay keychain. This will create a border and prevent the hole from closing up during baking.
- Once you’re satisfied with the border, put your keychain back into the oven and bake it according to the clay’s instructions.
- After baking, let the clay cool down completely before handling it.
Now you have a hole in your clay keychain, ready to attach a keychain ring or any other jewelry findings you want. You can also use clear epoxy resin to pour into the hole and create a unique and durable keychain.
Remember to always check the instructions and recommendations of your specific clay brand and follow them accordingly. Enjoy your DIY keychain making!
5 Bake the Clay
Once your clay keychains are fully shaped and dried, it’s time to bake them. Preheat your oven to 275°F (135°C) for polymer clays or follow the instructions provided on the packaging for other clays.
Place a piece of parchment paper on a baking sheet to prevent your keychains from sticking. Carefully place each keychain on the parchment paper, making sure they are not touching each other or the sides of the baking sheet.
Check the baking time and temperature recommendations for your specific clay. Typically, keychains need to bake for about 15-20 minutes, but this can vary depending on the clay type and thickness of your keychains. Always keep an eye on them while they are baking to avoid overbaking or burning.
After baking, allow the keychains to cool completely before handling them. Once they are cool, you can attach jump rings or hooks to your keychains to create a way to attach them to keys or other accessories.
Now that your clay keychains are baked and ready to go, you can add any additional decorations or accents if you desire. You can use mod podge to add a clear coat, attach a small flower or resin art piece, or even create a border with a different color of clay.
Keychains made from polymer clay are a fun and creative DIY project. They make great gifts and can even be sold to create a little extra income. Whether you’re making keychains for yourself or to give as a gift, always have fun and let your creativity shine!
6 Put the Shape on the Jump Ring
After the clay shapes have dried, it’s time to attach them to the jump rings. To do this, you will need a small jewelry pliers and your jump rings.
Start by laying out all of your clay shapes on a clean surface. You can arrange them in any order or pattern that you like. If you want to create a layered effect, you can stack the shapes on top of each other.
Next, take one of the jump rings and insert it through the hole in the clay shape. Make sure the jump ring is closed all the way so that the shape doesn’t fall off. You can use the jewelry pliers to gently squeeze the jump ring closed.
Repeat this step for each clay shape, attaching them to separate jump rings. You can use the same jump ring for multiple shapes if you want to create a cluster effect.
Once all of the shapes are attached to jump rings, you can decide how you want to arrange them on the keychain. You can keep them separate or stack them together. It’s totally up to you and your personal style.
After you have arranged the shapes, take another jump ring and attach it to the top jump ring. This will create a hook for the keychain. You can add charms or other accessories to this top jump ring if you like.
Before closing the jump ring, make sure to check that all of your shapes are secure and won’t fall off. Once you’re satisfied, use the jewelry pliers to close the jump ring completely. Your shape is now securely attached to the jump ring.
Now you can attach the jump ring to a keychain or use it as a decorative accessory. You can also make more keychains using different clay shapes and colors. The possibilities are endless when it comes to making your own DIY keychains!
7 Attach to the Keychain
After your keychains have dried and hardened, it’s time to attach them to a keychain ring. You can find keychain rings at craft stores or online.
First, preheat your oven to the temperature specified on the clay packaging. Cover a baking sheet with parchment paper to prevent sticking.
Take your dried clay keychains and lay them out on the baking sheet, making sure there is enough space between each one. If you have more than one keychain, it’s best to bake them separately.
If you want to add a hole for attaching the keychain ring, you can do this before baking. Use a pointy object like a toothpick or a needle to create a hole near the top of your keychain. Make sure the hole is large enough to fit the keychain ring.
Next, carefully place the baking sheet with the keychains in the preheated oven. Bake the keychains according to the instructions on the clay packaging. This usually involves baking them for a certain amount of time at a specific temperature.
Once the keychains are fully baked, take them out of the oven and let them cool completely. They will be hot, so be careful when handling them.
When the keychains have cooled down, it’s time to attach the keychain rings. Open the rings by gently bending them apart. Slide the open ring through the hole in the keychain and then close the ring by bending it back together.
Now your keychains are ready to be attached to your keys! You can also add other charms or beads to the keychain ring to personalize it even more.
Remember to always check that the keychain ring is securely closed to prevent your keys from falling off.
Accessorize your keys with these handmade keychains and show off your DIY skills. They also make great gifts for friends and family. So go ahead and create your own unique keychain collection!
8 Accessorize the Keychain
After making your keychain, it’s time to add some extra flair and make it truly unique! Here are a few ideas to accessorize your keychain:
- 1. Attach a jump ring: Use a small jump ring to attach a charm or other small trinket to your keychain.
- 2. Create clay charms: Roll out some polymer clay and shape it into different designs, such as flowers or animals. Bake them in the oven according to the clay’s instructions and then attach them to your keychain with a jump ring.
- 3. Add dried flowers: Press some dried flowers between two pieces of clear adhesive paper and cut them into small shapes. Stick these shapes onto your keychain for a natural, floral touch.
- 4. Make resin rings: Mix a small amount of clear resin according to the instructions and pour it into a ring mold. After it sets, remove the resin ring and attach it to your keychain.
- 5. Use Mod Podge: Use Mod Podge to cover your keychain with a layer of color or patterns. You can use decorative paper or fabric for this, or even paint your own design.
- 6. Add beach treasures: If you live near a beach, you can collect small seashells, sea glass, or other beach treasures and attach them to your keychain.
- 7. Create a jewelry hook: Use a small piece of wire to create a loop or hook on your keychain, where you can attach small jewelry items like charms or beads.
- 8. Check out other DIY keychain ideas: There are always more ways to accessorize your keychain! Check out online art and DIY sources for inspiration and tutorials on how to make even more unique keychains.
With these ideas, your keychain will become a true statement piece that reflects your personality and interests. Get creative and have fun accessorizing!
Sources
Here are some sources you can use to make your own DIY keychains:
1. Polymer Clay: Polymer clay is a clear favorite when it comes to making keychains. There are different brands and colors available, and you can easily find them online or at your local craft store. Polymer clay can be shaped and molded into any design you want, and it bakes in the oven to harden.
2. Jewelry Making Supplies: To accessorize your keychain, you’ll need some jewelry making supplies like jump rings and keychain rings. These can also be found online or at a craft store. Jump rings are used to attach the clay design to the keychain ring, while the keychain ring is what you’ll use to attach the keychain to your keys.
3. Mod Podge: Mod Podge is a popular sealant that you can use to protect your clay keychains. It comes in different finishes, such as matte, gloss, or even glitter! Applying Mod Podge to your keychain will give it a nice finishing touch and make it more durable.
4. Resin: If you want to take your keychain making to the next level, you can use resin to create a clear, glass-like finish on your keychains. By pouring resin over your dried clay keychain and placing it in a preheated oven, you’ll get a beautiful and shiny surface.
5. Clay Tools: To shape and create your clay keychains, you’ll need some clay tools like a rolling pin, a cutting tool, and a hole punch. These tools will help you roll out the clay, cut it into desired shapes, and create holes for attaching the keychain rings.
These are just a few key sources to get you started on making your own keychains. There are many more techniques and materials you can explore, so feel free to experiment and let your creativity run wild!


