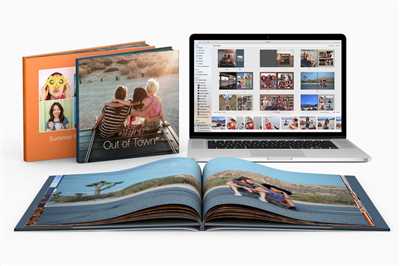
Photobooks are a great way to preserve your memories and showcase your photography skills. With so many different options available, you can create a unique collection of photos that can be used as a beautiful coffee table book or a personalized gift.
To create a photobook, you first need to select the photos you want to include. Most online photobook services have an easy-to-use interface where you can simply click and drag your selected photos into the desired order. They also offer different alignment options, so you can choose whether you want your photos to be aligned at the edges, centered, or arranged in a grid.
Once your photos are selected, you can add captions or text to each page. You can choose the font, size, and position of the text, and even specify if you want it to be bold or italicized. This is a great way to add context or descriptions to your photos.
Next, you can choose the type of cover you want for your photobook. Some options include hardcover, softcover, or layflat covers. Each type has its own price and design, so you can pick the one that best suits your needs. You can also change the cover at any time during the process.
After selecting the cover, you can customize the layout of each page. Many programs have pre-designed templates that you can fill with your photos. You can also add filler pages, which are blank pages that you can use to separate different sections of your photobook.
Once you’re satisfied with the layout, you can preview your photobook before ordering. This allows you to see how the final product will look and make any necessary changes. You can zoom in or out, flip through the pages, and even change the paper type.
When you’re ready to order, simply click the “Save” or “Order” button. You will then be prompted to enter your payment information and shipping address. After your order is placed, your photobook will be printed and shipped to you within a specified timeframe.
Creating a photobook is a fun and creative way to share and cherish your memories. Whether you’re a professional photographer or just someone who loves taking photos, a photobook is a great way to showcase your work and create a beautiful keepsake.
How to Create Your Own Photo Book Photo Ideas
If you have a collection of photos from memorable moments and want to showcase them in a unique way, creating your own photo book is a great option. Photo books provide a platform to display your photographs in an organized and visually appealing manner. Here are some steps to help you create your own photo book and get inspired with photo ideas:
1. Start by selecting the appropriate size and style: There are various sizes and styles of photo books available, so choose the one that suits your preferences and the number of photos you want to include. Options range from compact softcover books to larger hardcover books.
2. Choose a program or website: There are several online platforms that allow you to create and customize your own photo book. Popular options include Shutterfly, Blurb.com, and many others. Select the one that best fits your needs and budget.
3. Upload your photos: Once you have chosen a program, you can start uploading your photos. Follow the instructions provided by the platform to upload the images from your computer or directly from your social media accounts.
4. Arrange your photos: After uploading your photos, you can start arranging them on the pages of your photo book. Most programs have a drag-and-drop feature that lets you easily position and align your images. You can choose to have one photo per page or create collages with multiple photos.
5. Customize with captions and text: Add captions and text to your photos to provide context or simply to enhance their visual appeal. Most programs offer options to customize the font, size, alignment, and position of the text.
6. Select a cover: Choose whether you want a softcover or hardcover for your photo book. You can also customize the cover by adding an image or text.
7. Check the preview: Before finalizing your photo book, pause and go through the preview. Check for any errors in alignment or positioning, and make sure the photos and text are displayed correctly.
8. Save and order: Once you are satisfied with the design of your photo book, click the save button. You can then proceed to order your photo book, specifying the desired number of copies and any additional options such as paper quality or cover finish.
Creating your own photo book with personalized photo ideas is a rewarding and creative process. Whether you want to create a classic album or a modern photobook, follow these steps to bring your photographic memories to life.
Choose Your Photo Book Type
When creating a photobook, one of the most important decisions you’ll need to make is choosing the right type of book. There are several options to consider, each with its own unique features and benefits. This section will guide you through the different types of photo books available and help you decide which one is best for your needs.
1. Classic Photo Books: These traditional hardcover books are a great choice for showcasing a wide variety of photos. They are available in different sizes, layouts, and paper types, giving you the flexibility to create a book that is just right for your project. Classic photo books have a professional look and feel, with durable covers and high-quality printing.
2. Layflat Photo Books: If you want your photos to span across two pages without any interruption, layflat photo books are the way to go. They have special binding that allows the pages to lay flat when opened, giving you the opportunity to create stunning panoramic spreads. Layflat books are perfect for showcasing landscape and nature photography, as well as images that benefit from a wider viewing area.
3. Premium Photo Books: For a truly luxurious photo book, consider a premium option. These books are often handcrafted with high-quality materials, such as leather or linen covers, and thick, archival-grade paper. Premium photo books are great for special occasions or as gifts, and they offer a more refined and elegant presentation.
4. Photo Magazines: If you’re looking for a more casual and affordable option, photo magazines are a great choice. These softcover books often resemble a magazine or catalog and are perfect for quick and easy printing. They are a popular choice for portfolios or promotional materials, and they can be created and ordered online with ease.
When selecting your photo book type, keep in mind the content of your photos, the purpose of the book, and your budget. Each type offers its own unique advantages, so take the time to explore the options and find the best fit for your project. Once you’ve made your decision, you can start designing and customizing your photo book to create a truly personalized and memorable keepsake.
Note: The availability and pricing of photo book types may vary depending on the platform or service you are using to create your book. Be sure to check the options and order details to ensure that the type you want is available and fits within your budget.
Choose colors for your photo book
When creating a photobook, selecting the right colors is important in order to enhance the overall aesthetic and provide a visually pleasing experience. Blurb offers a range of options for you to choose from, so you can customize your photobook to your liking.
Before we delve into the color options, it’s important to note that the availability of colors may vary based on the product and size you select. Some options, like leather covers, will have limited color choices, while others, like softcover photobooks, may offer a wider range of colors.
To specify the color for your photobook, start by selecting the ‘Choose Colors’ section in your photo book creation program. This module allows you to change the color of the text, guides, and other elements on the book’s pages.
Once you’ve entered the ‘Choose Colors’ section, you will see a panel with various color options. You can click and drag the color slider to explore different hues, or manually enter RGB or HEX values for precise color selection.
Blurb provides a guide to help you select appropriate colors. The guide indicates whether the chosen color works well with the overall style of your photobook and whether it’s suitable for printing. It also presents a preview of how the color will look on the front and back covers of your book.
When selecting colors, it’s important to keep in mind that the actual colors may vary slightly between what you see on your screen and the final printed product. This is due to differences in color profiles and settings between monitors, as well as the printing process itself.
Blurb’s color module also allows you to specify the color of the text. You can choose between different font styles and sizes, and even add padding or adjust the corner rounding for a more customized look.
If you want to add a pop of color or create a cohesive theme throughout your photobook, you can also select from pre-set color schemes or create your own color palette, using the color picker and saving the colors you like.
It’s worth mentioning that Blurb.com offers a guide on how to use Lightroom Classic to create your photobook. With Lightroom Classic, you can easily move images from your library to your photobook layout and apply various edits to enhance the images.
Whether you prefer a classic and timeless look or a bold and vibrant aesthetic, selecting the right colors can greatly impact the final outcome of your photobook. Take some time to explore the different color options and consider your own preferences and creative ideas.
Once you’re satisfied with your color choices, make sure to check the ‘Safe Padding’ option. This ensures that no vital text or images are too close to the edge of the page and may get cut off during printing.
Remember, your photobook is a reflection of your memories and creativity. Choosing the right colors will bring your stories to life and create a visually captivating experience for your readers.
Lightroom and Lightroom Classic
If you are looking to create high-quality photobooks, then Adobe Lightroom and Lightroom Classic are excellent programs to consider. These programs not only offer a wide range of features for editing and organizing your photos, but they also have built-in tools for creating beautiful photobooks.
One of the advantages of using Lightroom or Lightroom Classic is the ability to create a photobook directly within the program. This eliminates the need to export your photos and use a separate photobook creation program. Additionally, both Lightroom and Lightroom Classic offer a variety of templates and layouts to choose from, making it easy to customize your photobook to your liking.
When creating a photobook in Lightroom or Lightroom Classic, you have the option to add captions and text to each photo. This is a great way to add context or tell a story with your images. Lightroom and Lightroom Classic also both make it easy to specify the size and type of book you want to create. Whether you prefer a softcover or hardcover book, you can easily customize these options in the program.
One of the standout features in Lightroom and Lightroom Classic is the ability to automatically generate a layout for your photobook. Using the auto-layout feature, Lightroom will automatically place your photos on the pages and adjust their size and orientation. This can save a lot of time and effort when creating a large photobook.
Another useful tool in Lightroom and Lightroom Classic is the ability to customize the background and layout of your photobook. With just a few clicks, you can change the colors, add a background image, or adjust the padding and alignment of your photos and text.
To create a photobook in Lightroom or Lightroom Classic, simply select the photos you want to include and click on the “Book” module in the top-right panel. From there, you can choose the size, type, and layout of your book. Lightroom Classic also gives you the option to create a photobook with Blurb or select other book vendors like Shutterfly.
Once you have selected your book options, Lightroom or Lightroom Classic will create a new section in the panel on the left side of the screen. This section will show all the pages of your photobook and allow you to drag and drop photos and text into each spread. You can also rearrange the order of the pages by simply dragging them to a different position.
To add photos to your photobook, simply drag and drop them from the filmstrip below into the cells on the page. Lightroom and Lightroom Classic will automatically adjust the size and placement of your photos to fit the bounding boxes. You can also add captions and specify the text appearance using the options above the photo cells.
Lightroom and Lightroom Classic make it easy to view and preview your photobook. Simply click on the arrow buttons to navigate between the pages, or use the slider at the bottom to view a larger preview of a specific page. You can also click on the “Preview” button to see a full-screen preview of your entire book.
Once you are satisfied with your photobook, you can click on the “Book” panel and choose the “Output” options. Lightroom and Lightroom Classic allow you to select the paper type, color profile, and resolution for your photobook. Once you have made all the necessary selections, simply click on the “Export Book” button to create the final output.
In summary, Lightroom and Lightroom Classic offer powerful tools for creating stunning photobooks. Whether you are a professional photographer or just want to create a beautiful keepsake, these programs are a great choice. With their wide range of customization options and easy-to-use interface, you can create a photobook that perfectly captures your memories.
Note: Availability and features may vary between Lightroom and Lightroom Classic. The above instructions are applicable to the currently available versions of these programs (as of [date]). For the latest information and updates, please refer to Adobe’s official website or the official documentation for Lightroom and Lightroom Classic.
Some of the features and options mentioned in this section may be specific to Adobe Lightroom Classic. Please consult the official documentation or Adobe’s website for more information on the capabilities of Adobe Lightroom.