

If you’re an avid reader, you probably know the struggle of protecting your books while on the go. Book sleeves are the perfect solution to this problem, offering a stylish and functional way to keep your favorite novels safe and secure. In this tutorial, we will guide you step by step on how to make your own book sleeve, customized to fit your books and personal style.
To start, gather all the materials you’ll need for this project. You’ll need two pieces of fabric/fleece that are wide enough to wrap around your book and leave a bit of space for a snug fit. The length should be long enough to cover the entire book, including the spine and edges. You’ll also need some elastic, a hook and loop fastener (Velcro), and a zipper (optional).
Begin by folding one of the fabric pieces in half with the right sides facing each other. Then, using a tape measure, measure and mark the center of the folded edge. From this center point, measure a few inches to the left and right and mark these points as well. These marks will be the starting point for your sleeves.
Next, take your needle and thread and start sewing along the marked line, creating a row of stitches. Make sure to secure the ends with a knot to prevent any unraveling. Repeat this process for both sides of the fabric, creating two parallel rows of stitches. These rows will serve as the pockets for your book.
After securing the pockets, it’s time to assemble the book sleeve. Take the other piece of fabric and place it right side up. Then, lay the fabric with the pockets on top, aligning the edges and making sure the pockets are facing towards the center. Pin the pieces together to keep them in place.
Now, sew along the edges of the fabric, leaving one of the shorter sides open. This will be the opening of the book sleeve. Once you’re done sewing, turn the fabric right side out and iron it to remove any wrinkles.
At this point, you can customize your book sleeve according to your personal taste. Add decorative trim, buttons, or even a personalized patch for an extra charm. You can also install a zipper along the opening to secure the book tightly inside.
To use your book sleeve, simply slip your book into the pockets and pull the elastic loops over the book cover to secure it in place. The elastic will keep the book snugly inside the sleeve, preventing it from slipping out.
With these easy instructions, you can create your own book sleeves and protect your favorite novels in style. So, gather your materials and get to work on making these practical and fashionable accessories for your reading pleasure!
DIY Book Sleeve
Have you ever wanted to keep your books safe and snug while on the go? If so, a DIY book sleeve is the perfect solution! With just a few simple materials and some basic sewing skills, you can create a customized sleeve that will not only protect your books but also add a touch of charm to your reading experience. Follow these step-by-step instructions to make your very own book sleeve.
Materials:
- Scant ¼ yard of fabric/fleece
- Velcro (hook and loop)
- 1-2 purls/pegs
- Measuring tape
- Sewing machine or needle and thread
- Iron
- Scissors
Step 1: Taking Measurements
First, measure the length and width of your favorite book. Add 2 inches to each measurement to allow for a snug fit. These measurements will be the starting point for customizing your book sleeve.
Step 2: Cutting the Fabric
Using the measurements from Step 1, cut two fabric panels to the desired size of your book sleeve. These panels will become the front and back of the sleeve.
Step 3: Sewing the Panels Together
Place the two fabric panels together, right sides facing each other. Sew along the edges, leaving the top open. Repeat this step for the fleece lining if desired.
Step 4: Adding Velcro
Measure and cut two small strips of velcro, one for each side of the book sleeve opening. Sew or iron them onto the inside edges of the sleeve. Make sure they align when the sleeve is closed.
Step 5: Customizing the Sleeve
Now it’s time to add some personal touches to your book sleeve. You can sew on loops to hold pens or bookmarks, attach pockets to store small notes or a phone, or even embellish the edges with decorative trim.
Step 6: Assembling the Book Sleeve
With the front and back panels secured together, sew or iron in the bottom edge of the sleeve to create a neat finish. Trim any excess fabric or threads.
Step 7: Making the Hook and Loop Closure
To secure the book inside the sleeve, measure and cut a piece of elastic or fabric trim that will wrap around the book horizontally. Sew one end to the back of the sleeve and add a loop or button to the other end to fasten it in place.
Step 8: Finishing Touches
Iron the book sleeve to make it look crisp and smooth. Trim any loose threads and make any final adjustments to ensure a snug fit for your book. Fold it up and slip it into your bag or bookshelf!
With these easy instructions, you can create a DIY book sleeve that not only keeps your books safe and secure, but also adds a touch of your own personal style. So get creative and start making your very own bookish accessory today!
Binder Sleeve
Looking for a way to bring a bookish charm to your favorite binder? A binder sleeve is the perfect solution! With a few easy steps, you can make a custom binder sleeve to keep your books, notes, and other essentials organized and protected.
To make a binder sleeve, you’ll need the following materials:
- Fabric/fleece for the outer part of the sleeve
- Fabric/fleece for the inner lining
- Elastic or velcro for closures
- Measuring tape
- Sewing machine or needle and thread
Start by measuring your binder’s dimensions. The measurements will help you determine the size of your sleeve. Add an inch to the width and height to allow for seam allowances.
Cut two pieces of fabric and two pieces of lining according to your binder measurements. Make sure the pieces are wide enough to wrap around the binder and cover the front and back.
Place the fabric and lining with right sides together. Sew around the edges, leaving a small opening for turning. Trim the corners and turn the sleeve right side out. Iron the edges to create a crisp look.
Next, measure the space for your pockets on the inside of the sleeve. Use pins or tape to mark the positions of the pockets. Sew along the marked lines to secure the pockets in place.
Now it’s time to customize the sleeve to fit your needs. You can add a zipper to keep your belongings secure, or you can sew on loops or hooks to hold pens and other items. Get creative with your designs and ideas.
For added convenience, you can also include an elastic or velcro closure to ensure your binder stays tightly closed. Sew the closure onto the outside of the sleeve, near the edges.
Repeat these steps for the other half of the sleeve, making sure the pockets and closures are aligned with the first half.
Once both halves are complete, place the binder inside the sleeve, making sure the rings go through the openings. Pull the tails of the closures tight to keep the binder secured.
Your binder sleeve is now ready to use! The pockets provide ample space for holding pens, sticky notes, and other essentials, while the sleeve keeps your binder protected from wear and tear.
Whether you’re using it for school or work, a binder sleeve is a functional and stylish way to keep your books and documents organized. Plus, you’ll have the satisfaction of making something yourself!
Sew the DIY book sleeves
Once you have cut and prepared the fabric pieces for your book sleeves, it’s time to sew them together. The following step-by-step instructions will guide you through the sewing process:
- Place the two fabric pieces wrong sides together: Take the main fabric panel and the lining panel and align them, making sure the right sides of the fabric are facing outwards.
- Pin the edges: Use pins to secure the edges of the fabric panels together, making sure to leave a small opening (about 2 inches) for turning the sleeve right side out later.
- Sew along the edges: Use a sewing machine or a needle and thread to sew a 1/4-inch seam allowance along the edges of the fabric panels, starting from one side of the opening and going all the way around to the other side.
- Turn the sleeve right side out: Carefully u-wrap the fabric through the opening, turning the sleeve right side out. Use a pencil or knitting needle to push out the corners to ensure a crisp look.
- Iron the sleeve: Iron the sleeve to remove any wrinkles and to give it a smooth finish.
- Secure the opening: Fold the edges of the opening to the inside and use pins or purl stitches to secure it closed. Make sure the stitches are close to the edge for a neat look.
- Sew the pockets: Decide how many pockets you want and where you want them to be. Use a ruler and fabric marker to mark the pocket placements on the front panel of the sleeve. Sew straight lines to create the pockets, using a sewing machine or a needle and thread. Repeat this step for each pocket you want to include.
- Add elastic loops: Cut elastic pieces and sew one end of each elastic piece to the inside of the front panel, right next to each side of the pockets. Make sure the elastic loops are tight enough to hold the books in place but not so tight that it distorts the fabric.
- Assembling the sleeve: Fold the sleeve in half lengthwise, bringing the two short sides together, and secure the sides with pins. Sew along the sides using a sewing machine or a needle and thread, leaving the top edge open for inserting your books.
Congratulations! You have successfully sewn your DIY book sleeves. Now, you can customize them even more by adding decorative elements such as zipper pulls, charms, or bookish patches. The possibilities are endless! Enjoy protecting and personalizing your favorite books with your newly made book sleeves.
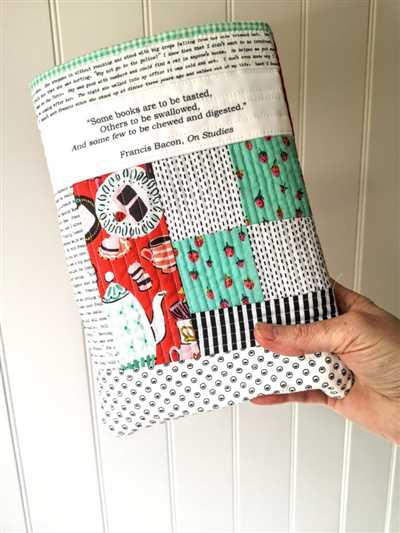
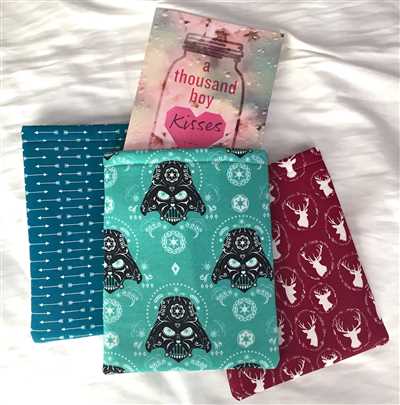
Ideas for Customizing Your Book Sleeves
If you’re making your own book sleeves, why not add a personal touch to make them truly unique? Here are some ideas for customizing your book sleeves:
Fabric Choice: Choose a fabric that reflects your personal style or matches your favorite books. You can opt for fun patterns, vibrant colors, or even bookish designs to show off your love for reading.
Add Pockets: Sew pockets onto the front or inside of your book sleeve to hold bookmarks or small notes. These pockets will keep your reading essentials secure and easily accessible.
Zipper or Velcro Closure: Rather than relying on an open-ended book sleeve, add a zipper or Velcro closure to keep your books snugly in place. This will prevent any accidental slips or damage while carrying your books.
Trim and Embellishments: Add some decorative trim or embellishments along the edges of your book sleeve to give it a personalized touch. You can use lace, ribbons, buttons, or even charms that match your style or favorite books.
Embroidery or Appliqué: Get creative and embroider your initials, favorite quotes, or bookish symbols onto your book sleeve. Alternatively, you can appliqué fabric pieces onto the sleeve to create unique designs or monograms.
Colorful Purl Edges: Use purl edges in contrasting colors to add a pop of color to your book sleeve. Simply knit or crochet a few rows of purls along the edges of your sleeve for a fun and eye-catching detail.
Customized Labels: Create your own custom labels or tags to sew onto your book sleeves. These labels can include your name, a bookish quote, or even a small message to make your sleeves truly one-of-a-kind.
Wrap-Around Straps: Add elastic or fabric straps with a button or snap closure to secure the book sleeve tightly around your book. This will provide extra protection and keep your book secure even when it’s in your bag.
DIY Book Sleeve Charms: Make small charms or keychains that can be attached to your book sleeve for an added touch of charm. These can be made with beads, fabric scraps, or even small book-shaped trinkets.
With these ideas and instructions, you can turn a simple book sleeve into a personalized accessory that reflects your love for reading. Customize it to suit your personal taste and style, and enjoy the added charm and functionality it brings to your favorite books.


