

Have you ever wondered how to insert your signature on a Mac? Whether you need to sign a document or add a personal touch to your emails, here’s a step-by-step guide to help you get started.
Option 1: Using Preview
If you’re composing a document or an email and want to insert your signature, look no further than the Preview app. Here’s how:
- Open the document or email you want to sign.
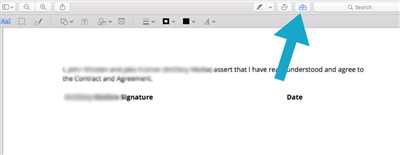
- Click on the “Markup” icon (a toolbox) in the toolbar.
- On the right-hand side, you’ll see a set of tools. Click on the pen icon with a squiggly line to create a signature.
- Use your trackpad to sign your name or click “Cancel” and type your name using the keyboard.
- Click “Done” when you’re satisfied with your signature.
- Preview will automatically save your signature for future use, so you don’t have to repeat the process every time.
Option 2: Using the Trackpad
If you prefer using your trackpad instead of the Preview app, here’s how you can easily insert your signature:
- Open the document or email you want to sign.
- Place your cursor where you want to insert the signature.
- With the trackpad, use your finger to sign your name.
- Click “Done” when you’re satisfied with your signature.
That’s it! Now you know how to insert your signature on a Mac using two different methods. Whether you’re signing documents, composing emails, or sharing files, adding a personal touch to your electronic communication is just a few clicks away.
Note: If you’re using Microsoft Word or other text editing tools, the process may be slightly different. However, the options to insert a signature are usually available in the menu or preferences, so make sure to look for those features.
Now go ahead and give it a try. Insert your signature on your Mac and add a professional touch to your documents and emails. It’s easy, quick, and will save you time in the long run!
In conclusion, inserting a signature on a Mac doesn’t have to be a complicated process. Whether you use the Preview app or the trackpad method, adding your signature is a breeze. So next time you need to sign a document or send an important email, you’ll know exactly how to do it!
- How to add an email signature in Apple Mail
- How to Create a Signature on a Mac
- Step 1: Open the Preview App
- Step 2: Click the Markup Tool Option
- Step 3 Click the Signature Icon
- Step 4 Click Create New
- Step 5: Create Your Signature
- Step 6: Click Done
- How to Sign PDF on Mac Using Preview
- Using Trackpad
- Using Camera
- Using iPhone or iPad
- Saving and sharing the signed document in Microsoft Word
- How to insert a signature in Pages Conclusion
- Video:
- How To Sign Documents On A Mac
How to add an email signature in Apple Mail
If you’re using Apple Mail on your Mac, iPhone, or iPad and want to add a professional email signature, here’s a guide to help you:
| Step 1: | Open Apple Mail on your Mac or iOS device. Click on the “Mail” menu in the top left corner and select “Preferences”. |
| Step 2: | In the Preferences window, click on the “Signatures” tab. |
| Step 3: | In the left pane, select the email account for which you want to create a signature. |
| Step 4: | On the right side, you’ll see a list of signatures you’ve already created. To create a new signature, click on the “+” icon below the list. |
| Step 5: | In the signature text box, you can type your desired signature. You can format the text, add links, or even insert images by using the options in the toolbar above. |
| Step 6: | If you have a pre-designed signature saved as an HTML file, you can also paste the HTML code directly into the text box. |
| Step 7: | Once you’re satisfied with your signature, close the Preferences window. Your new signature will be automatically applied to your outgoing emails. |
That’s it! Now you know how to easily add an email signature in Apple Mail. Whether you want a simple text signature or a more professional one with images and links, Apple Mail provides the tools to make it happen.
How to Create a Signature on a Mac
If you frequently need to sign documents or emails on your Mac, creating a digital signature can save you time and effort. With a Mac, you can create a signature using several different methods. In this guide, we will walk you through six easy steps to create a signature on a Mac.
- Open the Preview app on your Mac. You can find it in the Applications folder or by searching for it using Spotlight.
- Click on “Markup” in the toolbar at the top of the window.
- In the Markup toolbar, click on the icon that looks like a signature. If you don’t see this icon, go to “Preferences” in the Preview menu and make sure the “Show Markup Toolbar” option is selected.
- A drop-down menu will appear. Select “Create Signature” and then choose whether you want to use the trackpad or the camera to create your signature.
- If you choose the trackpad, use your finger to write your signature. If you choose the camera, hold a piece of paper with your signature up to the camera until it is captured.
- Once you are satisfied with your signature, click “Done” and it will be saved to Preview for future use.
Now that you have created your signature, here are some ways you can use it:
- In the Preview app, you can insert your signature into any document or PDF by clicking on the “Sign” button in the toolbar and selecting your signature.
- In the Mail app, you can add your signature to any email by clicking on the “Compose” button and then clicking on the “Signature” tool in the toolbar. Select your signature from the drop-down menu.
- If you use Pages, you can add your signature to documents by clicking on the “Insert” menu and selecting “Signature”. Choose your signature from the options available.
In conclusion, creating a signature on a Mac is a quick and easy process. Whether you need to sign documents for work or simply want to add a personal touch to your emails, creating a digital signature can streamline the process and make your life easier.
Step 1: Open the Preview App
To insert your signature on a PDF document using a Mac, you can utilize the built-in Preview app. Preview comes as a default application on all Macs and allows you to view and edit various file types, including PDFs.
Here’s a step-by-step guide on how to insert your signature using the Preview app:
| Step | Process |
| 1 | Open the Preview app on your Mac. You can find it in the Applications folder or use Spotlight (press Command + Space and type “Preview” into the search bar) to locate and open the app. |
| 2 | Select the PDF document where you want to insert your signature. You can either open the document directly in Preview or navigate to it using the “File” > “Open” option. |
| 3 | In Preview, click on the “Markup” icon in the toolbar. It looks like a toolbox and is located in the top-right corner of the window. |
| 4 | A sidebar will appear on the right side of the window. Click on the “Sign” icon at the top of the sidebar. |
| 5 | If you haven’t already added a signature, click on the “Create Signature” button. A pop-up window will appear with three options: “Trackpad,” “Camera,” or “iPhone/iPad.” Choose the option that suits you best. |
| 6 | If you choose the “Trackpad” option, use your finger to draw your signature on the trackpad. If you select “Camera,” use your Apple device’s camera to capture your signature. And if you choose “iPhone/iPad,” you can insert a saved signature from your Apple device. |
| 7 | Once you’ve inserted or created your signature, it will appear in the signature list on the right side of the sidebar. You can now easily insert it into your PDF document by clicking on it. |
| 8 | If you want to move or delete the signature, you can do so by clicking on the signature tool again and selecting the appropriate options. |
| 9 | After inserting and adjusting your signature, you can save the modified PDF document by clicking on “File” > “Save” or “File” > “Save As” if you want to save it with a different name. |
| 10 | Alternatively, if you’re composing an email and want to insert your signature, you can do so by clicking on the “Mail” icon in the toolbar. This will open a new email with your signed document attached. |
| 11 | That’s it! You’ve successfully learned how to insert your signature into a PDF document using the Preview app on your Mac. |
Now you can easily sign PDFs and other documents on your Mac without the need for printing, signing, scanning, or faxing. The electronic signature feature in Preview makes the process quick and convenient, saving you time and effort.
Step 2: Click the Markup Tool Option
After you have saved your document or image, open it on your Mac using the default Preview app. If you don’t have it, you can easily find it by searching in the Spotlight or looking in the Applications folder.
Once the document or image is open, click on the “Markup Tool” option in the toolbar. It looks like a pen tip inside a circle, and it is located on the upper-right corner of the window.
If you can’t find the Markup Tool in the toolbar, you can also access it by clicking on “Tools” in the menu bar, then selecting “Show Markup Toolbar”.
When the Markup Toolbar appears on the top of the window, you will see various options for editing and annotating your document or image. You can use this toolbar to easily insert a signature or add text to your document.
If you want to insert an already saved image of your signature, you can click on the “Image” icon in the Markup Toolbar. A window will open, allowing you to browse and select the image file of your signature. Once selected, simply click “Open” to insert the image into your document.
If you want to create a signature from scratch, you can click on the “Sign” icon in the Markup Toolbar. A new window will open, showing you the options to create a signature using your trackpad or the camera of your Mac. Follow the on-screen instructions to create your signature.
After you have inserted your signature, you can use the Markup Toolbar to move or delete it, change its size or rotation, or change the color and thickness of the signature stroke.
Once you are satisfied with your signature, you can save the document with the inserted signature by clicking on “File” in the menu bar, then selecting “Save” or “Save As”.
That’s it! Now you know how to easily insert a signature on your Mac using the Markup Tool option. In the next step, we will look at how to share the signed document via email, messages, or other ways of sharing files.
Step 3 Click the Signature Icon
Once you have your document open in the Preview app on your Mac, look for the toolbar at the top of the screen. In this toolbar, you will find the Signature icon. It looks like a pen tip inside a small signature box.
Clicking on the Signature icon will open a drop-down menu with options for creating and managing signatures. If you have already created an electronic signature, it will appear here. If not, you can easily add one by clicking on the “Create Signature” option.
When you click on the “Create Signature” option, a window will pop up giving you multiple ways to insert your signature. You can use your Mac’s trackpad to draw your signature, you can sign your name on a piece of paper and use your Mac’s camera to capture it, or you can type your name and choose a font that closely matches your signature.
Once you have created or selected a signature, it will be saved and added to your list of signatures. If you are not satisfied with the signature you created, you can click the “Cancel” button and start the process again.
The signature you created or selected will now appear in the signature menu when you click on the Signature icon. To insert your signature into a document, simply click on the Signature icon again and select your signature from the menu.
If you are composing a document in Microsoft Word, the process is the same. Just click on the Signature icon in the toolbar and select your electronic signature from the menu.
If you are using an Apple device like an iPad or iPhone, you can also insert your signature using the Markup tools in the Photos or files app. Just open the document you want to sign, click on the Edit button, and select the Markup option. From there, you can use your finger or an Apple Pencil to sign your name.
Remember, the Signature icon and options may vary slightly depending on the version of Preview or other tools you are using. But the basic steps to insert your signature remain the same across most Mac apps and devices.
That’s it! Now you know how to insert a signature on your Mac. In the next step of this guide, we will learn how to share the signed documents. So, stay tuned!
Step 4 Click Create New
After configuring your preferences and knowing the different sharing options, you are now ready to add a signature. Here’s a step-by-step guide on how to insert a signature on a Mac using the Mail app:
- Open the Mail app on your Mac.
- Click on the “Mail” menu in the top left corner of the screen.
- Select “Preferences” from the drop-down menu.
- In the Preferences window, click on the “Signatures” tab.
- On the left side, you will see a list of signatures. If you want to create a new signature, click on the “+” icon below the list.
- A new window will appear where you can compose your signature. You can type your signature using the text tool or insert an image of your signature by clicking on the camera icon.
- If you have already created a signature in Pages, Microsoft Word, or another application, you can easily add it by clicking on the “Choose Signature” option and selecting the file.
- Once you are satisfied with your signature, click on the “Done” button to save it.
- Now, whenever you compose a new email, your signature will be automatically inserted at the bottom of the message.
Alternatively, if you want to insert a signature into a specific email message, you can follow these steps:
- Open the Mail app on your Mac.
- Create a new email message by clicking on the “Compose” button.
- In the new email message window, click on the “Markup” icon on the top right corner.
- A toolbar with various markup tools will appear on the top right side of the window. Click on the “Signature” tool (it looks like a pen).
- A drop-down menu will open where you can select the signature you want to insert. If you haven’t created any signatures yet, you can select the “Create New” option to start the process of creating a signature as mentioned in the previous steps.
- Once you have selected the signature, it will be inserted into the email message where your cursor is located.
- You can now continue composing your email with the signature included.
And there you have it! Now you know how to insert a signature on your Mac using the Mail app. Whether you prefer to create an electronic signature or use an image file, the Mac Mail app provides easy-to-use tools to make the process quick and convenient.
Remember, you can always go back to the Preferences window to edit, delete, or add new signatures as you see fit. Have fun personalizing your emails with your very own signature!
Step 5: Create Your Signature
Now that you have your electronic document ready, it’s time to create a signature that you can easily insert into any document on your Mac. There are a few ways you can do this, depending on the tools and options you have available:
- Using a Trackpad: If you have a Mac with a trackpad, you can use the built-in signature tool. Open the document you want to sign, click on the “Markup” icon (looks like a pencil in a circle) on the top right corner of the window, and then click on the signature icon (looks like a cursive “S”) in the toolbar. A popup will appear where you can create a new signature by signing with your finger on the trackpad. Once you’re satisfied with your signature, click “Done”.
- Using Preview: If you don’t have a trackpad or prefer a different method, you can also use the Markup tool in the Preview app. Open the document you want to sign in Preview, click on the “Show Markup Toolbar” button (looks like a toolbox) on the top right corner of the window, and then click on the signature icon (looks like a cursive “S”) in the toolbar. You can then create a new signature by signing with your finger on the trackpad, or by using a camera to take a photo of your signature. If you choose to take a photo, make sure the signature is on a white piece of paper and move your camera as close as possible to get a clear image. Once you have your signature, click “Done”.
- Using an Image File: If you already have a saved image file of your signature, you can easily insert it into any document. Open the document you want to sign, click on the “Tools” menu at the top of the screen, and then select “Annotate” and “Signature”. From the options that appear, select “Manage Signatures”. In the popup window, click on the “+” button to add a new signature, give it a name, and then click “Create Signature”. You can then paste your signature into the window or select an image file from your computer. Click “Done” when you’re finished.
Once you have created your signature, it will be saved and you can easily insert it into any document. Now that you know how to create a signature on your Mac, you can confidently sign and share your documents without the need for printing, scanning, or faxing.
Step 6: Click Done
Once you are satisfied with your signature, click the “Done” button to complete the process. Your signature will be saved and ready to use.
How to Sign PDF on Mac Using Preview
If you’re an Apple user, you probably know that Preview is a handy app that allows you to view and edit various types of documents. But did you know that you can also use Preview to sign PDF files? With its markup and signature features, signing a document on your Mac has never been easier. In this guide, we’ll show you how to sign a PDF on Mac using Preview.
- Open the PDF file that you want to sign in Preview. You can do this by double-clicking on the PDF file, or by opening Preview and clicking on “File” in the top menu bar, then selecting “Open”.
- Once the PDF file is open in Preview, click on the “Markup” icon in the toolbar. It looks like a pen tip inside a circle.
- In the markup options menu that appears, click on the “Sign” icon. It looks like a signature with a plus sign.
- If you’ve already created a signature before, select it from the list. If not, click on “Create Signature” and follow the steps to create a new signature. You can use the trackpad on your Mac, an iPhone or iPad, or even a camera to create your signature.
- After selecting or creating your signature, click on the area where you want to insert the signature in the PDF document. You can move the signature around and resize it as needed.
- Preview will automatically save your signed document, so you don’t need to worry about saving it again. If you’re not satisfied with the signature, you can click on it and press the delete key to remove it. Alternatively, you can go to “Preferences” in the Preview menu, click on the “Signatures” tab, and delete or edit your signatures from there.
- Once you’re done signing the PDF, you can share it via email or save it to your preferred location by clicking on “File” in the top menu bar, then selecting “Export” or “Save”.
And that’s it! Now you know how to sign a PDF on Mac using Preview. The process is quick and easy, allowing you to insert your electronic signature into your documents with just a few clicks. Whether you’re signing multiple PDFs for work or just want to add a signature to a document for personal use, Preview has all the features you need. So go ahead and give it a try!
Please note that the features mentioned in this guide may vary depending on the version of Preview and macOS that you’re using.
Using Trackpad
Step 1: Open the document you want to sign. This can be a PDF, a Word document, or even a Pages file.
Step 2: Move your cursor to the place in the document where you want your signature to appear.
Step 3: Click on the “Tools” icon in the toolbar at the top of the window.
Step 4: From the dropdown menu, select the “Markup” option.
Step 5: In the Markup window, select the “Signature” tool.
Step 6: If you have already saved your signature, click on it in the window that appears. If not, click “Create Signature” and sign your name on the trackpad with your finger or a stylus.
Step 7: Your signature will now appear in the document. You can resize it or move it around if needed.
Step 8: Once you are satisfied with the position and size of your signature, click “Done”.
Step 9: If you want to save the document with the signature, go to File > Save (or press Command + S).
Conclusion: Using the trackpad to insert your signature is an easy and convenient way to sign documents on your Mac. Whether you’re composing an email, sharing a document, or saving it for later, this feature in Preview or Microsoft Word makes the process quick and efficient. Try it out and see how it works for you!
Please note: The steps provided here may slightly vary depending on the version of macOS or the application you are using. Make sure to explore the options and features available on your device to find the best way to insert your signature.
Using Camera
If you don’t have a pre-created signature and you want to create one using your Mac’s camera, you can easily do so. Here’s how:
- Open the document or email message you want to add a signature to.
- Click on the “Markup” icon (looks like a toolbox) in the top right corner of the window.
- In the Markup toolbar, click on the “Signature” tool (looks like a pen).
- If you have already created a signature with your trackpad or mouse, you’ll see it here. Alternatively, you can click on the “Camera” option to use your Mac’s camera.
- Click on the “Camera” option.
- A window will open with your Mac’s built-in camera.
- Hold your signature on a blank piece of white paper up to the camera. Make sure it’s clear and easy to read.
- Click the “Done” button once you are satisfied with the captured image of your signature.
- Your signature will be inserted into the document or email message.
- Move or resize the signature as needed using the tools at the left side of the Markup toolbar.
- Click on the “Done” button to finish composing your document or email.
That’s it! Now you know how to easily create and insert a signature using the camera on your Mac. You can use this method to sign multiple documents without having to manually add your signature each time.
Using iPhone or iPad
If you own an iPhone or iPad, you can easily insert a signature into your documents or emails. Here’s a step-by-step guide on how to do it:
1. Open the document or email you want to sign on your iPhone or iPad.
2. Look for the “Markup” toolbar. You can find it by clicking on the pen icon at the top right corner of your screen.
3. Tap on the “+” button to add a new signature.
4. Using your finger or an Apple Pencil, sign your name on the trackpad that appears on the screen.
5. If you’re not satisfied with your signature, you can tap on the “Cancel” button and try again. Alternatively, you can tap on the “Done” button to save your signature.
6. Once your signature is saved, you can easily insert it into your document or email. Just tap on the signature icon in the toolbar, and select your saved signature from the options menu.
That’s it! Your signature will now be inserted into your document or email. It’s as easy as that!
One important thing to note is that if you’re using Microsoft Word or Pages, the process may be slightly different. In these apps, you’ll need to turn on the “Allow Markup” option in the preferences menu.
In conclusion, inserting a signature on your iPhone or iPad is a simple and quick process. With the built-in tools and features, you can easily sign your documents or emails without the need for any external tools or apps. So next time you need to sign a document or compose an email on your Apple device, you know exactly how to insert your signature!
Saving and sharing the signed document in Microsoft Word
Once you have inserted your signature into a Microsoft Word document on your Mac, you will need to save and share the document. Here’s a step-by-step guide on how to do it:
- Click on the “File” menu at the top-left corner of the screen.
- Select “Save” to save the document with your inserted signature. You can choose a location on your Mac where you want to save the file.
- If you want to send the signed document via email, click on the “File” menu again, but this time select “Share” and then choose “Email”.
- A new window will open with your default email app. Here, you can enter the recipient’s email address, add a subject and message, and then click on the “Send” button to share the signed document.
- If you want to share the document using other methods, like saving it to an online storage app or copying it to a USB drive, you can select the appropriate options from the “Share” menu.
Alternatively, you can also use the “Save As” option to create a new and separate document with your inserted signature. This allows you to keep the original document without the signature if you need it for future use.
Here’s a quick recap of the steps:
- Click on the “File” menu and select “Save” to save the signed document.
- To email the document, select “Share” > “Email” and send it to the recipient.
- To share the document using other methods, choose the appropriate options from the “Share” menu.
- If you want to create a new document without the signature, use the “Save As” option.
That’s it! Now you know how to save and share your signed documents in Microsoft Word on your Mac.
How to insert a signature in Pages Conclusion
Adding a signature to your email, documents, or any other text can give them a personal touch and make them more professional. In this guide, we have looked at different methods and tools to easily insert a signature in Pages on your Mac.
If you want to insert a signature in Pages using the Markup tool, follow these steps:
- Open the document in Pages where you want to add the signature.
- Click the “Markup” button in the toolbar at the top of the window.
- Select the “Trackpad” option from the Markup tools.
- Create your signature by using your finger on the trackpad.
- Click “Done” when you are satisfied with the signature.
If you want to insert a signature from a saved image on your Mac, follow these steps:
- Open the document in Pages where you want to add the signature.
- Click the “Image” button in the toolbar at the top of the window.
- Select the image of your signature from your Mac.
- Click “Insert” to add the signature to the document.
You can also insert a signature using the built-in camera on your iPhone or iPad. Here’s how:
- Open the document in Pages where you want to add the signature.
- Click the “Camera” button in the toolbar at the top of the window.
- Use your device’s camera to capture your signature.
- Click “Insert” to add the signature to the document.
Once you have inserted a signature, you can easily customize it by clicking on it and using the formatting options in the toolbar. You can change the size, font, color, or even delete the signature if needed.
Furthermore, if you want to save your signature for future use, you can create signature presets in Pages. This way, you can quickly add your signature to any document without going through the whole process again.
In conclusion, Pages offers various options and features to insert a signature into your documents. Whether you prefer using the trackpad, an image, or the camera, you can easily add a signature and make your documents more personalized. Experiment with different methods to find the one that works best for you. Start adding signatures to your emails, app documents, or Word files, and give them a professional touch.


