

If you have a website and want search engines like Google to easily crawl and index your content, generating an XML sitemap is a crucial step. It provides a default reading and crawling mechanism for search engine crawlers to easily find and understand your website’s structure. In this article, we will show you how to create and add an XML sitemap to your project.
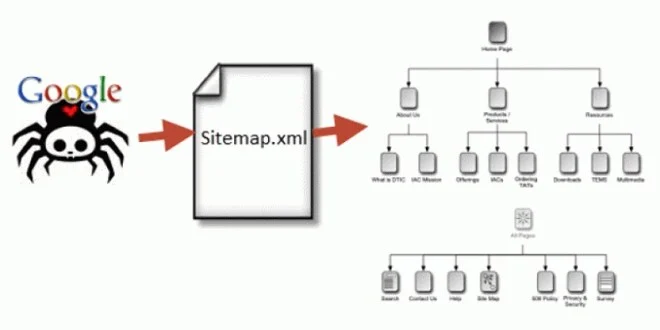
First, let’s talk about what XML sitemaps are and why they are important. An XML sitemap is a file that lists all the URLs of your website in a specific XML language format. It helps search engines like Google to quickly discover and index all the pages and posts on your website. By providing a well-structured XML sitemap, you help search engine crawlers to easily navigate through your website, ensuring that even the most hidden pages are not overlooked.
So, how do you generate an XML sitemap? Well, there are several tools and online generators available that can help you with this. One popular tool is the “sitemap.xml” feature provided by Next.js – a popular framework for building server-rendered React applications. You can make use of this built-in feature to generate an XML sitemap for your Next.js project.
To use the Next.js sitemap generator, you first need to add the necessary configuration to your project. This includes specifying the URLs you want to include in the sitemap and setting additional options if needed. Once you have set up the configuration, Next.js will automatically generate the XML sitemap for you based on the specified URLs and options.
After generating the XML sitemap, you can publish it to your website’s root directory. This makes it easily accessible to search engine crawlers, allowing them to review and index your website more efficiently. It’s also recommended to regularly update the XML sitemap whenever new content is added or existing content is modified, as this ensures that search engines have the most up-to-date information about your website.
In conclusion, generating an XML sitemap is an essential step to help search engines understand and crawl your website effectively. By following the steps and using tools like the Next.js sitemap generator, you can create a well-structured XML sitemap that will greatly aid in the indexing of your website.
How to Create an XML Sitemap

An XML sitemap is a file that provides search engines with information about the pages on your website. Search engines use sitemaps to crawl and index your website more effectively. In this article, we will review how to create an XML sitemap and why it is important.
1. Generate XML Sitemap:
There are several ways to generate an XML sitemap. One common approach is to use a default sitemap generator provided by some content management systems (CMS). These generators automatically create sitemaps for your website, ensuring that all your posts, pages, and other content are included. If you are using a CMS like WordPress, there are many plugins available that can help you generate an XML sitemap quickly and easily.
Alternatively, you can create an XML sitemap manually. This method is more suitable for smaller websites or static websites where content is not updated frequently. In this case, you would need to create a sitemap.xml file and add the necessary XML code to it. There are many online resources and tutorials available that can guide you on how to create an XML sitemap from scratch.
2. Structure of an XML Sitemap:
An XML sitemap follows a specific structure that search engines can understand. It starts with the
3. Add URLs to the XML Sitemap:
To create an XML sitemap, you need to list all the URLs of your website that you want search engines to crawl and index. This includes not only your main pages but also any other relevant pages, such as blog posts, category pages, and product pages. By including all the important URLs in your XML sitemap, you are helping search engine crawlers discover and index your content more effectively.
4. Submit the XML Sitemap to Search Engines:
Once you have created your XML sitemap, you need to submit it to search engines. Most search engines, such as Google, have a dedicated section in their webmaster tools where you can submit your sitemap. By submitting your sitemap, you are informing search engines about the existence of your XML sitemap and asking them to crawl and index your website.
5. Keep Your XML Sitemap Updated:
As you publish new content or update existing content on your website, make sure to update your XML sitemap accordingly. This ensures that search engines are aware of the latest changes and can crawl and index your new content more quickly.
In conclusion, creating an XML sitemap is an important step in helping search engines crawl and index your website. By providing search engines with a well-structured sitemap, you can improve the visibility of your website in search engine results and increase the chances of your web pages being indexed.
STEP 1 – Use of Sitemapxml Generator

When it comes to generating a sitemap for your website, one of the most convenient tools to use is a Sitemapxml Generator. This tool helps you create a sitemap in XML format, which is the preferred language for search engine crawlers to read and index the information on your site.
Having a sitemap is crucial for any website project, as it helps search engine crawlers quickly and easily crawl and index your site’s content. By using a sitemap, you can make it easier for search engines like Google to discover and show your pages in search results.
There are many sitemap generators available, but in this step, we will focus on using Sitemapxml Generator. This generator allows you to create a sitemap XML file from the URLs of your site. You can also use this tool to add more information to your sitemap, such as the last updated date of each page.
To begin using Sitemapxml Generator, first, navigate to the website where the generator is located. Once you’re there, you will usually find a simple interface where you can input the URLs of your website’s pages. Some generators may also allow you to specify the frequency of updates for each page and the priority of each page’s importance.
After entering the necessary information, you can click on the “Generate Sitemap” button or similar to create the XML file. The generator will then process the URLs you provided and generate an XML file in the sitemap.xml format.
Once you have the generated sitemap.xml file, you can publish it to your website’s root directory. This can be done by uploading the file directly via FTP or using a content management system (CMS). If you’re using Next.js or a similar framework, you may even be able to generate the sitemap automatically.
It’s important to note that most search engines will look for a sitemap in the default location, which is usually yourdomain.com/sitemap.xml. If your sitemap is located elsewhere, you will need to submit the sitemap URL manually to each search engine’s webmaster tools.
In conclusion, using a sitemap generator like Sitemapxml Generator can greatly help you create sitemaps for your website. By efficiently organizing your site’s URLs and providing additional information, you improve the chances of search engines indexing your content effectively.
What is an XML sitemap
An XML sitemap is a file that lists the URLs of a website and provides additional information about each URL, such as when it was last updated, how often it changes, and its priority relative to other URLs on the site. This file follows the XML syntax and structure, using the urlset element as the root element.
XML sitemaps are used by search engines like Google to crawl and index a website more efficiently. They help search engine crawlers discover and understand the content of a website, especially when there are complex structures or dynamic pages. By providing a comprehensive and up-to-date sitemap, website owners can ensure that search engines have the necessary information they need to properly index their site.
When a website is updated, adding new pages or publishing new blog posts, an XML sitemap helps notify search engines of the changes. It acts as a roadmap that directs search engine crawlers to the new or updated content, ensuring that it gets crawled and indexed in a timely manner.
XML sitemaps are particularly useful for websites built with Next.js, a popular JavaScript framework for building web applications. Next.js projects often rely heavily on dynamic routing and server-side rendering, which can make it harder for search engine crawlers to discover and index all the pages. By including an XML sitemap in your Next.js project, you can provide search engines with a quick and easy way to crawl and index your website, increasing its visibility in search engine results.
There are several XML sitemap generators available that can help automate the process of creating and updating XML sitemaps. These tools can crawl your website, extract the necessary information, and generate the sitemap.xml file automatically. Some XML sitemap generators even offer additional features, such as the ability to exclude certain URLs or prioritize specific pages.
In conclusion, an XML sitemap is a crucial tool for website owners and developers to help search engines discover, crawl, and index their content effectively. By creating and maintaining an XML sitemap, you can ensure that your website gets the visibility it deserves in search engine results.
Crawling and Indexing
When you publish a new post or update your existing content, search engines need to crawl and index your website to find and show them in search engine results. A quick way to help search engines find your pages is by creating an XML sitemap.
An XML sitemap is a file that lists all the URLs of your website in a special format. It provides search engine crawlers with information about the structure of your website and the priority of each page. This helps search engines understand your website better and index it more efficiently.
There are many XML sitemap generators available, some of which are even built into popular content management systems. However, if you have a custom project, you may need to create a sitemap manually.
To create an XML sitemap, you need to review your website and determine which pages you want search engines to index. If you have a large website, you may want to prioritize certain pages or exclude some pages from the sitemap.
When creating an XML sitemap, make sure to include all the important pages of your website, such as your homepage, blog posts, and other core pages. If you have multiple language versions of your website, you can also include language-specific URLs in the sitemap.
To use a sitemap generator, you simply need to provide the generator with the URL of your website. The generator will then crawl your website and generate an XML sitemap file, which you can then download and add to your website.
Once you have generated the XML sitemap, you need to add it to your website’s root directory. The default filename is usually “sitemap.xml”, but you can choose a different name if you prefer. This file should be accessible to search engine crawlers, so make sure it is not blocked by robots.txt or other access restrictions.
After you have added the XML sitemap to your website, you should also submit it to search engines like Google. This will further help search engines discover and index your website.
In conclusion, crawling and indexing are crucial steps in helping search engines find and show your content to users. Creating an XML sitemap is a useful tool to assist search engine crawlers in understanding your website’s structure and priorities. By following the steps outlined above, you can ensure that your website is indexed effectively and that your content is reaching a wider audience.
How to Add Sitemaps to a Nextjs Project
Adding sitemaps to a Next.js project can greatly improve the visibility and indexing of your content by search engines. Sitemaps provide search engines with a quick overview of the URLs on your website that they should crawl and index. In this post, we will review what sitemaps are, why they are important, and how to add them to your Next.js project.
A sitemap is an XML file that contains information about the URLs on your website. It helps search engines like Google understand the structure of your website and find all the relevant content. Sitemaps are especially useful when you have a large website with a lot of pages, posts, or other content files that need to be crawled and indexed.
In a Next.js project, you can generate a sitemap.xml file using a sitemap generator library. There are several popular libraries available that can help you create a sitemap for your Next.js project. One such library is “sitemap” which is a simple and easy-to-use sitemap generator for Node.js.
To add sitemaps to your Next.js project:
- Install the sitemap generator library using the following command:
npm install –save sitemap
- Create a sitemap.xml file in the root directory of your Next.js project. This file will contain the URLs that you want to include in the sitemap.
- In your Next.js project, create a sitemap.js file to generate the sitemap.xml. Use the sitemap generator library to generate the sitemap and save it to the sitemap.xml file.
Here is an example code snippet that shows how to generate the sitemap using the “sitemap” library:
“`javascript
import { SitemapStream, streamToPromise } from ‘sitemap’;
import { Readable } from ‘stream’;
export default async function handler(req, res) {
// Fetch all the necessary data for the sitemap
const urls = [
{ url: ‘/post/1’, changefreq: ‘daily’, priority: 0.7 },
{ url: ‘/post/2’, changefreq: ‘weekly’, priority: 0.5 },
// Add more URLs as needed
];
// Create a sitemap stream
const stream = new SitemapStream({ hostname: ‘https://example.com’ });
// Add URLs to the sitemap
urls.forEach((url) => {
stream.write(url);
});
// End the sitemap stream
stream.end();
// Convert the sitemap stream to a readable stream
const sitemap = (await streamToPromise(stream)).toString();
// Set the Content-Type header to ‘application/xml’
res.setHeader(‘Content-Type’, ‘application/xml’);
// Send the sitemap as response
res.send(sitemap);
}
Make sure to update the URLs in the `urls` array with the relevant information from your Next.js project.
Once you have completed these steps, you can test the sitemap by running your Next.js project and visiting the `/sitemap.xml` URL. The sitemap should show all the URLs that you have added.
Adding sitemaps to your Next.js project can help search engines like Google crawl and index your website more effectively. It is also useful for keeping search engines updated with any new or updated content on your website. By following the steps outlined in this post, you can easily add sitemaps to your Next.js project and improve its visibility in search engine results.
For more information on sitemaps and how they can help your website, consider reading the official documentation from search engines like Google. They provide further insights on the best practices and additional features that you can use when creating sitemaps.
Quick Review
Before we dive into how to generate an XML sitemap for your Next.js project, let’s do a quick review of what sitemaps are and why they are important.
A sitemap is a file that contains a list of all the URLs on your website. It is used by search engine crawlers to better understand the structure and content of your site. By providing a sitemap, you can help search engines like Google crawl and index your website more effectively.
XML sitemaps are a specific type of sitemap that use XML (eXtensible Markup Language) as the file format. They are the default choice for most websites as they are easy to generate and provide all the necessary information search engines need to crawl and index your site.
Now that we have a better understanding of what sitemaps are and why they are important, let’s move on to the next step – how to generate a sitemap for your Next.js project.
To generate a sitemap for your Next.js project, you will need to use a sitemap generator. There are several options available, but for this quick review, we will focus on one popular generator – “sitemap.xml”.
First, you need to add the “sitemap” package to your project. This can be done by running the following command in your terminal:
npm install --save sitemap
Once the package is installed, you can create a new file called “sitemap.js” in the root of your project. In this file, you can define the structure of your sitemap using the “urlset” function from the “sitemap” package:
const { SitemapStream, streamToPromise } = require('sitemap');
const { Readable } = require('stream');
const sitemap = new SitemapStream({ hostname: 'https://www.example.com' });
const posts = [
{ slug: 'post-1', lastmod: new Date() },
{ slug: 'post-2', lastmod: new Date() },
{ slug: 'post-3', lastmod: new Date() },
];
posts.forEach((post) => {
sitemap.write({ url: `/posts/${post.slug}`, lastmod: post.lastmod });
});
sitemap.end();
streamToPromise(Readable.from(sitemap)).then((sm) => {
console.log(sm.toString());
});
In this example, we are creating a sitemap that contains URLs for three posts. The “url” property specifies the path to each post, and the “lastmod” property specifies the last modified date of each post. You can customize this structure to fit the needs of your project.
Once you have created the sitemap file, you can publish it to your website. Make sure to update the sitemap file whenever you add or update content on your site to ensure search engines have the most up-to-date information.
In addition to helping search engines crawl and index your site, sitemaps can also be useful for other purposes. For example, you can use sitemaps to show a list of available URLs to users, or to provide XML files for further processing.
To summarize, sitemaps are an essential tool for website indexing. They help search engines like Google discover and crawl your site effectively. By using a sitemap generator like “sitemap.xml” in your Next.js project, you can easily create and maintain XML sitemaps to improve your website’s visibility.
Further Reading
If you need more information on how to generate XML sitemaps, here are some sources that you can review:
- What is an XML sitemap and why do you need one? – This article provides an overview of XML sitemaps and explains why they are important for search engine optimization. It also discusses how to create an XML sitemap for your website.
- How to create an XML sitemap – This step-by-step guide shows you how to generate an XML sitemap for your website using a sitemap generator tool. It explains what a sitemap.xml file is and how to add it to your website to help search engine crawlers index your content.
- How to use XML sitemaps for Google indexing – This article explains how XML sitemaps can help improve the indexing of your website on Google. It discusses the best practices for creating and submitting XML sitemaps to Google, as well as some common mistakes to avoid.
- How to make sure your XML sitemap is up to date – This guide provides tips on how to keep your XML sitemap updated when new posts or pages are added to your website. It explains how to automatically generate XML sitemaps for dynamic websites using a content management system or a sitemap generator.
- Using XML sitemaps in Next.js projects – If you are working with a Next.js project, this article explains how to generate and use XML sitemaps for your website. It shows you how to create a sitemap.xml file and include it in your Next.js project for better search engine crawling.
By reading these resources, you will gain a deeper understanding of XML sitemaps and learn how to create and use them effectively to improve the crawling and indexing of your website.
Sources
When it comes to generating an XML sitemap, there are several sources that can help you:
1. Google Sitemaps: Google provides a quick and easy way to create XML sitemaps through their Google Search Console. This tool can also show you valuable information about how Google’s crawling and indexing engine interprets your sitemap.
2. Third-party Sitemap Generators: There are many tools available online that can generate XML sitemaps for you. Some popular options include “Sitemap.xml” and “XML-Sitemaps.com”. These generators often have additional features, such as the ability to create sitemaps for different languages or include URLs from specific parts of your website.
3. CMS plugins: If you use a content management system like WordPress, there are plugins available that can automatically generate and publish XML sitemaps for your website. Examples include the “Yoast SEO” plugin for WordPress and the “Next.js Sitemap” plugin for Next.js projects.
4. Manually creating a sitemap: If you have a small website with a limited number of pages, you can create your own XML sitemap by hand. This involves creating an XML file in the “urlset” format and adding the URLs of your webpages. There are many online resources available to help you with this, as well as tutorials and guides to walk you through the process step by step.
These sources can be a great starting point for generating your own XML sitemap. However, it’s important to review and add to the sitemap as needed. Don’t overlook any important pages or posts that you want search engine crawlers to crawl and index. Furthermore, keep in mind that while XML sitemaps can help search engines discover and understand your website’s content, they are not a guarantee that all pages will be indexed. Even with a sitemap, search engines may still prioritize crawling and indexing pages based on other factors.


