

Designing a webpage is a crucial part of building a successful online presence. Whether you are a designer looking to launch a new website or an ecommerce store, it is important to check all the right boxes to ensure both a functional and visually appealing design. In this post, we will guide you through the various steps of designing a webpage, from planning and gathering feedback to choosing the correct tools and conducting testing.
The first step in designing a webpage is to define the goals and audience for your website. Understanding who your target audience is and what they are looking for will help you create engaging content and structure your webpage correctly. Take the time to gather feedback from your customers and learn from it. This will allow you to make the necessary updates and improvements to meet the needs of your audience.
Once you have defined your goals and audience, it is time to choose the right tools for your webpage. There are several popular platforms, such as Webflow, WordPress, and Chrome DevTools, which offer a range of functionalities to help you build and maintain your website. It is important to choose the tools that best suit your needs and skill level.
After selecting the tools, you can start designing the various elements of your webpage. Pay attention to the layout, color scheme, and navigation, as these are critical for a visually appealing design. Use JavaScript and CSS to add interactive and dynamic elements to your webpage, and make sure it performs well on different devices.
Once you have finished designing your webpage, it is crucial to test its performance. Conduct user testing to see how real users interact with your website and gather feedback to make any necessary improvements. Regularly update and maintain your webpage to keep it current and engaging for your audience.
In conclusion, designing a webpage involves careful planning, collecting feedback, and using the right tools to create an engaging and functional design. By following these 13 steps, you can build a successful website that attracts and retains customers.
- How to Design a Website: A Comprehensive Start to Finish Guide
- Step 1: Plan and Gather Information
- Step 2: Wireframes and Mockups
- Step 3: Choose the Right Tools
- Step 4: Design and Develop
- Step 5: Test and Launch
- Step 6: Update and Maintain
- 13 Steps to Designing a Website
- 1 Define Your Website’s Purpose
- 2 Identify Your Target Audience
- 3 Plan Your Website’s Structure
- 4 Create Wireframes and Mockups
- 5 Gather Website Content
- 6 Choose the Right Tools and Technologies
- 7 Start Coding Your Website
- 8 Implement Responsiveness
- 9 Perform Cross-Browser Testing
- 10 Optimize Your Website for Performance
- 11 Conduct User Testing and Feedback
- 12 Launch Your Website
- 13 Maintain and Update Your Website
- Critical Steps to Take Care Post Development
- Semantic Elements
How to Design a Website: A Comprehensive Start to Finish Guide
Designing a website is a crucial task that requires a comprehensive understanding of the various steps involved. In this comprehensive guide, we will walk you through the process of designing a website from start to finish. Whether you are a beginner or an experienced designer, this guide will provide you with the necessary knowledge to create your own functional and visually appealing website.
Step 1: Plan and Gather Information
- Define your target audience and their needs.
- Collect and organize the content you want to include on your website.
- Create a site map to outline the structure and navigation of your website.
- Write down a list of features and functionalities you want to incorporate.
Step 2: Wireframes and Mockups

- Create wireframes to visually represent the layout and structure of your web pages.
- Design mockups using preferred design tools or platforms like Webflow.
- Share your designs with clients or customers for feedback and make necessary updates.
Step 3: Choose the Right Tools
- Select the programming languages and technologies you will use to code your website. HTML, CSS, and JavaScript are commonly used.
- Optimize your coding workflow by utilizing tools such as code editors, version control systems, and task runners.
- Consider using platforms like Webflow for a more visual and code-free approach to designing and maintaining your website.
Step 4: Design and Develop
- Start coding your website using the correct HTML and CSS syntax.
- Optimize your website’s performance by implementing best practices.
- Ensure cross-browser compatibility by testing your website on different browsers and devices using tools like BrowserStack.
- Write clean and organized code to maintain your website easily in the future.
Step 5: Test and Launch
- Conduct user testing to gather feedback on the functionality and usability of your website.
- Check for any limitations or errors and make necessary adjustments.
- Once everything is functioning correctly, it’s time to launch your website to the real audience.
Step 6: Update and Maintain
- Regularly update your website with fresh content to keep your audience engaged.
- Optimize your website for search engines to improve visibility.
- Monitor and maintain the performance and security of your website.
By following this comprehensive guide, you can create a website that not only looks great but also functions effectively across different browsers and devices. Remember to keep your target audience in mind, gather the necessary information, design and develop correctly, test thoroughly, and maintain your website for continued success.
Let’s get started on designing your website!
13 Steps to Designing a Website
Designing a website can be a complex process that requires careful planning and attention to detail. In order to create an engaging and functional website, designers must take the time to learn what their customers and target audience are looking for. By implementing these 13 steps, designers can create a website that not only looks great but also performs well.
1. Plan your website: Before you start designing, it’s important to have a clear purpose and goal for your website. Consider what features are crucial for your website’s success and make a plan to implement them.
2. Gather resources: Collect any necessary materials, such as images, text, and videos, that you will need for your website. This will help streamline the design process.
3. Create mockups: Using a design tool or software, create mockups of your website’s pages. This will allow you to visualize the layout and structure of your website before you start coding.
4. Optimize for different devices: With the increasing use of smartphones and tablets, it’s important to ensure your website looks good and functions properly on various devices. Pay attention to responsive design techniques to create a seamless user experience.
5. Pay attention to the semantic structure: When writing the HTML code for your website, use semantic tags to give meaning to your content. This will improve accessibility and search engine optimization.
6. Implement engaging design: Use colors, typography, and images to create an attractive and visually appealing design for your website. Incorporate your brand’s style and personality into the design.
7. Test and gather feedback: Before launching your website, make sure to test it thoroughly. Check for any bugs or issues and gather feedback from users to make improvements.
8. Take cross-browser limitations into account: Different web browsers may display your website differently. Test your website on popular browsers like Chrome, Firefox, and Safari to ensure compatibility.
9. Launch your website: Once you have tested and made any necessary changes, it’s time to launch your website. Choose a reliable hosting provider and make sure your website is performing optimally.
10. Maintain your website: After launching, it’s important to regularly update and maintain your website. Keep an eye on performance, security, and user experience to ensure your website remains in top shape.
11. Learn from user data: Use analytics tools to gather data on user behavior and engagement on your website. This will help you make informed decisions on how to improve your website.
12. Post regular content updates: To keep your website fresh and engaging, regularly update it with new content. This will encourage users to come back and interact with your website.
13. Stay up to date with new technologies: The web development landscape is constantly evolving. Stay informed about new technologies, frameworks, and trends to ensure your website remains modern and competitive.
1 Define Your Website’s Purpose
Defining the purpose of your website is a crucial part of the design process. Before you start designing your webpage, you need to have a clear understanding of what you want to achieve with it. Each website has a different purpose, and it’s important to clearly define yours to guide your design choices.
Start by asking yourself what you want your website to accomplish. Are you looking to showcase your products or services? Do you want to provide information or educate your audience? Are you aiming to create an engaging user experience?
Gather and collect the content you have for your website. This may include text, images, videos, or any other media that you want to include on your site. Knowing what content you have will help you choose the right tools and technologies to implement it.
Now that you have a clear goal in mind and the content to support it, you can start structuring your website. Think about the different pages and sections you need to create to achieve your purpose. Consider the flow of information and how users will navigate through your site. This will help you create a comprehensive and user-friendly website structure.
As you define your website’s purpose, keep your target audience in mind. Consider their preferences, needs, and expectations. Write content that will appeal to them and create a design that will engage and hold their attention.
If you’re not a designer or don’t have experience with HTML and coding, don’t worry. There are several website builder platforms, such as Webflow, that can help you create and design your website without the need for coding knowledge. These builders usually have templates and mockups that you can choose from to get started.
Once you have a clear purpose, defined structure, and content ready, it’s time to start designing your webpage. Use the tools and features provided by your preferred platform or builder to bring your design to life. Remember, the design should not only be visually appealing but also optimize for performance and user experience.
After finishing the design, it’s important to test your website to ensure it functions correctly. Check for any functional or performance issues and make necessary updates to correct them. Testing tools like BrowserStack can help you perform comprehensive cross-browser testing to ensure your website works well on different browsers and devices.
By defining your website’s purpose, structuring it correctly, and designing with your target audience in mind, you can create an engaging and effective webpage that achieves its goals.
2 Identify Your Target Audience
Before you start designing your webpage, it’s crucial to identify your target audience. Understanding who will be visiting your site will help you make design decisions that cater to their preferences and needs.
Here are some steps to help you identify your target audience:
- Define the purpose of your website: Determine what your website is meant to achieve and what specific goals you want to accomplish.
- Collect comprehensive data: Conduct market research to gather information about your potential customers. This includes demographics, interests, preferences, and behaviors.
- Pick a designer or design team: Choose a professional designer or team with experience in your industry. Their expertise will help you create a visually appealing website that engages your target audience.
- Plan your website structure: Create a wireframe or mockup of your website’s layout. This will help you visualize the overall structure and navigation of your site.
- Write your content: Develop high-quality content that is relevant and compelling to your target audience. This will help you attract and maintain their attention.
- Test your design: Use tools like browserstack to check the performance and compatibility of your website across various browsers and devices. This ensures a consistent and engaging experience for all users.
- Host your website: Choose a reliable hosting provider that can support the traffic and demands of your target audience. Performance and uptime are critical factors to consider.
- Launch and gather feedback: After finishing the design and development of your website, launch it to the real audience. Collect feedback to make necessary improvements and optimizations.
By following these steps, you can ensure that your website design caters to your target audience’s preferences and effectively communicates your message. Taking the time to plan and understand your audience will significantly improve the success of your website.
3 Plan Your Website’s Structure
When it comes to designing a website, the structure is a crucial part of the process. Before you start coding or designing, you need to plan how your website will be organized. This planning phase will help you create a user-friendly and efficient website that meets the needs of your audience.
Here are 12 steps to help you plan your website’s structure:
1. Choose the right tools: As a designer, you need to choose the right tools to help you with the planning process. There are several tools available, such as wireframes and mockups, that can assist you in visualizing the structure of your website.
2. Collect and organize content: Before you can start planning your website’s structure, you need to gather all the necessary content. This includes text, images, and any other media that you plan to include on your website.
3. Define your target audience: It’s important to know who your website is targeting. This will help you design a structure that meets the needs and expectations of your audience.
4. Start with a comprehensive guide: A comprehensive guide will help you define the different pages and sections of your website. It will act as a roadmap for your design and development process.
5. Identify key features and technologies: Depending on the purpose of your website, you need to identify the key features and technologies that you want to implement. For example, if you are designing an e-commerce website, you may need to choose a platform like WordPress or Webflow.
6. Conduct user testing: User testing is an important part of the planning process. It lets you check if your website’s structure is functional and if it provides a good user experience.
7. Create wireframes: Wireframes are visual representations of your website’s structure. They show how different pages and sections will be laid out and how they will function.
8. Pick a website builder: Once you have your wireframes, you can choose a website builder that suits your needs. There are many options available, such as WordPress, Webflow, or even coding your website from scratch using HTML, CSS, and JavaScript.
9. Build your website: With the chosen website builder, you can now start building your website. Use the wireframes as a guide to implement each page and section correctly.
10. Optimize for performance: A well-structured website is optimized for performance. This includes using proper HTML and CSS markup, correctly sizing and compressing images, and minimizing the use of JavaScript to improve loading times.
11. Test on various devices: Make sure your website is responsive and looks good on different devices, including desktops, laptops, tablets, and smartphones. This will ensure a consistent experience for all users.
12. Launch and review: After completing the website’s structure and design, it’s time to launch your website. However, the process doesn’t stop there – regularly review and update your website to keep it fresh and engaging for your audience.
By following these steps, you can create a well-planned and visually engaging website that meets the needs of your target audience. Remember to gather and organize your content, define your target audience, and use the right tools to help you with the planning process. With careful planning and implementation, your website will be ready to launch and attract visitors.
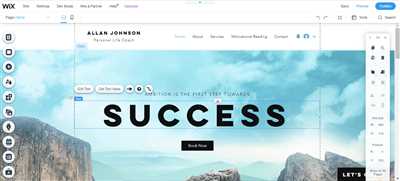
4 Create Wireframes and Mockups

When designing a webpage, it’s crucial to have a clear plan before diving into coding. One of the first steps in the planning process is to create wireframes and mockups. Let’s explore why these are important and how to create them.
Wireframes are simple, black and white sketches that outline the basic structure and layout of a webpage. They help you define the purpose of your website and show the positioning of various elements such as navigation, content, and CTAs (calls to action). Mockups, on the other hand, are more detailed and realistic representations of your webpage design. They include colors, fonts, and actual content to give a better understanding of how the final page will look.
Wireframes and mockups serve multiple purposes in the web development process. Firstly, they help you collect feedback from stakeholders and identify any design flaws or critical performance issues before launching the site. Additionally, they allow you to show your clients or team members what the final product will look like without getting into the nitty-gritty of coding. This can save you time and effort by ensuring that everyone is on the same page from the start.
There are many tools available for creating wireframes and mockups. Some popular options include Adobe XD, Sketch, Figma, and InVision. These tools provide a user-friendly interface with drag-and-drop functionality, making it easy to build and iterate on your designs. You can also choose from a variety of pre-designed templates or create your own from scratch.
When creating wireframes and mockups, it’s important to keep in mind the limitations of the platform or technologies you’ll be using. For example, if you’re designing a WordPress website, you’ll need to consider how your designs will translate into HTML and CSS files. Likewise, if you plan to use JavaScript for interactive functionality, you’ll need to ensure that your designs accommodate for this.
Another crucial aspect to consider is the responsiveness of your designs. With the increasing number of devices and screen sizes, it’s important to design for a variety of platforms. Tools like BrowserStack can help you test your designs on different browsers and devices to ensure a consistent user experience.
When designing wireframes and mockups, it’s also important to keep your target audience in mind. Understand their needs, preferences, and expectations to design the right experience for them. Collecting feedback from potential users can help you identify any usability issues and make necessary adjustments.
In conclusion, wireframes and mockups are essential tools in the web design process. They allow you to visualize your ideas, gather feedback, and make informed decisions about your design. By taking the time to create wireframes and mockups, you can ensure that your final website or webpage performs well, looks great, and meets the needs of your audience.
5 Gather Website Content
When designing a webpage, it is critical to gather the right content to create an engaging user experience. In this step, you need to identify and collect the necessary text, images, and files that will be used on your website.
The first step is to define your target audience and understand their preferred platforms and devices. This will help you in planning the structure and layout of your website. Additionally, it is important to consider the different technologies and coding limitations of various platforms and browsers such as Chrome, Edge, and Firefox.
Once you have identified your target audience and platforms, you can start collecting the content for your website. This includes writing or obtaining text, sourcing images and graphics, and any other media or files that you will need.
In order to maintain the visual design consistency across all pages of your website, it is recommended to create a style guide that outlines the preferred fonts, colors, and other design elements. This will help you build a cohesive and visually appealing website.
Another important aspect to consider is the responsiveness of your website. With the increasing use of mobile devices, it is crucial to design a website that can adapt to different screen sizes. This will ensure that your website looks and functions correctly on all devices.
In the 6th step of website development, you will learn how to optimize the loading speed of your website and make it more user-friendly. By reducing the file sizes and optimizing the code, you can improve the overall performance of your website.
Hosting is also an important consideration when designing a website. You need to find a reliable hosting platform that can support the traffic and features of your website. This will ensure that your website is always accessible to your customers.
Finally, in the 8th step, you will gather feedback from users and make any necessary adjustments to the design and functionality of your website. This will help you create a website that meets the needs and expectations of your target audience.
| Step | Action |
| 7 | Collect content and media |
| 8 | Define style guide and design elements |
| 9 | Ensure website responsiveness |
| 10 | Optimize website loading speed |
| 11 | Choose a reliable hosting platform |
| 12 | Collect and analyze user feedback |
By following these steps and gathering the right content, you can create a well-designed and engaging website that meets the needs of your target audience.
6 Choose the Right Tools and Technologies
When designing a webpage, it is crucial to have the right tools and technologies at your disposal. This ensures that you can design a visually appealing and functional website that meets the needs of your target audience.
1. Identify your purpose and gather requirements: Before you start designing, it is important to clearly identify the purpose of your website and gather the necessary requirements. This will help you understand what elements and features you need to include in your design.
2. Conduct comprehensive research: Take the time to research different tools and technologies that can help you with your web design process. There are many popular tools such as WordPress, BrowserStack, and various coding languages like JavaScript that can help you design and optimize your website.
3. Create wireframes and mockups: Before you start coding, it is recommended to create wireframes and mockups of your design. This will give you a visual representation of how your website will look and help you identify any potential design limitations.
4. Choose a tool for coding: Depending on your preferred coding language, you can choose a tool that best suits your needs. There are many text editors and integrated development environments (IDEs) available that can help you write your code efficiently.
5. Test for cross-browser compatibility: After you finish coding your website, it is important to test its performance and functionality on different browsers and devices. Tools like BrowserStack can help you check how your website performs on various platforms and ensure that it functions correctly across browsers.
6. Optimize for responsiveness: With the increasing use of mobile devices, it is crucial to design websites that are responsive and adapt to different screen sizes. This can be achieved by using CSS media queries and designing flexible layouts that adjust according to the user’s device.
7. Pay attention to navigation: Navigation is a crucial part of any website design. Ensure that your website has clear and intuitive navigation, allowing your customers to easily find what they are looking for.
By following these steps and choosing the right tools and technologies, you can design a website that not only looks great but also functions well for your target audience.
7 Start Coding Your Website
Once you have completed the planning and design stages of your website, it’s time to start coding. This is where you will use HTML, CSS, and JavaScript to bring your website to life.
Before you start coding, it’s important to choose the right tools and technologies. Many designers prefer using a code editor such as Sublime Text or Visual Studio Code, which provide features that make coding easier and more efficient.
One thing to keep in mind while coding is the purpose of your website. Are you looking for a visually appealing design with attention-grabbing features? Or are you focusing more on the performance and functionality? Understanding your website’s purpose will help you make the right coding decisions.
When coding your website, it’s crucial to pay attention to cross-browser compatibility. Your website should be correctly displayed and function properly on different web browsers such as Chrome, Firefox, and Edge. Tools like BrowserStack can help you test your website on multiple platforms and ensure it works well across various browsers.
Start coding by first creating the basic structure of your website using HTML. This includes defining the header, navigation, main content, and footer sections. Use semantic HTML tags to maintain the website’s structure and make it more accessible to users and search engines.
Next, write the CSS code to style your website. This is where you can bring your design to life by customizing the colors, fonts, layout, and other visual elements. Consider using CSS frameworks such as Bootstrap or Foundation to speed up the coding process and ensure consistency across different pages.
Lastly, add JavaScript functionality to your website. This can include interactive elements, form validation, image sliders, and more. JavaScript frameworks like React or Vue.js can be helpful if you’re looking to build more complex web applications.
Once you have coded your website, it’s important to test it thoroughly to check for any functional or design limitations. Ensure that all links, buttons, and interactive elements work correctly, and that the website is responsive and displays well on different screen sizes.
After testing, gather feedback from your team or potential customers to make any necessary improvements or adjustments. Launching a comprehensive website requires ongoing maintenance and updates to keep it functioning smoothly and meeting the needs of your target audience.
In conclusion, coding your website is a critical part of the web design process. Taking the time to plan, design, and code your website correctly will ensure its success in attracting and engaging users. Remember to choose the right tools, test thoroughly, and be open to feedback to create a functional and visually appealing website.
| Checklist: |
| 1. Start coding your website using HTML, CSS, and JavaScript |
| 2. Choose the right tools and technologies |
| 3. Understand the purpose of your website |
| 4. Pay attention to cross-browser compatibility |
| 5. Create the basic structure using semantic HTML |
| 6. Style your website with CSS |
| 7. Add JavaScript functionality |
| 8. Test your website for functionality and design |
| 9. Gather feedback and make improvements |
| 10. Launch and maintain your website |
8 Implement Responsiveness
Implementing responsiveness is a critical part of the website design process. It allows your website to adapt and function correctly on various devices, such as desktops, laptops, tablets, and smartphones. Without responsiveness, your website may appear broken or be difficult to navigate, limiting your audience’s experience.
There are several tools available to help you implement responsiveness in your design. For example, Webflow is a comprehensive tool that lets you visually design and build websites with responsive features. WordPress is another popular option, offering many responsive themes and plugins to choose from. Web designers can also use coding languages such as HTML, CSS, and JavaScript to code responsive elements manually.
Before starting the implementation process, it’s crucial to plan your website’s purpose and target audience. This will help you gather the right content, choose the correct tools, and design engaging mockups and wireframes. Take into consideration your customers’ needs and collect feedback from them to ensure that the final design meets their expectations.
Once you have a comprehensive plan, you can start coding your responsive website. Use semantic HTML to structure your content correctly and apply CSS media queries to adjust the layout and design for different devices. It’s also essential to test your website’s performance and functionality on various browsers and devices. Tools like BrowserStack can help you check how your website looks and works on different browsers and operating systems.
Implementing responsiveness may add some limitations to your design. For example, you may need to sacrifice certain visual elements or modify them for smaller screens. However, these limitations are necessary to maintain a responsive and user-friendly experience for all users.
To finish implementing responsiveness, launch your website and gather feedback from your audience. This feedback will help you identify any issues or areas for improvement that you may have missed. Make the necessary adjustments based on the feedback and continue to refine and improve your website’s responsiveness as needed.
9 Perform Cross-Browser Testing
When designing your website, it’s critical to test how it looks and functions on different web browsers. Each browser, such as Chrome, Firefox, and Edge, has its own set of technologies, limitations, and features. By performing cross-browser testing, you can ensure that your website is optimized for the various devices and browsers your customers may use to access it.
Start by looking at your wireframes and design specifications. Make sure that the structure and content of your website are semantically correct using HTML. Pick the right tools for the job, such as BrowserStack, which allows you to launch your website on various browsers and devices to identify any compatibility issues.
Conduct comprehensive testing to check the visual and functional aspects of your website. This includes testing how different browsers handle JavaScript, CSS, and the overall design of your website. Collect feedback from users to learn about any issues they may encounter or suggestions they have.
It’s also important to test your website’s responsiveness and how it adapts to different screen sizes and resolutions. This is especially critical for eCommerce websites, where a poor user experience can lead to lost sales. Use responsive design techniques and test your website on multiple devices to ensure it looks and functions correctly.
Performing cross-browser testing helps you identify and fix any issues before launching your website. It allows you to ensure a consistent and engaging experience for your target audience, regardless of the browser or device they use. By maintaining compatibility with popular browsers, you can reach a wider audience and provide a better user experience.
In conclusion, cross-browser testing is an essential part of website development. By conducting thorough testing and addressing any compatibility issues, you can create a visually appealing and functional website that meets the needs of your customers. Use the available tools and feedback to continuously improve and optimize your website’s performance across different browsers and devices.
10 Optimize Your Website for Performance
When designing a webpage, it is crucial to consider the performance of your website to ensure a smooth user experience. Optimizing your website can help improve loading times, increase functionality, and enhance user engagement. Here are 10 steps to help you optimize your website for performance:
1. Start with a Planning Phase: Before you begin building your website, take the time to plan and define your goals. Identify your target audience and gather the necessary information to create wireframes and a functional plan for your website.
2. Choose the Right Technologies: When choosing the technologies to use for your website, consider the preferred devices and browsers of your target audience. Pick technologies that are well-supported and compatible across various devices and browsers.
3. Gather Attention to Semantic HTML: Use semantic HTML elements to structure your website’s content correctly. This not only helps search engines understand your content but also improves accessibility and facilitates future updates.
4. Update Your Navigation Elements: Ensure that your navigation elements are easy to understand and use. Use clear labels and organize them in a logical order to enhance the user experience.
5. Check Cross-Browser Compatibility: Test your website across multiple browsers and devices to ensure it functions correctly. Tools like BrowserStack can help you identify and correct any compatibility issues.
6. Optimize Your Files: Minimize the size of your files by compressing images and combining CSS and JavaScript files. This will help reduce loading times and improve overall performance.
7. Host Your Files on the Edge: Use a content delivery network (CDN) to host your files on servers located closer to your users. This can significantly improve loading times, especially for users in different geographic locations.
8. Use Asynchronous JavaScript: Loading JavaScript files asynchronously allows the browser to continue rendering the webpage while the script is being downloaded. This can help improve loading times and prevent blocking the rendering of the page.
9. Test and Debug: Before launching your website, thoroughly test and debug it to ensure all functionality works as intended. Use various testing tools and engage with users to gather feedback and make necessary improvements.
10. Monitor and Update: Once your website is live, continue to monitor its performance and regularly update it. Stay up-to-date with the latest web development techniques and technologies to ensure your website remains optimized.
11 Conduct User Testing and Feedback
Implementing user testing and gathering feedback is a critical step in the website development process. By conducting user testing, you can learn how users interact with your website and identify areas that need improvement.
There are many tools and technologies available to help you conduct user testing. One popular option is BrowserStack, which lets you test your website on a comprehensive range of browsers and devices. This can help you identify any compatibility issues and ensure your website performs well across different platforms.
Before launching your website, it’s crucial to gather feedback from your target audience. This feedback can provide valuable insights into how users navigate and interact with your website. It can also help you identify any usability issues or limitations in the design.
When planning for user testing, it’s important to write a comprehensive test plan that outlines the objectives, tasks, and criteria for success. This will help guide the testing process and ensure you gather useful feedback.
There are various methods you can use to gather feedback from users. One approach is to create wireframes or mockups of your website and ask users to perform specific tasks. Another option is to ask users to provide feedback on specific elements or features of your website, such as the navigation or the content.
During the testing process, it’s important to take care of user preferences. Make sure to ask users about their preferred browsers, devices, and the technologies they are using. This will help you optimize your website to meet their needs and preferences.
Once you have gathered feedback, analyze the results and make any necessary updates to your website’s design or functionality. This iterative process will help you improve the user experience and ensure your website meets the needs of your target audience.
When conducting user testing, it’s also important to consider the limitations of the chosen tools or methodologies. For example, if you are using a website builder like WordPress or Webflow, you may have certain limitations in terms of design or customization options. Understanding these limitations will help you make informed decisions when designing and building your website.
In conclusion, conducting user testing and gathering feedback is a crucial step in the website development process. It helps you identify areas for improvement and ensures your website is engaging and functional for users. By following a comprehensive testing plan and using the right tools, you can gather valuable insights and optimize your website before launching it.
12 Launch Your Website
Once you have finished the design and development of your website, it’s time to launch it and make it available to real users. This step is crucial to showcase your hard work and make your website accessible to the target audience.
Here are some steps to follow to successfully launch your website:
| Step | Description |
| 1 | Check the website’s responsiveness across various devices and browsers. Ensure that it adapts well to different screen sizes and functions properly. |
| 2 | Optimize your website’s performance by using best practices. This includes reducing file sizes, minifying CSS and JavaScript files, and optimizing images. |
| 3 | Conduct comprehensive testing of your website to identify any issues or bugs. Pay attention to both the design and functionality to ensure a smooth user experience. |
| 4 | Gather and collect all necessary content for your website, such as images, text, and other media files. |
| 5 | Choose the right platform or tool to launch your website. There are many popular options available, such as WordPress, Wix, or Shopify for eCommerce websites. |
| 6 | Create a plan for post-launch maintenance and updates. This includes regular backups, security updates, and monitoring the website’s performance. |
| 7 | Design and implement a clear and engaging navigation structure. Make it easy for users to find the information they are looking for. |
| 8 | Write clean and semantic HTML code for each page of your website. Use proper tags and elements to structure the content and improve search engine optimization. |
| 9 | Wireframes and mockups can be helpful to visually guide the design and layout process of your website. Use them to identify the layout, features, and content placement. |
| 10 | Identify the purpose and target audience of your website. This will help you make design decisions that cater to the needs of your users. |
| 11 | Learn from other websites and take inspiration from their design and features. Take note of what works well and what could be improved. |
| 12 | Build and maintain an engaging and visually appealing website. Pay attention to details and create a user-friendly experience. |
By following these steps and paying attention to the design, functionality, and maintenance of your website, you can successfully launch and maintain a professional and well-designed website.
13 Maintain and Update Your Website
Once you have built and launched your website, your work is not done. It is important to maintain and update your website regularly to ensure it remains functional, user-friendly, and engaging for your target audience. In this section, we will discuss some steps you can take to maintain and update your website effectively.
1. Collect User Feedback: One of the best ways to understand how your website is performing is to collect feedback from your users. This can help you identify areas for improvement and make necessary updates.
2. Check for Cross-Browser Compatibility: Test your website on various browsers such as Chrome, Firefox, and Edge to ensure it functions correctly and displays properly on different devices and screen sizes.
3. Optimize for Search Engines: Regularly review and update your website’s content to include relevant keywords and improve its visibility on search engines. This can help drive more organic traffic to your website.
4. Update Content: Keep your website’s content fresh and up-to-date. This includes updating information, adding new pages or blog posts, and removing outdated content.
5. Maintain Website Structure: Regularly review your website’s structure and navigation to ensure it is intuitive and user-friendly. Consider organizing your content in a logical manner and implementing a clear menu structure.
6. Perform Functional Testing: Regularly test your website’s functionality, such as forms, links, and interactive elements, to ensure they are working correctly and providing a seamless user experience.
7. Stay Up-to-Date with Technologies: Keep up with the latest web development technologies and trends to ensure your website stays current. This may include learning new programming languages or using popular tools such as WordPress or Webflow.
8. Plan for Mobile Devices: With more users accessing the internet on mobile devices, it is crucial to design and optimize your website for mobile responsiveness. Test your website on different devices to ensure it looks and functions as intended.
9. Write Clean and Semantic HTML: Use proper HTML markup and semantic tags to create a well-structured website. This will improve accessibility, search engine optimization, and overall readability of your code.
10. Use JavaScript with Care: If you use JavaScript on your website, make sure to use it sparingly and optimize it for performance. JavaScript-heavy websites can slow down load times and negatively impact the user experience.
11. Perform Regular Backups: Regularly backup your website’s files and databases to avoid data loss. Choose a reliable hosting provider that offers backup services or use backup plugins to automate this process.
12. Seek Professional Help: If you are not comfortable maintaining and updating your website on your own, consider hiring a professional web designer or developer to assist you. They have the expertise and experience to handle the technical aspects and provide guidance.
13. Learn from Your Analytics: Utilize web analytics tools to track your website’s performance, such as page views, bounce rate, and user demographics. This data can help you identify areas of improvement and make data-driven updates to your website.
By following these steps, you can ensure that your website is always up-to-date, functional, and user-friendly. Maintaining and updating your website regularly shows your customers that you care about their experience and are committed to providing a high-quality online presence.
Critical Steps to Take Care Post Development
After the development of your website is complete, there are critical steps that you need to take care of to ensure its success. These steps will help you make your website more popular, visually appealing, and functional.
1. Choose a comprehensive testing tool like BrowserStack to check the compatibility of your website across different browsers and devices. This tool allows you to pick the right browsers and devices to test your website on, ensuring that it works well on all platforms.
2. Define the purpose and target audience of your website. This will help you create a design that is engaging and appealing to your customers. Pay attention to the structure and semantic of your HTML files, as this will play a crucial role in search engine optimization.
3. Conduct a thorough cross-browser testing to ensure that your website looks and performs well on all major browsers, such as Chrome, Firefox, and Edge.
4. Test the responsiveness of your website on different devices, including smartphones, tablets, and desktops. It is important to make sure that your website adapts well to different screen sizes, providing a seamless user experience.
5. Update the content of your website regularly. This will not only keep your audience engaged, but also help with search engine rankings. Write engaging and informative text that is relevant to your target audience.
6. Host your website on a reliable and preferred hosting platform. Choose a hosting provider that offers good uptime, security features, and technical support.
7. After the final design and development is complete, conduct a comprehensive testing of all the features and functionalities of your website. Pay special attention to ecommerce features if you are running an online store.
8. Show your website to a group of designers or peers and gather their feedback. This will help you identify any areas that need improvement and make necessary changes.
9. Learn popular web technologies and tools such as WordPress, which can help you easily update and manage your website without any coding knowledge.
10. Finish any remaining tasks, such as writing meta tags for SEO purposes, optimizing image sizes, and fixing any broken links.
11. Launch your website and promote it through various marketing channels to reach your target audience.
12. Monitor the performance of your website using analytics tools to track the number of visitors, bounce rates, and other important metrics.
13. Regularly update your website with new content, features, and improvements based on the feedback and needs of your customers.
By following these critical steps post-development, you can ensure that your website is well-designed, functional, and successful in reaching its target audience.
Semantic Elements
When it comes to designing a webpage, each element you implement should have a purpose and function. Semantic elements in HTML are tags that define the structure and meaning of content, making it easier for both developers and search engines to understand the information being presented.
There are many different semantic elements available in HTML, each with its own set of features and purposes. Let’s take a look at some of these elements:
- Header (h1, h2, h3, etc.): The header element is used to define the headings of a webpage. It helps organize and structure the content by showing the importance and hierarchy of each heading.
- Nav: The nav element is used to define the navigation section of a webpage. It is used to collect and display links that allow users to navigate through different parts of the website.
- Main: The main element is used to define the main content of a webpage. It represents the central part of the document and should contain the primary content of the page.
- Article: The article element is used to define a self-contained piece of content within a webpage. It could be a blog post, a news article, or any other type of content that can stand on its own.
- Section: The section element is used to define a section of a webpage. It helps group related content together and makes it easier to navigate and understand the structure of the page.
- Aside: The aside element is used to define content that is tangentially related to the main content of a webpage. It is often used for sidebars, pull quotes, or any other content that supports the main content.
- Footer: The footer element is used to define the footer section of a webpage. It typically contains information such as copyright notices, contact information, or other relevant details about the website.
By using semantic elements, you can optimize your website’s structure and help search engines better understand the content of your pages. Semantic HTML also helps with accessibility, as screen readers and other assistive technologies can use this information to provide a more meaningful experience for users with disabilities.
When planning your webpage, it’s crucial to gather feedback from your target audience and take steps to optimize your design. Wireframes and mockups can help visualize the layout and design of your website, while tools like WordPress make it easy to build functional and responsive websites without much coding experience.
To ensure cross-browser compatibility and responsive design, it’s important to test your website on different browsers and devices. Tools like BrowserStack can help you conduct such tests and make necessary updates before launching your website.
In conclusion, understanding and implementing semantic elements in your HTML code is a critical part of website design and development. By using the right semantic tags, you can structure your content in a way that is meaningful and accessible to both humans and search engines.


