Moodboards are a great way to visually express your feelings, emotions, and inspirations. Whether you’re feeling happy, sad, or somewhere in between, creating a moodboard can help capture the essence of your mood. And what better platform to showcase them than Tumblr? In this tutorial, we’ll show you how to make your very own moodboards on Tumblr.
First things first, gather your inspirations. Think about the mood you want to convey and collect images that resonate with that feeling. It could be anything from pictures of cozy sweaters and hot cocoa for a warm and fuzzy mood, to vibrant flowers and sunny landscapes for a bright and uplifting mood. The possibilities are endless!
Next, you’ll need a tool to put it all together. One of the most popular choices for creating moodboards is GIMP, a free and powerful image editing software. If you don’t already have it, you can easily find and download it from the official website.
Once you have GIMP installed, open it up and create a new canvas with your desired dimensions. There’s no right or wrong size for a moodboard, so feel free to experiment and see what works best for you. Remember, this is your personal expression, so let your creativity run wild!
Now comes the fun part – adding images to your moodboard. You can either drag and drop the images directly onto the canvas or use the file open feature in GIMP. Arrange the images, resize them if needed, and play around with the layout until you’re happy with the result.
If you want to add text or labels to your moodboard, GIMP has got you covered. Simply select the text tool and click on your canvas to start typing. Customize the font, size, and color to match the aesthetics of your moodboard.
Once you’re done, save your masterpiece. You can either save it as a GIMP project file if you want to make further edits later, or export it as a JPEG or PNG file to share it on Tumblr. Remember to give it a catchy title and maybe even a short description to give viewers a glimpse of what it’s all about.
Now that you know how to make a Tumblr moodboard, why not give it a try? Let your creativity flow and create moodboards that reflect who you are and how you feel. And if you’re ever in need of inspiration, there are plenty of tutorials and templates available online to get you started. Happy moodboarding!
Kara

Kara blew everyone away with her incredible aesthetics. She had a talent for finding the most beautiful pictures and putting them together into stunning moodboards. I labeled her the “Queen of Tumblr Moodboards,” and I wasn’t the only one. Just shaking, I followed her blog, eager to feel inspired by her creations.
She had a way of making each moodboard unique and personal. No two were ever the same. She kept templates on hand to help her keep her ideas organized, but her creativity knew no bounds. Kara’s moodboards were a glimpse into her soul, a visual representation of the beauty she saw in the world.
As someone who wanted to learn how to make moodboards like Kara, I turned to Google for help. I found tutorials and walkthroughs, but none of them felt quite right. They were either too complicated or didn’t capture the essence of what made Kara’s moodboards so special.
And then, by chance, I stumbled upon a tutorial she made herself. It had been a year since she had last posted, but there it was, a tutorial that promised to unlock the secrets of her stunning creations.
I followed her instructions diligently, learning how to use GIMP and Pandaisia to bring my own moodboards to life. It was a long process, and sometimes my frustration got the best of me, but I persevered. I wanted to create something that made my heart sing, just like Kara’s moodboards did for me.
And finally, after months of practice, I made my first moodboard. It wasn’t as perfect as Kara’s, but it felt good to have something that was truly my own. I posted it on Tumblr and sat back, wondering if anyone would ever notice.
To my surprise, people did notice. They liked and reblogged my moodboard, complimenting the colors and the composition. It was a small victory, but it meant the world to me. It made me realize that even if I never reached Kara’s level of expertise, I could still create something beautiful.
So, thank you, Kara. Thank you for inspiring me to try something new and for sharing your knowledge with the world. Your tutorials may have been gathering dust on the internet, but they brought light and creativity back into my life.
And to anyone wondering if they can make moodboards like Kara, I say go for it. It may take time and practice, but it is possible. Don’t be afraid to put your own spin on things and let your creativity flow. Who knows, maybe one day you’ll be the one labeled the “King” or “Queen” of moodboards. Just keep at it, and don’t forget to have fun along the way.
This is it

You’ve followed all the tutorials, opened up your inbox, labeled your sources, and requested a chance to follow everyone else’s moodboards. You’re shaking with excitement as you finally have the resources to make your own Tumblr moodboard together. Sometimes, the best way to express yourself is through the aesthetics of a moodboard. And this is your chance to do just that.
If you’re wondering how to make moodboards on Tumblr, here’s a walk-through tutorial for you. But before we dive in, let me share a personal story. There was this one year when I felt the cold light in my chest. It didn’t keep me down for long though, because I made myself a moodboard using GIMP. It felt good to put my thoughts into pictures and create something that reflected my inner self. And here’s the thing – moodboards have that effect on everyone. They make you feel alive and keep you going for awhile.
First things first, find some inspiration. Browse through Google or Tumblr for pictures that speak to you. It could be anything – from nature to fashion, from quotes to your favorite celebrities. Let your instincts guide you and collect these images in a folder. Got the pictures? Great. Now it’s time to dive into GIMP or any other image editing software you prefer.
Open up GIMP and start a new project. Set the dimensions and resolution according to your preference. Once your canvas is ready, it’s time to bring your moodboard to life. Add the images you collected earlier onto your canvas. Play around with the placement, size, and transparency to achieve the desired look. Don’t rush – take your time and let your creativity flow.
Feeling stuck? No worries, there are tons of tutorials online that can help you out. One of my favorites is the “Pandaisia” moodboard tutorial. It provides a step-by-step guide on how to create a beautiful moodboard that will leave you in awe. Give it a try and see the magic happen.
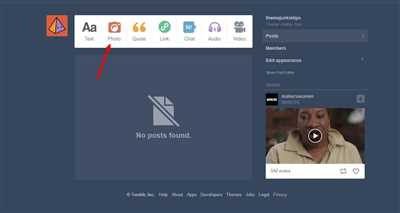
Once you’re done creating your moodboard, save it and upload it to your Tumblr blog. Give it a catchy title and add some tags to make it more discoverable. Don’t forget to credit the original source of the images if you’re using someone else’s work. It’s always good to spread the love and give credit where it’s due.
So there you have it. Creating moodboards on Tumblr is a wonderful way to express yourself and unleash your creativity. Remember, this is your chance to show the world what makes you tick. Follow your heart and let your moodboards speak louder than words. Good luck!
Sources
When it comes to creating moodboards on Tumblr, there are a few sources that can help inspire and guide you. Here are some options:
– Personal Tumblr blogs: Sometimes, seeing what others have created can spark ideas and inspiration for your own moodboard. Follow and explore different Tumblr users who create moodboards to find new aesthetics and concepts.
– Tutorials and walk-throughs: There are many tutorials and walk-throughs available online that can show you step-by-step how to create a moodboard. Websites like Pandaisia and Tutorials or even YouTube can be great resources for learning different techniques and styles.
– Templates: If you are new to making moodboards, using templates can be a good way to get started. You can find pre-made templates on websites like Google or Pinterest, or even create your own template using programs like GIMP.
– Pictures: The heart of any moodboard is the pictures you choose to include. You can use pictures from your own collection or find images online. Websites like Pinterest, Tumblr, or Unsplash are good sources for a wide range of images.
– Request inbox: If you are looking for specific images or themes for your moodboard, you can open up your request inbox and ask your followers or other Tumblr users for suggestions. This can help you gather a variety of pictures that fit your vision.
– Live your own aesthetic: Remember that moodboards are a personal expression. Don’t feel limited by what is labeled as “good” or “trendy.” Follow your own heart and create a moodboard that reflects who you are and what you love.
– Keep exploring: Moodboarding is a creative process that can take time to master. Try different techniques, experiment with various aesthetics, and keep exploring. The more you practice, the more you will develop your own unique style.
Remember, making moodboards is all about having fun and expressing yourself. Don’t be afraid to think outside the box and let your creativity run wild!

