Branding wood is a popular method of making a personalized mark on wooden items. Whether you want to add a custom design or simply mark your initials, branding wood can be a fun and easy way to leave your mark, quite literally, on a piece of wood. In this guide, we will take you through the steps of branding wood, from preparing the wood surface to testing your branded mark.
Step 1: Preparing the Wood
The first step in branding wood is to prepare the wood surface. Start by selecting a piece of wooden material that makes for a suitable workpiece. Softwoods such as balsa or hardwoods like oak or maple are often used for branding. Then, take scraps of the same type of wood and test different heating and marking methods on them.
Step 2: Heating the Branding Iron
There are several types of branding irons available, from handheld irons to electric irons. Depending on the type of iron you are using, follow the instructions provided to set up the iron for use. Most irons are heated by a flame, either directly or indirectly, through an electric heating element.
Step 3: Marking the Wood
Once the branding iron is heated to the right temperature, press the heated head onto the wooden surface. Apply a steady amount of pressure and hold it in place for a few seconds. The heat from the iron will burn the wood, leaving behind a permanent mark. Alternatively, you can use brass or other materials for a different effect.
Step 4: Testing and Adjusting
After branding the wood, it is important to test the mark to ensure it is successful. Dampen a cloth or sponge with water and gently wipe over the branded area. If the mark fades or disappears, you may need to adjust the heating time or pressure. Repeat the heating and marking process until you achieve the desired results.
Step 5: Finishing Touches
Once you are satisfied with the branding, let the wood cool down completely. Then, sand the wood surface to remove any rough edges or charred marks. Apply a suitable finish or sealant to protect the wood and enhance the appearance of the brand.
By following these steps, you can easily brand wood and create unique and personalized wooden items. Now, it’s time to gather your materials and start branding!
- Custom Branding Irons and the 5 Keys to Making a Successful Mark
- 3 Steps to Use a Flame Heated Branding Iron on Wood
- 1 Heating the Branding Iron
- 2 Preparing the Surface
- 3 Making Your Mark
- Easy Guide for using a Branding Iron 2023
- Test Branding Soft and Hard Wood
- Video:
- Branding your name and logo on all your wood working projects
Custom Branding Irons and the 5 Keys to Making a Successful Mark
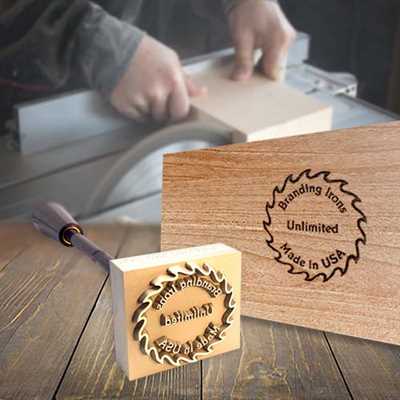
Branding irons are essential tools for marking wood with customized designs. Whether you want to brand wooden crafts, furniture, or any other wooden items, a custom branding iron can make the process quick, easy, and efficient. In this guide, we will explore the 5 keys to making a successful mark using custom branding irons.
| Key | Description |
|---|---|
| 1 | Choose the Right Material |
| 2 | Prepare the Wood Surface |
| 3 | Heat the Branding Irons Correctly |
| 4 | Make a Test Marking |
| 5 | Apply the Branding Iron Properly |
Let’s dive deeper into each key:
1. Choose the Right Material
The material of the branding irons plays a crucial role in achieving a successful mark. Brass irons are commonly used due to their high heat conductivity, which ensures even and consistent branding. Electric branding irons are also popular as they offer precise temperature control. Choose a material that suits your specific needs.
2. Prepare the Wood Surface
Before branding, it’s important to prepare the wood surface properly. Remove any dirt or dust from the wood, and ensure it is dry and free from dampness. If you’re working with soft wood like balsa, take extra care as it is highly absorbent and can lead to blurry marks.
3. Heat the Branding Irons Correctly
The heating process is a critical step in achieving a successful mark. Flame-heated branding irons require an open flame, such as a torch or gas stove, to heat them. Electric branding irons can be heated directly through an electrical outlet. Follow the manufacturer’s instructions and find the right heating time for your specific branding iron.
4. Make a Test Marking
Before branding your final workpiece, it is recommended to make a test marking on a scrap piece of wood. This allows you to check the alignment, depth, and clarity of the mark. Adjust the torque or pressure applied to the branding iron according to the desired outcome.
5. Apply the Branding Iron Properly
When applying the branding iron, stand directly in front of the workpiece and press the heated head firmly onto the wood surface. Hold it in place for a few seconds to ensure a clear and well-defined mark. Avoid moving the branding iron during the marking process to prevent smudging.
By following these 5 keys, you can achieve successful and consistent branding marks on your wooden items. Remember to always follow safety guidelines and consult a professional if needed. With practice and patience, you can master the art of branding wood effectively.
3 Steps to Use a Flame Heated Branding Iron on Wood
Step 1: Preparing the Wood
Before using a flame heated branding iron on wood, you need to prepare the surface. First, make sure the wood is clean and free of any dust or debris. Then, using sandpaper or a sanding block, smooth the surface of the wood to ensure an even and consistent result. If you want a specific design or mark on the wood, use a pencil or a marker to lightly draw the desired pattern.
Step 2: Heating the Branding Iron
To use a flame heated branding iron, you need to heat it properly. Turn on your handheld torch and adjust the fuel and oxygen flow to create a blue flame. Hold the branding iron directly in the flame and heat it for about 5 minutes or until it becomes red hot. You can test the temperature by gently touching the branding iron to a piece of scrap wood. If it leaves a mark, it is ready to use. Note that different types of woods and sizes of branding iron heads may require different heating times, so it’s important to test and adjust accordingly.
Step 3: Branding the Wood
Once the branding iron is heated, you can start branding the wood. Position the heated head of the branding iron directly on the surface of the wood where you want the mark to be. Apply firm and even pressure to ensure the mark is engraved into the wood. Hold the branding iron in place for a few seconds, then lift it straight up. Allow the wood to cool before touching it again.
Remember, safety is important when working with flame-heated branding irons. Make sure to work in a well-ventilated area, wear protective gloves, and keep a fire extinguisher or water source nearby.
By following these steps, you can successfully use a flame heated branding iron on wood to create custom marks and designs. Whether you are making personalized wooden items or branding your workpiece, this guide will help you achieve professional and unique results.
1 Heating the Branding Iron
Heating the branding iron is a crucial step in the process of wood branding. It ensures that the iron is hot enough to leave a permanent mark on the wood surface. There are several methods for heating the branding iron, and the one you choose will depend on the materials and tools you have at your disposal.
1. Flame-Heated Iron
If you are using a handheld branding iron, you can heat it using an open flame. This can be done with a torch or a gas stove. Simply hold the branding iron in the flame, making sure that the front of the iron where the design is engraved is directly in the flame. Heat the iron for about 1-5 minutes, depending on the size and material of the branding head.
2. Electric Iron
An electric branding iron is another popular option. These irons come with a heating element that is powered by electricity. To heat the iron, simply plug it in and wait for it to heat up to the specified temperature. This is usually indicated by an indicator light or a gauge on the iron.
3. Testing the Iron
No matter what type of branding iron you use, it is important to test its temperature before branding any items. This can be done by pressing the heated branding iron onto a scrap piece of wood. If the mark is too light, the iron needs more time to heat up. Alternatively, if the mark is too dark or the wood starts to burn, the iron is too hot. Adjust the heating time accordingly until you achieve the desired mark.
4. Heating Considerations
When heating a branding iron, it is important to use caution and follow safety guidelines. Avoid heating the iron near flammable materials, and always use heat-resistant gloves when handling the hot iron. Additionally, make sure that the working area is well-ventilated to avoid inhaling any harmful fumes.
By following these steps and guidelines, you can ensure that your branding iron is heated to the right temperature for successful wood branding. Remember to always take your time and share the knowledge you have learned with others to help them in making their own branded wooden items.
2 Preparing the Surface
Before you can start branding wood, it’s important to properly prepare the surface of your workpiece. This step is essential to ensure a successful branding process and ensure that your design comes out clear and precise.
The first thing you need to do is determine the type of wood you are working with. Different types of wood may require different preparation techniques. Soft woods like balsa can be easily branded, while harder woods may need more preparation.
If your wood is already in the desired shape and size, you can proceed to the next step. However, if your wood needs to be cut or shaped, make sure to do this before preparing the surface.
To prepare the surface, start by sanding it smooth. You can use sandpaper with different grit sizes to achieve the desired smoothness. It’s important to sand the surface evenly and remove any rough spots or imperfections.
If you are using a handheld branding iron, it’s a good idea to test it on a scrap piece of wood first. This will allow you to make any adjustments to the iron or the settings before branding the actual workpiece.
Alternatively, you can use an electric branding iron. These irons are heated using electricity and can provide a consistent and controlled temperature. They come with different heads that can be interchanged to create custom designs.
Before you start branding, make sure the surface of the wood is clean and free of any dust or debris. You can use a damp cloth to wipe it down and remove any particles.
When branding wood, it’s important to apply the iron directly and firmly onto the surface. The heat from the iron will transfer onto the wood, leaving a mark. You can hold the iron in place for a few seconds, depending on the type of wood and the size of the mark you want to make.
It’s recommended to work in a well-ventilated area when branding wood, as the process can produce smoke and fumes. You can also use a fan or a small vent to help move the air and prevent smoke buildup.
Remember to take breaks during the branding process to let the iron cool down. This will prevent overheating and ensure that the branding remains consistent. If the iron becomes too hot, it can burn the wood and leave undesirable marks.
After each branding, it’s important to clean the iron to remove any residue that may have accumulated. This can be done by wiping the iron with a damp cloth or using a brass bristle brush.
By preparing the surface properly and following the right steps, you can achieve successful wood branding and create beautifully branded wooden items.
3 Making Your Mark
When it comes to branding wood, there are several methods you can use to make your mark. Each method has its own advantages and is suited for specific materials and designs. Here are three popular ways to brand wood:
- Handheld Flame-Heated Irons: This is one of the most common methods used for branding wood. It makes use of a handheld iron that is heated by a flame. You can either buy a pre-made branded iron or create a custom one with brass keys or other materials. To use this method, first, prepare the workpiece by cleaning and sanding the surface. Then, heat the iron until it reaches the right temperature. Place the iron on the wooden surface and apply pressure for a few seconds. The heat will burn the design onto the wood.
- Electric Heating Irons: If you don’t want to deal with an open flame, you can use an electric heating iron instead. This method works similarly to the flame-heated irons, but the iron is heated using electricity. The steps are the same – heat the iron, press it onto the wooden surface, and hold it for a few seconds to transfer the design.
- Water-Heated Branding Irons: Another alternative is to use water-heated branding irons. These irons have a hollow head that can be filled with water. Once heated, the water turns to steam, which in turn heats the iron. The process is the same as with the other types of irons – heat the iron, press it onto the wood, and hold it for a few seconds.
Before you start branding your wooden items, it’s important to test the process on scraps of wood or balsa. This will help you determine the right setting, the duration of heating, and the amount of pressure needed to achieve a successful mark. Additionally, make sure to use a damp cloth to clean the branding iron between each use, as the heat can cause the wood to char and stick to the iron.
Branding wood is a precise and delicate process, but with the right tools and techniques, you can create beautiful branded designs on any wooden surface. Explore the range of branding irons available in different sizes and designs to find the one that best suits your needs. Remember to always work in a well-ventilated area and take necessary safety precautions when handling heated tools.
Easy Guide for using a Branding Iron 2023
Branding wood is a great way to create custom marks and designs on wooden surfaces. One of the easiest and most effective tools for this process is a branding iron. In this guide, we will learn how to use a handheld branding iron to brand wood items with your own unique design.
- Preparing the wood material is the first step in successful branding. Make sure the surface is clean, free from any dirt, dust, or scraps. If the wood is rough, sand it down to create a smooth surface for branding.
- Next, determine the right temperature setting for your branding iron. Electric branding irons usually have specific heat settings. Alternatively, flame-heated irons need to be heated until they reach the right temperature. Test by placing the iron on a scrap piece of wood and waiting for it to heat up.
- Once the branding iron is heated, carefully hold the handheld tool by its wooden or brass handle. Make sure the branding head is facing away from your body.
- Position the branding iron directly in front of the mark you want to make on the wood and press it firmly against the surface. Apply slight downward pressure and hold it in place for a few seconds to ensure the mark is clear and prominent.
- After each branding, take a moment to let the branding iron cool down before using it again. You can also dip the iron into a container of water to speed up the cooling process.
- Repeat the process for each mark you want to make on your wooden workpiece. Take your time to ensure each mark is consistent and aligned properly.
- When branding multiple items, it’s important to clean the branding head between each use. Wipe it with a damp cloth to remove any residue or build-up that could affect the next mark.
- Once you are done branding, carefully store the branding iron in a safe place. Keep it away from heat sources and ensure the branding heads are protected.
Using a branding iron is an easy and straightforward process. By following these steps, you can create beautiful custom marks and designs on wood surfaces. Whether you are making wooden crafts, engraved signs, or other wooden items, a branding iron is a versatile tool that makes the process quick and efficient.
Now that you have learned the process of using a branding iron, you can try it out on different types of wood. From soft balsa wood to hard wooden materials, a branding iron can create a unique mark that adds a personal touch to your creations. Have fun experimenting with different designs and sizes, and share your success stories with others!
Test Branding Soft and Hard Wood
When it comes to branding wood, it’s important to test the process on both soft and hard wood materials. This will help you determine the best settings and techniques to use for your specific needs.
There are a few key steps to follow when testing the branding process:
- Preparing the wood: Make sure the surface of the wooden workpiece is clean and smooth. If needed, sand it down to remove any roughness.
- Heating the branding iron: If you’re using an electric branding iron, plug it in and let it heat up. If you’re using a flame-heated branding iron, then light the flame and heat the head until it’s very hot.
- Testing the branding iron: Before using the branding iron on your actual wood, do a test on scrap pieces of wood. This will allow you to adjust the heat and pressure to get the desired results.
- Branding the wood: Once you’re confident with the test results, you can proceed to brand your actual wood items. Hold the heated branding iron firmly and press it directly onto the wood surface for a few seconds. Keep in mind that you might need to adjust the pressure and timing for different types of wood.
- Water bath: After each branding, dip the hot branding iron into a damp cloth or water bath to cool it down. This will prevent any unwanted marks or scorching on the next branded area.
It’s important to note that branding soft wood, such as balsa, will require a lower temperature and shorter heating times compared to hard wood. Soft wood is more prone to scorching, so be careful not to overheat the branding iron.
Branding irons come in a range of sizes and designs, allowing you to create a custom engraved mark on your wooden items. The size and design you choose will depend on your personal preference and the size of the workpiece you’re branding.
By testing the process on scraps and taking the time to learn the characteristics of different wood types, you can ensure a successful branding result every time.