

An ePortfolio is an online platform where you can showcase your work, experiences, and skills. It is a digital collection of your best pieces, listed in one place for others to see. Whether you are a student looking to showcase your school projects or a professional seeking to display your work to potential employers, an ePortfolio is the perfect tool to present yourself in a meaningful and organized way.
So, where does one begin when creating an ePortfolio? The first step is to decide what information you would like to include. This could be your resume, examples of your work, images, a short bio about yourself, or anything else that you think will help you present a complete picture of who you are and what you have accomplished.
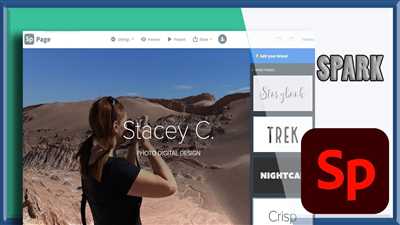
Next, you need to choose a platform to create your ePortfolio. There are several tools available that provide drag-and-drop editing, making it quick and easy for you to design your ePortfolio just the way you want it. For example, Quercus is a popular tool that allows you to create sections and easily navigate between them. Select a tool that meets your needs and has a user-friendly interface.
Once you have selected a platform, you can start creating your ePortfolio by adding the necessary sections. These sections can vary depending on your purpose and audience, but some common ones include “About Me,” “Education,” “Work Experience,” “Projects,” and “Skills.” Think about what type of information you want to present and organize your sections accordingly.
Now comes the time to populate your ePortfolio with content. You can start by writing a short bio about yourself and providing an overview of your goals and aspirations. Then, you can list the schools you have attended, the degrees you have earned, and any relevant coursework or projects you have completed. This helps provide context for your learning experiences and allows others to get a sense of your academic background.
The next step is to showcase your work. This can include any projects, papers, or other materials that you have completed. For each item, provide a brief description and explain why you selected it to include in your ePortfolio. This helps demonstrate your ability to reflect on your work and choose the best pieces to present to others.
Additionally, you can use images and other visual elements to enhance your ePortfolio and provide a more dynamic representation of your work. For example, if you are an artist, you can include pictures of your artwork. If you are a writer, you can showcase book covers or excerpts from your writing. These visual elements add depth to your ePortfolio and make it more engaging for the viewer.
After you have created all the sections and added the necessary content, it’s time to go back and review your ePortfolio. Make sure everything is coherent, well-organized, and visually appealing. Ask yourself if your ePortfolio effectively communicates who you are and what you have to offer. Put yourself in the shoes of your audience and consider what impression they will get when they view your ePortfolio.
Finally, when you feel that your ePortfolio is complete and ready to be shared with the world, make it public. You can provide the link to your ePortfolio on your resume, LinkedIn profile, or any other platform where it is relevant. Share it with potential employers, colleagues, or anyone else who may be interested in learning more about you and your work.
Remember, an ePortfolio is a living document that can be updated and revised as you progress in your career or academic life. It is an effective tool to showcase your talents, reflect on your achievements, and present yourself in a unique and compelling way. So, go ahead and create your own ePortfolio – the possibilities are endless!
- How to Create an Impressive ePortfolio
- Step 1: Select a Platform
- Step 2: Choose Your Items
- Step 3: Design Your Portfolio
- Step 4: Reflect on Your Work
- Step 5: Present Your ePortfolio
- How To Make An ePortfolio
- 1 Find a platform
- 2 Decide What Type of ePortfolio is Necessary
- 3 Decide What Goes in your ePortfolio
- How do I create an ePortfolio in Quercus
- Step 2: Collect, Select, Reflect
- Video:
- PAANO GUMAWA NG E-PORTFOLIO GAMIT ANG GOOGLE SITES? #googlesites #eportfolio #onlineportfolio #fabby
How to Create an Impressive ePortfolio
When it comes to creating an impressive ePortfolio, there are several steps you can take to ensure that your work stands out from the crowd. In this article, we will go through the process of creating an ePortfolio, from selecting a platform to showcasing your materials and experiences.
Step 1: Select a Platform
The first step in creating an ePortfolio is to select a platform that suits your needs. There are many tools and platforms available, such as Quercus, that provide access to editing and customization options. Take the time to explore different platforms and choose the one that best fits your goals.
Step 2: Choose Your Items
Once you have selected a platform, it’s time to decide which items you would like to showcase in your ePortfolio. This can include documents, images, and even short writing samples. Select the materials that best reflect your skills and experiences.
Step 3: Design Your Portfolio
After selecting your items, it’s important to design your ePortfolio in a way that is visually appealing and easy to navigate. Use tools provided by your chosen platform to create sections and display your work in a way that goes beyond simple text. Showcase your evidence and tell a story with your portfolio.
Step 4: Reflect on Your Work
In addition to showcasing your work, it’s important to reflect on what you have created. Use sections or pages within your ePortfolio to provide context and explain the goals and experiences behind your work. Show others the thought process and decision-making that went into each project.
Step 5: Present Your ePortfolio
Once your ePortfolio is complete, it’s time to present it to others. Depending on your goals, you may choose to keep your ePortfolio private or make it public. Either way, make sure to provide easy access to your portfolio so that others can view your work.
In conclusion, creating an impressive ePortfolio is a multi-step process. It involves selecting a platform, choosing the right items to showcase, designing your portfolio, reflecting on your work, and finally presenting it to others. By following these steps and using the tools available to you, you can create a professional and impressive ePortfolio that showcases your skills and experiences.
How To Make An ePortfolio
An ePortfolio is a digital collection of your work, experiences, and learning goals. It allows you to showcase your achievements and create a personalized website that can be accessed by others. Here is a step-by-step guide on how to make an impressive ePortfolio.
Step 1: Set Your Goals
Before diving into creating your ePortfolio, take some time to reflect on your purpose and what you hope to achieve with it. Are you creating it for school, work, or personal development? What type of audience will it target? Answering these questions will help you decide what items to include and how to design your ePortfolio.
Step 2: Collect Materials
Gather all the materials you want to include in your ePortfolio. This can be documents, images, videos, or any other evidence of your work and experiences. Make sure to organize them and give each item a name for easy navigation.
Step 3: Choose a Platform
There are several tools and platforms available for creating ePortfolios, such as Quercus, WordPress, or Google Sites. Select a platform that suits your needs and is easy to use. Look for features such as drag-and-drop editing, customizable templates, and the ability to display different types of content.
Step 4: Design Your ePortfolio
When designing your ePortfolio, keep in mind the purpose and audience. Choose a layout and color scheme that reflects your personality and the context of your work. Add sections and organize your materials in a logical way to make it easy for viewers to navigate.
Step 5: Present Your Work
Showcase your work in the ePortfolio by providing short descriptions or reflections for each item. Explain the context and significance of the work, and highlight any impressive achievements. Use a combination of text, images, and multimedia to make your ePortfolio visually appealing.
Step 6: Make it Public
Decide whether you want your ePortfolio to be public or private. If you are creating it for school or work, there may be guidelines or restrictions on privacy. If you choose to make it public, consider making it shareable on social media or including a link on your resume.
Step 7: Reflect and Update
An ePortfolio is a dynamic tool that should be regularly updated with new experiences and achievements. Take the time to reflect on your work and update your ePortfolio accordingly. This will keep it relevant and show growth over time.
By following these steps, you can create an impressive ePortfolio that showcases your skills, experiences, and learning goals. Take the time to craft a compelling story and provide evidence of your achievements to make a lasting impression on your audience.
1 Find a platform
Finding a platform for creating an e-portfolio is the first step in this process. There are several pieces to consider when choosing a platform that best suits your needs. You want to find a platform that is user-friendly and provides the necessary tools to create and display your personal portfolio.
Some platforms offer drag-and-drop tools, which make it easy to organize and showcase your work. Others provide a more text-based approach, allowing you to provide detailed information about each item in your portfolio. It’s important to consider the type of audience you are targeting and what type of materials you will be showcasing.
Some platforms also allow you to choose from different design templates or customize the look of your portfolio to make it more reflective of your personal style. You may also want to consider whether the platform allows for public access, so that others can view your portfolio. This is especially important if you are creating an e-portfolio for a school or work submission.
Once you have selected a platform, take some time to familiarize yourself with the tools and options available. This will make it easier to navigate and edit your portfolio as you go. Consider what sections or pages you would like to include, such as a short biography, your goals and learning experiences, and examples of your work.
When you start editing your e-portfolio, think about the purpose behind each item you include. What story does it tell? How does it provide evidence of your skills and experiences? Make sure to include a variety of types of materials, such as images, text, and videos, to showcase the full range of your abilities.
Remember, the design of your e-portfolio should be impressive, but also easy to navigate. Make it as quick and easy as possible for others to access the information they need. Consider creating a table or other organizational tool to help structure your portfolio and make it more user-friendly.
Overall, finding the right platform for your e-portfolio is an important first step. Take the time to research and select the best option for your needs. Once you have created your e-portfolio, feel free to share it with others to get feedback and showcase your work.
2 Decide What Type of ePortfolio is Necessary
After you have chosen a name for your eportfolio and selected a platform to create it on, the next step is to decide what type of eportfolio is necessary for your needs. There are several types to choose from, each with its own purpose and audience.
One type of eportfolio is a personal eportfolio. This type is often used by individuals to showcase their work and experiences. It is a place where you can display your impressive pieces of work, such as documents, images, and videos. A personal eportfolio can be a great tool for self-reflection and learning, as it allows you to see your progress and growth over time.
Another type of eportfolio is a school or learning eportfolio. This type is often used by students and educators to provide evidence of their learning and accomplishments. It can include sections like a resume, an about me, and a list of courses or projects completed. A school or learning eportfolio is a good way to show what you have learned and how you have applied that knowledge.
Finally, there is a professional eportfolio. This type is often used by professionals to showcase their work and skills. It is a public-facing eportfolio that can be listed on a personal website or a professional platform. A professional eportfolio is a great way to present your work to potential employers or clients.
Once you have decided on the type of eportfolio that is necessary for your context, you can then select the tools and platform that will help you create it. Many eportfolio platforms offer drag-and-drop editing and design tools, making it easy to customize your eportfolio to your needs. Some platforms also provide templates and themes to help you quickly create a professional-looking eportfolio.
In short, deciding what type of eportfolio is necessary for your needs is a key step in creating an eportfolio. Consider your goals and audience, and select the type of eportfolio that will best showcase your work and experiences. Then, choose the tools and platform that will help you collect and display the necessary information. With these steps in mind, you can create an impressive eportfolio that will help you stand out and show what you are capable of.
3 Decide What Goes in your ePortfolio
When creating an ePortfolio, it is important to decide what content you will include. This step will help you choose what evidence or materials you would like to showcase to others. Consider your goals and the purpose of your ePortfolio to help guide your selection process.
First, think about the types of items you would like to include in your ePortfolio. For example, you may want to include pieces of your written work, such as essays or research papers, to showcase your writing skills. You can also include documents or examples of projects you have completed for school or work, to demonstrate your abilities in those areas.
Next, consider the format of your ePortfolio. Some ePortfolio platforms, such as Quercus, provide templates or sections where you can easily drag-and-drop your materials. Others may require more time and HTML editing skills to create a custom website. Think about how much time you are willing to invest and how comfortable you are with website design when selecting a platform.
Once you have determined what goes into your ePortfolio, think about how to organize the content. You may choose to create sections based on different areas of your life or experiences, such as school, work, or personal projects. This will help viewers navigate your ePortfolio and find the information they need in context.
It’s also important to consider the viewer’s perspective. Think about the purpose of your ePortfolio and who will be accessing it. For example, if you are creating an ePortfolio for a job application, you may want to focus on highlighting skills and experiences relevant to that industry or position. On the other hand, if your ePortfolio is for personal reflection or learning, you may choose to include a wider range of materials that showcase your growth and learning over time.
In short, deciding what goes into your ePortfolio is a crucial step in the creation process. Take the time to collect and select the necessary evidence and materials that best represent you and your goals. Consider the platform you are using and how it allows you to showcase and display your work. Think about the purpose and audience of your ePortfolio, and design it in a way that helps them navigate and understand your story.
How do I create an ePortfolio in Quercus
Creating an ePortfolio in Quercus is a great way to showcase your work and experiences in a digital format. It’s like your own personal website where you can collect and display pieces of evidence, such as documents, images, and text, that reflect your learning and achievements.
To create an ePortfolio in Quercus, follow these steps:
- Log in to Quercus, your school’s learning management system.
- Select the “ePortfolios” tab to access the ePortfolio tools.
- Choose a name for your ePortfolio that represents its purpose and audience. For example, if you’re creating an ePortfolio to showcase your writing skills, you could name it “Writing Portfolio – Examples for Others.”
- Start by adding sections to your ePortfolio to organize your work. You can create several sections based on the different types of items you want to showcase.
- After creating the sections, you can begin adding items to each section. These can be documents, images, or written text that you have created or collected.
- As you add items, be sure to provide a short description or context to help the viewer understand what they are looking at. You can also add tags to make it easier to navigate and find specific items.
- While editing your ePortfolio, you can choose a design template that best fits your goals and needs. Quercus provides several options to choose from, so you can select the one that you feel represents your work the best.
- Once you have added all the necessary items and sections, take a quick look at the ePortfolio to see how it is presented. Make any necessary changes to ensure a good design and easy navigation for the viewer.
- When you are satisfied with your ePortfolio, make sure it is set to public so that others can access and view it. You can also choose to keep it private if you only want certain individuals to have access.
- Finally, share your ePortfolio with others! You can provide them with the link to your ePortfolio or invite them to view it directly through Quercus.
Creating an ePortfolio in Quercus is a great way to showcase your work, reflect on your learning, and provide evidence of your skills and experiences. Take the time to make it personal and meaningful, and you’ll have a powerful tool to showcase your achievements.
Step 2: Collect, Select, Reflect
Once you have created a name for your eportfolio and decided on its purpose and audience, it’s time to gather the necessary materials and tools to make your eportfolio a reality. In this step, you will collect and select the pieces that will showcase your learning, achievements, and goals.
Start by finding the appropriate items that you want to include in your eportfolio. These can be images, documents, or text that provide evidence of your accomplishments and reflect your learning journey. You may also choose to include short descriptions or stories to provide context to your audience.
There are several ways you can collect these items. You can go back to your school’s learning management system, such as Quercus, and find the materials you’ve created or uploaded there. You can also use drag-and-drop tools to save items from your computer or the internet.
After you have collected your materials, it’s time to select which ones to include in your eportfolio. Take the time to review each item and decide if it aligns with your goals and audience. Choose items that are not only impressive but also represent the type of work you want to showcase.
Once you have decided on the items, you can start organizing them in your eportfolio platform. Most eportfolio tools provide sections or templates where you can present your materials. You can create different sections or pages for different types of items or themes.
Reflect on the purpose of each item and where it fits best in your eportfolio. Consider how these items collectively tell a story about your learning journey. You may also consider organizing them in a chronological order or based on specific learning outcomes.
Remember that your eportfolio is a personal and unique representation of your work and accomplishments. Take the time to navigate through your eportfolio as if you were a visitor. Make sure it is easy to navigate, visually appealing, and showcases your best work.
When you are satisfied with your selections and the overall design of your eportfolio, you can proceed to the next step – presenting your eportfolio to the public!


