If you need to make labels, whether it’s for your personal use or for your business needs, this guide will provide you with all the necessary steps to create and print labels using a pre-installed template. With this method, you’ll be able to customize your labels in different ways, such as adding an icon, changing the font style, and more.
Step 1: Open Microsoft Word and click on the “File” tab at the top left corner of the screen. From the drop-down menu, select “New” to open a new document.
Step 2: In the search bar at the top of the page, type in “labels” and press Enter. A list of label templates will appear. Scroll through the options and select a template that suits your needs.
Step 3: After selecting a template, a new window will open with the template loaded. This window shows a preview of the label template and gives you options to customize it further.
Step 4: On the right-hand side of the window, you’ll find options to customize your labels. You can change the font style, make the text bold, add an icon, and more. Play around with these options until you’re satisfied with the look of your labels.
Step 5: Once you’ve customized your labels, click on the “Save” button in the bottom right corner of the window. Choose a location on your computer to save the label file.
Step 6: To print your labels, click on the “File” tab at the top left corner of the screen again. From the drop-down menu, select “Print” to open the printing options.
Step 7: In the printing options window, select the printer you want to use and choose the number of copies you want to print. You can also select other printing preferences, such as the paper size and orientation.
Step 8: Once you’re satisfied with the printing options, click on the “Print” button to start printing your labels. You can also click on the “Print Preview” button to see a preview of how your labels will appear on the printed page.
In conclusion, making labels in Microsoft Word is a simple process that can be customized to your liking. By following the steps outlined above, you’ll be able to create and print labels with ease. Whether you’re mailing a product or creating a list, this method will help you find the best label options for your needs.
How To Make Labels In Microsoft Word
If you need to create labels for an event or to organize items, Microsoft Word provides a convenient and easy way to do so. By using the pre-installed label templates and customization options, you can quickly and efficiently create labels that suit your needs.
Step 1: Open Microsoft Word
To start making labels, open Microsoft Word on your computer. You’ll be greeted with a blank document window.
Step 2: Select a Label Template
In the Word menu, navigate to the “Mailings” tab. Click on the “Labels” button located in the Create group. A pop-up window will appear.
Step 3: Choose a Label Style and Size
In the Label Options section of the pop-up window, you can select the label style and size that you want to use. This will determine how your labels will appear and how they will fit on a page. Click on the “Options” button to see more label styles and sizes.
Step 4: Create and Customize Your Labels
In the Label Options window, you can customize the content and appearance of your labels. You can choose to add different elements such as text, images, or shapes. You can also format the text to be bold, italic, or underlined, and choose the font style and color. Customize your labels according to your preferences.
Step 5: Save and Print Your Labels
Once you have created and customized your labels, save your file. Click on the “Save” icon or go to File > Save. To print your labels, click on the “Print” button in the pop-up window. Make sure you have loaded your label sheets into your printer before printing.
Conclusion
Creating labels in Microsoft Word is a simple and efficient method that allows you to easily make customized labels for various purposes. The pre-installed label templates and customization options provide great flexibility in creating professional-looking labels. Whether you need to organize your mailing list or label your products, Microsoft Word has the tools to help you achieve your goal.
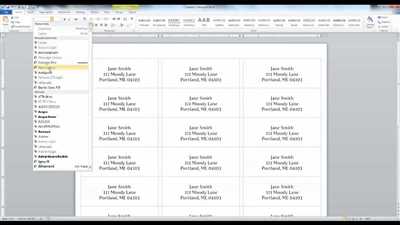
| This is a screenshot of the pop-up window where you can select label options: |  |
Tips:
- If you don’t see the label style or size you want in the pre-installed options, you can find more templates online by clicking on the “More templates” button.
- To center your labels on the page, go to the Page Layout tab and click on the “Center” option in the Page Setup group.
- When customizing your labels, make sure to use a font color that contrasts well with the label background for better readability.
Method 2: Create a Page of Different Labels
If you need to create a page of different labels, you can do so using Microsoft Word’s label template feature. This method allows you to easily customize and print multiple labels on a single page. Here’s how:
- Open Microsoft Word and click on the “Mailings” tab at the top of the screen.
- In the “Create” group, click on the “Labels” button. A new window will appear.
- In the Labels window, click on the “Options” button. A new window will appear with various label options.
- From the Label vendors dropdown list, select your label vendor. If your label vendor is not listed, you can select “Other/Custom” and enter the label dimensions manually.
- In the Label Information section, select the product number or name that matches the labels you’ll be using.
- Click on the “OK” button to close the Label Options window.
- In the Labels window, you’ll see a preview of the label template. You can customize the label text by clicking on the label field and typing your own text. You can also format the text using the formatting options at the top of the screen.
- Click on the “New Document” button. This will create a new Word document with a page filled with your labels.
- Now you can customize each individual label by changing the text, font, style, etc. You can also add images, logos, or other elements to make your labels more personalized.
- Once you’re done customizing your labels, you can save the document by clicking on the “Save” icon or using the “File” menu.
- To print your labels, click on the “Print” icon or go to the “File” menu and select “Print”. Make sure your printer is connected and ready.
- Follow the on-screen steps to set up your printing options, such as the number of copies, paper size, etc.
- When everything is set, click on the “Print” button to start printing your labels.
This method is a great option if you need to print many different labels at once. It’s quick, easy, and allows for customization. Now that you know how to create a page of different labels in Microsoft Word, you can easily create professional-looking labels for any purpose.
Conclusion
In conclusion, creating labels in Microsoft Word is a quick and easy process. By following the steps outlined in this article, you’ll be able to customize and print your own labels for any product or mailing list. Whether you choose to use a pre-installed template or create your own, Word offers many options for different label styles and formats.
The first step is to select the “Mailings” tab at the top of the screen in Microsoft Word. From there, click on the “Labels” icon located on the left side of the window. This will open a new window where you can select the label template you want to use.
You can customize the label template by selecting options such as label size, font style, and label content. Once you have chosen the template and customized it to your liking, click the “OK” button to save the changes and close the window.
With the label template created, you can now load the file with the labels onto your printer. In Word, go to the “File” tab at the top of the screen and select the “Print” option. A print preview will appear showing how your labels will look when printed. If everything looks good, click the “Print” button to start the printing process.
These steps demonstrate the basic method of creating labels in Microsoft Word. However, there are many more options and tips available to make your labels stand out. For example, you can center the labels on the page, add a bold or italic style to the text, or even use different label styles for different products or brands.
In conclusion, creating labels in Microsoft Word is a great option for anyone looking to make their own printable labels. With its user-friendly interface and customizable options, Word makes it easy to create professional-looking labels for any purpose.
Save your Mailing labels
If you have created a list of mailing labels in Microsoft Word, you have the option to save them for future use. This can be a convenient method if you frequently send mailings and want to save time by reusing labels that you have previously created. In this article, we will show you how to save your mailing labels so that you can easily access them again in the future.
- First, open the document in Microsoft Word that contains the mailing labels that you want to save.
- Next, click on the “File” tab in the top left corner of the screen.
- A dropdown menu will appear. From this menu, select the “Options” button at the bottom.
- A new window will open, titled “Word Options”.
- In this window, click on the “Advanced” option on the left side of the screen.
- Scroll down until you find the “General” category.
- In this category, you will see a section titled “Save”.
- At the bottom of this section, there is a box labeled “Label Options”. Click on this box.
- Another window will appear that shows the different label options available.
- Scroll through the list to find the label style that you want to save.
- Select the label by clicking on it.
- Click on the “OK” button to close this window and return to the “Word Options” window.
- Click on the “OK” button again to close the “Word Options” window.
- Now, when you click on the “File” tab and select the “New” option, you will see your saved label template listed under the “Labels” category.
- To create a new page of labels using this template, simply click on the template and then click on the “Create” button.
- A new document will open with a page of labels that are formatted according to the template you selected.
- You can now customize the labels with your own text and design.
- To print the labels, click on the “File” tab and select the “Print” option.
- Follow the on-screen instructions to print the labels using your printer.
By following these steps, you can easily save your mailing labels and have them readily available for future use. This can be a great time-saving option if you frequently send mailings or if you use a specific brand or style of labels.
Option B: Load A Pre-Installed Label Template
If you don’t want to create a label from scratch, Microsoft Word offers a great option for you. You can load a pre-installed label template that is ready for printing. This method is perfect if you are in a hurry or if you want to use a design that the template already provides.
Here are the steps to load a pre-installed label template:
- Open Microsoft Word and click on the “File” tab at the top left corner of the screen.
- A window will appear with many options. Click on “New” to open a new document.
- In the search bar at the top of the screen, type “label” and press enter. This will bring up a list of different label templates.
- Select the template that you want to use for your product. There are many options available, so you can choose the one that fits your brand and style the best.
- Once you’ve selected a template, a new page will appear with the label template. You can now customize the template with your product information.
- To customize the template, click on each label to edit the text. You can change font styles, add bold or italic text, and more.
- When you’re done customizing the template, click on the “File” tab again and select “Save” to save your label template as a Word document.
- Now you can print your labels by clicking on the “File” tab and selecting the “Print” option. Follow the on-screen instructions to complete the printing process.
That’s it! By following these steps, you’ll be able to create professional-looking labels using a pre-installed template in Microsoft Word. You can customize the template to fit your product and brand, and then easily print the labels for mailing or any other purpose.
Here are some tips for using this method:
- Experiment with different template options to find the one that suits your needs the best.
- Make sure to save your label template as a Word document so that you can easily edit and reuse it in the future.
- Print a test page before printing a large batch of labels to ensure that everything looks correct.
In conclusion, loading a pre-installed label template in Microsoft Word is a quick and easy way to create labels. It provides you with many options and allows you to customize the template to fit your brand and style. Give it a try and see how it can help you make professional-looking labels in no time!
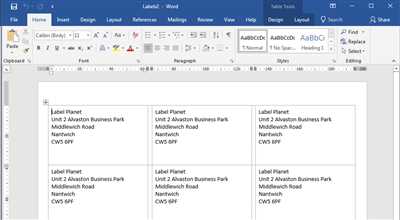
Screenshot:
[Here insert a screenshot of the Microsoft Word screen with the pre-installed label template loaded and customized]