

If you’re looking to create a flowchart using Microsoft Word, you’re in the right place. Word is a versatile program that allows you to create professional-looking documents, and it also has some great features for making flowcharts. In this step-by-step guide, we’ll show you how to use Word to easily create flowcharts for any process or project.
Before we get started, make sure you have Microsoft Word installed on your computer. If you don’t have it, you can easily download it from the official Microsoft website. Once you have Word open, you’re ready to start making your flowchart.
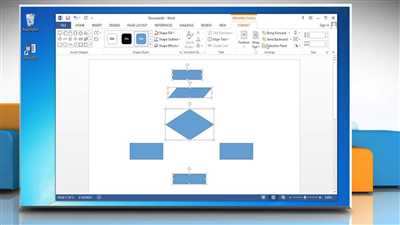
The first step in making a flowchart in Word is to open a new document. Simply click on the “File” tab at the top-left corner of the screen, then choose “New” from the options that appear. In the search bar, type “flowchart” and hit enter. Word will show you a variety of different flowchart templates to choose from.
Next, select the template that best fits the content and style you’re going for. You can also choose to start from a blank document and build your flowchart from scratch. Once you’ve made your selection, click on the template or the “Create” button, and Word will open a new document with the chosen flowchart template.
Now that you have your template, it’s time to start editing it to fit your needs. You can easily add or alter shapes and boxes by clicking on them and typing in the text you want to show. Word also allows you to connect shapes and boxes by clicking on the first shape, then clicking on the second shape you want to connect it to. The process is simple and intuitive, making it easy to create cross-functional flowcharts.
Word also gives you the option to change the formatting and look of your flowchart. Simply click on a shape or box to select it, then go to the “Format” tab at the top of the screen. From here, you can change the colors, fonts, and more to make your flowchart stand out. You can also add a header or footer to your document, which can be useful for adding additional details or instructions.
Once you’ve finished editing your flowchart and are happy with the result, it’s time to save and share your work. To save your flowchart, simply click on the “File” tab again, then choose “Save As” from the options that appear. Give your flowchart a title, choose where you want to save it, and click “Save”. Your flowchart is now saved as a Word document, and you can easily share it with others or print it out for reference.
That’s it! You now know how to make a flowchart in Microsoft Word. With the step-by-step instructions provided here, you can easily create professional-looking flowcharts for any process or project. Whether you’re a student, professional, or just looking to organize your work, flowcharts can be a valuable tool. Word makes it easy to create, edit, and save flowcharts, so start making your own today!
- How to make a swimlane diagram in Microsoft Word
- Build a Flowchart Template for Microsoft Word – Step-by-Step Instructions
- Step 1: Open Microsoft Word
- Step 2 Look for a Flowchart Template Option 1
- Step 3: Type in the Keyword on the Search Text Box (Option 2)
- Step 4: Choose a Flowchart Template to Edit
- Step 5 MS Word File Format
- Step 6: Open the Zip File in Word
- Step 7 Header or Flowchart Title
- Step 8 Add the Shapes and Arrows
- Step 9 Details
- Step 10: Save the Flowchart Template
- How to Make a Flowchart on Microsoft Word
- Start Making Flowcharts in Boardmix…
- Sources
How to make a swimlane diagram in Microsoft Word
Microsoft Word is a versatile tool that can be used for creating various types of diagrams, including swimlane diagrams. Swimlane diagrams are a type of flowchart that organizes information into lanes or sections, allowing you to visually represent processes that involve multiple participants or departments.
Here are step-by-step instructions on how to create a swimlane diagram in Microsoft Word:
- Open Microsoft Word and start a new document.
- On the top menu, click on the “Insert” tab.
- In the “Illustrations” group, click on the “Shapes” button.
- A drop-down menu will appear with various shape options. Scroll down and click on the “Vertical Box List” or “Horizontal Box List” option. These shapes can be used to create swimlanes.
- Click and drag the shape onto the document to create the first swimlane. You can add more swimlanes by repeating this step.
- To edit the text within the swimlanes, simply double-click on the shape. This will open a text box where you can type in the desired content.
- To connect the swimlanes, click on the “Insert” tab again and then click on the “Shapes” button. From the drop-down menu, choose the arrow or line shape that you prefer.
- Click and drag the arrow or line shape to connect the swimlanes. You can add arrows to show the flow of information or lines to separate different sections.
- If you want to add a title or header to your swimlanes, click on the “Insert” tab and then click on the “Header” button. From the drop-down menu, choose the type of header you want and edit the text accordingly.
- Once you have finished creating the swimlane diagram, click on the “File” tab and choose “Save” to save your document.
Microsoft Word also provides pre-made swimlane templates that you can use. To find these templates, click on the “File” tab, then click on “New”. In the search bar, type in “swimlane” or any keyword related to the type of swimlane diagram you want to create. Microsoft Word will search for available templates and display them on the screen.
Creating a swimlane diagram in Microsoft Word is a simple process that can be easily accomplished with the software’s built-in tools and templates. Whether you are looking to make a cross-functional flowchart or show the flow of processes between various departments or participants, Microsoft Word provides the options and settings needed to get the job done.
Build a Flowchart Template for Microsoft Word – Step-by-Step Instructions
If you’re looking for a way to easily create flowcharts in Microsoft Word, you’ve come to the right place. In this step-by-step guide, we’ll show you how to build a flowchart template that can be used to make flowcharts for various processes and workflows.
Step 1: Open Microsoft Word and start a new file.
Open Microsoft Word, and click on the “File” tab at the top left of the screen. From the drop-down menu, choose “New” to start a new document.
Step 2: Add a title and header.
Next, add a title to your flowchart template. Simply type the desired title in the document’s header section. This will make it easier for you to search for and find your template later on.
Step 3: Choose a flowchart template.
In the “Search” bar, type “flowchart” to search for available templates. Microsoft Word offers a variety of pre-designed flowchart templates that you can choose from. Click on the template that best suits your needs, and click “Create” to open it.
Step 4: Alter the template to match your needs.
Once the template is open, you can start editing it to fit your specific requirements. You can add more shapes, connect them with arrows, change the text contents, and alter the formatting options to make it more visually appealing.
Step 5: Add boxes and swimlane details.
If you need to make a cross-functional flowchart or a swimlane flowchart, you have the option to add boxes and swimlanes to the template. Simply click on the “Shapes” menu under the “Home” tab to find the shapes you need, and drag them onto the template.
Step 6: Connect the boxes.
To connect the boxes, click on the “Arrows” option under the “Home” tab. You can then simply click on the box you want to connect from, and drag the arrow to the box you want to connect to. This will help show the flow and order of the processes or steps.
Step 7: Save your template.
Once you have finished editing the template, click on the “File” tab and choose “Save As” to save your flowchart template as a separate file. You can choose the file format and location where you want to save it.
Step 8: Use your flowchart template.
Now that you have created your flowchart template, you can easily use it in future projects. Simply open the template file, make any necessary changes, and save it as a new file for each new flowchart you need to create.
By following these step-by-step instructions, you can easily build a flowchart template in Microsoft Word that makes it simple to create flowcharts for various processes and workflows. With the ability to customize and edit the template to match your specific needs, you’ll have a valuable tool for visualizing and documenting processes.
Источники:
1. https://www.techwalla.com/articles/how-to-make-a-flowchart-in-word
3. https://www.lucidchart.com/pages/flowchart-tutorial-how-to-flowchart
Step 1: Open Microsoft Word
When it comes to creating flowcharts in Microsoft Word, the first step is to open the Word application on your computer. Follow the instructions below to easily start building your flowchart:
- Launch Microsoft Word by clicking on the Start menu or searching for it in the search box.
- If you have the Microsoft Office Suite installed on your computer, you may be able to find Word under the “Microsoft Office” folder. Simply click on “Microsoft Word” to open the program.
- Once Word is open, you will see a blank document with default settings. This is where you will be able to create your flowchart.
Microsoft Word provides various templates for different types of diagrams. To find flowchart templates, you can either click on the “File” option in the top left corner and choose “New” from the drop-down menu, or you can click on the “New” button when the application first opens.
In the search box that appears, type “flowchart” to search for available flowchart templates. Word offers a variety of options, including basic flowcharts, cross-functional flowcharts, swimlane diagrams, and more. You can choose the one that best suits your needs.
Once you have selected a flowchart template, click on “Create” or “Download” to open it. The template will show you a pre-built flowchart with placeholder text and shapes that you can easily edit or alter to fit your specific requirements.
Make sure to save your document frequently to avoid losing any work. You can do this by clicking on the “File” tab in the upper left corner, choosing the “Save As” option, providing a title for your flowchart, and selecting a location to save the file.
By following these step-by-step instructions, you will be able to open Microsoft Word and find the flowchart template that makes the most sense for your needs. Next, you can start adding text, shapes, arrows, and connectors to build your flowchart.
Step 2 Look for a Flowchart Template Option 1
Once you have Microsoft Word open, the first step in making a flowchart is to look for a flowchart template. There are a few different options you can choose from, and we will show you how to find them.
1. Start by clicking on the “File” tab in the header of Word. This will open up the options menu.
2. From the options menu, click on “New”. This will open up a window with different templates you can choose from.
3. In the search box, type in the keyword “flowchart” to find flowchart templates. You can also use other keywords, like “process” or “diagram”, to find more options.
4. Once you have found the flowchart templates, click on the one that you want to use for your project. This will open a new Word file with the selected template.
5. If you want to change the format or layout of the flowchart, you can easily do so by editing the template. Simply click on the different shapes and arrows to add or alter them.
6. If you want to add more details or text to your flowchart, you can do so by clicking on the shapes and typing in the content. You can also change the title of the flowchart by editing the text box at the top of the template.
7. If you are making a cross-functional or swimlane flowchart, you can use the grids and boardmix shapes that are provided in the template.
8. To connect processes or steps in your flowchart, you can use the arrows provided or add your own from the Shapes options.
9. If you have been working on a flowchart and want to save your progress, click on the “File” tab again and choose “Save As”. This will allow you to save your file in a .docx format.
10. If you need to share your flowchart with others who may not have Microsoft Word, you can save it as a PDF or a zip file.
By following these step-by-step instructions, you will be able to easily find and start making flowcharts in Microsoft Word.
Step 3: Type in the Keyword on the Search Text Box (Option 2)

Another way to make a flowchart in Microsoft Word is by using the built-in templates. Here’s how:
- Open Microsoft Word and click on the “File” tab located in the top header.
- Under the “New” tab, you will find a search text box. Type in the keyword related to the type of flowchart you want to create. For example, if you’re making a cross-functional flowchart, type in “cross-functional” or simply “flowchart”.
- Click on the “Search” button or press Enter. Microsoft Word will show you a list of templates that match your keyword.
- Choose a template that suits your needs and click on it to open it.
- Edit the content of the flowchart template by adding text, arrows, shapes, or any other details you want to include in your diagram. You can simply click on each element and start typing or make changes to them.
- Connect the different processes or steps in your flowchart by using arrows. You can easily add arrows by clicking on the “Shapes” option located in the top toolbar. Choose the arrow shape you want to use and connect the boxes or shapes in your flowchart.
- Save your work by clicking on the “File” tab again and selecting the “Save” option. Choose a file name and location to save the flowchart.
- If you need to make further edits or changes to your flowchart in the future, you can always open the saved file and follow the same instructions.
Using templates in Microsoft Word makes the process of creating flowcharts easier and more efficient. It provides pre-designed shapes, grids, and options that you can alter to fit your needs. This option is especially useful if you’re looking for a quick and simple way to build a flowchart without starting from scratch.
Step 4: Choose a Flowchart Template to Edit
Once you have installed Microsoft Word and opened a new file, you are ready to start making your flowchart. In this step-by-step guide, we will show you how to easily edit flowchart templates to create your own customized diagrams.
To begin, go to the “File” tab in the Word header. Under “New,” type “Flowchart” into the search box. Here, you will find a variety of pre-made flowchart templates that you can use as a starting point. Microsoft Word offers several different options for flowcharts, including basic flowcharts, cross-functional flowcharts, and swimlane flowcharts.
Choose the template that best fits the purpose of your flowchart. If you are unsure which template to use, you can click on each template to see a preview of what it looks like. Take the time to read the details for each template to ensure that it meets your needs.
Once you have selected a template, click “Create” to open the template and start editing. You will now be in the editing mode, where you can add or alter the shapes, text, and connectors on the template to customize it based on your requirements.
Work from left to right or top to bottom, connecting the shapes and processes in the diagram. Use the predefined shapes and grids to organize your flowchart. You can also change the format, color, and style of the shapes to make your flowchart more visually appealing and easier to understand.
Make sure to add a title or header to your flowchart, so it is clear what the flowchart represents. This title should be concise and descriptive of the content of the flowchart.
Once you have finished editing the template, click on “File” and choose the “Save As” option to save your flowchart as a Word document or in another file format of your choice. You may also choose to save your flowchart as a PDF for easier sharing and printing.
Congratulations! You have now learned how to choose a flowchart template and edit it to create your own customized flowchart in Microsoft Word. With the various options and settings provided, you can easily build a professional-looking flowchart that makes the processes and steps clear.
Step 5 MS Word File Format
Microsoft Word is a commonly used word processing program that can be used to create flowcharts. In this step-by-step guide, we will show you how to make flowcharts in MS Word.
1. Open a new MS Word document. You can start with a blank document or choose one of the pre-made templates that come with Word. To access the templates, go to File > New, and then type “flowchart” in the search box. You will find a variety of flowchart templates to choose from.
2. Once you have chosen a template, open it and you will see a basic flowchart diagram on the page. You can easily add or edit each step in the flowchart by simply clicking on the text and typing your content.
3. To add more shapes to the flowchart, go to the Shapes option under the Insert tab. Choose the type of shape you want to add and click on the page where you want it to appear.
4. To connect the shapes and show the flow of processes, use the Arrows option under the Insert tab. Click on the shape you want to connect from, then click on the shape you want to connect to. You can also click and drag a line to connect shapes.
5. If you want to make a cross-functional or swimlane flowchart, go to the SmartArt option under the Insert tab. Choose the flowchart template that suits your needs.
6. To make your flowchart more visually appealing, you can add grids or alter the formatting of the shapes. Go to the Layout and Format tabs for options like adding grids, changing colors, or adjusting the size of the shapes.
7. To save your flowchart, go to File > Save As. Choose the location where you want to save the file, type a title for it, and select Word Document (.docx) as the file format.
8. If you plan to share your flowchart with others who don’t have MS Word, you can save it in a different file format. Go to File > Save As and choose the desired file format, such as PDF or image formats like PNG or JPEG.
9. You can also export your flowchart as an image or PDF directly from Word. Go to File > Export and select the appropriate option.
10. If you want to send your flowchart to someone as a package, you can use the Zip option under the File tab. This will create a zip file that contains all the necessary files and resources needed to open and view the flowchart.
These instructions will help you create flowcharts using MS Word, giving you the flexibility to easily make changes or modify the content as needed. MS Word provides a user-friendly interface and a range of tools to build and edit flowcharts efficiently.
Step 6: Open the Zip File in Word
After you have downloaded the zip file containing the flowchart templates, you will need to extract the files and open them in Microsoft Word. Here are the step-by-step instructions on how to do it:
- Locate the downloaded zip file on your computer and right-click on it.
- In the context menu, select the “Extract All” option.
- A dialog box will appear asking you where you want to save the extracted files. Choose a location on your computer and click “Extract”.
- Once the files have been extracted, navigate to the location where you saved them.
- Look for the file with the .docx extension. This is the Microsoft Word format file that you will be working with.
- Double-click on the .docx file to open it in Microsoft Word.
Now that you have the flowchart template open in Word, you can start making the necessary changes to fit your specific needs. You can edit the text, connect the shapes, alter the formatting of the shapes, and more.
Please note that each flowchart template may have different instructions or options, so be sure to follow any specific guidelines provided by the template or the source where you downloaded it from.
Once you have made all the necessary edits to your flowchart, you can save the file in Word format (.docx) for further editing or in any other format you prefer.
Here is a table with some additional details on the flowchart templates you may find in the zip file:
| Template | Description |
|---|---|
| Cross-Functional Flowchart | A flowchart that shows the steps of a process across departments or functions. |
| Swimlane Flowchart | A flowchart that uses swimlanes to show the steps of a process across different roles or responsibilities. |
| Basic Flowchart | A simple flowchart template that can be easily customized to fit your needs. |
By following the step-by-step instructions and using the various templates available, you can easily create professional-looking flowcharts in Microsoft Word.
Step 7 Header or Flowchart Title
After you have created the flowchart diagram, the next step is to add a header or flowchart title. This will help to provide context and make it easier for others to understand the content of the flowchart. The header or title should clearly describe what the flowchart is about.
To add a header or flowchart title in Microsoft Word, start by opening the document where you have created the flowchart. Then, follow the instructions below:
- Click on the “Insert” tab at the top of the page.
- In the “Text” section, click on the “Text Box” option.
- A dropdown menu will appear. Choose the option that says “Simple Text Box” or “Draw Text Box”.
- A text box will appear on your document. Type the header or title for your flowchart in the text box.
- You can format the text by selecting it and using the options in the “Format” tab.
- Move and resize the text box to place it where you want it to appear on the flowchart diagram.
- You can also change the font, size, color, and other formatting options for the header or title by selecting it and using the options in the “Format” tab.
- To connect the header or title to the flowchart, you can use arrows, lines, or other shapes to indicate the relationship.
- Save your document to ensure that all changes are saved.
By following these step-by-step instructions, you will be able to easily add a header or flowchart title to your diagram. This will make your flowchart more professional and help others understand the content at a glance.
It is also worth noting that there are templates available for Microsoft Word that already have predefined header or title options. If you are looking for more inspiration or want to save time, you can find many flowchart templates online or in the Microsoft Word template library.
Overall, adding a header or flowchart title is an important step in making your flowchart easy to understand and visually appealing. It provides context, helps with organization, and makes it easier for others to locate and refer to specific flowcharts when needed.
Step 8 Add the Shapes and Arrows
Now that you have set up the basic layout of your flowchart in Microsoft Word, it’s time to add the shapes and arrows that will represent the different steps in your process. Here’s how you can do it:
- Select the “Insert” tab at the top of the Word window.
- In the Illustrations group, click on the “Shapes” option.
- A drop-down menu will appear, showing a variety of shapes you can choose from. Click on the shape you want to add to your flowchart.
- Your cursor will change to a crosshair. Click and drag on the spot where you want to place the shape in your document.
- Resize and reposition the shape as needed using the handles that appear when you click on it.
- If you want to add text inside the shape, right-click on it and choose the “Add Text” option. Type the desired content into the text box that appears.
- To connect the shapes with arrows, select the “Insert” tab again and click on the “Shapes” option. This time, choose the “Line” option under the “Lines” section.
- Click and drag to draw a line from one shape to another, creating a connection between them. You can also click on the circles at the ends of the line to extend or adjust them.
- Repeat steps 3 to 8 for each additional shape and arrow you want to add to your flowchart.
- Once you have finished adding all the shapes and arrows, save your document to preserve your work.
By following these step-by-step instructions, you can easily build a flowchart in Microsoft Word. Remember that you can always edit the shapes, arrows, and text to fit your specific needs. Word provides a variety of formatting options that can be used to change the color, size, and format of each element. Now that you have learned how to add shapes and arrows to your flowchart, you are ready to move on to the next step!
Step 9 Details
Once you have completed the previous steps and have chosen a template to use for your flowchart in Microsoft Word, you can now start adding the details for each step in your flowchart. This step-by-step process will ensure that your flowchart is easy to understand and follow.
To add the details, first click on the specific shape or box where you want to add text. This could be a start or end shape, or a shape that represents a particular process or decision point. After clicking on the shape, a text box will appear where you can type in the content.
Next, you can use the options in the Format tab to change the font, size, color, and other formatting settings for the text. You can also edit the shape itself by clicking on it and using the options under the Format tab to alter the borders, colors, gradients, and other design elements.
If you have multiple processes or decision points in your flowchart, you can easily connect them using arrows. Simply click on the shape you want to connect from, choose the option to add a connector or arrow, and then click on the shape you want to connect to. This will create a line with an arrowhead that shows the flow of the process from one shape to another.
It’s important to save your work frequently while making the flowchart to avoid losing any changes. To save, click on the File tab, then choose the option to save. You can also use the keyboard shortcut Ctrl + S to quickly save your document.
Once you have finished adding the details to your flowchart, you can also add a title or header to provide more information about the flowchart. You can do this by clicking on the Insert tab, choosing the option for header, and then typing in the title or header text.
The flowchart templates in Microsoft Word have been designed to make the creation and editing of flowcharts easier. They provide pre-made shapes and grids that you can use, as well as the option to add swimlanes for cross-functional flowcharts. You can also find more templates by going to the templates section and searching for “flowchart” or a keyword related to your topic.
Once your flowchart is complete, you can save it as a Word document or other file format to share with others. You can also print it out for reference or presentation purposes.
That’s it! You have now learned how to make a flowchart in Microsoft Word, step-by-step. With the right templates, tools, and instructions, creating a flowchart in Word can be a straightforward and efficient process.
Step 10: Save the Flowchart Template
Now that you have finished making your flowchart diagram in Word using the step-by-step instructions provided, it’s time to save the template for future use. Follow the following steps to save the flowchart template:
- Click on the “File” tab in the Microsoft Word toolbar to open the file options.
- In the left-hand panel, click on “Save As” to open the save options.
- Choose the location on your computer where you want to save the flowchart template.
- Enter a title for the template in the “File name” field.
- From the “Save as type” dropdown menu, choose the “Word Template (*.dotx)” option.
- Click on the “Save” button to save the flowchart template.
By saving your flowchart template as a “.dotx” file type, you can easily find and open it in Word whenever you need to create a new flowchart. This saves you time from having to recreate the entire flowchart from scratch.
Once you have saved the template, you can start editing it by simply clicking on the text boxes, shapes, or arrows and changing the content to fit your specific needs. You can also add more shapes or swimlane diagrams by following the same step-by-step instructions that you used to build the first one.
Word provides a range of formatting options for editing your flowchart template. You can alter the font, color, size, and other settings to make your flowchart more visually appealing and easy to understand. You can also choose to show or hide grids, add a header or footer, and use other options to customize your flowchart template according to your preferences.
Remember to save your changes regularly as you work on the flowchart template so that you don’t lose any progress. You can do this by clicking on the “Save” button or pressing the “Ctrl+S” keyboard shortcut.
A well-designed flowchart template makes it easier to visualize and communicate complex processes or workflows. By using Microsoft Word, you can create professional-looking flowcharts that effectively convey information. Saving your flowchart template ensures that you have a reusable resource that you can edit and modify as needed.
How to Make a Flowchart on Microsoft Word
If you need to create a flowchart to visualize processes or show the steps of a project, Microsoft Word provides a user-friendly and efficient way to do so. With the built-in flowchart templates and easy-to-use editing options, you can quickly build professional-looking flowcharts in Word. Follow these step-by-step instructions to start making flowcharts with Microsoft Word:
- Open Microsoft Word and start a new document.
- Go to the “File” tab and choose “New” to open the template options.
- In the search bar, type “flowchart” or simply browse through the available templates to find one that suits your needs. Click on the template to open it.
- Start by adding a title for your flowchart. This could be the name of the process or project you are depicting.
- Next, add the main content or details for each step of your flowchart. You can easily alter the text by clicking on the shapes or text boxes and editing them.
- To add shapes or symbols to represent each step in your flowchart, go to the “Shapes” tab in the Word toolbar. Choose the desired shape from the options available and click on the canvas to place it.
- Connect the shapes or steps in the order you want them to appear by using arrows or lines. Go to the “Insert” tab and choose the “Shapes” option to find the arrow shapes. Click and drag to draw the connection.
- If you want to add swimlanes or categorize your flowchart, go to the “Insert” tab and choose the “SmartArt” option. Select the “Hierarchy” category and choose a swimlane layout.
- Edit and format your flowchart as needed. You can change the color, size, or style of the shapes, arrows, and text. Use the formatting options available in the toolbar to customize the look of your flowchart.
- Save your flowchart by clicking on the “File” tab and choosing “Save As”. Select the desired file format and location to save your flowchart.
Microsoft Word makes it easy to create flowcharts with its user-friendly interface and various templates. Whether you are a beginner or an experienced user, you can easily make flowcharts in Word to illustrate processes or show the steps of a project. Start using Microsoft Word to create professional and visually appealing flowcharts today!
Start Making Flowcharts in Boardmix…
If you’re looking to create flowcharts, Boardmix is a great tool to use. With its user-friendly interface and powerful features, you can easily create professional-looking flowcharts in no time.
To start making flowcharts in Boardmix, here are the step-by-step instructions:
- Open Boardmix on your computer. If you don’t have it installed, you can easily find and download it from the Microsoft website.
- Once you have Boardmix open, click on the “File” option in the header. From the drop-down menu, choose “New” to create a new flowchart or “Open” to edit an existing one.
- When creating a new flowchart, you can choose from a variety of templates to make the process easier. Simply type a keyword in the search box to find the template that suits your needs.
- After choosing a template, you can start adding shapes and text to build your flowchart. Boardmix provides a wide range of shapes that you can easily add to the canvas by clicking on them. You can also alter the size, color, and format of each shape to make it more relevant to your content.
- To connect the shapes, you can use arrows or swimlane grids. Simply click on the shape you want to connect and then click on the shape where you want it to connect to. Boardmix will automatically add the arrows or swimlane grids to connect them.
- As you’re making your flowchart, don’t forget to save your work regularly. Click on the “Save” option under the “File” tab to save your progress.
- If you want to change the settings of your flowchart, click on the “Options” tab. Here, you can alter the title, add a header or footer, change the page layout, and more.
- Once you’re happy with your flowchart, you can export it in different formats. Click on the “Export” option under the “File” tab to choose the format you prefer. You can save it as a Word document, PDF file, or even a zip file.
- If you need to edit your flowchart in the future, simply open Boardmix again and click on the “Open” option under the “File” tab. Navigate to the location where you saved your flowchart, and you can continue editing it.
- Boardmix also allows you to collaborate with others in real-time. Simply click on the “Share” option under the “File” tab, and you can invite others to view or edit your flowchart.
With these instructions, you’re now ready to start making flowcharts in Boardmix. Whether you’re a beginner or an experienced user, Boardmix provides all the tools and features you need to create professional and visually appealing flowcharts.
Sources
When it comes to making flowcharts in Microsoft Word, there are several sources you can turn to for instructions, templates, and more. Here are some of the sources you can use:
| Source | Description |
|---|---|
| Microsoft Word Templates | You can start building a flowchart in Word by using the pre-made templates that come with the software. Simply open Word, click on “File” in the header, then choose “New” and search for “flowchart” in the search bar. You will find a variety of templates to choose from. |
| Step-by-Step Instructions | If you prefer a more detailed guide on how to make a flowchart in Word, there are many step-by-step tutorials available online. These instructions will take you through each stage of the process, from starting a new document to adding, editing, and connecting the flowchart shapes. |
| Online Resources | There are numerous websites and forums where you can find resources, tips, and tricks for making flowcharts in Word. These online sources often provide downloadable files, additional templates, and further guidance on how to customize and format your flowchart. |
| YouTube Videos | If you prefer visual demonstrations, there are plenty of YouTube videos available that show you exactly how to create flowcharts in Word. These videos often provide a hands-on look at the process and can be helpful for both beginners and those looking to learn more advanced techniques. |
By utilizing these sources, you will have all the information and tools you need to easily create professional-looking flowcharts in Microsoft Word. Whether you choose to use built-in templates, follow step-by-step instructions, or explore online resources, you can tailor your flowchart to suit your specific needs.


