
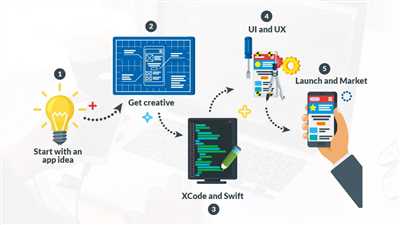

Welcome to the world of iOS app development! If you’ve always wanted to create your very own app for Apple devices, this is your chance to turn that dream into a reality. With the right tools, resources, and knowledge, you can easily build and publish your own iOS application. In this article, we will walk you through the essential steps and provide you with the best ways to get started.
The first step in creating an iOS application is to set up your development environment. Since iOS apps can only be built on macOS, you will need to have a Mac computer or access to a macOS environment. You will also need to download and install Xcode, Apple’s official integrated development environment (IDE) for app development. Xcode provides all the necessary tools and resources you need to develop, test, and finalize your app.
Once you have your development environment set up, it’s time to dive into coding. iOS apps are primarily developed using the Swift programming language, which is Apple’s preferred language for app development. If you’re new to Swift, there are plenty of online resources and tutorials available to help you learn the basics. Additionally, JavaScript can also be used for certain app features, so having some knowledge of JavaScript is a plus.
Now that you have the basic knowledge and tools, it’s time to start building your app. You can either create your app from scratch or use app builders and templates available online. Building from scratch allows for more advanced features and customization, but it requires a higher level of coding expertise. App builders, on the other hand, provide an easier and faster way to create basic apps without much coding. This can be a good option for beginners or those who want to get their app up and running quickly.
Remember that creating an iOS application is not just about coding. You also need to consider the design and user experience of your app. Apple devices are known for their sleek and intuitive interfaces, so your app should reflect that. Pay attention to color schemes, user-friendly navigation, and overall aesthetics. Remember, a well-designed app will attract more users and provide a better user experience.
Once you have built and tested your app, it’s time to publish it on the App Store. To do this, you will need to enroll in the Apple Developer Program, which requires a yearly fee. This program allows you to submit your app for review and, once approved, make it available for download on the App Store. Keep in mind that the review process can take some time, so be patient and address any issues or questions raised by the reviewers.
Building an iOS app can be a challenging but fulfilling endeavor. With the right mindset, resources, and mentorship, you can develop your own app that will be enjoyed by users all around the world. So, what are you waiting for? Start your iOS app development journey today and turn your ideas into reality!
- The Best Way to Build An iOS App 6 Steps
- 1 Setup your MAC
- 2 Download Xcode
- 3 Learn Swift
- 4 Look for a Mentor
- 5 Run the App
- 6 Make your iOS App Advanced by Adding Features Programmatically Optional
- React Native and Expo
- Top Frequently Asked Questions
- How do you develop an app for iPhone
- How much does it cost to build an iPhone app
- How can I make an iPhone app without coding
- What language is used to make iOS apps
The Best Way to Build An iOS App 6 Steps
Building an iOS app can be an exciting and rewarding experience. Whether you want to create the next top-grossing game or a useful productivity tool, getting started is easier than you think. In this guide, we will outline the 6 essential steps to build an iOS app using JavaScript and React Native.
Step 1: Learn the Language
To build an iOS app, you need to have a good understanding of JavaScript. JavaScript is the language used to create interactive and dynamic websites, and it is also the foundation of many mobile app development frameworks, including React Native. There are many online resources available to help you learn JavaScript, and a mentor can also be a valuable option if you want to accelerate your learning.
Step 2: Set up your development environment
Before you can start building your iOS app, you need to set up your development environment. This includes installing Xcode on your Mac, which is the tool used to create iOS applications. Xcode also includes the iOS Simulator, which allows you to run your app on a virtual iPhone or iPad. If you don’t have a Mac, you can use Expo, an online tool that lets you develop and test your app without the need for a Mac or an iOS device.
Step 3: Build your app with React Native
React Native is a popular framework for building mobile apps, including iOS apps. It allows you to write code once and run it on both iOS and Android devices, which can save time and effort. React Native also provides access to native iOS features, giving your app a polished look and top performance. To build your app with React Native, you will need to learn the basics of the framework and familiarize yourself with its features.
Step 4: Add features and finalize your app
Once you have the basic structure of your app built, you can start adding features and customizing the design. This is where your creativity comes into play. You can add features like push notifications, social media integration, or in-app purchases to make your app more engaging and functional. Additionally, you will need to fine-tune the performance of your app and ensure it works flawlessly on different iOS devices.
Step 5: Test and debug your app
Testing is an essential step in the app development process. You should thoroughly test your app on different devices and iOS versions to ensure it works as expected. You can use tools like Xcode’s debugging features to identify and fix any bugs or issues. Additionally, make sure to test your app’s performance and user experience to provide a seamless and enjoyable user journey.
Step 6: Publish your app
Once your app is ready and thoroughly tested, it’s time to publish it on the App Store. To publish an app on the App Store, you will need an Apple Developer account, which requires a yearly fee. You will also need to follow Apple’s guidelines and submit your app for review. Once approved, your app will be available for download to millions of iOS users worldwide.
Building an iOS app may seem like a daunting task, but by following these 6 steps, you can make the process smoother and more efficient. Remember to stay focused, keep learning, and don’t hesitate to ask questions along the way. With the right tools and guidance, you can turn your app idea into a reality and join the vibrant community of iOS app developers.
1 Setup your MAC
Before you can start building iOS applications, you need to set up your Mac with the necessary tools and services. Here are the steps to get started:
- Download and install Xcode: Xcode is the official integrated development environment (IDE) for iOS app development. It includes all the tools and resources you need to create native iOS applications. You can download Xcode for free from the Mac App Store. Once installed, you can open it and start using it for your app development projects.
- Register as an Apple Developer: To publish your apps on the App Store, you’ll need to become a registered Apple Developer. This requires a yearly subscription fee, but you can get started with a free developer account to test your apps on your own device.
- Choose your programming language: iOS app development can be done using Swift or Objective-C. Swift is a modern, powerful, and user-friendly programming language developed by Apple, while Objective-C is an older but still widely used language. Take some time to learn and familiarize yourself with the language you choose.
- Set up your development environment: Once you have Xcode installed and your programming language chosen, you can start creating your first iOS app. Xcode provides a range of features and tools to help you build better apps faster. Take a look at the various options and explore the possibilities.
- Test your app on a device: While Xcode includes an iOS simulator that lets you test your app on virtual devices, it’s always a good idea to test on a real device as well. This will give you a more accurate idea of how your app will perform on a user’s device. Connect your iPhone or iPad to your Mac, select your device as the testing device, and run your app on it.
- Advanced features and performance: As you become more experienced with iOS app development, you can explore advanced features and techniques to enhance the performance and functionality of your apps. This may include adding animations, integrating with other APIs, optimizing code, and more. The possibilities are endless.
- Finalize and publish your app: Once you’re satisfied with your app and have tested it extensively, it’s time to finalize and publish it on the App Store. This requires following a set of guidelines and requirements set by Apple. Take some time to review these guidelines and make sure your app meets all the necessary criteria.
Setting up your Mac for iOS app development may seem overwhelming at first, but with practice and persistence, you’ll become more comfortable with the process. Don’t hesitate to ask for help or consult online resources if you have any questions or run into any issues along the way. Good luck!
2 Download Xcode
Xcode is a powerful tool that is used to create, test, and publish iOS applications. It provides a top-notch performance and a user-friendly interface, making it the best choice for iOS app development. Xcode is only available for macOS, so if you are using Windows, you’ll need to choose alternative options.
To download Xcode, follow these steps:
- Open the App Store on your Mac computer or laptop.
- Search for “Xcode” in the search bar.
- Choose the Xcode app from the search results.
- Click on the “Download” button to start the download.
- Wait for the download and installation process to complete.
- Once Xcode is installed, you can find it in your Applications folder.
Downloading and installing Xcode requires a stable internet connection, as it is a large application. Depending on your internet speed, this process may take some time, so be patient. Xcode is free to download and use, but you need an Apple ID to sign in and use it.
In addition to Xcode, you may need to download other tools and services depending on your app’s requirements. For example, if you are using Swift or Objective-C as your programming language, you may need to download additional frameworks and libraries. If you are developing a React Native app, you will need to install Node.js and the React Native CLI. These additional tools and services can be downloaded from their official sources or through Xcode’s integrated interface.
Once you have Xcode and the necessary tools set up, you are ready to create and run your iOS application. In the next step, we’ll explore how to create a new project in Xcode and set up the necessary configurations.
3 Learn Swift
Swift is the programming language that is used to create iOS apps. It is developed by Apple and is the primary language for building iOS applications. Learning Swift is an essential step if you want to create your own iOS app.
Here are the steps you need to follow to learn Swift:
| Step 1: | Download Xcode |
| Step 2: | Set up your Mac |
| Step 3: | Start coding in Swift |
| Step 4: | Build your first iOS app |
| Step 5: | Test your app on a device |
| Step 6: | Finalize and publish your app |
1. Download Xcode: Xcode is the best tool to use for iOS app development. It is available for free on the Mac App Store and requires a Mac to run.
2. Set up your Mac: Before you can start coding in Swift, you need to set up your Mac for iOS development. Follow the instructions provided by Xcode to set up your development environment.
3. Start coding in Swift: Once you have Xcode installed and your Mac set up, you can start writing Swift code. Xcode provides an integrated development environment (IDE) where you can write, test, and debug your Swift code.
4. Build your first iOS app: Start by creating a new project in Xcode and choose the “Single View App” option. This will create a basic iOS app with a single view. You can then add more views and features to your app using Swift.
5. Test your app on a device: To see how your app looks and functions on an actual iPhone or iPad, you can connect your device to your Mac and run the app on it. This will give you a better understanding of how your app will work on a real device.
6. Finalize and publish your app: Once you have built and tested your app, you can finalize it by adding any additional features or improvements. When you are satisfied with your app, you can submit it to the App Store for approval and distribution to users.
Learning Swift is a crucial step in becoming an iOS app developer. With Swift, you can create powerful and user-friendly apps for iPhone and iPad. By following these steps and using Xcode as your development tool, you will be well on your way to creating your own iOS applications.
4 Look for a Mentor
When it comes to learning how to make an iOS application, having a mentor can be incredibly helpful. There are so many things to learn and understand, and having someone with experience by your side can make the process much easier and more efficient.
One of the best ways to find a mentor is to look within your own network. Ask around to see if you know anyone who has experience developing iOS apps. They may be willing to help guide you through the process and answer any questions you have along the way.
If you don’t have anyone in your personal network, there are online communities and forums where you can connect with experienced iOS developers who are willing to mentor aspiring developers. These mentors can help you understand the ins and outs of iOS development, answer your coding questions, and provide guidance and feedback on your app’s performance.
Another option is to look for a mentor through coding bootcamps or programming classes. Many of these programs offer mentorship as part of their curriculum, providing you with access to experienced developers who can help you every step of the way.
Regardless of how you find a mentor, it’s essential to communicate your goals and expectations clearly. Let them know what you hope to achieve with your iOS app and what specific areas you need help with. This will ensure that your mentor can tailor their guidance to your needs.
Remember that building an iOS app is a collaborative process, and having a mentor can make it much more enjoyable and fruitful. They can help you navigate the essential steps, such as app setup, coding, and testing, while also providing insights into best practices and performance optimization.
So don’t be afraid to reach out and look for a mentor. With their help, you will be well on your way to creating a successful iOS app that users will love.
5 Run the App
Once you have completed all the necessary steps to create your iOS application, it’s time to run the app and see it in action. Here are the steps to follow:
- Make sure you have Xcode installed on your Mac. Xcode is an integrated development environment (IDE) provided by Apple for iOS app development. You can download it from the Mac App Store.
- Open the project in Xcode by double-clicking the .xcodeproj file. This will open the Xcode workspace with your project.
- Connect your iOS device to your Mac using a USB cable. Make sure the device is unlocked and connected to the internet.
- In Xcode, select your iOS device as the deployment target. You can do this by clicking on the active scheme in the top left corner and selecting your device from the list.
- Click on the “Run” button in Xcode or press ⌘R to build and run the app on your device. Xcode will automatically compile the code and install the app on your device.
Once the app is installed on your device, you can interact with it just like any other app. You can test its features, check its performance, and see how it looks and feels on a real device. This is an important step in the app development process, as it allows you to finalize and fine-tune your app before publishing it to the App Store.
Note that running the app on a physical device is optional. You can also run and test your app using the iOS Simulator, which is included with Xcode. The iOS Simulator allows you to simulate different iOS devices and test your app without the need for a physical device.
By following these steps, you can successfully run your iOS app and make sure everything is working as expected. If you encounter any issues or have any questions, you can look for answers in online forums and developer communities or ask for help from more experienced iOS developers.
Once you’ve finalized your app and tested it thoroughly, you can proceed to publish it to the App Store and make it available to iOS users worldwide. This is a significant milestone in your app development journey and will allow you to reach a larger audience and potentially generate revenue through paid apps or in-app purchases.
6 Make your iOS App Advanced by Adding Features Programmatically Optional
If you want to take your iOS app to the next level and provide additional functionality, there are several optional features that you can add programmatically. These features can enhance the user experience and make your app stand out among the rest.
1. Add a Dark Mode: Dark mode has become increasingly popular, and adding this feature to your app can give it a modern and sleek look. You can create a toggle switch that allows users to switch between light and dark mode, depending on their preference.
2. Implement Gesture Controls: Gesture controls enable users to interact with your app using gestures such as swiping, pinching, or rotating. These gestures can enhance the overall user experience and provide a more intuitive way of navigating your app.
3. Customize App Colors: By allowing users to customize the colors of your app, you can give them a sense of personalization and make your app more visually appealing. You can provide a selection of predefined color schemes or allow users to choose their own custom colors.
4. Integrate Social Media Sharing: Adding social media sharing capabilities to your app can help promote your app and increase its reach. Users can easily share content from your app on platforms like Facebook, Twitter, or Instagram, allowing others to discover and download your app.
5. Implement Push Notifications: Push notifications are a great way to keep users engaged with your app by sending them timely notifications, such as reminders or updates. You can send push notifications to users even when they are not actively using your app, helping to drive user retention.
6. Integrate In-App Purchases: If you want to monetize your app, you can add in-app purchases to offer additional content or features for a fee. This can be a great way to generate revenue from your app and provide users with a better experience.
These optional features can be implemented programmatically using the Swift programming language, which is the preferred language for iOS app development. You can learn Swift through online tutorials and resources, or by using the built-in documentation in Xcode, Apple’s integrated development environment (IDE) for iOS app development.
Adding advanced features programmatically requires coding knowledge and may require assistance from experienced iOS developers. However, there are also app builders and frameworks available, such as Expo and React Native, which allow for a more visual and simplified way of building iOS apps without the need for extensive coding.
Before finalizing your app with these advanced features, it is always a good idea to test them thoroughly on an actual iOS device or simulator. This will ensure that everything works as expected and that users will have a seamless experience with your app.
In conclusion, adding optional features programmatically can take your iOS app to the next level and provide a better user experience. With the right tools, resources, and coding knowledge, you can create a feature-rich and advanced iOS app that users will love.
React Native and Expo
React Native is a popular framework for building iOS and Android applications using JavaScript. It allows developers to create native apps, which means the apps can run with better performance and look without the need for an online build option.
Expo is a set of tools and services that makes it easier to get started with React Native. It provides an essential set of features and services, such as the ability to run and test your app on devices without the need for Xcode or Android Studio.
Getting started with React Native and Expo is easy. Here are the steps:
- Download and install Node.js, a JavaScript runtime.
- Install the Expo CLI by running the command
npm install -g expo-cliin your terminal. - Create a new project by running
expo init MyApp. This will set up a new project with the necessary files and folders. - Navigate into the project folder by running
cd MyApp. - Run
expo startto start the Expo development server. - Scan the QR code with the Expo app on your iOS device (iPhone or iPad) to preview your app.
Once you have your project set up and running, you can start developing your app using JavaScript. React Native allows you to build advanced and feature-rich applications by adding functionality programmatically.
Expo also provides additional services, such as Expo Push Notifications and Expo Updates, that can help you with building and publishing your app. It is a great tool for developers who want to get started quickly and build apps that run on both iOS and Android devices.
Before finalizing your app, it’s essential to test it on a real device. You can use Expo’s online paid service or connect your iOS device to your Mac and use Xcode to build and run the app.
React Native and Expo provide developers with a faster and easier way to create iOS applications. It’s a top choice for many developers, and learning how to use it can help you become a more proficient app maker.
It’s worth noting that developing iOS apps requires a Mac and Xcode. However, if you’re using Windows, you can still develop and test your app using Expo’s tools and services.
In conclusion, React Native and Expo are powerful tools for building iOS applications. They provide developers with features and services that make development faster, easier, and more efficient. If you’re new to iOS development or looking to build your first app, React Native and Expo are excellent choices.
Top Frequently Asked Questions
1. How can I create an iOS application?
To create an iOS application, you will need a Mac computer running macOS. You can use Xcode, Apple’s integrated development environment (IDE), to build native iOS apps using Swift or Objective-C. Follow these steps to get started:
- Download and install Xcode from the Mac App Store.
- Open Xcode and choose the option “Create a new Xcode project”.
- Select the “iOS” tab and choose the template for your app (e.g., Single View App).
- Enter a name for your app and choose the organization identifier.
- Specify additional project settings (e.g., language, user interface, etc.).
- Finalize the project setup by selecting a location for your files.
- You can now start coding your iOS app using Swift or Objective-C.
- Test your app on a physical device or in the iOS Simulator.
- When your app is ready, you can deploy it to the App Store for others to download.
2. How do I learn iOS programming?
To learn iOS programming, there are several options available:
- You can enroll in online courses or tutorials that teach iOS development using various programming languages, such as Swift or Objective-C.
- If you prefer a more hands-on approach, you can find a mentor or join coding bootcamps that specialize in iOS programming.
- Apple also provides documentation, tutorials, and sample code on their official website, which can help you get started with iOS development.
3. Can I develop iOS apps on Windows?
No, developing iOS apps on Windows is not possible. iOS app development requires Xcode, which is only available for macOS. However, you can use cross-platform frameworks like React Native or Xamarin to develop apps that can run on both iOS and Android devices.
4. What are the essential tools for iOS development?
The essential tools for iOS development are:
- Xcode: Apple’s official IDE for building iOS apps.
- Simulator: A tool that allows you to test your app on different iOS devices without the need for physical devices.
- Git: Version control system used for managing source code.
- Interface Builder: A visual tool for designing user interfaces.
- Instruments: A tool for analyzing app performance and debugging.
5. Are there any paid services or features I need to create an iOS app?
Creating an iOS app does not require any paid services or features. However, if you want to distribute your app on the App Store, you will need to enroll in the Apple Developer Program, which requires an annual fee. This program provides additional benefits and resources for iOS developers.
6. What are the benefits of using a native programming language for iOS app development?
Using a native programming language, such as Swift or Objective-C, for iOS app development offers the following benefits:
- Optimized performance: Native apps can take full advantage of the device’s capabilities, resulting in faster and more efficient performance.
- Access to advanced features: Native development provides direct access to advanced features and APIs offered by iOS.
- Better user experience: Native apps offer a seamless and familiar user experience, as they are designed specifically for iOS devices.
- Easier integration with existing iOS ecosystem: Native apps can easily integrate with other iOS apps and services.
These are some of the frequently asked questions about iOS app development. If you have any more questions, feel free to ask!
How do you develop an app for iPhone

Developing an app for iPhone can seem like a complex process, but with the right guidance and tools, it is achievable for anyone. Below, we will outline the steps you need to follow to create your own iOS application.
Step 1: Choose your development scheme
There are two main ways to develop an iPhone app: natively or using a cross-platform framework. Natively, you can use Apple’s Swift programming language or Objective-C to build your app. Alternatively, you can use cross-platform frameworks like React Native or Xamarin to write code once and run it on multiple platforms.
Step 2: Set up your development environment
Before getting started, you will need a Mac computer as the development tools are only available on macOS. You will also need to download and install Xcode, Apple’s integrated development environment (IDE), which includes all the necessary tools and resources.
Step 3: Learn the iOS app development basics
Regardless of the development scheme you choose, it is important to familiarize yourself with iOS app development fundamentals. This includes learning about the different components, UI design guidelines, and working with the various APIs and frameworks.
Step 4: Write your code
Once you have a good understanding of iOS app development, you can start writing your code. Whether you are using Swift, Objective-C, React Native, or another framework, this is the step where you bring your ideas to life by implementing the desired features and functionalities.
Step 5: Test and debug your app
Testing is a crucial part of the app development process. Make sure to thoroughly test your app on different devices and iOS versions to ensure its compatibility and reliability. You can use Xcode’s built-in simulator or connect physical devices for testing.
Step 6: Publish your app
Before publishing your app to the App Store, there are a few final steps to complete. You will need to sign up for the Apple Developer Program, create an App ID, compile your app with the necessary provisioning profiles, and submit it for review. Once approved, your app will be available for download by users.
Developing an app for iPhone can be an exciting and rewarding experience. While there are online services and app builders that can help you create an app without coding, these options often limit your customization and may require a paid plan. Building an app programmatically will give you more control, better performance, and the ability to add unique features to your app.
Remember, as you develop your app, it’s essential to consult official documentation, online forums, and communities for frequently asked questions and guidance. Additionally, finding a mentor or joining a developer group can help accelerate your learning and provide invaluable support.
So if you’re wondering how to develop an app for iPhone, follow these steps and look into these resources to make the process smoother and faster. With the right setup and knowledge, you can turn your ideas into a fully functional iOS application.
How much does it cost to build an iPhone app
Building an iPhone app is an exciting and innovative way to enter the mobile app market. Whether you are a beginner or an experienced developer, creating an iOS application can be a rewarding and profitable venture. However, it is important to understand the factors that contribute to the cost of building an iPhone app.
There are several ways to build an iPhone app, and the cost can vary depending on the method you choose. The most common and recommended way is to use native iOS development with Swift, Apple’s programming language. This option offers better performance and more advanced features, but it requires knowledge of coding and proficiency in Swift.
Before getting started, there are a few essential steps to consider. Firstly, you will need a Mac computer running Xcode, Apple’s integrated development environment, to create and test your app. Xcode is only available on macOS, so Windows users won’t be able to use this tool without setting up a virtual machine or using a Mac. Secondly, you should have a basic understanding of Swift or be willing to learn the language. Fortunately, there are many resources available to learn Swift, including Apple’s official documentation and online courses.
Once you have the necessary setup and knowledge, you can start building your iPhone app. Here are the top 5 steps to follow:
- Plan your app: Before diving into coding, it’s important to have a clear idea of what your app will do and what features it will have. This will help you organize your development process and make the most of your time and resources.
- Design the user interface: The visual aspect of your app is crucial for user experience. Use Xcode’s interface builder to create a visually appealing and user-friendly interface for your app.
- Code your app: Once you have a plan and a design, start coding your app using Swift. This is where your programming skills will come into play. You can add features and functionality to your app by writing code and using various iOS frameworks.
- Test and debug: Testing is an essential part of the development process. Use Xcode’s built-in testing and debugging tools to identify and fix any issues or bugs in your app.
- Finalize and publish: Once your app is ready, you can submit it to the App Store for review and publication. This will require an Apple Developer account and a paid membership, but it is necessary to distribute your app to iOS users.
When it comes to the cost of building an iPhone app, there are several factors to consider. The development cost will depend on the complexity of your app, the number of features, and the time required to build it. Additionally, hiring a mentor or developer to assist you can also add to the cost.
Furthermore, there are services and tools available that can help you build an iOS app without extensive coding knowledge. Appy Pie, for example, is a popular app maker that offers a drag-and-drop interface to create and publish iOS apps. However, these services may have limitations in terms of customization and advanced features.
In conclusion, the cost of building an iPhone app can vary greatly depending on various factors. It is important to plan your app, learn the necessary skills, and consider your options before starting the development process. By following the recommended steps and utilizing the right resources, you can create a successful and profitable iPhone app.
How can I make an iPhone app without coding
If you want to make an iPhone app but don’t have coding experience, there are still options available to you. Here are some ways you can create an app without having to write any code:
- Use Xcode and Interface Builder: Xcode is the official development tool for creating iOS apps. It comes with Interface Builder, which allows you to design the app’s user interface visually. With Xcode 6 and later, you can even create app layouts that look better on iPhone 6 and iPhone 6 Plus.
- Learn Swift: Swift is Apple’s programming language for iOS app development. It’s a beginner-friendly language, and there are many online resources available to help you learn it. Once you’ve learned Swift, you can start building your app programmatically.
- Use app builders: There are online app builders like Appy Pie and AppMakr that allow you to create apps using a drag-and-drop interface. These tools don’t require any coding knowledge and can help you quickly build an app with basic features.
- Hire a developer or mentor: If you have a specific app idea but don’t want to code it yourself, you can hire a developer or find a mentor who can guide you through the app development process. This option may require a higher cost, but it can help you create a more advanced and customized app.
- Use a platform like Expo: Expo is a toolchain built around React Native that enables you to create, develop, and publish iOS and Android apps. It simplifies the development process and allows you to see the changes you make in real-time on your device.
Before you get started, make sure you have a Mac as iOS app development requires using Xcode, which is only available on macOS. Also, keep in mind that while these options can help you create an app without coding, having some coding knowledge will always be an asset.
Once you finalize your app and want to test it on a real device, you’ll need an Apple Developer account. Adding your device to your developer account will allow you to test your app on it.
Remember that building an app is a trial-and-error process, so don’t be afraid to ask questions and seek help from the iOS developer community. There are many forums and online communities where you can find support and guidance throughout your app development journey.
What language is used to make iOS apps
When it comes to developing iOS apps, developers have a few options to choose from. The top language used for building native iOS apps is Swift. Swift is a powerful and advanced language developed by Apple specifically for iOS app development. It offers great performance and is frequently updated with new features.
In addition to Swift, developers can also use Objective-C, which is the older language used for iOS app development. However, Objective-C is being phased out in favor of Swift, so learning Swift is essential for developers looking to create cutting-edge apps.
If you’re familiar with JavaScript, you can also use frameworks like React Native or Expo to develop iOS apps using JavaScript. React Native allows you to build apps that can run on both iOS and Android devices, which can save time and cost. Expo, on the other hand, provides an online tool that helps you develop and test iOS apps without the need to set up a complex development environment.
For developers who are just getting started with iOS app development and don’t have a Mac, there are online tools like Appy Pie or AppMakr that allow you to create iOS apps without coding. These platforms provide a user-friendly interface where you can drag and drop features to build your app. However, keep in mind that these tools have limitations and may not offer the advanced features and performance of native iOS apps.
If you want to build native iOS apps and have a Mac, you will need Xcode, Apple’s integrated development environment (IDE) for iOS app development. Xcode provides a comprehensive set of tools and features to help developers finalize and test their apps before publishing to the App Store. It also requires the use of Swift or Objective-C for coding.
In summary, the language used to make iOS apps depends on the developer’s preference and the type of app they want to create. Swift is the recommended language for building native iOS apps, while JavaScript can be used with frameworks like React Native or Expo to develop apps for both iOS and Android devices. Online app makers offer a way to create iOS apps without coding, but they may not offer the same level of control and performance as native apps built with Xcode and Swift.


