

If you often send out documents or print copies, adding a watermark to your Word document can give it a professional and custom touch. A watermark is a faint background image or text that appears on every page or selected pages of a document. Word provides a comprehensive set of tools that allow you to easily create, add, and customize watermarks. In this guide, we will show you how to create a watermark in Microsoft Word 2010/2007.
To create a watermark in Word, follow these steps:
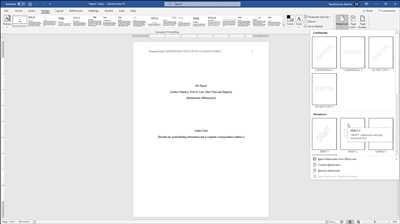
- Open Microsoft Word and click on the “Page Layout” tab in the ribbon.
- In the “Page Background” section, click on the “Watermark” button. A drop-down menu will appear with default watermark options, such as “Confidential” or “Draft”.
- If you wish to add a custom watermark, click on the “Custom Watermark” option at the bottom of the drop-down menu.
- A dialog box will open with several options. You can choose to create a text watermark or use an image as a watermark. If you select the text option, type your desired text in the provided box. You can also customize the font, size, color, and layout of the text. If you choose to use an image, click on the “Select Picture” button and choose the image file you want to use as a watermark.
- Once you have entered the desired settings, click on the “Apply” or “OK” button to add the watermark to your document.
Now, your watermark will appear as a background on every page of your Word document. You can also choose to apply the watermark only to specific pages by selecting the “Only on the First Page” or “Only on This Section” options in the watermark dialog box. Additionally, you can change the position of the watermark by selecting the “Diagonal” or “Horizontal” layout options.
By following these simple steps, you can easily add a watermark to your Word documents. Whether you want to display a confidential status, create a custom logo, or add a draft label, Word provides a user-friendly interface that allows you to create professional-looking watermarks. Use this guide as a comprehensive resource to enhance the layout and viewing experience of your documents.
Comprehensive Guide to Add a Word Watermark Default or Custom
Adding a watermark to a Word document can help protect its contents and add a professional touch to your documents. Whether you want to add a default or custom watermark, this comprehensive guide will show you how to do it step by step.
Adding a Default Watermark

- Open the Word document you wish to add a watermark to.
- Click on the “Page Layout” tab in the Microsoft Word ribbon.
- In the “Page Background” section, click on the “Watermark” button.
- A drop-down menu opens, displaying a list of pre-designed watermarks. You can choose from options like “Confidential,” “Draft,” “Do Not Copy,” and more. Click on the desired watermark.
- The watermark will be added to the document. You can view it by switching to the “Print Layout” or “Full Page” view.
Adding a Custom Watermark
- Open the Word document you wish to add a watermark to.
- Follow steps 2 and 3 from the previous section.
- In the “Watermark” menu, click on the “Custom Watermark” option at the bottom.
- A “Printed Watermark” dialog box opens. Here, you can select the “Text watermark” option to add a word watermark or the “Picture watermark” option to add an image or logo as a watermark.
- If you choose the “Text watermark” option, type the word or phrase you want to use as the watermark in the provided box. Select the font, size, layout, and color of the watermark according to your preference.
- If you choose the “Picture watermark” option, you can either select an image from the pre-made options or click on the “Select Picture” button to choose your own image or logo from your computer.
- Set the scale, washout, and layout options for the picture watermark.
- Click on the “OK” button to apply the custom watermark to your document.
Following these steps, you can add a default or custom watermark to your Word documents. Watermarks are often used to indicate the status of a document, add a background image or logo, or mark it as confidential. Experiment with different options and designs to create watermarks that enhance the visual appeal of your documents.
Sources:
- Microsoft Office Support: Add or remove a watermark in Word
- Microsoft Office Support: Customize the appearance of a watermark
Word 2007
In Microsoft Word 2007, you can easily add watermarks to your documents. Watermarks are usually used to indicate that a document is a draft, confidential, or for viewing purposes only. You can customize the watermark by adding text, an image, or a logo to the background of a page or multiple pages.
To create a watermark in Word 2007, follow the comprehensive guide below:
- Open the document you wish to add a watermark to in Microsoft Word 2007.
- Click on the “Page Layout” tab at the top of the Word window.
- In the “Page Background” section, click on the “Watermark” button.
- A drop-down menu will appear with default watermarks such as “Confidential” and “Draft”. If you want to use one of these default watermarks, simply click on the desired watermark.
- If you want to create a custom watermark, click on the “Custom Watermark” option at the bottom of the drop-down menu.
- A “Printed Watermark” window will open. In this window, you can choose whether to add a text or image watermark.
- If you choose “Text Watermark”, you can type the text you want to appear as the watermark in the “Text” field. You can also customize the font, size, and layout of the text.
- If you choose “Picture Watermark”, you can browse your computer for an image or logo to use as the watermark. You can adjust the scale and washout settings to make the watermark more or less visible.
- Once you have specified the desired watermark settings, click on the “OK” button.
- The watermark will be added to your document. You can see the watermark in the background of each page while viewing the document in either “Print Layout” or “Full Screen Reading” view.
That’s it! With these steps, you can easily add a watermark to your Word 2007 documents. Remember to save your document before closing it to preserve the changes you made.
Sources:
– Microsoft Office Support: Add or Remove a Watermark in Word
Add Watermark in Microsoft Word 2007 and 2010
If you wish to add a watermark to your Microsoft Word 2007 or 2010 document, you can easily do so by following this comprehensive guide. Watermarks are often used to indicate that a document is confidential, or to add a professional touch to your documents.
To add a watermark in Microsoft Word 2007 or 2010, first open the document you wish to add the watermark to. Then, from the top navigation bar, click on the “Page Layout” tab. From there, click on the “Watermark” button, which is located in the “Page Background” section.
A drop-down menu will appear with different watermark options. You can choose from pre-designed watermarks like “Confidential” or “Draft,” or you can create a custom watermark by clicking on the “Custom Watermark” option.
If you choose a pre-designed watermark, it will be added to all the pages in your document. However, if you select the “Custom Watermark” option, a dialog box will open where you can choose the layout, type, size, and font of your watermark.
If you would like to use an image as your watermark, you can do so by selecting the “Picture Watermark” option in the dialog box. From there, you can choose an image file from your computer or from the Microsoft Office collection of clip art.
Once you have selected or created your watermark, click on the “OK” button to add it to your document. The watermark will then appear as a default background on all the pages.
In addition to adding watermarks to individual pages, you can also add watermarks to specific parts of your document, such as headers or tables. To do this, you will need to use the “Header” or “Table” tools, which can be found under the “Insert” tab.
Adding a watermark to your Microsoft Word 2007 or 2010 document is a great way to enhance the visual appeal and protect the contents of your document. Whether you’re using a pre-designed watermark or creating a custom watermark, the process is quick and easy.
By following the steps outlined in this guide, you can add a watermark to your Microsoft Word 2007 or 2010 document, giving it a professional and polished look.
Источники:
- www.howtogeek.com
- www.wikihow.com
- www.support.microsoft.com
How to use Word document like a board
If you wish to use a Word document as a board for viewing or printing, you can make it more like a board by adding watermarks, headers, and custom background images. This guide will show you how to create a comprehensive board-like layout in Word.
First, open the Word document that you want to use as a board. Then, click on the “Page Layout” tab in Microsoft Word 2010 or 2007.
To add a watermark to your document, follow these steps:
- Click on the “Watermark” button in the “Page Background” section.
- From the drop-down menu, you can choose from a variety of default watermarks such as “Confidential” or “Draft”.
- If you wish to use a custom watermark, click on the “Custom Watermark” option at the bottom of the drop-down menu.
- In the “Printed Watermark” window that opens, you can either select an image as a watermark or type your own text.
- Once you have selected the desired watermark type, click on the “OK” button to apply it to your document.
To add headers or footers to your document, follow these steps:
- Click on the “Insert” tab in Microsoft Word.
- From the “Header & Footer” section, click on either “Header” or “Footer” to insert a header or footer into your document.
- In the header or footer area, you can add items like page numbers, document titles, or headings.
- You can also format the header or footer by using options in the “Header & Footer Tools” tab that appears when you are working in the header or footer area.
To change the background color or add a custom background image to your document, follow these steps:
- Click on the “Design” tab in Microsoft Word.
- In the “Page Background” section, click on the “Page Color” button to select a background color or click on the “Fill Effects” button to add a custom background image.
- In the “Fill Effects” window, you can choose from various types of fill effects such as gradient and texture.
- Once you have selected the desired background color or image, click on the “OK” button to apply it to your document.
By following the steps above, you can transform a Word document into a board-like layout that is more suitable for reviewing or presenting information. Whether you want to add watermarks, headers, or customize the background, Word provides the tools to make your document resemble a board.
Sources: Microsoft Word 2010 User Guide.
Sources
The following sources provide a comprehensive guide on how to create watermarks in Microsoft Word:
1. Microsoft Word Help Documentation: This is the default help documentation provided by Microsoft Word. You can access it by clicking on the “Help” button in the toolbar and searching for “watermarks.” It contains step-by-step instructions on how to add watermarks to your documents.
2. Microsoft Word Online Support: Microsoft Word’s official website offers a wealth of information on how to use various features, including watermarks. You can find more detailed instructions and troubleshooting tips on the official Microsoft Word support pages.
3. Online Tutorials: There are many online tutorials available that provide step-by-step instructions on how to create custom watermarks in Word. You can find these tutorials by performing a simple search on popular search engines like Google or Bing.
4. Microsoft Office Community: The Microsoft Office Community is an online forum where users can ask questions and receive answers from experts and other community members. You can visit the Microsoft Office Community website and search for “watermarks in Word” to find discussions and solutions related to creating watermarks.
5. YouTube Video Tutorials: YouTube offers a wide range of video tutorials on how to create watermarks in Word. You can search for “Word watermark tutorial” or similar keywords to find video guides that demonstrate the process visually.
Note: While the information provided in these sources is accurate and up-to-date at the time of writing, it is always recommended to double-check the instructions and use the official Microsoft Word documentation as the primary source of information.


