

Microsoft Forms is a versatile tool that allows you to create surveys, quizzes, and questionnaires online. With a wide range of features and options, it is a valuable resource for teachers, students, and business professionals alike.
Creating a new form is quick and easy. To get started, simply click on the “New Form” button or follow the links provided on the Microsoft Forms homepage. You can also choose from a variety of templates to get your form started. Templates are available for surveys, quizzes, and more, making it easy to find the right format for your needs.
When creating your form, you can add a title, description, and any text you’d like. You can also choose the font, color, and underline options for your questions and answers. Additionally, you have the choice to insert images, videos, and even links to webpages for further information.
In the questions section, you can choose from a variety of question types, such as multiple choice, text, rating, and more. For each question, you can specify if it is required or not, as well as the answer format, such as numbers or characters. You can even add descriptions or bullet points to further clarify your questions.
Along with the question section, you have a gallery of options available. These options include adding a new section, a note, or even a file upload. You can also choose to delete any sections or questions that have been created.
Once your form is complete, you can preview it to see how it will look to the participants. If everything looks good, you can choose to share it with others via a link or by embedding it on a webpage. You can also choose to collect responses anonymously or require participants to sign in with their Microsoft or school staff account.
Learning the keyboard shortcuts for Microsoft Forms can also be helpful for quicker form development. Some of these shortcuts include Ctrl/Cmd+B to bold text, Ctrl/Cmd+U to underline text, and Ctrl/Cmd+I to italicize text.
In conclusion, Microsoft Forms is an excellent tool for creating surveys, quizzes, and questionnaires. With its user-friendly interface, customizable options, and various question types, it is a valuable resource for both teaching and learning. Whether you need to create a quick survey or a comprehensive quiz, Microsoft Forms has you covered.
Creating a New Form
When working with Microsoft Forms, creating a new form is a simple and straightforward process. Follow these steps to get started:
| Step 1 | Open Microsoft Forms on your computer or mobile device. If you don’t have it installed, you can access it through the OneNote or OneDrive apps. |
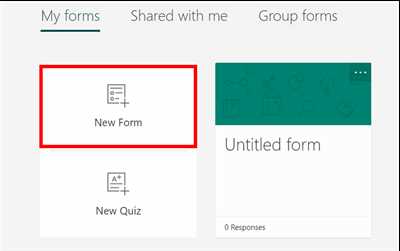
| Step 2 | Click on the “New Form” button to start creating a new form. |
| Step 3 | Choose a template from the template gallery or start with a blank form. |
| Step 4 | Add a title to your form, such as “Teaching Survey” or “Class Feedback”. You can also add a description to provide more context. |
| Step 5 | Start adding questions to your form. There are various question types available, such as multiple choice, text, date, and more. Select the appropriate type for each question. |
| Step 6 | Customize the appearance of your form by changing the font, color, and formatting options. You can use shortcuts like Ctrl+I (or Cmd+I on a Mac) to italicize text, Ctrl+B (or Cmd+B) to make it bold, and Ctrl+U (or Cmd+U) to underline it. |
| Step 7 | Organize your form by adding sections or subsections. This helps to keep the form structured and easier to navigate for users. |
| Step 8 | Add images, links, or videos to your form to enhance the learning experience or provide additional context for questions. |
| Step 9 | Use the “Preview” button to test your form before it is shared with others. This allows you to see how the form will look and function. |
| Step 10 | When you are ready, click on the “Send” button to distribute the form to your intended audience. You can share it via email, social media, or embed it on websites or class sites. |
| Step 11 | All responses from the form will be automatically collected and stored in a Microsoft Excel workbook or OneNote notebook, depending on your preferences. You can access and analyze the responses at any time. |
| Step 12 | To delete a form permanently, go to the Forms home page, select the form, click on the ellipsis (…) button, and choose “Delete”. Be careful, as deleted forms cannot be recovered. |
By following these steps, you can easily create engaging and informative forms for various purposes such as surveys, quizzes, feedback collection, and more.
Create a form with Microsoft Forms
Microsoft Forms is a powerful tool that allows you to easily create online forms and surveys. Whether you need to collect feedback, conduct a quiz, or gather information from staff or students, Microsoft Forms has got you covered.
To create a form with Microsoft Forms, follow these simple steps:
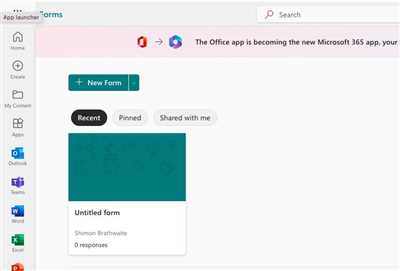
- Open Microsoft Forms by clicking on the Forms button in your Office 365 app launcher.
- Click on the “New Form” button to create a new form.
- Give your form a title and, if needed, add a description in the provided sections.
- Add questions to your form by clicking on the “Add question” button. You can choose different question types such as multiple choice, text, rating, and more.
- If required, you can mark certain questions as required so that users must answer them before submitting the form.
- To organize your form, you can create sections. Sections allow you to group related questions together and make your form easier to navigate.
- To further customize your form, you can change the theme, format text, add images, and insert links.
- Add additional information or instructions for your users in the form’s header or footer sections.
- You can also add other options to your form such as branching, which allows you to show or hide questions based on certain conditions.
- Once you have finished creating your form, click the “Preview” button to see how it will look to users.
- When you are ready to share your form, click the “Share” button to generate a link or embed code. You can also restrict access to your form by requiring a sign-in or setting a password.
- Data collected from your form will be automatically stored and organized in a workbook, which you can access and analyze.
Microsoft Forms is not only available on the web but also on mobile devices, making it easy to create and respond to forms on the go. Along with this, Forms can be integrated with other Microsoft tools such as OneNote and SharePoint, allowing for seamless collaboration and organization within your education or workplace.
Now that you know how to create a form with Microsoft Forms, you can start using it for various purposes such as teaching, conducting surveys, collecting feedback, or organizing events. The possibilities are endless!
Start a new form
When creating a new form, you can start from scratch or use templates that are available for different kinds of surveys and question types. To start a new form, follow these steps:
- Open Microsoft Forms by going to or through the Forms tab in your OneDrive or SharePoint sites.
- Click on the “New Form” button to create a new form.
- Enter a title for your form in the provided text box.
- Add questions to your form by clicking on the “+ Add question” button. You can choose from a variety of question types, such as text, file upload, rating, and more.
- Organize your questions into sections if needed. To add sections, click on the “Add section” button.
- Customize the look of your form by changing the font, color, and background under the “Theme” tab.
- Include any additional instructions or notes for participants in the “Message” field.
- Specify if certain questions are required or optional.
- Insert images, links, or videos to enhance your form using the toolbar at the top of the page.
- Use the “Preview” button to see how your form will look to users.
- When you are ready, click on the “Send” button to share your form with others. You can choose to send the form via email, generate a QR code, or share a link.
Note that any responses collected through the form will be stored in a spreadsheet-like format in your OneDrive or SharePoint that is associated with your Microsoft account.
Create a new form and start collecting data from users in a quick and organized manner by following these easy steps!
Add questions
Once you have created an MS Form, you can start adding questions to it. To access the questions section, go to the webpage where the form is available and choose the “Add question” button.
There are various types of questions to choose from, such as multiple choice, text answers, and image choice. Select the type that suits your needs and enter the question along with any necessary instructions or choices.
Note that once a question is created, you cannot permanently delete it. However, you can choose to hide it from users by restricting access to it. Also, if you want to reorder the questions, you can use the Ctrl/Cmd+U shortcut to go up and Ctrl/Cmd+D to go down.
Keep in mind that there are some restrictions when it comes to question titles. They can have up to 200 characters, including spaces. You can also use formatting options, such as bold or underline, to highlight important words or sections of the question.
If you want to insert an image into your question, you can do so by clicking the “Insert” button and selecting an image from your computer or from an online source. Note that images may not be available for some question types, such as multiple choice or quizzes.
Once the questions have been created, you can start organizing them into sections. Sections can help users navigate through the form and group related questions together. To create a section, click on the “Add section” button and enter a title for it.
If you want to add descriptions or follow-up explanations for your questions, you can do so by adding a note to each question. Notes can contain text, images, or even links to external websites.
Finally, if you have been working on a form and have deleted some questions, you can still restore them by going to the “Deleted” section in your OneNote notebook. From there, you can select the questions you want to restore and click the “Restore” button to bring them back.
These are some of the steps you can follow to add questions to your MS Form. By organizing and structuring your form effectively, you can create a user-friendly quiz or survey that meets your needs.
Preview your form
When creating an MS Form, it is important to preview your form before sharing it with your audience. Previewing your form allows you to see how it will look to users and ensure that everything is formatted correctly. Here are some steps to preview your form:
1. Open the MS Forms webpage in your web browser and sign in with your Microsoft account.
2. On the Forms homepage, click on the form you have created or want to preview.
3. On the form’s editing page, you will see a preview of your form on the right side of the screen. This preview will show you how the form will appear to your users.
4. Take a few moments to review the form’s layout, titles, questions, and answer options. Make sure everything is organized and easy to understand.
5. Check the formatting of your form. You can use features such as bold, italic, and bullet points to make your form more visually appealing.
6. If your form includes questions that require an answer, make sure the “required” option is selected for those questions. This will ensure that users cannot submit the form without answering those questions.
7. If you have enabled the “Quiz” option for your form, you can preview the scoring system. This will show you how scores will be calculated when users submit the form.
8. Preview the image and file upload sections, if applicable. Ensure that users can easily upload files and that the form will collect the data correctly.
9. If you have integrated other Microsoft services, such as OneDrive or Excel, into your form, make sure that links and access to these services are available.
10. Pay attention to the mobile preview of your form. Make sure that it is user-friendly and easy to navigate on a mobile device.
11. When previewing your form, note any changes or adjustments that you may need to make. You can go back to the editing page to make these changes.
12. Finally, click the “Preview” button at the top of the page to see how your form will look when it is live. This will open a new tab or window where you can interact with the form as a user would.
By previewing your form, you can catch any errors or problems before sharing it with others. This is especially important if you are using the form for teaching or business purposes. Take the time to preview your form and make any necessary adjustments to ensure a smooth user experience.
How to create a form from a template
Creating a form from a template is a quick and easy way to organize information and collect data. Microsoft Forms offers various templates that you can use to create forms for different purposes, such as education, surveys, events, and more. Follow the steps below to create a form from a template:
- Access the Microsoft Forms website by opening a web browser on your computer or mobile device.
- Sign in with your Microsoft account or school/work account if prompted.
- In the Forms homepage, click on the “New Form” button to start creating a new form.
- On the top portion of the page, you will see a selection of templates. Click on the template that best suits your needs.
- A preview of the selected template will be displayed. Click on the “Use Template” button to start working with it.
- The selected template will be loaded, and you can start customizing it according to your requirements.
- The form title and a brief description will already be filled in. You can edit these or add additional text to provide more context.
- Questions will also be pre-populated in the form. You can modify, delete, or add new questions as needed.
- To add a new question, click on the “+” button in the question list. You can select from various question types, including multiple choice, text, rating, and more.
- For each question, you can customize the question text, add answer choices, set restrictions, and more.
- If you want to add more sections or organize questions using headers, you can do so by clicking on the “Add New” button and selecting the desired option.
- To insert images, links, or other media into your form, use the toolbar located above the question list. You can also format text using bold, underline, and other formatting options.
- Once you have finished customizing your form, click on the “Preview” button to see how it will look like for the users.
- If everything looks good, you can click on the “Send” button to share the form with others. You can choose to send it via email, generate a link, or embed it on a webpage.
- The form responses will be automatically collected and can be accessed by clicking on the “Responses” tab.
Creating a form from a template in Microsoft Forms allows you to quickly gather information and streamline the data collection process. Whether it’s for education, surveys, or other purposes, using templates can save you time and effort in form development. Try it out and see how it can benefit you!
Quick Links
In Microsoft Forms, you can create different types of questions such as multiple choice, rating, and text entry. You can also add images and descriptions to your questions, and choose whether a question is required or not.
To start creating a new form, you can click on the “New Form” button in the top left corner of the screen. You can also access Forms through other Microsoft apps such as Word, Excel, and PowerPoint by clicking on the “Insert” tab and selecting “Forms”.
Once you have created your form, you can customize the layout and format by using the toolbar located at the top of the screen. You can change the font style, size, and color of your text, as well as add bold, italics, and underlining. You can also add bullets and numbers to create a more organized structure.
If you have already started creating a form and want to add a new question or section, you can use the “Add new” button at the top of the page. This will open a menu with different question types and section options that you can choose from.
If you want to delete a question or section, you can use the “Delete” button next to the question or section title. Please note that once a question or section is deleted, it cannot be recovered.
To upload a file or image from your computer, you can click on the “Upload” button in the toolbar and select the file or image you want to add. You can also insert images from online sources, such as the Microsoft Gallery or OneDrive.
When you are ready to share your form, you can click on the “Share” button in the top right corner of the screen. This will generate a link that you can send to users to collect their responses. You can also choose whether users need to sign in or not before they can access and answer your form.
Microsoft Forms automatically collects and stores the data from your form, which you can access and analyze through the “Responses” tab. You can view the responses as a summary or individually, and export the data to Excel for further analysis.
If you have any questions or encounter any problems while creating or using Microsoft Forms, you can use the keyboard shortcut “Ctrl+/” to open the Help pane. You can also find more information and resources on the Microsoft Education website.
That’s it! With these quick links and tips, you can create and customize your own forms in Microsoft Forms. Start teaching, collecting data, and getting more insights with this user-friendly tool. Happy form creating!
PROBLEM WITH THIS WEBPAGE
If you are experiencing any issues with this webpage, there could be a few reasons why. Firstly, check if your internet connection is stable and you’re not experiencing any network interruptions. If other websites are working fine, then the problem might lie specifically with this webpage.
There may be some formatting issues with the text on the webpage. Please make sure that all the bullets, words, and titles are properly formatted and readable. You can use features like underline, bold, different font types, and colors to make the text more visually appealing and easier to read.
Another potential problem could be with the buttons or forms on the webpage. Make sure they are functioning properly and that they are working as intended. If there are any issues with the forms, double-check the settings and configurations to ensure that they are correct.
If you are using any images or videos on the webpage, make sure they are properly uploaded and displayed. Check the resolution, size, and format of the images to ensure they are compatible with the webpage. Additionally, make sure that all the links on the webpage are valid and working.
If you are creating this webpage for educational purposes, there could be restrictions imposed by your school or organization. Check if there are any restrictions on the types of content you can include or the specific platforms you can use. You may need to consult with your staff or IT department for further assistance.
If you are using Microsoft OneNote or OneDrive to create this webpage, please ensure that you have access to these platforms and that your account is properly set up. Check if the required permissions are granted for creating and publishing webpages.
Lastly, if you have been working on this webpage for a while and have made several changes, it’s possible that some of the changes were not saved properly. Make sure to save your work regularly and create backups to avoid losing any important data.
If none of the above suggestions resolve the problem, it may be a technical issue with the webpage itself. Consider reaching out to technical support for further assistance.
Sources
When creating a Microsoft Form, there are several sources you can use to gather information and learn more about the process. Some of the sources available to you include:
- Microsoft Office Support – Microsoft’s official support website provides detailed instructions and tutorials on how to use Microsoft Forms.
- Microsoft Forms Gallery – You can access a collection of pre-created forms and templates in the Microsoft Forms Gallery. These templates can be used as a starting point for your own forms.
- Microsoft OneDrive – Microsoft Forms is integrated with OneDrive, meaning you can save and access your forms directly from your OneDrive account.
- Microsoft Word – You can create a Microsoft Form directly from a Word document by following the steps provided in the Word application.
- Microsoft Excel – Forms can also be created from an Excel workbook. This allows you to use data from spreadsheets in your forms.
- Microsoft SharePoint – Microsoft Forms can be added to a SharePoint webpage, making them easily accessible to users.
- External Websites – You can embed a Microsoft Form into an external webpage by following the provided instructions on the Microsoft Forms website.
These sources will help you learn more about creating and using Microsoft Forms, providing you with the necessary tools and knowledge to make the most of this powerful survey and quiz creation tool.


