
If you’re looking for a way to track your finances and save money, creating a spending spreadsheet can be a great tool. With just a few simple steps, you can set up a spreadsheet that works with your budget and helps you achieve your financial goals.
To start, open a new Google Sheets document or Excel and create a blank sheet. Let’s name this sheet “BudgetSheet” for now.
Once you have the sheet open, you’ll need to create columns to track different categories of expenses. You can create columns like “Transport”, “Food”, “Bills”, “Entertainment”, or any other expenses you’d like to track. These columns will be where you add your daily expenses.
Now it’s time to format your sheet to make it easier to read and use. Select the top row of cells and apply formatting using the options provided. You can give the cells a bold font, a different background color, or any other formatting that helps you quickly identify and locate information.
The next step is to calculate your income and subtract your expenses. In the first column, list your income and any other regular sources of money. In the second column, list your expense categories. In the third column, calculate the total for each category by adding up the expenses in that category. In the fourth column, subtract the total expenses from your income to get an overview of how much you’ve spent in each category.
To make your spreadsheet even more useful, you can use conditional formatting to highlight specific cells based on certain criteria. For example, you can set it up to automatically highlight cells that contain expenses over a certain threshold or highlight cells that indicate you’ve exceeded your budget for a particular category.
Once you have your spending spreadsheet set up, it’s time to enter your expenses. You can do this on a daily or weekly basis, depending on your preference. Make sure to keep track of every expense you make and enter it into the corresponding category column.
By keeping track of your spending in a spreadsheet, you’ll have a clear view of where your money is going and how much you’re saving. This will be an invaluable guide to help you stay on track with your financial goals and make adjustments where needed. Don’t forget to regularly check your spending spreadsheet to stay updated on your budget and make any necessary changes.
So, don’t wait any longer! Use this step-by-step guide to create your own spending spreadsheet and take control of your finances. Happy budgeting!
Bonus tip: If you’re not comfortable creating a spreadsheet from scratch, you can search online for budgeting spreadsheet templates. There are many free options available that you can download and customize to fit your needs.
- Overview How to Make a Budget with Google Sheets
- Step 1: Open Google Sheets
- Step 2: Set up Your Budgetsheet
- Step 3: Add Your Income and Expenses
- Step 4: Track Your Spending
- Step 5: Set Budget Goals
- 1 Create a new Google Sheet
- 2 Add your income at the top
- 3 List your expenses by category
- 4 Total your income minus expenses
- 5 Track your spending daily
- BONUS Use BudgetSheet to create your budget automatically
- Want more? Join our mailing list
- Step 4: Add extra columns to your budget template
- Sources
Overview How to Make a Budget with Google Sheets
Creating a budget is an essential step in managing your finances effectively. Google Sheets provides a simple and user-friendly platform for creating a spending spreadsheet and tracking your expenses. In this guide, we will go through the step-by-step process of creating a budget using Google Sheets.
Step 1: Open Google Sheets
First, open Google Sheets and create a new spreadsheet. Give it a name to easily identify it later.
Step 2: Set up Your Budgetsheet

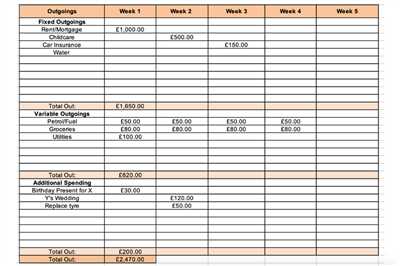
In your spreadsheet, create multiple columns to categorize your expenses. A basic setup could include columns for Category, Expense, Date, and Amount. Feel free to customize it based on your personal budgeting needs.
Step 3: Add Your Income and Expenses
Add your regular income sources into the appropriate cell. Then, add your expenses in the corresponding cells. As you add more expenses, Google Sheets will automatically calculate the total amount spent in the designated cell at the top of the expense column.
Step 4: Track Your Spending
To track your spending and stay on budget, you can use conditional formatting in Google Sheets. This feature lets you highlight cells that exceed a certain amount or percentage of your budget. It can help you identify areas where you may need to cut back.
Step 5: Set Budget Goals
Based on your income and expenses, set budget goals for each category. Google Sheets allows you to create new columns and name them according to your budget goals. With these goals in mind, you can easily track your progress and make adjustments as needed.
In summary, creating a budget with Google Sheets is a straightforward process that helps you keep your finances in check. By using this spreadsheet template, you can track your income, subtract your expenses, and automatically calculate your spending. It also provides an overview of how much you have spent in each category, making it easier to stay on top of your financial goals. So, start budgeting with Google Sheets and take control of your finances!
1 Create a new Google Sheet
Creating a spending spreadsheet can help you track your expenses and make informed decisions about your finances. One simple way to do this is by using Google Sheets, a free online spreadsheet tool. In this step-by-step guide, we’ll show you how to create a new Google Sheet for your budgeting needs.
- Open your web browser and go to https://docs.google.com/spreadsheets.
- If you don’t have a Google account, click on “Create account” to join Google and create a new account. If you already have a Google account, simply sign in.
- Once you’re signed in, click on the “+” button in the top left corner to create a new blank spreadsheet.
- Give your new spreadsheet a name by clicking on “Untitled spreadsheet” at the top and typing in a name, such as “Monthly Budget”.
- Now, let’s set up the basic structure of your budget sheet. In the first row, starting from column A, you can list the categories of your expenses, such as “Housing”, “Transportation”, “Food”, “Entertainment”, and “Savings”.
- In the next row, starting from column B, you can list any regular income sources you have, like your salary or other income.
- In the next column, you can write down your financial goals for each category, such as how much you want to save or how much you want to spend.
- Below the category names, create a row for each expense item you want to track. This will give you a clear overview of where your money is going.
- In the cells below the income sources, enter the amount you spend in each category on a daily or monthly basis. You can use the SUM function to automatically calculate the total amount you’ve spent in each category.
- Here’s a bonus tip: you can use conditional formatting to make your budget sheet look more organized and visually appealing. For example, you can use different colors to highlight when you’ve exceeded your budget for a specific category.
- Save your budget sheet by clicking on “File” in the top left corner, then selecting “Save” or “Save as”.
Once you’ve created your budget spreadsheet, you can start using it to track your expenses, set goals, and make financial decisions based on your spending habits. Whether you’re new to budgeting or just want a simpler way to keep track of your finances, Google Sheets offers a user-friendly and flexible solution.
2 Add your income at the top
Once you have your spending spreadsheet set up, it’s time to add your income. This step will give you an overview of how much money you have to work with and how much you can allocate towards different expenses.
To make your finances simple and easy to track, start by creating a new column at the top of your spreadsheet. Give this column a name like “Income” or “Monthly Earnings”. In the cells below this column, you can enter the amount of money you earn on a regular basis.
If you have multiple sources of income, you can create additional columns to track each source separately. For example, you could have one column for your regular job and another for any bonus or extra income you may receive.
Once you’ve entered your income information, you can use a simple formula to calculate the total. In the cell next to your last income entry, use the formula “=SUM(A2:A)” where “A2” is the first cell with income information and “A” is the column you’re using for income. This formula will automatically add up all the income entries and give you a total.
Having your income at the top of your spreadsheet helps you to see how much money you have available to spend. It also gives you a clear starting point when you begin to allocate your income to different expense categories. If you’re using a Google Sheets template or an Excel budgeting sheet, you can select this income column and use it as a conditional variable to help you calculate how much you can spend in different categories.
Adding your income at the top of your spending spreadsheet will give you a clear overview of your finances and make it easy to track how much you’re earning and where you can save. It’s an essential step in creating a budget that works for you. Once you have your income in place, you can move on to the next step and start listing out your expenses.
3 List your expenses by category
Once you have created your budget sheet in Google Sheets or Excel, it’s time to start adding your expenses. To keep things simple, you may want to create a list of categories that you will use to categorize your expenses. This will help you get an overview of how much you are spending in each category.
To create a category list, start by selecting an empty column at the top of your budget sheet. In this column, you can add the names of the categories you want to use. For example, you can have categories like “Housing”, “Transportation”, “Food”, “Entertainment”, “Utilities”, “Debt Payments”, and “Savings”.
Once you have listed all the categories, you can start adding your expenses in the cells below each category. For example, if you spent $100 on groceries this month, you can add that amount in the cell next to the “Food” category. This way, you can track how much you have spent in each category.
To make it easier to work with your budget sheet, you can use conditional formatting to highlight the cells where you’ve spent too much. This can be done by selecting all the cells with expense information and applying conditional formatting rules based on your spending goals.
The spreadsheet works automatically to calculate the total spent in each category, so you don’t have to manually calculate it. It subtracts your expenses from your income to give you the total amount saved or spent for the month.
This category list will also help you create a spending overview for your budget. You can use this information to see where you are spending the most money and where you can cut back to save more.
So, in this step, create a category list at the top of your budget sheet and start adding your expenses below each category. Use conditional formatting to help you track your spending and give you a visual representation of your budgeting goals.
4 Total your income minus expenses
Once you’ve created a budget template and added all your income and expense information to the spreadsheet, it’s time to start tracking your spending. This step will help you subtract your expenses from your income to see how much you have left over.
In your budget sheet, select a cell where you want to display the total amount of your income minus expenses. This could be at the top of the list or in a new column. Let’s name this cell “Total”.
To calculate the total, you can use a simple formula in Google Sheets or Excel. In the cell next to “Total”, type the following formula:
=SUM(income column) – SUM(expense column)
Replace “income column” with the range of cells where you listed your income sources, and “expense column” with the range of cells where you listed your expenses. For example, if your income sources are in column C and your expenses are in column D, the formula would be:
=SUM(C2:C) – SUM(D2:D)
After typing the formula, press Enter to get the result. The cell will automatically calculate the total amount of your income minus expenses.
This total will give you an overview of how much money you have left after deducting your expenses from your income. If the result is positive, congratulations! You have extra money to save or use towards other goals. If the result is negative, you may need to review your expenses and find ways to reduce them.
This step helps you keep track of your finances on a regular basis. By creating a spending spreadsheet and calculating your income minus expenses, you can keep a close eye on your budget and make adjustments as needed.
5 Track your spending daily
Tracking your spending daily is an essential step in creating a budget and staying on top of your expenses. It helps you to see where your money is going and allows you to make adjustments if needed. Whether you use a spreadsheet or a budgeting app, tracking your spending is crucial for financial success. Here is a step-by-step guide on how to track your spending daily:
- Create a budget sheet: Start by creating a budget sheet in Excel or Google Sheets. If you don’t have a template, you can use a simple spreadsheet with columns for the date, category, description, and amount spent.
- Add your income: In the first column of your budget sheet, enter your income for the month. This can include any regular income like salary, freelance earnings, or bonuses.
- Track your expenses: Each day, open your budget sheet and add any expenses you’ve incurred. Make sure to give each expense a category so you can easily view it later. You can also add a column for notes if you need to add any additional information.
- Calculate your spending: Once you’ve entered all your expenses, create a formula in the Total column that automatically subtracts your expenses from your income. This will give you an overview of how much you’ve spent and how much you have left for the month.
- Check your spending regularly: To stay on track, regularly check your spending against your budget. This will help you identify any areas where you may be overspending and make adjustments accordingly.
Tracking your spending daily not only helps you stay organized but also gives you a clear picture of your finances. By following these steps, you can create a budget that works for you and start saving for your financial goals.
BONUS Use BudgetSheet to create your budget automatically
If you want to take your budgeting to the next level, BudgetSheet can help you create your budget automatically. BudgetSheet is a useful tool that simplifies the process of budgeting by checking and creating your budget for you.
With BudgetSheet, all you need to do is input your income and expenses, and it will automatically calculate and create a budget for you. It takes into account your regular expenses, such as rent, utilities, and transportation, as well as any extra or irregular expenses you may have.
To start using BudgetSheet, simply open the template provided or create a new sheet in Google Sheets or Excel. Once you have the sheet open, you can add your income sources in the “Income” column and your expenses in the “Expenses” column. BudgetSheet lets you categorize your expenses, so you can easily track where your money is going.
Once you’ve entered all your income and expenses, BudgetSheet will subtract your expenses from your income to give you an overview of how much you have left to spend. It also lets you set goals and gives you a daily spending limit based on your budget. This helps you stay on track and avoid overspending.
If you want to look at your budget in a different format, BudgetSheet lets you select different columns and cells to get the information you need. You can also use conditional formatting to highlight certain cells or categories based on your preferences.
In addition to helping you create your budget automatically, BudgetSheet also offers other useful features. For example, it has a mailing list feature where you can join to receive helpful budgeting tips and guides directly in your email inbox. It also has a “Total Spent” column that keeps track of how much you’ve spent so far, and a “Budget” column that tells you how much you should be spending in each category.
To use BudgetSheet, you can either save it to your computer or use it online with Google Sheets. Whichever method you choose, BudgetSheet is a great tool to help you take control of your finances and make budgeting simple and efficient.
So, if you’re ready to make budgeting easier and more automated, give BudgetSheet a try. It will save you time and effort while giving you a clear view of your finances.
Want more? Join our mailing list
If you want to save more and stay on track with your daily expenses, creating a spending spreadsheet can be a helpful tool. Whether you use Google Sheets or Excel, this step-by-step guide will give you a template to work with and help you calculate your budget and expenses.
1. Open a new spreadsheet in Google Sheets or Excel. This will be your budget sheet where you’ll track your spending.
2. Start by adding the following columns: date, name, category, regular expense, extra expense, and income. These columns will help you keep track of where your money is going.
3. In the “regular expense” column, enter the names of the categories you want to track, such as food, transportation, utilities, etc.
4. Once you have set up your columns and categories, you can start inputting your daily expenses. In the “name” column, add the name of the expense, and in the corresponding category column, select the category that expense falls into.
5. In the “regular expense” and “extra expense” columns, input the amounts you’ve spent. The spreadsheet will automatically calculate the total amount spent in each category based on the information you provide.
6. In the “income” column, add the amounts of money you receive on a regular basis, such as your salary or any other source of income.
7. To get an overview of your spending, you can use conditional formatting to highlight where you may be spending too much. For example, you can set a rule to automatically highlight any cell where the expenses in a particular category are greater than a certain amount.
8. To calculate your budget for the month, subtract your total expenses from your total income. This will give you an idea of how much extra money you have or if you need to make any adjustments to your spending habits.
By using a spending spreadsheet, you can create a simple yet effective budgeting tool that will help you keep track of your finances. If you want even more tips and information, join our mailing list. We regularly send out bonus tips and resources to help you make the most of your budget and reach your financial goals.
| Date | Name | Category | Regular Expense | Extra Expense | Income |
|---|---|---|---|---|---|
| – | – | – | =SUM(C2:C) | =SUM(D2:D) | =SUM(F2:F) |
Step 4: Add extra columns to your budget template
Now that you have a simple budget template set up, it’s time to customize it to fit your specific spending needs. One way to do this is by adding extra columns to your budget sheet.
Adding extra columns to your budget sheet allows you to track additional spending categories, giving you a more detailed overview of your finances. This can help you see where you’re spending the most and where you can make adjustments to save more.
To add extra columns to your budget template in Excel, follow these steps:
- Open your budget template in Excel.
- On the top of your sheet, select the column next to the “Category” column. This is where you’ll add your new columns.
- Name your new column based on the spending category you want to track. For example, if you want to track your transportation expenses, you can name the column “Transport” or “Transportation”.
- Repeat step 2 and 3 for each additional spending category you want to track.
- Once you’ve added all the extra columns you need, you can start entering the spending information for each category.
- For each month, enter the amount you’ve spent in each category in the corresponding cells.
- Excel will automatically calculate the total amount spent for each category and give you a grand total at the bottom of the column.
By creating extra columns in your budget spreadsheet, you can easily keep track of your spending in more specific categories. This will give you a clearer picture of how much you’re spending and can help you make more informed budgeting decisions.
Sources
If you want to create a spending spreadsheet, there are several sources you can use to help you get started.
1. Google Sheets: Google Sheets is a free online spreadsheet tool that allows you to create and edit spreadsheets. It’s a simple and easy-to-use platform where you can add and track your expenses. You can start with a blank sheet or use a template provided by Google.
2. Excel: If you have Microsoft Excel installed on your computer, you can use it to create a spending spreadsheet. Excel provides various features and functions that can help you organize and calculate your expenses. You can create columns for categories, expenses, and totals.
3. Budgeting apps: There are plenty of budgeting apps available, both free and paid, that can help you track your expenses. These apps often have features to automatically track your expenses and categorize them for you. You can input your income and expenses, and the app will calculate your budget based on your goals.
4. Mailing list: Joining a mailing list or subscribing to a personal finance website can provide you with helpful information and tips on budgeting and tracking expenses. You can learn new strategies and techniques to improve your financial management skills.
5. Templates: Many websites offer free budgeting templates that you can download and use. These templates often come preformatted with categories and formulas to automatically calculate totals and subtract expenses from your income. They can be a great starting point if you’re not sure how to structure your spreadsheet.
Remember, creating a spending spreadsheet is just the first step. It’s important to regularly check and update your spreadsheet to stay on top of your expenses. By tracking your spending, you can save more, set financial goals, and have a clearer view of your finances.