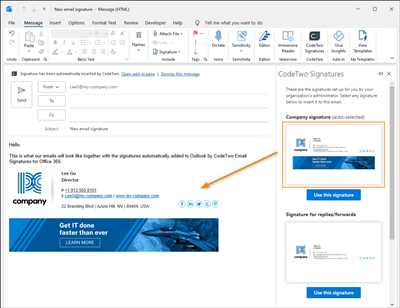
If you’re a Microsoft Outlook user, you might want to personalize your email messages and give them a personal touch. One way to do this is by adding a signature to your emails. A signature is like a virtual business card, as it helps the person on the receiving end know more about you and your organization.
In Outlook, there are a few ways to create and add a signature to your emails. You can create a signature in the browser version of Outlook or in the Outlook app on your laptop. Once created, your signature will be available on every device you use Outlook on.
To create a signature in Outlook, first, open Outlook and go to the settings menu. There, you’ll find an option for “Signatures.” Click on it, and a pane will open up where you can manage your signatures.
There, you can create a new signature by clicking on the “New” button. Give your signature a name so that you can easily identify it later. You can choose from pre-designed templates or start from scratch and design it yourself. You can also format your signature by changing the font, size, color, and more.
Once your signature is created, you can select it from the drop-down menu under “Choose default signature.” You can also choose whether to include your signature on new messages, replies/forwards, or both.
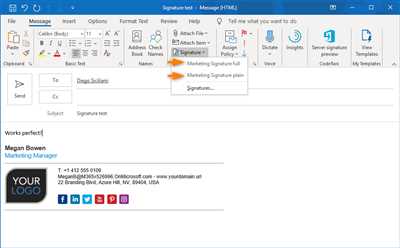
In addition to creating a signature, you can also insert an Outlook signature into specific email messages. To do this, compose a new message or open a reply/forward. In the toolbar, you’ll find a “Signatures” button. Click on it, and a menu will open up showing all the signatures you’ve created. Select the desired signature, and it will be inserted into your email message.
If you prefer using the browser version of Outlook, the process is quite similar. When composing a new email, click on the three dots in the lower-right corner of the compose pane and select “Insert signature.” Choose the signature you want to use, and it will be inserted into your email.
Creating and inserting an Outlook signature can help give your emails a professional and polished look. It’s a small detail, but it can make a big difference in how you are perceived by the recipient. So take a few moments to create a signature that best represents you and your organization.
Create an Email Signature in Outlook Online
If you use Outlook Online as your email client, you have the ability to create a personalized email signature. This signature will be automatically added to every email you send, giving your messages a professional and polished look.
To create an email signature in Outlook Online, follow the steps below:
- Sign in to your Outlook Online account in your web browser.
- In the top-right corner, under the toolbar, click on the Settings menu (the gear icon).
- A new pane will open on the right side of the page. Under the Your app settings section, click on Mail.
- A new page will open with various options and settings for your mailbox. Under the Automatic processing section, click on Email signature.
- In the signature editor, enter the text for your signature. You have several formatting choices, including font size, font color, and text alignment.
- If you want to add images or links to your signature, you can do so by clicking the Insert Picture or Insert Hyperlink icons in the toolbar.
- Once your signature is created, select the Save button at the top of the page.
- Now, every email you compose or forward will automatically include your signature at the bottom. If you have more than one email address associated with your Outlook account, you can choose which signature to use for each email address.
Outlook Online also provides you with some additional ways to customize your signature. For example, you can create different signatures for personal and professional use, or even create separate signatures for different departments within your organization.
If you need help creating your signature, there are templates and examples available to assist you. You can also copy and paste a signature that you’ve created in another program, like Microsoft Word or OneNote.
Remember, creating an email signature is a great way to give your emails a professional touch and make a good impression on the recipients. So take advantage of this feature and create a signature that reflects your personal or organization’s style and design!
Create an email signature
Every user can create a personalized email signature in Outlook. This signature will be automatically added to every email you compose. Outlook offers various options to design your signature, which opens up a new level of professionalism and aesthetic appeal to your emails.
To create an email signature, open Outlook and go to the “File” menu. From there, select “Options” and then click on “Mail”. In the “Compose messages” section, you will find the option to add a signature. Click on “Signatures” to access the signature creation window.
In the signature creation window, you’ll see a pane on the left side where you can choose the email account for which you want to create a signature. If you have multiple accounts in Outlook, like a work and a personal account, you can create a separate signature for each of them.
To create a new signature, click on the “New” button and give your signature a name. This name is for your own reference and will not be visible to the recipients of your emails. Once you’ve named your signature, you can start designing it.
Outlook provides you with a formatting toolbar similar to those available in various word processing app, cell, email, or web browser. You can use this toolbar to format the text in your signature, including font, size, and more.
If you want to add organization-specific information, like your name, designation, contact details, and more, you can use the options under the “Business Card” menu. You can also select a pre-designed template provided by Microsoft or create a signature from scratch.
Once you’ve designed your signature, click on the “OK” button to save it. You can now return to the main signature window, where you will see a list of all the signatures you have created. From here, you can select the signature you want to use as your default signature for new messages, for replies/forwards, or for specific email accounts.
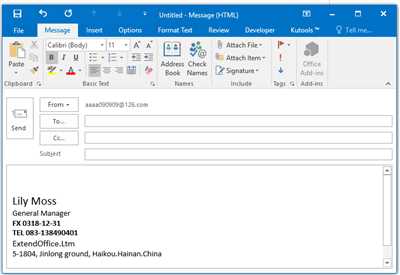
To insert a signature into your email, simply place your cursor where you want the signature to appear and then select the appropriate signature from the toolbar. You can also configure Outlook to automatically insert your signature in every new email you compose.
There are multiple ways to create an email signature in Outlook, and the choices you make will depend on your personal preferences and needs. But once you’ve created your signature, it’s like giving your email a stamp of professionalism and style.
So go ahead, create your own personalized email signature in Outlook today and let your emails stand out from the crowd!
Create and add an email signature in Outlook Web App

If you’re using Outlook Web App to send and receive email, you have the ability to create and add an email signature to your messages. A signature is a block of text that is automatically added to the bottom of every email you send. This is helpful for providing contact information or a personal touch to your messages.
To create and add a signature in Outlook Web App, follow these steps:
1. Open the Outlook Web App and then click on the Settings menu.
In the toolbar under the Outlook Web App logo, you’ll see a gear icon. Click on it to open the Settings menu.
2. Enter your signature in the Signature box.
On the Settings page, go to the Mail section and click on “Signatures.” In the Signature box, enter your desired signature. You can enter your name, job title, phone number, and any other contact information you want to include.
3. Format your signature using the options provided.
In the Signature box, you’ll see a toolbar with various options for formatting your signature. You can change the font, size, and color of the text, as well as add links, images, and more. Use these options to design your signature to your liking.
4. Save your signature.
Once you’ve created your signature, click on the Save button at the top of the page to save your changes. Your signature will now be automatically added to all new messages you compose in Outlook Web App.
5. Check your signature in a new message.
To make sure your signature is working correctly, open a new message in Outlook Web App. Your signature should be automatically added to the bottom of the message. You can also use the “Signature” menu in the compose pane to select from multiple signatures if you have more than one created.
By following these steps, you can create and add an email signature in Outlook Web App. Your signature will give every email you send a professional and personalized touch, helping you make a good impression with every message you send.
Want more

If you’re looking for more options when it comes to creating an Outlook signature, there are several ways to get additional help and templates:
|


