

If you’re a designer or working in the field of design, you must have come across Figma – a powerful design tool that has gained immense popularity among design professionals. With the help of Figma, you can create stunning designs, prototype them, and collaborate with your team seamlessly. In this article, we will guide you through the process of creating a Figma prototype and explore some useful techniques and features that can enhance your design workflow.
To start creating a Figma prototype, first, you need to have a Figma account. If you don’t have one, go to the Figma website and sign up. Figma offers different subscription plans, including a free plan with some limitations. Once you have signed up and logged in, you can start the prototyping process.
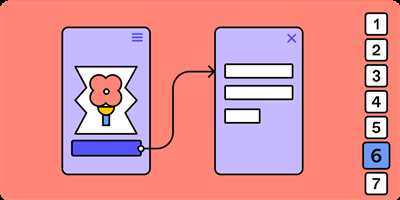
Figma allows you to design prototypes for different devices such as desktop, tablet, and mobile. You can create responsive designs that adapt to different screen sizes and resolutions. Figma provides a wide range of tools and features to help you design and prototype with ease. One of the common techniques for creating a prototype in Figma is by using frames and objects. You can design different screens of your app or website in separate frames and then create interactions between them using objects.
To create interactions, you can use features like auto animate and smart animate. Auto animate allows you to create smooth transitions between frames, while smart animate automatically detects changes in objects and creates animations based on those changes. You can also add interactions like hover, click, and drag to make your prototype more interactive and realistic.
Once you have finished designing and prototyping your project, you can share it with others for feedback or collaboration. Figma provides different sharing options such as generating a link to the prototype, embedding it in a website, or exporting it as a video or GIF. You can also invite team members to view and edit the project, making it easier to collaborate on the design process.
With Figma’s cloud-based system, you can access your designs and prototypes from anywhere as long as you have an internet connection. This makes it convenient for teams working remotely or for freelancers who need to showcase their work to clients. Figma also provides a version history feature that allows you to track changes and revert to previous versions of your design.
In conclusion, Figma is a powerful and versatile tool for designing and prototyping. With its user-friendly interface, extensive features, and collaborative capabilities, Figma can help you streamline your design process and create impressive prototypes. Whether you’re a beginner or an experienced designer, Figma is definitely worth exploring. So, if you haven’t tried it yet, go ahead and give it a shot!
- How do you create a prototype in Figma
- Figma Techniques
- Exporting Figma Prototype to Video – FAQ
- How to record a GIF of a Figma prototype
- Does Figma Have a Screen Recording Feature
- Can I Download Figma Prototype as a Video
- Can I Embed a Figma Prototype in an Email
- Can You Record a Figma Prototype With a Webcam Bubble
- Download courses and take training wherever you are
- Explore Business-Related Topics
- Explore topics related to creativity
- Explore topics related to technologies
- Sources
How do you create a prototype in Figma
Creating a prototype in Figma is a straightforward process that allows you to bring your design ideas to life. Here are the steps on how to do it:
- Design your screens: Start by designing the screens that you want to include in your prototype using Figma’s design tools. You can create different artboards for each screen, making it easy to navigate through the prototype.
- Create frames: Once you have your screens ready, you can create frames to define the clickable areas. Frames help in establishing the flow and interaction between the screens.
- Add interactions: With the frames in place, you can now add interactions to create the desired user experience. Figma allows you to define interactions like clicking, hovering, or swiping to navigate between the screens.
- Preview your prototype: After adding interactions, you can preview your prototype to see how it works. Figma offers a live preview feature that allows you to test and experience the prototype as if it were a real app or website.
- Share and get feedback: Once you are satisfied with your prototype, you can share it with others for feedback. Figma provides options for sharing the prototype via a secure link, embedding it on a website, or even exporting it as a video or GIF.
That’s it! You’ve successfully created a prototype in Figma. You can now iterate and make changes to your design based on the feedback you receive.
Creating prototypes in Figma is worth the effort as it helps you visualize and test your design ideas before investing time and resources in the development process. It allows you to identify and address any issues or improvements early on, ensuring a better user experience for your final product.
So go ahead, give Figma a try, and start designing and prototyping your next big idea!
Figma Techniques
When it comes to creating prototypes in Figma, there are several techniques that can help you make the most out of this powerful design tool. Whether you’re a beginner or an experienced Figma user, these techniques will definitely enhance your workflow and make the process of creating prototypes much easier and more efficient.
1. Sharing and Publishing
One of the great features of Figma is the ability to share and publish your designs with others. You can easily share a link with your team members or stakeholders, allowing them to view and comment on the design. You can also publish your design as a website, making it accessible to anyone on the web.
2. Creating Interactive Prototypes
Figma allows you to create interactive prototypes by linking frames together. You can define user interactions such as clicking on buttons or swiping between screens. This helps you preview and test the flow of your design, ensuring a seamless user experience.
3. Exporting and Downloading
Figma offers various options for exporting your designs. You can export individual assets as PNG, SVG, or PDF files. You can also export the entire design as a Figma file or as a ZIP archive. Additionally, Figma allows you to download a GIF of your prototype, which can be useful for showcasing your work.
4. Recording and Sharing Videos
If you want to create a video of your prototype in action, Figma makes it easy to record your screen. You can then share the video with others, either by uploading it to a video hosting platform or by sending it via email. This is a great way to demonstrate the functionality of your design.
5. Embedding Prototypes
Figma allows you to embed your prototypes in websites or other platforms. This means you can showcase your interactive designs directly on your website or integrate them into other applications. It gives you more flexibility in how you share and present your work.
6. Learning and Exploring
If you’re new to Figma, it’s worth taking the time to explore the available resources and learn about the different techniques and features. Figma has a comprehensive documentation, including tutorials, courses, and FAQ sections that cover various topics related to design and prototyping.
In conclusion, Figma offers a wide range of techniques and features that make the process of creating prototypes easier and more efficient. Whether you’re sharing and publishing your designs, creating interactive prototypes, exporting and downloading assets, recording and sharing videos, embedding prototypes, or exploring the available resources, Figma has everything you need to bring your design ideas to life.
Exporting Figma Prototype to Video – FAQ
Exporting your Figma prototype to a video format can be a useful way to showcase your designs and communicate your ideas. In this FAQ, we will address common questions and provide answers to help you navigate the exporting process.
Q: How can I export my Figma prototype to video?
A: To export your Figma prototype to video, you can use third-party tools and techniques. One popular option is using a tool like Crackwheel or Chuckwired to record your screen while interacting with the prototype. You can then save the recording as a video file, which can be shared or embedded in other platforms.
Q: Can I export my Figma prototype as a GIF?
A: At the moment, Figma does not have a built-in feature to export prototypes directly as GIFs. However, you can use the recording method mentioned above and convert the video to a GIF using other tools or online converters.
Q: Is it difficult to export a Figma prototype to video?
A: The difficulty level of exporting a Figma prototype to video depends on your familiarity with the tools and techniques involved. If you are comfortable with recording your screen and using third-party tools, the process can be relatively straightforward. However, if you are new to these techniques, it may require some learning and practice.
Q: Can I export a responsive Figma prototype?
A: Yes, you can export a responsive Figma prototype to video. By designing your prototype using responsive design principles and techniques such as flexbox, you can ensure that your design scales and adapts to different screen sizes. When recording your screen, make sure to test your prototype on different devices to capture the responsive behavior accurately.
Q: Where can I publish or share my exported Figma prototype video?
A: Once you have exported your Figma prototype to video, you can publish and share it on various platforms. Some common options include sharing the video on social media platforms, embedding it in webpages or blog posts, sending it via email, or uploading it to cloud storage services. Choose the platform that best suits your needs and target audience.
Q: Do you have any recommendations for courses or resources to learn more about exporting Figma prototypes to video?
A: If you are looking to enhance your skills and knowledge in exporting Figma prototypes to video, there are several online courses and resources available. Some recommended sources include official Figma documentation, tutorial videos on platforms like YouTube, design forums and communities, and online learning platforms such as Udemy or Coursera. Take the time to explore these sources and find the ones that align with your learning style and goals.
Remember, exporting your Figma prototype to video can be a valuable tool in communicating and showcasing your design work. Familiarize yourself with the techniques, explore different tools, and have fun experimenting with this feature!
How to record a GIF of a Figma prototype
If you are designing a prototype in Figma and want to share it with others as a GIF, you can easily record a GIF of the prototype using a screen recording tool.
First, make sure you have the Figma design file open and the prototype loaded in Figma. Then, open your screen recording tool. There are many different screen recording tools available that you can use, such as Loom, QuickTime Player (Mac), or OBS Studio (Windows and Mac).
Once you have your screen recording tool open, set up the recording settings as desired. You can choose to record the entire screen or just a specific window or area. Make sure that the recording includes the Figma prototype and your webcam if you want to include yourself in the recording.
Start the recording and navigate through your Figma prototype as you normally would. You can interact with the prototype, click on different elements, and show different features and transitions. Make sure to mention any important points or explain the process as you go along.
When you have recorded all the necessary frames, stop the recording. The screen recording tool will then save the recording as a video file. You can check the file location or settings of your screen recording tool to locate the saved video file.
If the recorded file is in a format that is not compatible with GIF, you may need to convert it using a video editing tool or an online converter. There are many online tools available that can convert video files to GIF format.
Once you have the GIF file, you can share it with others by uploading it to a cloud storage or file sharing platform or by sending it via email. Alternatively, you can embed the GIF in a blog post or article, or share it on social media.
Recording a GIF of a Figma prototype can be a useful technique for showcasing your design and sharing it with others without the need for them to have a Figma account. It can help you demonstrate the user experience, show off the features and interactions of your design, and receive feedback from others.
So whenever you need to record a GIF of your Figma prototype, follow these steps and start sharing your designs with the world!
Does Figma Have a Screen Recording Feature
When it comes to creating prototypes in Figma, one common question that often comes up is whether Figma has a screen recording feature.
Unfortunately, Figma does not have a built-in screen recording feature to record your design process. However, there are other ways you can achieve the same result.
One option is to use a screen recording tool outside of Figma, such as Loom or Screencast-O-Matic, to record your design process and create a video. You can then upload the video to a platform like YouTube or Vimeo and share the link with others.
Another option is to use third-party plugins, such as CrankWheel or ChuckWired, which allow you to record your screen directly within Figma. These plugins often have additional features, such as the ability to record your webcam as well. Keep in mind that some of these plugins may have a cost associated with them.
If you don’t want to use external plugins or tools, you can also create a prototype in Figma and then use a separate screen recording software to capture your design process. This way, you can record your interactions and animations in Figma and create a video that showcases your prototype.
While Figma may not have a built-in screen recording feature, the flexibility of the platform allows you to export your designs in various formats, such as GIF or video. This means that even without a native screen recording feature, you can still create and share video demonstrations of your prototypes.
It’s worth noting that Figma does have a feature called “Share Prototype” that allows you to share your designs with others. This feature generates a unique URL that you can send via email or embed in a website, where others can view and interact with your prototype.
In conclusion, while Figma does not have a screen recording feature, there are several techniques and third-party tools you can use to record your design process. Whether you choose to record outside of Figma or use plugins, you can still create comprehensive and engaging video demonstrations of your prototypes.
Can I Download Figma Prototype as a Video

If you’re wondering whether you can download your Figma prototype as a video, unfortunately, Figma doesn’t have a built-in feature for exporting prototypes as video files. While you can create and share interactive prototypes in Figma, the ability to export them as videos is not available.
However, there are alternative ways to record and share your Figma prototypes in video format. One common technique is to use screen recording software or apps to capture the prototype as you interact with it. There are various screen recording tools available, such as CrankWheel, ChuckWired, or even the built-in screen recording feature in your operating system. By recording your prototype, you can then save it as a video file.
Once you have recorded your Figma prototype, you can save it in different video formats, such as MP4 or AVI. You can then publish or share the video wherever you like, including platforms like YouTube, Vimeo, or even embed it on your website or in emails.
It’s worth noting that recording and exporting Figma prototypes as videos can be a bit more difficult than simply exporting them directly from Figma. However, if you want to share your interactive prototypes as videos, this process can help you achieve that goal.
While Figma doesn’t provide a built-in video exporting feature, their focus is on creating and designing responsive web and app interfaces. Figma prototypes are meant to be interactive, allowing you to simulate how your design behaves and the user flows. They provide a cloud-based system where you can create and share your prototypes, making it easy for team members or clients to review and provide feedback without the need for them to have a Figma account.
In conclusion, if you want to download your Figma prototype as a video file, you’ll need to rely on screen recording techniques or third-party tools. This workaround allows you to record your prototype in action and save it as a video, which you can then use for various purposes.
Can I Embed a Figma Prototype in an Email
One common question that many designers have is whether they can embed a Figma prototype in an email. While it would be amazing if you could simply embed a fully interactive Figma prototype directly into an email, the reality is that it’s not currently possible. However, there are still options available to help you share your Figma prototypes with others through other means.
When it comes to sharing your Figma prototypes, one option is to create a video recording of your prototype in action. You can use screen recording software or a dedicated tool like CrankWheel to capture the interactions and movements of your prototype. Then, you can share the video with others by uploading it to a hosting platform like YouTube or Vimeo. This way, people can watch the video whenever they want and get a sense of how your prototype behaves and functions.
Another option is to export your Figma prototype as a GIF file. Figma has a built-in feature that allows you to export frames as GIFs, which can then be shared through email or other messaging platforms. While GIFs don’t offer the same level of interactivity as a fully functional prototype, they can still give viewers a good idea of what your design looks like and how it might work.
If you’re a Figma Organization member, you can take advantage of the “Share” feature in Figma, which allows you to publish your prototype to the Figma Cloud. Once your prototype is published, you can generate a public share link and send it in an email. The recipient can then view your prototype directly in their web browser, without needing to have a Figma account.
While embedding a Figma prototype directly in an email is not possible at the moment, these alternative methods can still help you effectively share your designs with others and get valuable feedback. So don’t be discouraged if you can’t embed your Figma prototype in an email – there are still plenty of options available to showcase your creativity and get the input you need.
| FAQ: |
| Q: Can I embed a Figma prototype in an email? |
| A: No, it is currently not possible to embed a Figma prototype directly in an email. However, you can share your prototype using video recordings, GIF files, or by publishing it to the Figma Cloud and sharing a public link. |
So, if you’re struggling with embedding a Figma prototype in an email, don’t worry. Try out these alternative methods and find the one that works best for you. Keep exploring and experimenting with different techniques to make the most of Figma’s design possibilities.
Can You Record a Figma Prototype With a Webcam Bubble
If you’re wondering whether you can record a Figma prototype with a webcam bubble, you’ve come to the right place. Figma is a powerful design tool that allows you to create interactive prototypes for websites and apps. While Figma offers many features to help you design and prototype, recording a video with a webcam bubble is not one of them.
Figma does not have a built-in feature for recording prototypes with a webcam bubble. However, there are alternative methods you can use to capture a video of your Figma prototype in action. One common technique is to export your prototype as a GIF or video file and then record your screen, including the Figma prototype, using a screen recording tool.
Here’s a step-by-step process you can follow to record a Figma prototype without a webcam bubble:
- Create your prototype in Figma, making sure all the elements and interactions are in place.
- Export the frames of your prototype to a format that supports animation, such as GIF or video.
- Download a screen recording tool, such as CrankWheel or CloudApp, to record your screen.
- Open the exported frames or video in a media player of your choice.
- Start the screen recording tool and select the area of your screen where the Figma prototype is displayed.
- Click “Record” to start recording your screen and interact with the Figma prototype as you normally would.
- When you’re done recording, stop the screen recording tool and save the video file.
- Now you have a video of your Figma prototype recorded without a webcam bubble.
Once you have the video file, you can share it with others by uploading it to a cloud storage service and sending them a link. Alternatively, you can embed the video on a website or in an email to share it with others.
While recording a Figma prototype without a webcam bubble can be a bit more difficult compared to using an all-in-one recording feature, with the right techniques and tools, you can achieve the desired result. It’s worth noting that Figma is continually evolving, so it’s always a good idea to check its official documentation, FAQ, or community sources for the latest information on prototyping and sharing features.
Download courses and take training wherever you are
If you want to learn how to create Figma prototypes, there are various sources you can turn to. Many websites offer courses on Figma, covering everything from the basics to advanced techniques. Whether you are a beginner or an experienced designer, these courses can help you improve your skills and stay up to date with the latest trends in the industry.
One common source of Figma courses is online learning platforms. Platforms like Udemy, Coursera, and LinkedIn Learning have a wide range of courses on Figma design. These courses are usually self-paced, allowing you to learn at your own convenience. You can access them from any device with an internet connection, which means you can learn wherever you are – whether it’s at home, in the office, or even while traveling.
Another option is to download Figma courses and watch them offline. Some platforms allow you to download course videos and materials to your device, so you can watch them even without an internet connection. This is especially useful if you have limited internet access or want to save data.
When it comes to sharing your Figma prototypes, there are several ways you can do it. One common method is to use the “Publish” feature in Figma. This feature allows you to publish your designs to the web, making them accessible to anyone with a link. You can also embed your prototypes on websites or share them via email.
If you want to share your designs in a more interactive way, you can use screen recording tools like CrankWheel or Chuckwired. These tools allow you to record your screen and create a video or GIF of your prototype in action. This can be particularly helpful when presenting your designs to clients or stakeholders.
In addition to sharing your prototypes, you can also collaborate with others on Figma. The cloud-based nature of Figma allows multiple people to work on the same design simultaneously. You can invite others to join your project, make comments, and work together in real-time. This can help streamline the design process and foster collaboration.
Figma also has a feature called “Design System” that makes it easier to create consistent and responsive designs. Design System is a collection of reusable components, styles, and assets that can be shared across different design projects. It helps maintain design consistency, speeds up the design process, and ensures that design changes are applied consistently throughout the project.
If you want to export your Figma designs for use in other tools or systems, you can do so easily. Figma allows you to export your designs as PNG, JPEG, SVG, or PDF files. You can also export individual frames or objects within your design. This flexibility makes it easy to work with Figma alongside other design tools or integrate it into your existing design workflow.
As you can see, learning and working with Figma offers numerous opportunities for creativity and growth. Whether you are a designer looking to expand your skills or a business owner who wants to improve the design process, Figma has a lot to offer. So download the courses, start learning, and unleash your creativity with Figma!
Explore Business-Related Topics
When creating a Figma prototype, it is important to familiarize yourself with topics related to business. Understanding these topics can help you design and create prototypes that align with the needs and goals of your organization.
Here are some key areas to explore:
- Email integration: Learn how to create interactive email prototypes to showcase your designs in a professional and engaging manner. Understand the process of embedding Figma prototypes in emails and sharing them with colleagues or clients.
- File management: Discover techniques for organizing and managing design files effectively. Explore cloud-based solutions and learn how to handle different file formats for seamless collaboration.
- Collaboration: Understand how to work effectively with team members and stakeholders by utilizing Figma’s collaboration features. Learn how to leave comments, request feedback, and resolve design issues.
- Design systems: Explore the concept of design systems and their role in creating consistent and scalable designs. Learn how to establish and maintain a design system within Figma.
- Sharing and feedback: Familiarize yourself with different methods of sharing prototypes with clients and team members. Understand how to gather feedback and iterate on your designs based on the input received.
- Responsive design: Learn techniques for creating responsive prototypes that adapt to different screen sizes and devices. Understand how to use Figma’s frames and constraints to build flexible and user-friendly interfaces.
- Video recording: Explore tools and techniques for recording screen interactions and creating demonstration videos. Understand how to use Figma’s built-in recording feature or integrate with external applications for more advanced recording options.
- Webcam integration: Discover how to leverage webcam integration in Figma to create prototypes with interactive elements that simulate real-time user interactions.
- Business-oriented plugins: Explore Figma’s plugin ecosystem and identify plugins that can enhance your workflow and productivity when working on business-related design projects. Look for plugins that automate common tasks or provide specialized features for business-oriented design needs.
By familiarizing yourself with these business-related topics, you can ensure that your Figma prototypes not only showcase your design skills but also align with the objectives and requirements of your organization.
Explore topics related to creativity
When it comes to designing prototypes in Figma, there are several topics related to creativity that are worth exploring. These topics can help you enhance your design process and create high-quality prototypes.
- Design techniques: Discover different design techniques and learn how to apply them in your Figma prototypes. Techniques such as flexbox, responsive design, and creating animations can greatly enhance the user experience.
- Sharing and collaboration: Figma offers many features for sharing and collaborating on prototypes. Learn how to share your prototypes with team members or clients, allowing them to view and interact with your designs. You can also enable comments and feedback to make the iteration process smoother.
- Exporting and downloading: Figma allows you to export your prototypes in various formats, such as PDF, PNG, and SVG. You can also download the design files to edit them outside of Figma. Familiarize yourself with the exporting and downloading options to ensure seamless integration with your workflow.
- Embedding and publishing: If you want to showcase your prototypes on a website or a blog, Figma allows you to embed your designs easily. You can generate an embed code and copy-paste it wherever you want the prototype to appear. Figma also provides options for publishing your prototypes on the web.
- Record and share videos: Figma allows you to record your prototype interactions as videos, which can be useful for documenting user flows or demonstrating specific features. You can then share these videos with stakeholders or use them for educational purposes.
- Common questions and FAQs: As you dive into the world of Figma prototyping, you may come across common questions or face challenges. Make sure to explore the extensive documentation and FAQs provided by Figma to troubleshoot any issues you encounter.
- External resources and communities: Figma has a vibrant community of designers who regularly share tips, tricks, and resources related to prototyping. Visit forums, blogs, and websites dedicated to Figma to find additional learning materials and inspiration.
- Prototyping best practices: As you gain more experience with Figma prototypes, you’ll discover techniques and best practices that work well for you. Take note of these practices and refine your prototyping process to improve the efficiency and effectiveness of your designs.
By familiarizing yourself with these topics and continuously learning, you can unlock the full potential of Figma for creating impressive prototypes that truly reflect your creative vision.
Explore topics related to technologies
When it comes to creating prototypes in Figma, it is important to familiarize yourself with various topics related to technology. These topics can help you navigate the process of designing, sharing, and exporting your prototypes without difficulties.
Here are some key areas you should explore:
- Designing responsive prototypes: Learn how to create prototypes that adapt to different screen sizes. Flexbox and other techniques can help you achieve this.
- Sharing and collaborating: Figma offers various ways to share your prototypes with others. You can publish them to the web, create an embed code, or export them as GIF or video files. You can also invite team members to collaborate using Figma’s cloud-based system.
- User testing and feedback: Figma provides features that allow you to record your user testing sessions or collect feedback from stakeholders. You can use tools like CrankWheel or Chuckwired to record your screen or webcam, then share the recording with others to gather valuable insights.
- Integration with other tools: Figma can be integrated with other design and prototyping tools, as well as with project management systems. This can help streamline your workflow and ensure smooth collaboration.
- Learning resources: Figma offers various learning resources, including video tutorials, FAQs, and online courses. These resources can help you deepen your understanding of the platform and its features.
- Business applications: Explore how Figma can be used for business purposes, such as creating design systems, maintaining a design library, or collaborating with clients through email sharing.
By familiarizing yourself with these topics, you can enhance your proficiency in creating Figma prototypes and make the most out of the platform’s capabilities. Remember, learning is an ongoing process, so don’t hesitate to explore new techniques and stay updated with the latest industry trends!
Sources
When it comes to sharing and embedding your Figma prototype, there are a few common things you should know.
- Email: You can send a link to your prototype via email to anyone you want to share it with.
- Download: You can download your Figma prototype as a GIF or a video file, depending on your needs.
- Cloud: Figma has a cloud system where you can store and access your prototypes whenever you need them.
- Sharing URL: Figma provides you with a unique URL for your prototype that you can share with others.
- Figma Mirror: This is a mobile app that allows you to preview your prototype on your phone or tablet.
- Embedding: You can also embed your Figma prototype on your website or blog.
- Figma Community: Figma has a community of designers where you can discover and share prototypes.
- Online courses: There are online courses and tutorials available that can help you learn more about Figma and its features.
- Recordings: Figma allows you to record your screen and webcam while making your prototype.
- FAQ: Figma’s website has an FAQ section where you can find answers to common questions.
These sources can help you in the process of creating and sharing your Figma prototype. Whether you want to learn new techniques, find inspiration, or get answers to your questions, they are worth exploring.


