

Signatures in Outlook are a simple way to add a personal touch to your emails and make them more professional. You can customize your signature by adding a picture, your name, and other details. In this article, we will show you how to setup and change your default signature in Outlook.
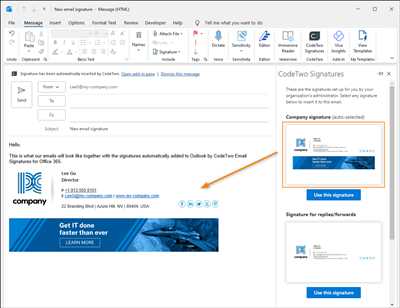
To add a signature in Outlook, go to the File menu and select Options. In the Options dialog box, click on the Mail tab and then click on the Signatures button. The Signatures and Stationery dialog box will open.
In the Signatures and Stationery dialog box, you can create a new signature by clicking on the New button. Enter a name for your signature, such as “London” or “UCL”, and then click OK. You can also choose to include your signature in new messages, replies, or forwarded messages.
If you wish to add an image to your signature, click on the “Insert Picture” button and select the image file from your computer. You can then resize and format the image as needed.
Once you have created your signature, you can assign it as your default signature by selecting it from the “New messages” and “Replies/forwards” drop-down menus. You can also change your default signature by selecting an existing signature from the drop-down menus.
Now you know how to setup and customize your signature in Microsoft Outlook. With these options and facilities, you can make your emails more professional and convey a personal touch. Happy emailing!
How to setup an email signature in Outlook

Setting up an email signature in Outlook is a simple process that allows you to assign a default signature to any email you compose. Whether you want to add a simple text signature or include an image, Microsoft Outlook has options to customize your signature based on your preferences.
To setup an email signature in Outlook, follow these steps:
- Open Outlook and go to the “File” menu.
- In the menu, click on “Options”.
- A dialog box will appear. Click on “Mail” in the left panel.
- In the “Compose messages” section, click on “Signatures”.
- A new window will open with the signature settings.
- Click on the “New” button to create a new signature.
- Enter a name for your signature, for example, “London Office”.
- In the “Edit signature” section, you can type the text you want to appear in your signature. You can also format the text by using the provided options.
- If you wish to include an image in your signature, click on the “Picture” button and browse your computer to select the image file.
- Once you have finished creating your signature, click on “OK” to save it.
- In the “Signatures and Stationery” window, you can choose the default signature for new messages, replies, and forwards.
- Click on “OK” to close the window and save the changes.
Now, every time you compose a new email or reply to a message, your assigned signature will automatically be added to the email.
Whether you want a professional signature for business purposes or a personalized one for personal use, setting up an email signature in Outlook allows you to add a personal touch to your emails and make them more professional and distinct.
Sources: Microsoft Outlook.com, UCL Facilities
How to add a picture to the signature
If you want to personalize your email signature in Outlook, you can easily add a picture to it. Here’s how:
- Open Microsoft Outlook and go to the “File” tab.
- In the navigation menu, click on “Options”.
- In the Options dialog box, select the “Mail” tab.
- Under the “Compose messages” section, click on the “Signatures” button.
- In the Signatures and Stationery dialog box, select the signature you want to add a picture to or create a new one by clicking on the “New” button.
- In the Edit signature box, place the cursor where you want to insert the picture.
- Click on the “Insert Picture” button (represented by a picture icon) in the formatting toolbar.
- In the Insert Picture dialog box, navigate to the location of the image you wish to include in your signature.
- Select the image and click on the “Insert” button.
- If necessary, resize the picture by clicking on it and dragging the resizing handles.
- Click on the “OK” button to save your changes and close the Signatures and Stationery dialog box.
- Click on the “OK” button in the Options dialog box to save your settings.
Once you have followed these steps, the picture will be added to your signature. You can change the default signature for new messages or replies/forwards in the same Signatures and Stationery dialog box. Now, every time you compose an email, your chosen signature with the picture will be automatically included.
Please note that if you are using Outlook.com or Outlook in the web browser, the steps may slightly vary.
How to Change a Signature in Microsoft Outlook
In Microsoft Outlook, you have the option to create and assign multiple signatures to your email messages. This allows you to include different information or styles depending on the context or recipient. If you wish to change your existing signature in Microsoft Outlook, there is a simple process you can follow.
Here are the steps you can take:
- Open Microsoft Outlook.
- In the menu, click on “File” in the top-left corner of the screen.
- In the File menu, click on “Options”.
- In the Options dialog box, select the “Mail” category on the left-hand side.
- Scroll down until you find the “Signatures” section.
- Click on the “Signatures” button.
- In the Signatures and Stationery dialog box, you’ll see a list of your existing signatures. Select the signature you wish to change.
- Click on the “Change” button.
- In the Signature settings, you can edit the name and default options of the signature. You can also add or change a picture by clicking on the “Picture” button.
- Once you’ve made the desired changes, click on “OK” to save your new signature.
- Back in the Signatures and Stationery dialog box, click on “OK” to apply the changes to your signature.
And that’s it! You have successfully changed your signature in Microsoft Outlook. Now, whenever you compose a new email, your updated signature will be included.
It’s worth mentioning that the steps above apply to the desktop version of Microsoft Outlook. If you are using Outlook.com or the web-based version of Outlook, the process may be slightly different. However, the general idea of changing a signature remains the same.
So, whether you’re in London or any other location, you can easily change your signature in Microsoft Outlook by following these steps.
Assigning a Default Signature
In Microsoft Outlook, you can create and assign a default signature to be used in all of your outgoing email messages. This signature will appear at the end of your message, providing contact information or any other desired text.
To assign a default signature in Outlook, follow these simple steps:
- Open Microsoft Outlook and click on the “File” menu.
- From the drop-down menu, click on “Options”.
- In the Outlook Options dialog box, select the “Mail” tab.
- Scroll down to the “Compose messages” section, and click on the “Signatures” button.
- In the Signatures and Stationery dialog box, you will see a list of existing signatures. If you wish to create a new signature, click on the “New” button and give it a name.
- In the Edit Signature box, you can type in the desired text for your signature. You can also include an image by clicking on the “Picture” button.
- Once you have created or selected the signature you want to use as your default, go back to the Signatures and Stationery dialog box.
- In the “Choose default signature” section, use the drop-down menu to select the email account you want to assign the default signature to.
- Finally, click on the “OK” button to save your changes.
From now on, whenever you compose a new email or reply to an email using the account you assigned the default signature to, the signature will automatically appear at the end of the message. This saves you the hassle of manually adding a signature to each email.
Remember, these steps may vary slightly depending on the version of Outlook you are using. If you are using Outlook.com or the Outlook app for mobile devices, the settings may also be slightly different. However, the general options and facilities for assigning a default signature should be present in all versions of Outlook.
By following these simple steps, you can easily change your default signature in Microsoft Outlook and have it automatically added to your emails, ensuring a professional and consistent appearance in all your communication.
UCL facilities
In Microsoft Outlook, you have several options to create a signature that you can include in every email you compose. One of the default options is UCL facilities, which allows you to add a simple signature containing the name of UCL, an image of UCL facilities, and a link to the UCL website.
To setup the UCL facilities signature in Outlook, follow these steps:
- Open Outlook and go to the settings menu by clicking on the gear icon in the top-right corner of the screen.
- In the settings menu, click on “View all Outlook settings.”
- In the left-hand menu, navigate to the “Mail” section and select “Compose and reply.”
- Scroll down to the “Email signature” section and click on the “Create new” button.
- In the signature dialog, assign a name to your signature, for example, “UCL facilities.”
- In the text box, type the desired text for your signature, such as “UCL facilities – London” or any other information you wish to include.
- To add an image to your signature, click on the picture icon in the toolbar. From there, you can either choose an image from your computer or provide a link to an online image source.
- After adding the image, use the options in the picture dialog to change the size, alignment, and other settings as needed.
- Once you are satisfied with your signature, click “Save” to save your changes.
Now, whenever you compose a new email or reply to a message, the UCL facilities signature will be automatically inserted at the bottom of your email. You can also choose to manually select the UCL facilities signature from the signature menu while composing your email.
By following these steps, you can easily create and assign a UCL facilities signature in Outlook, adding a professional touch to your emails.
Sources
- To add a picture to your email signature in Outlook, you can follow these steps:
- Open Microsoft Outlook.
- Click on the File menu in the top left corner of the Outlook window.
- In the File menu, select Options.
- In the Outlook Options dialog box, click on the Mail tab.
- In the Compose messages section, click on the Signatures… button.
- In the Signatures and Stationery dialog box, select the signature you wish to change or create a new one.
- Click on the Picture button located on the right side of the dialog box.
- In the Insert Picture dialog box, browse for the image file you want to use and click on the Insert button.
- You can adjust the size and position of the image by clicking and dragging it.
- Click on the OK button to save your changes to the signature.
- In Outlook.com (formerly known as Hotmail or Windows Live Hotmail), the process to add a picture to your email signature is similar:
- Sign in to your Outlook.com account.
- Click on the gear icon in the top right corner of the Outlook.com window.
- In the drop-down menu, select Options.
- In the Options menu, click on Mail located under the Mail > Layout section.
- In the Email Signature section, click on the Signatures… button.
- In the Edit Signature dialog box, select the signature you wish to edit or create a new one.
- Click on the Image button located on the right side of the dialog box.
- In the Insert Picture dialog box, browse for the image file you want to use and click on the Insert button.
- Click on the OK button to save your changes to the signature.


