

Feeding your sourdough starter is an essential step in the bread-making process. It’s what helps to maintain the health and activity of the starter, and ultimately results in a delicious loaf of sourdough bread. If you’re new to sourdough, don’t worry – it’s a simple and rewarding process that anyone can learn!
But first, let’s talk about what a sourdough starter actually is. It’s a mixture of flour and water that is left to ferment, thanks to the wild yeast and bacteria that naturally occur in the environment. This fermentation process is what gives sourdough bread its unique taste and texture.
To begin, you’ll need a small amount of starter. If you don’t already have one, you can make your own by combining equal parts flour and water and letting it sit at room temperature for a few days. Once you have your starter, you can begin the feeding process. Feedings are usually done once a day, but you can adjust the frequency based on your needs.
To feed your starter, simply discard about half of the starter and then add fresh flour and water. The exact amount will depend on the recipe you’re using, but a good rule of thumb is to use equal parts flour and water by weight. For example, if you discard 100 grams of starter, you would add 50 grams of flour and 50 grams of water.
Once you’ve added the flour and water, mix everything together until well combined. The consistency should be similar to a thick pancake batter. Then, cover your starter loosely with a cloth or plastic wrap and let it sit at room temperature for a few hours, or until it becomes active. You’ll know it’s ready to use when it doubles in size and floats in water.
If you’re not planning to bake with your starter right away, you can store it in the refrigerator. This slows down the fermentation process and allows you to feed it less frequently. To maintain your starter in the fridge, you can feed it once a week instead of daily.
One important thing to remember is to always check your starter before using it. Even if it’s been in the fridge, it’s possible for it to go bad. To check, simply give it a quick sniff – it should smell slightly sour, like yogurt or vinegar. If it smells off or moldy, discard it and start again.
With these simple instructions, you’ll be well on your way to making delicious sourdough bread. Don’t forget to experiment with different recipes and techniques to find what works best for you. And most importantly, have fun and enjoy the process!
Some tips:
- Keep in mind that the process might take longer in colder temperatures.
- When feeding your sourdough starter, use room temperature water to help speed up the fermentation process.
- If your starter is not active and doubling in size after feedings, it might need more frequent feedings or a smaller amount of discard.
- If you want to test if your starter is ready for baking, you can do a float test. Drop a small spoonful of your starter into a glass of water – if it floats, it’s ready to use.
- Remember that sourdough is more than just bread – it’s a journey that takes time and patience, but the results are worth it!
So go ahead and start your sourdough journey today. Happy baking!
How To Feed Sourdough Starter
Feeding your sourdough starter is an essential step in the process of making sourdough bread. By providing it with regular feedings, you can keep your starter healthy and strong, ensuring that it will be ready to leaven your delicious loaves of bread.
Here’s a simple guide on how to feed your sourdough starter:
1. Know your starter
Before you start feeding your starter, it’s important to familiarize yourself with it. Different starters may have different hydration levels, which is the ratio of flour to water. Some starters are more liquid, while others are more stiff. Understanding the hydration level of your starter will help you adjust your feeding schedule and recipe instructions accordingly.
2. Check if your starter is active
To check if your sourdough starter is ready to be fed, place a small amount of it in a bowl of water. If it floats, it’s a good sign that your starter is active and ready to be fed. If it sinks, it may need a bit more time to become ready.
3. Scale your ingredients
Once you know that your starter is ready to be fed, you can scale your feeding ingredients based on the amount of starter you have. A general rule of thumb is to feed your starter with equal parts flour and water. For example, if you have 100 grams of starter, you would feed it with 50 grams of water and 50 grams of flour.
4. Feed your starter regularly
Regular feedings are crucial for maintaining a healthy sourdough starter. Depending on how active your starter is, feeding it once a day or once every few days might be necessary. It’s best to establish a consistent feeding schedule to ensure that your starter stays healthy and active. Some people prefer to feed their starter in the morning, while others prefer to do it at night.
5. Discard some starter
To maintain a manageable amount of starter, it’s important to discard some of it before each feeding. This will prevent your starter from growing too large and requiring excessive amounts of flour and water. A general rule is to discard approximately half of your starter before feeding it.
6. Store and refrigerate
If you’re not planning on using your starter immediately, you can store it in the refrigerator. Before refrigerating, make sure that your starter is active and has been recently fed. Cold temperatures will slow down fermentation, allowing you to maintain your starter for longer periods between feedings.
7. Remember to feed before using
If you plan on baking with your sourdough starter, be sure to feed it a few days before you intend to use it. This will give your starter enough time to become active and ready to leaven your bread dough. Plan ahead and make note of the date or use a reminder to ensure that you don’t forget to feed your starter before baking.
Final tips:
– The sourdough feeding process is more of an art than a science. It takes some experimentation and testing to find out what works best for your starter.
– Make sure to use filtered or chlorine-free water when feeding your starter. Chlorine can hinder the fermentation process.
– Pay attention to the nutrition and hydration needs of your starter. A well-fed and hydrated starter will result in better bread.
– For beginners, it’s helpful to follow a sourdough starter recipe or guide until you become familiar with the process.
– Don’t be discouraged if your first few attempts at sourdough baking don’t turn out as expected. Like any skill, it takes practice and patience to master the art of sourdough baking.
By following these steps and incorporating your own adjustments along the way, you can maintain a healthy and active sourdough starter that will produce delicious loaves of bread for years to come.
How To Feed Sourdough Starter
How Do You Make a Good Sourdough Starter
Creating a healthy and active sourdough starter is the first step towards baking delicious homemade bread. This guide will provide you with step-by-step instructions on how to make a good sourdough starter, along with some tips and tricks to ensure success.
Ingredients:
- Flour
- Water
Instructions:
- Start by mixing equal parts of flour and water in a glass container. For beginners, it is recommended to begin with 100 grams of flour and 100 grams of water.
- Stir the mixture well until there are no lumps and it has a consistency similar to pancake batter.
- Cover the container loosely with a clean cloth or plastic wrap and let it sit at room temperature, preferably between 70-75°F (21-24°C), for 24 hours.
- After 24 hours, discard half of the starter and feed it with equal amounts of flour and water. For example, if you have 100 grams of starter, discard 50 grams and add 50 grams of flour and 50 grams of water.
- Repeat this process every 24 hours for the first week. Each time you feed the starter, it should double in size within 6-8 hours.
- Once your sourdough starter is consistently doubling in size within the feeding period, it is ready to be used in baking recipes or stored in the refrigerator.
Tips and Notes:
- It is normal for the starter to go through phases of activity and inactivity during the first few weeks. Stick to the regular feeding schedule, and it will become more stable over time.
- If you want to maintain your sourdough starter without baking every day, you can scale down the amount to feed. For example, 50 grams of starter, 25 grams of flour, and 25 grams of water.
- When using your starter in a recipe, only use the amount specified. Avoid using all of your starter, as it can deplete your supply.
- To test if your sourdough starter is ready for baking, drop a small spoonful into a glass of water. If it floats, it is ready to use.
- Remember to keep some starter aside before discarding and feeding. This will ensure you always have a backup in case something goes wrong with the feeding process.
- Don’t forget to feed your starter regularly, even if you’re not baking. It’s like having a pet – it needs food to stay happy and healthy!
Creating a good sourdough starter is not an exact science, and the process may vary based on factors like temperature, hydration, and the type of flour used. Don’t be discouraged if it takes a few weeks to get your starter to become active and stable. With patience and practice, you’ll be baking delicious sourdough bread in no time!
How to Feed Sourdough Starter
Feeding your sourdough starter is an essential process to keep it healthy and active. Here is a simple method that you can follow:
Step 1: Take your starter out of the fridge. If you have been refrigerating it, leave it at room temperature for a few hours before feeding.
Step 2: Scale out the amount of starter you will need for your recipe. Most recipes will require about 100 grams of starter.
Step 3: Discard most of your existing starter, leaving only a small amount in the jar. This will help maintain a good balance of ingredients and hydration.
Step 4: Feed your starter by adding equal amounts, by weight, of flour and water to the jar. For example, if you have 100 grams of existing starter, you would add 50 grams of flour and 50 grams of water.
| Feeding Sourdough Starter | |
|---|---|
| Existing Starter | Feed |
| 100g | 50g flour + 50g water |
Step 5: Mix the flour, water, and existing starter until well combined. You can use a spoon or your hands.
Step 6: Cover the jar loosely with a lid or a cloth and let it sit at room temperature. Feed your starter once a day if you are going to bake, or every couple of days if you’re not planning to bake anytime soon.
Step 7: Once your starter doubles in size within a few hours of feeding, it is ready to be used in your recipe. You can also do a float test by dropping a small amount of the starter into water. If it floats, it’s ready.
Tips:
- Keep notes on your feeding schedule and observations. This will help you understand your starter better and make adjustments if needed.
- For beginners, it might take a few weeks to get your starter to a healthy and active state. Don’t get discouraged and keep feeding it regularly.
- You can refrigerate your starter between feedings to slow down its activity if you’re not baking as often.
- Don’t forget to discard some of your starter before each feeding. Without discarding, your starter can quickly accumulate and require more flour and water.
- Check the nutrition information on the flour package to know its protein content. Higher protein flour is recommended for better results in sourdough baking.
Following these instructions will help you maintain a healthy and active sourdough starter, ready to be used for delicious bread and other sourdough recipes.
Ingredients
Feeding your sourdough starter is a crucial process to keep it healthy and ready for baking delicious bread. To start the feeding process, you’ll need the following ingredients:
- Water – regular tap water will do just fine.
- Flour – you can use regular all-purpose flour or bread flour.
That’s it! Just two simple ingredients to begin the feeding process and maintain your sourdough starter.
Now, let’s dive into the details:
Water: The amount of water used for feeding will depend on the hydration level of your starter, which is the ratio of water to flour. Most starters have a hydration level of around 100%, which means equal parts water and flour by weight. However, some recipes call for higher or lower hydration levels, so make sure to follow the instructions of the recipe you’re doing.
Flour: You can use any type of flour for feeding your starter, but regular all-purpose flour or bread flour is most commonly used. Whole wheat, rye, or other specialty flours can also be used to add flavor and nutrition to your starter. Just make sure to use the same type of flour that you initially used to start your sourdough starter.
Now that you know the ingredients, it’s important to know the method of feeding your starter. Here are some tips:
- Feed your starter once a day for the first week, then you can switch to feeding it every 12 hours or every 24 hours, depending on your schedule and what works best for you.
- Before each feeding, discard a small amount of your starter. This will keep the amount of starter manageable and prevent it from taking over your kitchen.
- Use a scale to measure the ingredients for more accurate feedings. A 1:1 ratio of water to flour by weight is a good starting point.
- Start with small feedings and gradually increase the amount as your starter doubles in size. This will help you avoid wasting too much flour.
- Store your starter in the fridge if you’re not baking with it regularly. This will slow down the fermentation process and allow you to feed it less frequently, such as once a week or once every two weeks.
- Check the readiness of your starter by performing the float test. Take a small spoonful of your starter and drop it into a bowl of water. If it floats, it’s ready to be used for baking.
Don’t forget to take notes about your feedings, including the timing, quantity of ingredients, and any observations you make during the process. This will help you understand your starter better and troubleshoot any issues you might encounter along the way.
Keep in mind that feeding your starter is both a science and an art. There are many variables at play, and it may take some experimentation to find the method that works best for you. But with practice and patience, you’ll develop a good understanding of how to feed and maintain a healthy sourdough starter.
Instructions
Feeding your sourdough starter is an essential step in maintaining a healthy and active culture. Here is a simple method to follow:
1. Begin by checking your starter. It should have a pleasant aroma and a bubbly consistency. If it has formed a layer of liquid on top, you might want to discard this “hooch” before feeding.
2. Scale down your starter. If you have a large amount, you can discard some or use it for baking. For beginners, it’s recommended to work with a smaller amount to make the process less overwhelming.
3. Feed your starter. Mix equal parts of flour and water to refresh your starter. The amount you use will depend on how much starter you have and how much you want to maintain. A typical ratio is 1:1 (equal parts flour and water by weight), but you can adjust the hydration level depending on your recipe and preference.
4. Use good quality flour. The type of flour you use can have a significant impact on the flavor and texture of your bread. It’s best to use unbleached, all-purpose or bread flour. You can experiment with different types of flour to see what works best for you. Some bakers even use whole wheat or rye flour to add more flavor to their starter.
5. Mix the ingredients well. Make sure there are no dry flour spots in your starter. It should have a thick, pancake batter consistency.
6. Leave the starter at room temperature. Cover it loosely with a towel or plastic wrap and let it sit for several hours or overnight. This allows the natural yeasts in the starter to feed on the flour and become more active.
7. Check for signs of activity. After a few hours, you should see some bubbles on the surface of your starter. If you’re not sure whether it’s ready, do the float test: drop a small amount of starter into a cup of water and see if it floats. If it does, your starter is ready to use. If not, you might need to give it a few more hours.
8. Store your starter. If you’re not ready to use your starter yet, you can store it in the fridge. It can stay in the fridge for up to a week without feeding. Just make sure to feed it once a week to maintain its activity.
These instructions are a basic guide to help you start and maintain your sourdough starter. Remember, there is a science behind sourdough baking, but it’s also a delicious and rewarding process. Don’t forget to experiment with different recipes and techniques to make your own unique loaf of bread!
Notes:
– Depending on the amount of starter you have, the feeding process might take longer. It’s also a good idea to take notes during your feedings to track your starter’s progress.
– If you’re new to sourdough baking, it’s normal to feel overwhelmed at times. Just keep practicing and experimenting, and you’ll get the hang of it!
– Don’t forget to test your starter before baking with it. A healthy and active starter should be able to double in size within a few hours after feeding.
– If you’re not sure what hydration level your starter has, you can check by weighing the flour and water you use in your feedings. This will give you a better idea of how much water to use in your recipes.
Equipment
Here is a list of equipment you’ll need to make, feed, and maintain a sourdough starter:
– A large glass or plastic jar with a tight-fitting lid to store your starter.
– A kitchen scale to accurately measure the amount of flour and water you’ll be using in your feedings.
– A large mixing bowl for preparing your starter recipes.
– A whisk or spoon for mixing the ingredients together.
– Plastic wrap or a clean kitchen towel to cover your bowl during fermentation.
– A bench scraper or spatula to help you handle and shape the dough when it’s time to bake.
– Baking equipment such as a Dutch oven or baking stone to give your bread a good crust.
– Optional but helpful: a bread lame or sharp knife for scoring the bread before baking.
– Storage containers or bags to keep any discard you might have, which can be used in other recipes.
– A digital thermometer to check the temperature of your water and dough during the bread-making process.
– A notebook or notebook app to keep track of your feeding and baking schedule, as well as any notes or tips that you find helpful along the way.
Having the right equipment will make the sourdough journey much easier and more enjoyable. Make sure to have everything ready before you start to avoid any unnecessary delays or frustrations. Remember, good equipment can often make a huge difference in the outcome of your bread.
Notes
Feeding your sourdough starter is an important part of the baking process. It provides the necessary nutrition for the yeast and bacteria to grow and develop the flavors that make sourdough bread so delicious. Here are some tips to help you maintain a healthy and active starter:
1. Know your starter: Each starter is unique, with its own characteristics and preferences. It takes time to get to know your starter and understand how it behaves. Pay attention to its appearance, aroma, and how it responds to feedings. This will help you better understand what it needs to thrive.
2. Follow a regular feeding schedule: Regular feedings help keep your starter healthy and active. Most beginners start with a once-daily feeding, but some starters may need to be fed twice a day, especially in warmer weather. You can adjust the feeding schedule based on the activity of your starter.
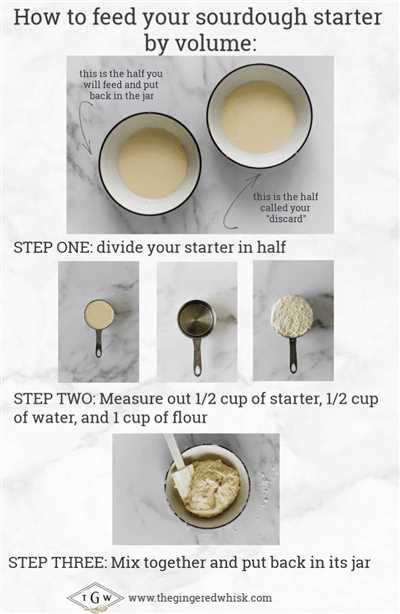
3. Feed based on weight, not volume: It’s important to use a kitchen scale when measuring the ingredients for feeding your starter. This ensures accuracy and consistency in the hydration and overall balance of the starter. Using volume measurements can lead to variations in the amount of water or flour, which can affect the health of your starter.
4. Refrigerate your starter: If you’re not planning to bake for a while or if you won’t be able to maintain a regular feeding schedule, it’s best to refrigerate your starter. This will slow down the fermentation process and allow you to feed it less often. Just make sure to feed it before putting it in the fridge and give it a good feeding when you take it out.
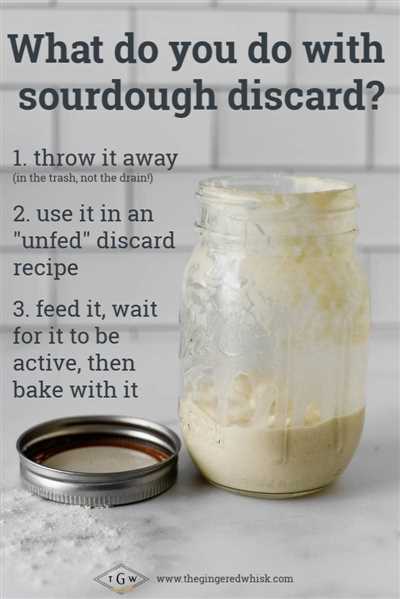
5. Don’t forget to discard: Regular feedings usually involve discarding a portion of the starter before feeding. This helps maintain a healthy balance of yeast and bacteria and prevents the starter from becoming overly acidic. You can use the discard in other recipes, like pancakes or waffles.
6. Keep an eye on the hydration: The hydration level of your starter refers to the ratio of water to flour. A higher hydration will give you a more liquid starter, while a lower hydration will make it thicker and stiffer. Different recipes may call for starters with different hydration levels, so it’s good to have a starter with a range of hydration options.
7. Testing for readiness: To know if your starter is ready to be used in a recipe, you can perform the float test. Simply drop a small spoonful of the starter into a bowl of water. If it floats, it’s ready to use. If it sinks, give it a few more feedings and test again until it floats.
Remember, feeding your sourdough starter is as much art as it is science. Experiment with different feeding methods and ratios to find what works best for you and your starter. With some practice and patience, you’ll be able to make delicious loaves of sourdough bread and other sourdough-based recipes.
| You will need: | – Kitchen scale |
| – Water | – Flour |
| – A jar or container | – Regular feeding schedule |
Nutrition
Feeding your sourdough starter is a key part of the baking process. It helps to maintain a healthy and active starter, ensuring that your breads will turn out delicious every time. Here are some tips and instructions to help you understand the nutrition needs of your starter.
First, you need to know the basic feeding method. Most starters are based on a simple recipe that takes a small amount of starter (about 25 grams) and feeds it with equal amounts of flour and water. This is called a 1:1:1 feeding, where the weight of the starter, flour, and water is the same.
If you’re a beginner, it’s always good to start with a regular feeding routine. A common practice is to feed your starter once a day. Some bakers prefer to feed their starters twice a day, especially if they are planning to bake with it soon. But for most people, daily feedings are enough to keep the starter healthy and active.
The amount of flour and water you use for feeding will depend on how much starter you have. It’s a good idea to weigh your ingredients using a kitchen scale, as this will give you more accurate measurements. A typical feeding for a starter might be 25 grams of starter, 25 grams of flour, and 25 grams of water.
When you feed your starter, don’t forget about the discard. This is the portion of the starter that you remove before feeding. Some bakers like to store the discard in the fridge and use it for other recipes, like pancakes or waffles. But if you’re not going to use the discard, you can just throw it away.
It’s important to note that the hydration level of your starter can affect the amount of flour and water you need to feed it. A high hydration starter (around 100% hydration) will require equal amounts of flour and water. But if your starter has a lower hydration level, you might need to use more or less water.
On the surface, feeding your starter may seem like a simple process. But there is actually some science behind it. When you feed your starter, you’re providing it with the nutrition it needs to grow and thrive. The flour and water you add to the starter contain the carbohydrates and nutrients that the yeast and bacteria in the starter need to survive.
During the feeding process, the yeast and bacteria in the starter consume the carbohydrates in the flour and produce carbon dioxide and alcohol as byproducts. This is what causes the starter to rise and become bubbly. The longer you leave your starter to ferment, the more carbon dioxide and alcohol it will produce.
So, how do you know when your starter is ready to be used? One way to check is to do the float test. Take a small spoonful of your starter and drop it into a glass of water. If the starter floats, it’s ready to use. If it sinks, it needs more time to ferment.
If you’re not going to use your starter right away, you can leave it in the fridge. But be aware that the cold temperature will slow down the fermentation process. You’ll still need to feed your starter regularly, but you can do it less often, like once a week. Just make sure to take it out of the fridge and let it come to room temperature before using it in a recipe.
Feeding your starter is a delicate balance between giving it enough nutrition to thrive and not overfeeding it. If you feed your starter too much, it will become sluggish and less active. If you don’t feed it enough, it will become weak and less stable. The key is to find the right feeding schedule and amount of food for your specific starter.
So, that’s the nutrition side of feeding your sourdough starter. Now that you know how to start and maintain a healthy starter, you’re ready to bake some delicious breads. Don’t forget to experiment with different recipes and techniques to find what works best for you.
| Equipment | Notes |
|---|---|
| kitchen scale | Weighing your ingredients will give you more accurate measurements. |
| container with lid | You’ll need a container to store your starter in. |
| spoon or spatula | Use a spoon or spatula to mix the starter and feed it. |


