

If you want to share your slideshow with others, there are several methods you can use to make the process quick and easy. Whether you prefer to send the slideshow directly to your friends or publish it online for a wider audience, we’ve got you covered.
First, make sure you have the right software or app installed on your device. There are many options available, such as PowerPoint, iMovie, or even the built-in slideshow feature on your iPhone or iPad. Choose the one that suits your needs best and start creating your masterpiece!
Once your slideshow is ready, you can share it with others in a few different ways. If you want to share it with a select group of people, you can send it via email. Most slideshow software enables you to add recipients and even customize the message with comments or additional information.
If you want a wider audience to access your slideshow, you can upload it to an online platform like YouTube or Facebook. This way, anyone with the link will be able to view it, and you can also invite specific users to collaborate or leave comments on your creation.
Another popular method is to save your slideshow in the cloud. By doing this, you can access it from any device with an internet connection. This is especially useful if you want to view your slideshow on a different computer, share it with others, or even stream it onto an HDTV for a more immersive experience.
By following these simple steps, you can share your slideshow with the world and let your creative ideas shine. Whether you want to share it with a few close friends or a larger audience, the options are endless. So go ahead, explore the possibilities, and start sharing your amazing slideshows today!
- How To Make and Export a Slideshow On Your iPhone
- Method 1: Using the built-in Photos app
- Method 2: Using third-party slideshow apps
- 2 Stream a slideshow onto HDTV from iPhone iPod
- Saving a Slideshow on iPhone
- Method 1: Saving a Slideshow to the Photos App
- Invite people to view or edit your presentation
- Explore Themes Related to Creativity
- Источники
How To Make and Export a Slideshow On Your iPhone
Creating and sharing slideshows on your iPhone is a great way to showcase your photos and memories. With the advancements in technology, it has become easier than ever to make and export a slideshow directly from your iPhone. Whether you want to share your slideshow on social media platforms like Facebook and YouTube, or send it to your friends and family via email or messaging apps, this guide will show you how.
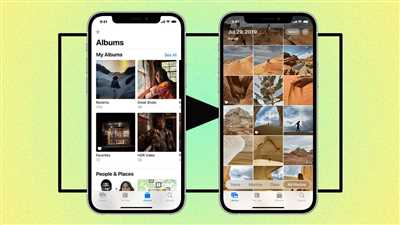
Method 1: Using the built-in Photos app
If you have an iPhone, you already have a powerful tool for creating and sharing slideshows – the Photos app. Here’s how you can use it:
- Open the Photos app on your iPhone.
- Navigate to the album or collection that contains the photos you want to include in your slideshow.
- Tap on the “Select” option in the upper right corner of the screen.
- Select the photos you want to include in the slideshow.
- Tap on the “Share” icon (usually represented by a square with an upward arrow) at the bottom of the screen.
- From the list of sharing options, select “Slideshow“.
- The slideshow editor will open, where you can add/edit the photos, choose a theme, and customize the slideshow settings as desired.
- Once you’re done editing the slideshow, tap on the “Export” option.
- Choose a method to share your slideshow, such as posting it on social media, sending it via email, or saving it to your device.
Method 2: Using third-party slideshow apps
If you’re looking for more advanced features and customization options, you can explore third-party slideshow apps available on the App Store. Here are a few popular options:
- iMovie: This app, developed by Apple, is a powerful video editing tool that allows you to create stunning slideshows with photos, videos, and music.
- SlideStory: This app offers a simple and intuitive interface, making it easy to create and share slideshows directly from your iPhone.
- PhotosMovie: With this app, you can create slideshows from your photos, add transitions and effects, and even export them in HD quality to share on your HDTV.
Regardless of the method or app you choose, it’s important to consider the recipients of your slideshow. Make sure you have the necessary permission to share their photos, and enable any privacy options required. Additionally, consider the file size of your slideshow, as some sharing platforms may have limitations.
By following these steps, you can easily create and export a slideshow on your iPhone. Whether you want to share it with a small group of people or a wider audience, the options are endless. So get creative, start sharing those memories, and dazzle the world with your slideshow!
2 Stream a slideshow onto HDTV from iPhone iPod
If you want to share a slideshow from your iPhone or iPod onto an HDTV, you can easily do so by using the right software and method. In this section, we will list the steps you need to take to stream a slideshow onto an HDTV from your iPhone or iPod.
| Step 1: | Save your slideshow onto your device. This can be a PowerPoint presentation, photos, or videos that you want to include in your slideshow. If you are using an iPhone or iPod touch, you can use the Photos app to create a slideshow with the photos you want to share. If you have a presentation created in PowerPoint, you can save it onto your device using the appropriate app, such as Keynote or PowerPoint for iPad. |
| Step 2: | Access the sharing options. Depending on the software or app you are using, you will have different options to share your slideshow. Look for an option to export or share your slideshow. |
| Step 3: | Enable the streaming option. Some apps or software will have a specific option to enable streaming. Look for this option and make sure it is enabled. |
| Step 4: | Connect your iPhone or iPod to your HDTV. You can do this using an HDMI cable or using a wireless streaming device, such as Apple TV. |
| Step 5: | Stream your slideshow onto the HDTV. Once your device is connected to the HDTV, you can start streaming your slideshow. Depending on the software or app you are using, the steps to stream may vary. Look for an icon or option that allows you to start streaming. |
| Step 6: | Invite viewers or share additional information. While your slideshow is streaming, you can invite people to view it or share additional information, such as comments or audio. Some apps or software will have a built-in option to send invitations or post the shared slideshow on social media platforms, like Facebook or YouTube. |
By following these steps, you can easily stream a slideshow from your iPhone or iPod onto an HDTV, allowing more people to view and enjoy your creative presentation.
Saving a Slideshow on iPhone

If you’ve created a slideshow on your iPhone and want to share it with others, you may also need to save it. Saving a slideshow allows you to access it later or share it on your social media platforms. Here are a few methods you can use to save your slideshow on your iPhone:
iMovie: If you have the iMovie app installed on your iPhone, you can save your slideshow by exporting it as a video. Open iMovie, tap on your slideshow project, then tap on the Share icon (represented by a box with an arrow pointing up). From the options listed, choose to export your slideshow to your Camera Roll or directly upload it to platforms like YouTube or Facebook.
PowerPoint: If you prefer using PowerPoint for your slideshow creation, you can save it directly from the app. Open the PowerPoint app, then open your slideshow presentation. Tap on the three-dot menu icon on the upper right corner, then select the “Save As” option. You’ll be able to choose the location for saving your slideshow, such as OneDrive or your device.
Photos App: The Photos app on your iPhone also provides a convenient way to save your slideshow. After creating your slideshow, go to the Photos app and find your slideshow in the list of albums or photos. Tap on the slideshow to open it in fullscreen mode, then tap on the Share icon (represented by a box with an arrow pointing up). You can choose to save the slideshow to your Camera Roll or send it via email to your desired recipients.
Regardless of the method you choose, saving your slideshow on your iPhone ensures that you have easy access to it and can share it with others whenever you want. Just remember to check the settings and enable audio, if your slideshow includes audio files. Before sharing, it’s always a good idea to preview your slideshow and make any necessary edits or comments. Once saved, you can post it on social media platforms, send it via email, or even stream it onto an HDTV using the appropriate software or devices.
Remember to check the terms of use of the app or software you’re using, as well as any copyright restrictions that may apply when saving and sharing slideshows. Now that you know how to save a slideshow on your iPhone, you can unleash your creativity and share your masterpieces with the world!
Method 1: Saving a Slideshow to the Photos App
If you want to share a slideshow on your iPhone, iPad, or iPod touch, one of the easiest ways to do so is by saving it to the Photos app. This method allows you to save your slideshow locally on your device, making it accessible even when you’re offline.
Here’s how to save a slideshow to the Photos app:
- First, open the slideshow presentation or software you’re using. This could be PowerPoint, iMovie, or any other software that allows you to create and edit slideshows.
- Edit your slideshow as desired. Add photos, videos, audio, or any other content you want to include in your presentation.
- Once you’re satisfied with your slideshow, go to the “Save” or “Export” option, usually located in the upper right corner of the window.
- Select the option to save the slideshow to the Photos app on your device. The exact wording may differ depending on the software you’re using, but there should be an option specifically for saving to the Photos app.
- After selecting the Photos app as the save destination, you’ll see a list of options and settings. Enable any features you want, such as adding audio or comments to your slideshow.
- Lastly, click on the “Save” or “Export” button to save the slideshow to the Photos app on your device.
Once the saving process is complete, your slideshow will be accessible from the Photos app. From there, you can view, edit, or share the slideshow with others. With an iPhone, iPad, or iPod touch, you can send the slideshow via email, post it on Facebook or YouTube, or even stream it to your HDTV. You can also invite other users to view and comment on the slideshow, making it a shared experience.
Of course, this method only applies to those using Apple devices with the Photos app. If you’re using a different device or software, make sure to explore other options or seek out information specific to your device or software.
Invite people to view or edit your presentation
If you want to share your presentation with others, there are several methods you can use to invite people to view or edit your slideshow. Here are some options:
-
Email: One of the simplest ways to share your slideshow is by sending it via email. You can attach the presentation file to an email and send it to the recipients you want to invite. They can then open the attachment and view or edit the slideshow using the appropriate software.
-
Cloud storage: Another popular method is to save your presentation files on a cloud storage platform like Dropbox, Google Drive, or Microsoft OneDrive. Once saved, you can generate a shared link and send it to the people you want to invite. They can then click on the link to access the slideshow and make edits or view it.
-
Collaboration software: If you are working on a presentation with a team, using collaboration software like Google Slides or Microsoft PowerPoint Online can be a convenient option. These platforms allow multiple users to access and edit the slideshow simultaneously, enabling real-time collaboration.
Depending on the method you choose, the process of inviting people to view or edit your slideshow may vary. Make sure to familiarize yourself with the specific steps and instructions provided by the software or service you are using. Whether you want to share your presentation via email, cloud storage, or collaboration software, enabling others to contribute to your creative work can enhance the overall quality and impact of your slideshow.
Explore Themes Related to Creativity
If you’re looking for ways to unleash your creativity and express yourself through multimedia presentations, there are various methods you can explore. Whether you want to share a slideshow with others, make edits to existing presentations, or add photos and videos to enhance your creations, these topics offer a wealth of information and sources to help you get started.
| To create a slideshow, you can use software like PowerPoint, iMovie, or even the built-in app on your iPhone or iPad. Simply open the software, create a new presentation, and start adding photos, videos, or audio. You can then save your slideshow as a file on your device or export it to the cloud for easy access from other devices. |
| If you want to share your slideshow with others, you have several options. You can send it via email, post it on social media platforms like Facebook or YouTube, or even invite people to view it on a shared cloud storage. Most software will allow you to enable comments or adding recipients to ensure that only the intended users can access and view your presentation. |
| Another popular method is to save your slideshow as a video file. This way, you can upload it to platforms like YouTube or Vimeo, where you can reach a wider audience and receive feedback from others. |
| If you have an iPod touch, iPhone, or iPad, you can also use the AirPlay option to stream your slideshow onto a compatible device like an HDTV. Simply enable AirPlay in the settings, select the device you want to stream to, and start your presentation. This method allows for a larger viewing experience and is great for showcasing your work in a professional setting. |
By exploring these topics and methods, you’ll be able to unleash your creativity and share your ideas with others in an engaging and visually appealing way. So go ahead, dive into the world of multimedia presentations and discover new ways to express yourself!
Источники

When it comes to sharing a slideshow, there are several sources you can use to make the most of your presentation. Here are some options:
1. PowerPoint software: If you have created your slideshow using Microsoft PowerPoint, you can save it onto a USB drive or email it to recipients as an attachment.
2. Cloud storage: Save your slideshow to a cloud storage platform, such as Google Drive or Dropbox. This way, you can access it from any device with an internet connection.
3. Photo sharing platforms: Websites like Flickr or Instagram allow you to post your slideshow online, making it accessible to a wider audience. You can also add tags to make it easier for people to find your presentation.
4. Social media: Share your slideshow on popular social media platforms like Facebook or YouTube. You can either post it on your own profile or send it as a private message to specific users.
5. Email: A simple and straightforward method is to send your slideshow as an email attachment. Make sure to compress the file if it’s too large.
6. Mobile apps: Using apps like iMovie on your iPad or iPhone, you can edit and export your slideshow directly from your device. You can also stream it to an HDTV to view it on a larger screen.
7. Invitations: If you want to invite specific people to view your slideshow, you can create a guest list and send them an invitation. This can be done through email or using an event management platform.
With so many options available, you’ll definitely find a method that suits your needs and enables you to share your slideshow with others. Feel free to explore these sources and get creative with how you share your presentation.


