

Alcohol ink is a versatile and vibrant medium that can be used to create beautiful pieces of art on various surfaces. Whether you’re a pro artist or just starting out, alcohol ink can help you add movement, depth, and a unique effect to your paintings. In this article, we’ll explore different ways to make alcohol ink at home using certain dyes and alcohol – a technique loved by many artists.
To make alcohol ink, you’ll need a few basic ingredients: alcohol, dyes, and some plastic or glass containers. You can find high-quality dyes specifically made for creating alcohol ink that will give you the best results. These dyes are available in a wide range of colors, allowing you to blend different shades and create your desired effect.
First, gather all the materials you’ll need, including a brush or pens for applying the ink. Then, pour a small amount of alcohol into a container. Take another container and add a few drops of dye into it. You can experiment with different combinations and ratios to achieve your desired color. If you want a lighter shade, add more alcohol to the dye container.
Next, carefully pour the dye-alcohol mixture into the alcohol container. This will allow the colors to blend together, creating a full range of hues. If you want to create a layered effect, let each layer dry before applying the next one. This will give you more control over the final outcome of your artwork.
Once you have your alcohol ink ready, you can apply it to various surfaces. Paper and plastic are some of the most common choices, but you can also experiment with other materials. When working with alcohol ink, it’s important to keep safety in mind. Make sure you’re in a well-ventilated area and avoid inhaling the fumes. You should also protect your work area with a plastic or disposable table cover to prevent any accidental spills or stains.
When applying the alcohol ink, you can use a brush or pens to create different effects. The ink will spread and move on the surface, creating blends and organic patterns. You can also use tools like straws or cotton swabs to manipulate the ink and create more intricate designs. The possibilities are endless, so don’t be afraid to experiment and tune into your creative instincts!
In conclusion, knowing how to make alcohol ink gives you the freedom to create unique and stunning pieces of art. Whether you’re a professional artist or just starting out, this technique can help you add depth and movement to your work. With a few materials and a little practice, you’ll be able to create beautiful paintings that capture the eye and showcase your artistic talent!
How To Make Alcohol Ink At Home
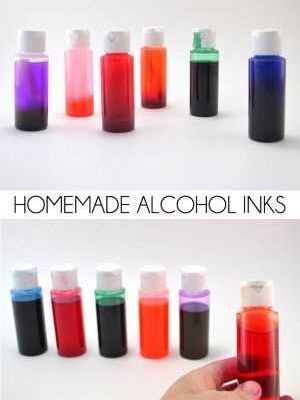
If you’re into creating beautiful paintings, then making your own alcohol ink at home is a great way to add a unique touch to your artwork. Alcohol inks are vibrant and full of color, making them a popular choice among artists. In this guide, we’ll show you how to make alcohol ink at home using a few simple ingredients.
What You’ll Need

- Isopropyl alcohol (at least 91% concentration)
- Dye-based coloring agents or liquid food coloring
- Plastic squeeze bottles or small jars
- Brush pens or paintbrushes
- A surface for your artwork (such as glass or glossy paper)
- A well-ventilated area for safety
Creating The Ink
To make your alcohol ink, start by filling the plastic squeeze bottles or small jars with isopropyl alcohol. It’s important to use high-quality isopropyl alcohol with a concentration of at least 91% for best results. Then, add a few drops of the dye-based coloring agents or liquid food coloring to the alcohol. You can experiment with different ratios to achieve the desired color intensity.
Blending The Colors
To create beautiful blends and effects, you can blend different colors of alcohol ink together. One way to do this is by using a brush or brush pen to mix the colors directly on the surface of your artwork. You can also layer the colors on top of each other to create depth and movement in your paintings.
Adding Control
If you want more control over the spread of the colors, you can use a brush or brush pen to apply the alcohol ink in specific areas. This will allow you to create precise lines or shapes in your artwork.
Tuning The Ink
If you find that the ink is too transparent or light, you can add more dye-based coloring agents or liquid food coloring to tune the ink to your liking. Alternatively, if you want a more subtle effect, you can dilute the ink with a small amount of isopropyl alcohol.
Conclusion

Making alcohol ink at home is a fun and creative way to enhance your artwork. With a few simple ingredients and some practice, you can create stunning pieces that are unique to your style. Experiment with different blending techniques and color combinations to find what works best for you. Just remember to work in a well-ventilated area and follow safety precautions when handling isopropyl alcohol. Enjoy the process and let your creativity soar!
What is alcohol ink painting
Alcohol ink painting is a popular and vibrant form of art that involves using alcohol-based inks to create stunning and unique works of art. It has gained popularity in recent years among artists and hobbyists alike due to its versatility and vibrant colors.
The process of alcohol ink painting involves applying alcohol inks to a variety of surfaces, such as glass, plastic, or paper. The alcohol in the ink allows it to spread and blend easily, creating beautiful patterns and blends.
So, what exactly is alcohol ink? Alcohol ink is a type of dye that is mixed with isopropyl alcohol. The alcohol acts as a solvent, allowing the dye to spread and move freely on the surface it is applied to. This movement and blending of colors is what gives alcohol ink paintings their unique and stunning effect.
There are many ways to create alcohol ink paintings. One popular method is to drop the ink directly onto the surface and let it spread naturally. Another technique involves using a brush or other tool to manipulate the ink, creating specific patterns or designs.
If you want to try alcohol ink painting at home, there are a few things you’ll need. First, make sure you have a well-ventilated area to work in, as the alcohol fumes can be strong. It’s also important to wear gloves and work on a covered surface to protect yourself and your workspace.
When it comes to the materials, you’ll need alcohol inks, isopropyl alcohol, brushes, and some kind of surface to paint on. You can also use alcohol ink pens or markers for more control and detailed work. The quality of the alcohol inks and paper or surface you choose can greatly affect the final result, so it’s worth investing in good quality materials if you’re serious about creating beautiful alcohol ink paintings.
To get started, simply drop or brush the alcohol ink onto the surface and watch as the colors blend and spread. You can layer different colors on top of each other to create depth and dimension, or blend them together to create seamless transitions.
One pro tip for achieving a beautiful blend of colors is to work quickly and be mindful of the drying time. Alcohol ink dries very quickly, so if you want to blend colors, make sure to do it while the ink is still wet. You can also use a little bit of isopropyl alcohol to help blend the colors smoothly.
In conclusion, alcohol ink painting is a versatile and vibrant art form that allows artists to create stunning works of art. Whether you’re a beginner or an experienced artist, alcohol ink painting offers endless possibilities for creativity and experimentation. So gather your supplies, tune into your creative side, and let the alcohol inks work their magic!
7 Ways to Blend Alcohol Inks Like a Pro
When it comes to working with alcohol inks, blending is a key technique that can take your artwork to the next level. By mastering the art of blending, you can create beautiful, professional-looking paintings that wow viewers. Here are seven ways to blend alcohol inks like a pro:
- Tune into the Movement: Blending alcohol inks requires a delicate touch. Tune into the movement of the inks on the surface and work with them, rather than against them. This will help you achieve a smoother blend.
- Layering: Layering is an excellent way to create depth and dimension in your paintings. Start with a base layer of alcohol ink, let it dry, and then add additional layers to create more complexity and interest.
- Brush and Pen Combinations: Experimenting with different brushes and pens can give you varying effects. Fine brushes will provide more control, while pens can help add fine details and lines to your artwork.
- Work on Porous Surfaces: If you want your alcohol inks to spread and blend well, work on porous surfaces such as Yupo paper or ceramic tiles. These surfaces absorb the ink, allowing for better blending and layering.
- Use Blending Solutions: If you’re having trouble blending certain colors or achieving a certain effect, blending solutions can come to the rescue. These solutions can help soften colors, create a watercolor-like effect, or help the inks flow more freely.
- Experiment with Different Tools: Don’t limit yourself to just brushes and pens. Try using plastic wrap, straws, or even natural objects like leaves to create unique blending effects.
- Practice and Patience: Blending alcohol inks is a skill that takes time to develop. Be patient with yourself and practice regularly. With time, you’ll become more comfortable with the process and be able to create stunning blends.
By following these tips, you’ll be well on your way to creating professional-quality alcohol ink paintings. Remember to prioritize safety when working with alcohol inks, and always refer to reliable sources for instructions and guidance.
Conclusion
In conclusion, creating alcohol ink at home can be a fun and rewarding hobby. By following the steps mentioned earlier and experimenting with different colors and techniques, you can make beautiful paintings and art pieces.
Alcohol inks offer a unique and vibrant way to express your creativity. Their blending capabilities allow you to create smooth transitions between colors and create depth in your work. With a little practice and experimentation, you’ll be able to achieve the desired effect and control over your artwork.
It’s important to note the safety precautions when working with alcohol inks. Make sure to work in a well-ventilated area, as the fumes can be strong. Also, use gloves to protect your hands from the alcohol and ensure that you’re using the inks on a non-porous surface, like glass or plastic, for optimal results.
Quality inks and paper can also make a significant difference in the outcome of your artwork. Investing in professional-grade materials will enhance the vibrancy and longevity of your paintings.
There are many ways to use alcohol inks, such as in pens or with a brush. You can spread the ink on the surface to create a blended effect or use a dry brush for a more controlled application. Creating layers of ink can also add depth and complexity to your paintings.
In conclusion, by following the steps outlined in this guide and practicing regularly, you’ll be well on your way to creating stunning alcohol ink artworks. Whether you’re a beginner or a pro, the possibilities are limitless. So, tailor the techniques to your preference, experiment with different colors and movement, and tune into your creative flow to make the most out of alcohol ink painting.
Sources
If you want to start creating your own alcohol ink paintings at home, here are some sources where you can find the materials you need:
1. Alcohol: The main ingredient in alcohol ink is, of course, alcohol. You can use isopropyl alcohol or rubbing alcohol, which can be found in most drugstores or grocery stores.
2. Dyes: Alcohol inks are made by combining alcohol with dyes. You can find a wide variety of alcohol-based dyes online or in art supply stores.
3. Glass: Glass is a popular surface to work on when using alcohol ink. You can use glass tiles, glassware, or even old windows. The smooth surface allows the ink to spread and blend more easily.
4. Paper: If you want to create alcohol ink paintings on paper, there are special types of paper designed for this purpose. Yupo paper is a popular choice, as it allows the ink to spread and blend without being absorbed.
5. Brushes and Pens: Brushes and pens can be used to apply alcohol ink to your surface. Both can create different effects and give you more control over the ink. Just make sure to clean them thoroughly after each use to prevent the colors from mixing.
6. Safety: When working with alcohol ink, it’s important to prioritize safety. Make sure to work in a well-ventilated area, as the alcohol fumes can be strong. Also, wear gloves to protect your hands and work on a protected surface to avoid any stains.
7. Blending and Layering: Blending and layering are key techniques in alcohol ink painting. You can use blending solution or rubbing alcohol to help the colors blend together smoothly. By layering different colors, you can create depth and dimension in your paintings.
In conclusion, there are many sources where you can find the materials you need to make alcohol ink paintings at home. With a little pro tips and practice, you can create beautiful paintings that have movement, depth, and a unique effect. Explore different ways to blend, layer, and control the ink, and let your creativity shine!


