
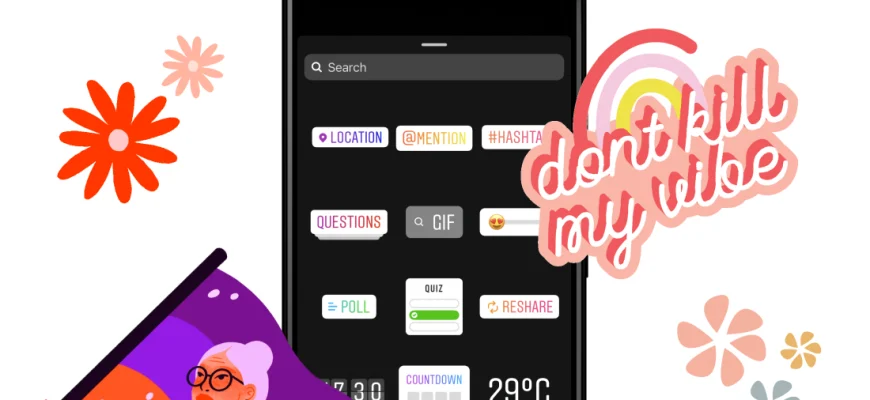

If you want to add some fun and creativity to your social media posts in 2022, creating Giphy stickers is the way to go. Many people love using stickers to express their emotions and make their messages more engaging. Giphy, the popular GIF platform, serves as a great resource for finding and sharing stickers. But why just use stickers that others have created when you can make your own?
Designing and creating your own Giphy stickers is easier than you might think. You don’t need to be a pro with Photoshop or have extensive design skills. There are a few different options you can choose from depending on your preferences and the tools you have available.
One way to create Giphy stickers is by using Canva, a popular graphic design platform. Canva offers a wide range of pre-made templates and design elements that you can work with to create your own custom stickers. Simply choose a template, add your own photos or graphics, and voila! You have your own unique Giphy stickers.
Another option is to use Procreate, a powerful digital illustration app. Procreate is perfect for artists who want to take their sticker design to the next level. The app offers many advanced features and tools that allow you to create high-quality stickers with ease. Once you’re done designing your stickers in Procreate, you can export them as PNGs and upload them to Giphy.
When it comes to uploading your stickers to Giphy, there are a few things you should keep in mind. Giphy only accepts stickers in GIF format, so if you’re working with PNGs, you’ll need to convert them into GIFs. There are many online tools available, such as EZGIF, that allow you to easily convert your PNGs into GIFs.
Before you upload your stickers to Giphy, it’s important to take some time to optimize them. Giphy has certain guidelines and requirements for stickers, so make sure your stickers meet their criteria. For example, Giphy stickers should be no longer than 3 seconds and should have a transparent background. By following these guidelines, you can increase the chances of your stickers being discovered and used by others.
Once your stickers are uploaded to Giphy, they won’t instantly appear in search results. Giphy usually takes some time to review and process new uploads. Once your stickers have been verified and approved, they will become searchable and viewable by others. This means that your stickers could become part of the trending options on Giphy and reach a wide audience.
So, why not give it a try and create your own custom Giphy stickers? It’s a fun and creative way to add a personal touch to your social media posts, messaging apps, or even your own brand’s channel. With the options and resources available, there aren’t many reasons not to dive into the world of sticker creation on Giphy. Let your imagination run wild and turn your ideas into stickers that people will love!
- How to Add or Create a GIF Sticker for WhatsApp 2022
- How To Create A GIPHY Brand Channel
- How to make your own GIFs
- 1. Designing your GIF
- 2. Breaking it down into frames
- 3. Creating the GIF
- 4. Sharing your GIF
- 1 Canva
- 2 EZGIF
- 3 Procreate
- 4 Photoshop
- Giphy won’t work for creating GIF stickers only GIFs
- How long does it take for stickers to show on Instagram search?
- Sources
How to Add or Create a GIF Sticker for WhatsApp 2022
WhatsApp has become one of the most popular messaging platforms, and adding GIF stickers to your messages can add a fun and creative touch to your conversations. In this article, we will show you how to add or create a GIF sticker for WhatsApp in 2022.
1. Search for GIFs Stickers: The first step is to find the perfect GIF sticker to use in your WhatsApp messages. There are many websites and platforms that offer a wide range of stickers, such as Giphy, Canva, and Ezgif. These platforms have searchable libraries with many trending and high-quality stickers to choose from.
2. Create Your Own Stickers: If you can’t find the perfect sticker or want to add a personal touch, you can create your own. There are many apps and design platforms available, like Canva and Photoshop, that allow you to create custom stickers. You can also use platforms like Procreate if you prefer sketching and drawing.
3. Convert GIFs into Stickers: Once you have found or created your perfect sticker, you need to convert it into a sticker format that is compatible with WhatsApp. Usually, WhatsApp stickers are in the PNG format. You can use platforms like Ezgif or other online conversion tools to convert your GIFs or images into PNGs.
4. Add Stickers to WhatsApp: Now that you have your sticker in the right format, it’s time to add it to WhatsApp. To do this, open a chat in WhatsApp and click on the emoji icon next to the typing area. Then, click on the stickers icon at the bottom of the screen. WhatsApp provides a collection of default stickers, but if you want to add your own, click on the “+” icon on the right. This will open your sticker library, and you can choose to add stickers from your device or from the WhatsApp Sticker Store.
5. Use Your Stickers: After adding your stickers, they will be available for you to use in your WhatsApp conversations. To use them, simply open the sticker library, select the sticker you want to use, and tap on it to send it in your chat. You can also add multiple stickers to your message before sending.
Creating and adding GIF stickers to your WhatsApp messages is a great way to express yourself and make your conversations more engaging. With the options available in 2022, you have limitless possibilities to design and customize your own sticker collection. Get creative and have fun!
How To Create A GIPHY Brand Channel
GIPHY is a searchable platform where users can find and share GIFs and stickers. It offers a wide range of options when it comes to creating and sharing your own stickers. If you want to give your brand more visibility and reach, creating a GIPHY brand channel is the way to go. In this section, we will break down how to create a GIPHY brand channel step by step.
- Verify your account: Before you can create a GIPHY brand channel, you need to make sure your account is verified. This means you need to have at least 5 GIFs uploaded to the platform.
- Create your channel: Once your account is verified, you can go ahead and create your brand channel. To do this, simply click on the “Create a GIPHY Brand Channel” option in the settings menu.
- Design your channel: Now that you have your brand channel, it’s time to make it your own. You can choose a custom thumbnail, add your brand logo, and customize the channel’s appearance to match your brand’s aesthetics.
- Add stickers: The main purpose of having a GIPHY brand channel is to showcase your stickers. You can upload your own high-quality PNGs or GIFs to make them searchable on the platform. It’s recommended to use transparent backgrounds for your stickers to ensure they look good on any messaging app or social media platform.
- Promote your channel: Once you have your stickers uploaded, it’s time to promote your channel. Share your brand channel on social media, in your email signature, or any other means you have to reach your target audience. The more views your stickers get, the more exposure your brand will have.
Creating a GIPHY brand channel is a great way to take your brand’s visibility to the next level. With a well-designed channel and high-quality stickers, you’ll be able to tap into the millions of users who use GIPHY on apps like Instagram, WhatsApp, and more. So don’t wait, create your GIPHY brand channel today and start spreading your brand’s message through GIFs and stickers!
How to make your own GIFs
Creating your own GIFs can be a fun and creative way to express yourself in the digital world. In this article, we will show you how to make custom GIFs using various tools and platforms.
1. Designing your GIF
Before you can create a GIF, you need to have the design or content you want to animate. This could be a series of photos or illustrations, or even a video clip.
There are many tools you can use to design your GIF, such as Photoshop, Procreate, or even your own drawings. The key is to have a series of images that you can turn into a GIF.
2. Breaking it down into frames
Once you have your design ready, you’ll need to break it down into individual frames. You can do this in Photoshop by opening your design and selecting “Save for Web”, which will give you options to choose the number of frames and the GIF settings.
If you don’t have access to Photoshop, you can use online tools like ezgif or Canva to upload your design and choose the GIF settings.
3. Creating the GIF
After you have your frames ready, you can use a GIF creation platform like Giphy to turn them into a GIF. Giphy is a popular platform that serves as a searchable database for GIFs.
Simply create an account on Giphy, then upload your frames. Giphy will automatically turn them into a GIF and give you options to add tags, captions, and stickers to your creation.
4. Sharing your GIF

Once your GIF is created, you have several options for sharing it. You can share it on social media platforms like Instagram and Facebook, or you can send it through messaging apps like WhatsApp.
If you want to give your GIF a super trendy, you can also submit it to Giphy’s Trending channel. However, note that this channel is only available to verified brand accounts.
Remember that when creating your own GIFs, you have the freedom to add your own style and creativity. Have fun and let your imagination run wild!
1 Canva
One popular platform for creating Giphy stickers is Canva. Canva is an online graphic design tool that offers a wide range of options for designing stickers. With Canva, you don’t have to have any design experience to create your own stickers.
Canva provides a user-friendly interface and an extensive library of templates, images, and graphics. You can choose from various pre-designed sticker templates or start from scratch to create custom stickers. Canva also allows you to upload your own images or photos to use as sticker designs.
When creating stickers in Canva, you have the option to work with high-quality PNGs, which offer better image quality and transparency. This is important because Giphy stickers need to have a transparent background so that they can be easily added to messages or posts without any unwanted white space.
Canva is a great option for creating stickers because it offers many customization options. You can add text, shapes, and other design elements to your stickers to make them unique and eye-catching. Canva also provides various filters and effects that you can apply to your sticker designs to give them a trendy or artistic look.
After you have finished designing your stickers in Canva, you can easily download them in PNG format. Once you have the PNG files, you can then upload them to Giphy for verification. It’s important to note that Giphy has specific guidelines and criteria for verifying stickers, so make sure to read and follow their guidelines before uploading your designs.
Once your stickers are verified and approved by Giphy, they will become searchable on various messaging platforms like WhatsApp, Instagram, and other apps that integrate with Giphy. This means that users will be able to find and use your stickers in their messages or posts.
Creating stickers with Canva is a relatively simple and straightforward process. With its user-friendly interface and wide range of design options, it’s a great platform for both beginners and experienced designers to create their own unique Giphy stickers.
2 EZGIF
If you’re not keen on creating your own stickers from scratch or if the other options we’ve mentioned aren’t working out for you, there’s another website that could help out: EZGIF. This platform serves as a super easy way to add stickers to Giphy. You won’t have to go through a lengthy process of designing your own high-quality GIFs or PNGs within Photoshop.
The best part? EZGIF is completely free to use. All you need are some custom stickers that you want to turn into GIFs and upload to Giphy. Here’s a breakdown of how it works:
- Open EZGIF in your browser and choose the option to “Edit GIF”.
- After uploading your stickers, you can add them to your GIF.
- Before you hit “Create GIF”, you have some options to customize your GIF, such as adding a text overlay, adjusting the GIF speed, or cropping the GIF.
- After you’ve made your edits, click “Create GIF” and EZGIF will generate the final GIF for you.
Once you have your GIF, you can go ahead and upload it to Giphy. Keep in mind that it usually takes some time for Giphy to process and verify your stickers before they show up in search results or on your channel. So don’t be discouraged if you don’t see your stickers right away. Patience is key!
With EZGIF, creating your own Giphy stickers is a breeze. It doesn’t require any specialized apps or software, and it’s a great option for those who want to quickly make their own stickers but aren’t familiar with design tools like Photoshop or Procreate.
So give EZGIF a try and add some trendy and searchable stickers to your Giphy collection for 2022!
3 Procreate
Procreate is a popular digital art app that serves as a great platform for creating Giphy stickers. With Procreate, you can design your own stickers and turn them into high-quality GIFs. This means that you have full control over your sticker design and can choose how it will appear when searched for on Giphy.
Before you start creating your stickers in Procreate, you’ll need a few things. First, you’ll need an idea for your sticker design. Think about what kind of sticker you want to make and how it will represent your brand or message. Once you have your idea, you can start designing your sticker in Procreate. Procreate offers many options for customizing your design, so take some time to explore all the tools and features available.
When creating stickers in Procreate, it’s important to keep in mind that Giphy has some limitations on the types of files it accepts. Giphy only accepts GIFs and PNGs, so make sure that your sticker design can be exported in one of these formats. Procreate does not support exporting directly to GIF, so you’ll need to export your design as a PNG and then use a separate tool, like EZGIF, to convert it into a GIF.
Once you have your sticker design in PNG or GIF format, you can upload it to Giphy. Before uploading, make sure to add relevant tags and descriptions to optimize your sticker’s visibility on Giphy. You can also choose which categories your sticker belongs to, which can help it show up in relevant searches. After uploading, it usually takes some time for Giphy to process your sticker before it becomes searchable.
Creating Giphy stickers in Procreate is a great way to add some custom design elements to your brand’s messaging. By leveraging the popularity of Giphy and other messaging platforms like Whatsapp, Instagram, and more, you can give your brand more visibility and offer your audience fun and engaging ways to express themselves.
It’s worth noting that creating Giphy stickers is not just about getting more views. Stickers can also be used to show support for a cause, promote a product or service, or simply bring some joy to people’s conversations. So don’t be afraid to get creative and experiment with different sticker designs!
In summary, Procreate is a powerful tool for creating Giphy stickers. With its customizable options and high-quality output, you can design stickers that stand out and make a lasting impression. So, if you’re looking to add some fun and visual elements to your brand messaging, give Procreate a try!
4 Photoshop

If you have some designing skills and want to create high-quality custom stickers, Photoshop is the way to go. It offers a wide range of options and serves as a powerful tool when it comes to creating stickers for Giphy.
Here is a breakdown of how to create Giphy stickers using Photoshop:
- Open Photoshop and choose a canvas size that suits your needs. Generally, Giphy stickers are usually around 500 pixels wide, but you can adjust this according to your preference.
- Start designing your sticker using the tools and features available in Photoshop. You can take inspiration from trending GIFs or come up with your own unique design.
- Once you are satisfied with your design, save it as a GIF file. Giphy accepts GIFs, so you can save your design in this format.
- Go to Giphy’s website and click on the “Upload” button. This will take you to the Giphy Channel Dashboard, where you can upload your sticker.
- Upload your GIF sticker to Giphy and add relevant tags and descriptions. This will make it searchable and increase its chances of appearing in search results.
- After uploading your sticker, Giphy will verify it and it will become searchable within the platform. This means that users can now add your sticker to their own GIFs or use it in messaging apps like WhatsApp or Instagram.
- Give it some time for your sticker to gain popularity. Giphy stickers can take some time before they start getting views and become popular among users.
- Enjoy the success of your Giphy sticker and continue creating more to keep your brand or personal channel active on the platform.
Photoshop is a widely used tool for designing and creating various types of visual content. With its multitude of features, you can create stunning stickers that will surely stand out on Giphy.
Giphy won’t work for creating GIF stickers only GIFs
If you want to create your own GIF stickers, Giphy might not be the platform for you. Although Giphy is well-known for its vast collection of GIFs and stickers, it limits the options for users who want to design and add their own custom stickers.
Giphy’s main focus is on providing a searchable database of GIFs and stickers that users can easily find and share. They serve as a popular choice for platforms like Instagram, WhatsApp, and other messaging apps, where users can quickly search for trending GIFs and stickers to enhance their conversations.
But when it comes to creating high-quality, custom GIF stickers, Giphy falls short. Giphy’s GIF stickers are usually behind-the-scenes, meaning users can’t upload and design their own stickers directly on the platform. Instead, Giphy only offers limited options for creating GIFs, such as turning a series of PNGs into a GIF or breaking down a GIF into multiple frames.
If you want to make your own GIF stickers, you’ll need to use other apps or design software. Some popular options include Canva, Photoshop, Procreate, or any software that allows you to create and export GIFs. These apps give you more freedom and control over your sticker designs, allowing you to add your brand or create custom stickers for your own purposes.
Creating GIF stickers takes time and effort, especially if you want to create high-quality, eye-catching designs. You’ll have to turn to other tools and resources to achieve the desired result. Also, keep in mind that not all platforms support custom GIF stickers. Only verified users or channels on certain platforms have the option to add their own custom stickers.
In summary, if you want to create your own GIF stickers, Giphy won’t be the go-to platform. It primarily focuses on providing a vast library of searchable and trending GIFs and stickers that users can easily access. If you want to make your own custom stickers, you’ll have to turn to other apps or software that allows you to design and export GIFs.
How long does it take for stickers to show on Instagram search?
When you create custom stickers for Instagram, you might wonder how long it takes for them to show up in the search results. The timeframe for stickers to become searchable on Instagram can vary based on a few factors. Let’s dive into it!
1. Sticker Designing: Before you can make your own stickers, you need to create them. This process involves designing high-quality stickers using tools like Photoshop, Procreate, Canva, or other apps that offer options for creating GIFs or PNGs. Make sure your stickers are visually appealing and relevant to your brand or theme.
2. Uploading to Giphy: Once you have your stickers ready, you need to upload them to Giphy, a popular platform for creating and sharing animated stickers. Giphy serves as an intermediary for stickers on various messaging apps and social media platforms, including Instagram.
3. Giphy Verification: After uploading your stickers to Giphy, it usually takes some time for them to be processed and verified. Giphy checks the uploaded stickers for compliance with their guidelines and verifies the account behind the stickers. This verification process ensures that only authorized and trustworthy creators can add stickers to the Giphy library.
4. Searchable on Instagram: Once your stickers are verified and approved by Giphy, they become searchable on Instagram. Usually, this process takes a few hours to a day, but it can vary. Keep in mind that the search algorithm of Instagram is constantly evolving and may prioritize trending or popular stickers.
Timing and Views: It’s important to note that the timing of when your stickers show up in Instagram search can depend on various factors, including the number of views your stickers get on Giphy, the popularity of the search term, and the overall demand for stickers. Stickers with a higher number of views are more likely to appear earlier in the search results.
Limitations: While Giphy allows you to create and upload your own stickers, it’s worth mentioning that the visibility of your stickers on Instagram is not guaranteed. Instagram’s search algorithm determines which stickers to display based on various factors. So, even if you do everything right, your stickers might not always show up prominently in the search results.
| Giphy Process | Timeframe |
|---|---|
| Designing Your Stickers | Depends on your designing skills |
| Uploading to Giphy | A few minutes |
| Giphy Verification | Within 24 hours |
| Searchable on Instagram | A few hours to a day |
To summarize, the process of turning your own designs into searchable stickers on Instagram involves creating high-quality stickers, uploading them to Giphy, getting them verified, and waiting for a few hours to a day for them to become searchable on Instagram. Keep in mind that the visibility and placement of your stickers in the search results can vary based on popularity and demand.
Sources
When it comes to creating your own giphy stickers, there are a few limited options available. Here are some popular platforms that you can use:
1. Giphy: Giphy is the most well-known platform for creating and uploading stickers. It has a long history and is highly searchable, making it a great place to search for stickers or upload your own.
2. Ezgif: Ezgif is a website that serves as an easy-to-use tool for creating stickers from your own images or gifs. It offers a breakdown of how to turn pngs into gifs and has options for adding text or effects.
3. Photoshop: If you have some design experience, you could use Photoshop to create your own custom stickers. This platform takes more time and skill, but it gives you a high-quality and professional result.
4. Canva: Canva is a popular graphic design tool that many people use for creating stickers. It has a user-friendly interface and offers templates and elements to choose from.
These are just a few of the platforms available for creating giphy stickers. Depending on your needs and preferences, you can choose the one that works best for you. However, keep in mind that not all messaging apps or platforms support stickers. Make sure to check if the platform you want to use supports stickers before spending time designing your own.
If you don’t want to create your own stickers from scratch, you can also search for trending stickers on Instagram, Procreate, or other verified sticker apps. These platforms usually offer a wide range of stickers that you can simply add to your messaging channels without the need for customization. This option is great if you’re looking for quick and easy options that have already been designed.


