

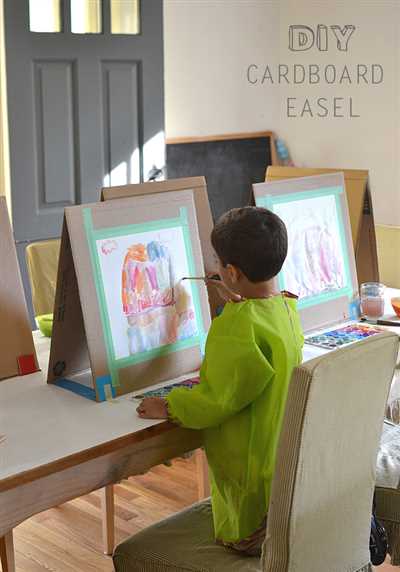
If you have a wall in your home or studio, you can easily make a great easel to pair with it. An easel is a must-have for any artist, providing a stable and adjustable surface to draw or paint on. In this step-by-step guide, we will show you how to make a wooden easel with a chalkboard, using materials such as wood offcuts and basic craft supplies. With just a few simple tools and some working time, you can create a functional and stylish easel that will make your art projects a breeze.
The first thing you will need is a piece of wood, which will serve as the main frame of your easel. Three wooden strips would be just enough for this project, and you can easily find them in any craft or DIY store. Make sure they are long enough to reach the desired height of your easel. You will also need two narrower wooden strips, which will act as the struts of the easel, and a wooden shelf to hold your art supplies.
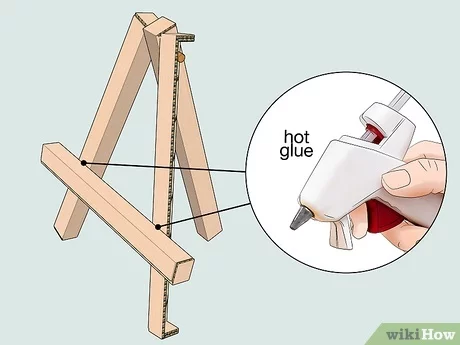
Start by attaching the three vertical wooden strips together, using brackets and screws. Make sure they are secure and stable. Then, attach the horizontal struts to the top and bottom of the frame, creating a sturdy structure. You can fasten them with screws and washers for added strength. Next, attach the wooden shelf to the bottom of the frame, making sure it is wide enough to hold your art materials.
Now it’s time to create the chalkboard surface. Using a piece of card or plywood, cut it to the desired size and give it a smooth finish. Attach it to the frame, leaving a small space between the board and the frame for the chalkboard to be easily adjustable. You can use hinges or mortises for this step, depending on your preferred method. Once the chalkboard is attached, you can hang it on the wall or use a stand to make it freestanding.
And there you have it! Your very own DIY easel with a chalkboard. Now you can make art and keep track of your ideas all in one place. This easel is perfect for working on canvas or just using as a display for your favorite greeting cards. And if you ever need to make adjustments, the wooden frame is versatile enough to accommodate different heights and angles. So why rely on store-bought easels when you can make your own personalized version? Visit our website, CraftyMarie, for more DIY ideas and inspiration.
CraftyMarie
If you’re looking to create your own DIY easel, CraftyMarie has some great ideas on their website. Making an easel is not only an easy craft project but also a practical solution for working on your art. Whether you’re a seasoned artist or just starting out, having a dedicated space to draw or paint can make a big difference.
Materials you’ll need for this project include:
- Wooden boards (12mm wide)
- Measuring tape
- Pencil
- Pair of brackets
- Washers
- Wooden strips (offcuts)
- Chalkboard paint
First, you’ll need to measure the height and width you want your easel to be. CraftyMarie recommends making the easel approximately 1.2 meters tall and wide enough to hold a standard canvas or card. Once you have the measurements, cut two long wooden boards for the vertical struts and two shorter ones for the horizontal shelf.
Next, attach the brackets to the back of the vertical struts using screws and washers. These brackets will hold the horizontal shelf in place. Make sure they are securely attached to give your easel enough stability.
Once your brackets are attached, it’s time to work on the shelf. Paint one side of the wooden strips with chalkboard paint. This will give you a surface to easily draw or write on with chalk. Let the paint dry completely before attaching the strips to the brackets.
After the paint has dried, attach the strips to the brackets using screws. This will create a horizontal shelf for you to place your canvas or card on while working. Make sure the shelf is sturdy and level.
When everything is assembled, you’ll have a functional easel that you can easily adjust to your desired height and angle. CraftyMarie suggests adding a pair of wing nuts to each side of the shelf, allowing you to change the angle of the canvas or card. This way, you can work vertically or at an angle, depending on your preference.
Remember to make the easel stable enough to rely on for your artwork. CraftyMarie suggests using a thicker material for the struts, such as 12mm wood, to ensure stability. Additionally, adding a crossbar between the two vertical struts will provide extra support.
With your CraftyMarie-inspired easel, you’ll have a dedicated space to let your creativity flow. Whether you’re working on greeting cards or creating masterpieces in your studio, this DIY easel will make your artistic journey much more enjoyable.
Material and supplies
When working on making an easel, there are several materials and supplies that you will need. Here is a list of the items you will need:
- Boards: You will need two wide and long boards for the main structure of the easel. These boards will be the base and the back support.
- Working boards: You will also need two smaller boards that are planned to be attached to the main boards. These will be used to draw on and hold the canvas.
- Measuring equipment: To ensure accuracy in your easel dimensions, you will need measuring tools such as a ruler, tape measure, or a combination square.
- Pencil: You will need a pencil to mark the measurements and make the necessary markings on the wood.
- Wood: The main material for the easel will be wood. You will need various sizes and types of wood for the different parts of the easel.
- Brackets: Three brackets will be needed to attach the working boards to the main boards. These brackets will provide stability and support for the easel.
- Screws and washers: You will need screws and washers to securely attach the brackets to the boards.
- Paint or stain: Depending on the look you want to achieve, you may choose to paint or stain the wood of your easel.
These are the basic materials and supplies you will need to make your own DIY easel. However, feel free to modify and experiment with the materials based on your own ideas and the available resources you have.
Great ideas
If you’re looking for great ideas on how to make an easel, CraftyMarie’s website has some amazing suggestions. One idea involves using a pair of wooden boards, measuring 12mm wide and long enough to give you the desired height. These boards can easily be attached vertically using brackets, which will give you a sturdy frame to hang your canvas or chalkboard.
Another great idea is to make a DIY easel using offcuts of wood. By cutting the wood into strips and creating mortises, you can create the struts for your easel. Attach these struts to a horizontal shelf, which will act as the base, and then attach another strip vertically to act as the support. This easel gives you enough space to hang your canvas or chalkboard and is easy to make with just a few materials.
If you’re a craft enthusiast, you might also consider making an easel that can double as a greeting card display. By attaching horizontal strips of wood to the vertical struts, you can create spaces to hang greeting cards. This way, not only will you have a functional easel for your studio, but also a display for your beautiful card designs.
Another great idea is to make an easel that can be easily folded and stored away. By using hinges and wing nuts, you can create a collapsible easel that can be adjusted to the desired height. This way, you can easily take it with you on your outdoor painting adventures or store it in a small space when not in use.
If you’re into working with chalk or pencil, you could also consider adding a chalkboard or pencil holder to your easel. Attach a strip of wood to the frame, leaving enough space to hold your chalk or pencils. This way, you’ll always have your drawing equipment within reach.
These are just a few great ideas for making your own easel. Whether you’re a professional artist or just enjoy crafting, having your own easel can make your creative process much easier. So why not give it a try and start making your own easel today?
Materials & Equipment
Before you start making your easel, you’ll need to gather the following materials and equipment:
Materials:
- 12mm wooden offcuts
- Wood glue
- Washers
- 3 wooden boards for the horizontal struts
- 2 wooden boards for the vertical struts
- 2 wooden strips for the wing nut brackets
Equipment:
- A pair of scissors
- A craft knife
- A ruler
- A pencil
- A drill
- A screwdriver
- A chalkboard or canvas
These materials and equipment will give you a great start in making your own DIY easel. However, if you don’t have some of these supplies, don’t worry. You could easily substitute them with other materials you have on hand. For example, instead of wooden offcuts, you could use long boards or strips. Just make sure they are wide and sturdy enough to support your canvas or chalkboard.
If you’re planning to use the easel for greeting cards or smaller crafts, you can use narrower boards for the struts. You’ll also need less space between the vertical struts, so adjust the measurement accordingly.
To make your easel, start by measuring and cutting the materials as planned. Attach the horizontal struts to the vertical struts using wood glue and screws. Make sure to create mortises in the vertical struts where the struts will be attached. This will give them extra stability.
Once the main structure is built, you can add wing nut brackets to easily adjust the height and angle of the easel. Attach these brackets to the back of the horizontal struts, near the top. You can find step-by-step instructions on websites like CraftyMarie.
Now you have a sturdy easel that will support your work in the studio. Just hang your canvas or chalkboard vertically, adjust the angle with the wing nuts, and you’re ready to start creating!
Chalkboard DIY Easel
If you’re looking for an easy and crafty DIY project, making your own chalkboard easel is a great idea. With just a few materials and some basic tools, you can create a versatile and functional easel for your studio, craft space, or even as a greeting card display.
For this DIY easel, you will need the following supplies:
- Two wooden boards, each measuring 12mm thick and wide enough to give you the desired height and width for your easel
- Offcuts or strips of wood to make the vertical struts
- Wooden brackets or wing brackets
- Washers and screws
- A chalkboard or chalkboard paint
- An easel or canvas
Once you have gathered all your materials, you can start by measuring and cutting your wooden boards to the desired height and width for your easel. If you’re not sure how tall you want your easel to be, a standard height is around 60 inches.
Next, attach the brackets to the back of one of the boards, using screws and washers to secure them in place. These brackets will hold your easel at an angle, so make sure they are positioned correctly to achieve the desired tilt.
Now, attach the vertical struts between the two boards. You can use offcuts or strips of wood for this part. Measure and cut the struts to the desired length, ensuring they are evenly spaced apart. Attach them using screws and washers.
Once the struts are attached, it’s time to attach the chalkboard or apply chalkboard paint to one of the boards. If you’re using a chalkboard, simply attach it to the front of the board using screws. If you’re using chalkboard paint, follow the instructions on the can to apply it to the board.
With the chalkboard attached or paint applied, your DIY easel is ready to use! You can lean it against a wall or rely on the brackets to keep it standing upright. It’s a great way to display artwork, drawings, or even greeting cards vertically.
Now that you know how to make a chalkboard DIY easel, you can easily customize it to fit your space and style. Whether you’re a professional artist or just enjoy crafting, this easel will be a useful addition to your studio or craft area.


