

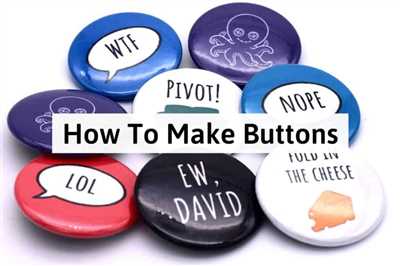
If you’re looking for a creative and unique way to express yourself, making DIY pins might be just the thing for you. With endless designs and materials to choose from, you can create your own personalized pins that speak to your style and personality.
One of the most popular ways to make DIY pins is with polymer clay. This versatile material allows beginners and experienced crafters alike to mold and shape their own designs. All you need to get started is some polymer clay in the colors of your choice, a few basic sculpting tools, and an oven to bake the clay.
Another option for creating your own DIY pins is through nail polish. Nail polish gives you the freedom to experiment with color and texture, and it’s so easy to work with. Simply choose your favorite nail polish colors, grab some plain metal pins or backs, and start painting. Once your design is dry, you can seal it with a layer of clear nail polish to protect it.
If you’re more tech-savvy, you might want to try 3D printing your own DIY pins. With a 3D printer and some basic modeling software, you can bring your sketches and designs to life. The possibilities are endless when it comes to shape, size, and color. Just upload your images, choose the settings, and let the printer do the rest. It’s a fun and modern way to create unique DIY pins.
For those who don’t have access to a 3D printer, there are still plenty of options to choose from. You can easily find online courses and tutorials that teach you how to create your own DIY pins using materials like plastic, metal, or even fabric. These courses will guide you through every step of the process, from sketching your designs to attaching the pin backs.
Whether you’re a beginner or an experienced crafter, making DIY pins is a fun and rewarding hobby that everyone can enjoy. So pick up your favorite materials, let your creativity run wild, and start designing your very own collection of unique DIY pins. You can wear them on your clothes, hang them on your bag, or give them as gifts to your loved ones. The choice is yours!
How To Make Enamel Pins
Enamel pins have become a popular accessory that allows you to showcase your personal style or support a cause that is close to your heart. The great thing about making your own enamel pins is that you can design them to look exactly how you want, and it’s easier than you might think!
If you’re interested in creating your own enamel pins, here are some easy steps to get you started:
- Sketches and Designs: Start by sketching out your pin designs on paper. Think about what images or symbols resonate with you and what you want your pins to represent. Don’t worry if you’re not a great artist, just do your best!
- Color and Polish: Once you’re happy with your sketches, you can add color to them using markers or colored pencils. You can also add a layer of polish to give them a glossy finish.
- Printing: If you don’t have access to a professional printer, you can use your own inkjet or laser printer to print out your designs. Just make sure to use high-quality paper to get the best results.
- Transferring to Plastic or Clay: To create the pins themselves, you have a few options. You can use plastic sheets or clay, depending on what you have available and what look you’re going for. Follow the instructions for your chosen material to transfer your designs.
- 3D Printing: If you’re comfortable with 3D printing, you can also use this method to create your pins. There are online courses and tutorials available if you’re new to 3D printing.
- Glue or Nail Polish: Once your designs are transferred to the pins, you may need to seal them with glue or nail polish to protect the artwork and give them a finished look.
- Add Pin Back: Finally, attach a pin back to each pin. You can find pin backs online or at craft stores. Make sure to securely attach them so that your pins stay in place when you wear them.
That’s it! Now you have your own custom-made enamel pins. Whether you’re making them for yourself or to give as gifts, this DIY project is a fun and creative way to express yourself. Don’t be afraid to experiment with different materials and designs to find what works best for you. Happy pin making!
What is 3D printing
3D printing is a revolutionary technology that has gained popularity in recent years. It allows you to create three-dimensional objects by layering materials on top of each other. This innovative process enables you to turn your digital designs into physical realities.
Using a 3D printer, you can make objects in various shapes, sizes, and colors. The printer works by using a polymer material, typically plastic, which is heated and then deposited layer by layer to form the desired shape. You can also use other materials like metal or clay, depending on the printer you have.
One of the most exciting aspects of 3D printing is its versatility. You can use it to create anything from simple tools and household items to intricate jewelry and works of art. The only limit is your imagination.
For beginners, there are online courses and tutorials available to help you get started with 3D printing. These resources can teach you how to use design software, operate a 3D printer, and troubleshoot any issues you may encounter along the way.
When it comes to making your own DIY pins, 3D printing offers an easy and efficient way to bring your designs to life. You can sketch your ideas on paper or use digital software to create 3D models. Once you have your design ready, you can simply upload it to the printer and watch as it transforms into a tangible object.
3D printing keeps the process of making pins simple and straightforward. You don’t have to worry about gluing or polishing the pins, like you might with other methods. The printer takes care of everything, from creating the base shape to adding color and details.
Another advantage of 3D printing is the ability to create “enamel” pins without actual enamel. Traditional enamel pins can be expensive and time-consuming to produce, but with 3D printing, you can achieve a similar look and feel by using different colored plastics for each section of your design.
Whether you’re a DIY enthusiast or a professional designer, 3D printing offers exciting possibilities for creating your own pins. It’s a fun and accessible technology that is gaining popularity among everyone who wants to bring their ideas to life.
- 3D printing allows for the creation of objects in various shapes, sizes, and colors.
- The process involves using a polymer material, usually plastic, that is deposited layer by layer to form the desired shape.
- Other materials such as metal or clay can also be used, depending on the printer.
- Online courses and tutorials are available for beginners to learn the ins and outs of 3D printing.
- 3D printing offers an easy and efficient way to make DIY pins.
- Designs can be sketched on paper or created digitally, then uploaded to the printer.
- The printer takes care of creating the base shape, adding color and details.
- 3D printing can create “enamel” pins without the need for traditional enamel.
- 3D printing is a popular choice for DIY enthusiasts and professional designers alike.
Nail polish “enamel” pins
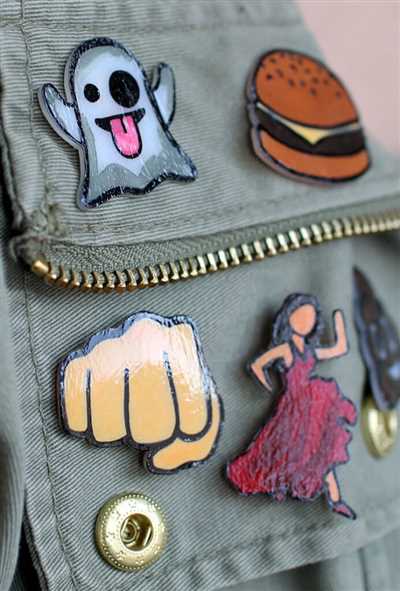
If you’re into DIY and looking for a way to express your creativity, making your own enamel pins might be a great option. Enamel pins are trendy accessories that can be attached to clothing, bags, and more. They come in various designs and colors, allowing you to create something unique that reflects your personal style.
While there are online courses and 3D printers available for creating enamel pins, this article will guide you through a simple and easy DIY method using nail polish. This method is beginner-friendly and doesn’t require specialized tools or materials.
Here are the steps to create your own nail polish “enamel” pins:
1. Gather your materials. You’ll need nail polish in the colors of your choice, a plastic or polymer clay heart-shaped mold, and strong adhesive or glue.
2. Start by sketching out your pin designs on paper. Once you have an idea of what you want to create, pick out the nail polish colors that match your designs.
3. Take the plastic or polymer clay heart-shaped mold and fill it with your chosen nail polish colors. You can experiment with different color combinations to create unique effects.
4. Allow the nail polish to dry and harden in the mold. This might take a few hours, so be patient.
5. Once the nail polish has fully dried, carefully remove the hardened enamel from the mold. You can use a toothpick or a small tool to gently pry it out, being careful not to damage the design.
6. Apply a thin layer of strong adhesive or glue to the back of the enamel pin. Make sure the adhesive is strong enough to keep the pin securely in place.
7. Press the pin onto a piece of fabric or any desired surface and let it dry completely. This will ensure that the pin stays in place and doesn’t fall off.
And there you have it – your very own DIY nail polish “enamel” pins! These pins can be a fun and creative way to show off your personal style or even make unique gifts for friends and loved ones. So, get your nail polish collection ready and start making some one-of-a-kind pins today!
Easy Ways to DIY Your Own Pins
If you’re looking for a fun and creative project, making your own DIY pins is something that everyone can do. You don’t have to be a professional artist or designer to create your own unique pins. With a few easy steps and some basic materials, you can design and create your own pins that can be worn, displayed, or given as gifts.
When it comes to making DIY pins, there are several different ways you can go about it. One simple way is to use polymer clay. This type of clay is easy to work with and comes in a variety of colors. Simply shape the clay into your desired design, bake it according to the package instructions, and then glue a pin back onto it. You can paint your pins with nail polish or use enamel pens to add color and detail.
Another popular option is 3D printing. If you have access to a 3D printer, you can easily create your own pin designs. There are many online courses and tutorials available that can teach you how to use a 3D printer and design your own pins. Once your design is ready, simply print it out and attach a pin back to it. This method allows you to create complex and detailed designs that would be difficult to achieve by hand.
If you’re not comfortable working with clay or don’t have access to a 3D printer, don’t worry. You can still create your own pins using materials you probably already have at home. One option is to make pins out of plastic. You can cut out shapes from plastic bottles or containers, paint them, and then attach pin backs. Another option is to use images or sketches to create your pins. Simply find an image or sketch that you like, print it out, cut out the design, and then glue a pin back onto it.
Creating your own DIY pins is a great way to express your creativity and add a personal touch to your accessories. Whether you’re a beginner or an experienced crafter, making your own pins is a fun and rewarding project. So pick a method that suits you best and start designing your own pins today!
| What you’ll need: | Steps: |
| Polymer clay in various colors | 1. Sketch out your pin designs |
| Baking oven or toaster oven | 2. Shape the clay into your designs |
| Glue | 3. Bake the clay according to instructions |
| Nail polish or enamel pens | 4. Paint and add details to your pins |
| Pin backs | 5. Attach pin backs to your pins |
| Plastic bottles or containers | 6. Cut out shapes from plastic or print out images/sketches |
| Scissors | 7. Paint and add details to your cutouts |
| Printer (if using images) | 8. Attach pin backs to your cutouts |
Online Courses for Polymer Clay Beginners
If you’re looking to try your hand at creating your own DIY pins, one of the best ways to get started is by taking online courses for polymer clay beginners. Polymer clay is a type of plastic material that can be molded and shaped into various designs and images. Unlike traditional clay, polymer clay is baked in an oven to harden and keep its shape.
Online courses provide a convenient and accessible way to learn the basics of working with polymer clay. They offer step-by-step instructions on how to create different designs using this versatile material. Whether you’re a complete beginner or have some experience with polymer clay, these courses will help you develop your skills and create beautiful pieces.
When considering online courses, you might come across the term “enamel” clay. Don’t be confused – it does not refer to traditional enamel. It is a term used to describe polymer clay that has a glossy, polished look similar to enameled jewelry. This type of clay is popular among DIY pin makers as it gives the pins a professional and finished appearance.
One of the first steps in making DIY pins is to sketch out your design ideas. You can use pencil and paper to create sketches or use computer software to create digital designs. Once you have your design finalized, you can start working with polymer clay.
There are different ways to create your pins using polymer clay. You can mold the clay by hand, use molds to create 3D designs, or even use a 3D printer to bring your designs to life. The choice is yours! Whichever method you pick, make sure to follow the instructions provided in the online courses to ensure success.
After shaping your polymer clay, it’s time to add color and detail. You can use acrylic or nail polish to paint the clay, or use colored clay itself. For a more professional look, some pin makers use colored pencils or alcohol-based markers to add intricate details to their designs.
To turn your polymer clay designs into pins, you’ll need some additional materials such as pin backs and glue. Once your design is complete and hardened, simply glue the pin back onto the back of your design. Allow the glue to dry completely before wearing or displaying your DIY pin.
Online courses for polymer clay beginners are a great resource for anyone interested in making their own DIY pins. They provide step-by-step instructions and helpful tips to guide you through the process. Whether you’re a beginner or have some experience, these courses are designed to cater to everyone’s needs and help you improve your pin-making skills.
So don’t wait any longer – start exploring online courses today and unleash your creativity with polymer clay!


