

Creating forms in Microsoft Outlook allows users to compose messages, add-ins, and templates with more customization options. Forms are usually created using a step-by-step process that involves designing a custom layout and adding fields for users to fill in. These forms can be used for various purposes such as composing quick messages, creating meeting invites, or even organizing class schedules.
To create an Outlook form, users must first open the Outlook application on their Windows computer. Then, they can either customize an existing form or create a new one from scratch. There are also template files available that can be used as a starting point for designing custom forms.
Once the form is open, users can read and work with the form’s pages, adding text fields, checkboxes, or any other necessary items. The design of the form can be customized to fit the desired look and feel. For composing messages, users can save a form as a template and then use it later to quickly compose similar messages with just a few clicks.
To add more functionality to the form, users can also use commands and add-ins to customize how the form behaves. This can include adding custom buttons, automating certain tasks, or even integrating external data sources. The possibilities for customization are virtually limitless.
Create Outlook add-ins for compose forms
When working with Outlook, you can create custom add-ins to enhance the functionality of your compose forms. These add-ins can provide users with quick and easy access to specific commands or allow them to read, create, and work with text and messages more efficiently.
To create an Outlook add-in for compose forms, you will need to follow a few step-by-step instructions. Here’s a quick guide on how to do it:
- First, open Outlook and navigate to the compose window. This is usually done by clicking on the “New Email” button.
- Next, you will need to save the compose form as a template. To do this, go to the “File” menu and click on “Save As”. Choose a name for your template and save it as an Outlook Template file (*.oft).
- Once you have saved the template, close the compose window and go to the Windows Registry.
- In the Registry, navigate to the following path: HKEY_CURRENT_USER\Software\Microsoft\Office\XX.0\Outlook\Options\Mail, where XX.0 represents your Outlook version.
- Create a new REG_EXPAND_SZ value called “FormTemplate” and set its value to the path of the template you saved earlier.
- Restart Outlook for the changes to take effect. Now, when you compose a new email or meeting item, your custom form template will be available for selection.
With an Outlook add-in for compose forms, you can customize the design and fields of your form to fit your specific needs. This allows you to create a form that works best for you and your users.
By creating custom add-ins for compose forms, you can also add additional functionality to your emails, such as the ability to read or work with items from external sources. This can be done through the use of custom commands or by adding specific fields to your form.
In conclusion, creating Outlook add-ins for compose forms can be a powerful tool for enhancing the functionality of your emails and meeting invitations. By following these steps, you can easily create and customize your own form templates to better suit your needs.
To design an Outlook form
When creating custom forms in Outlook, you can design your own pages and windows to customize the user experience. By following these steps, you can easily create a custom form to compose meeting requests, messages, and more.
1. Open Outlook and click on the “File” tab.
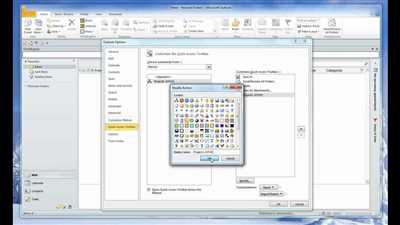
2. Click on “Options” and then select “Customize Ribbon” from the sidebar.
3. In the “Customize Ribbon” window, click on “New Tab” and give it a name.
4. Select the newly created tab and click on “New Group”.
5. Click on “Rename” to give the group a meaningful name.
6. In the “Choose commands from” dropdown, select “All Commands”.
7. Scroll down and select “Design a Form” from the list.
8. Click on “Add” and then click on “OK”.
Now, when you compose a new item in Outlook (such as a message or a meeting request), you can find the “Design a Form” button in the custom tab you created. Clicking on this button will open the form designer window.
In the form designer window, you can add and customize fields, add-ins, and commands. You can also add text and formatting to the body of the form.
Once you have designed your form, click on “Save” and close the designer window.
Now, whenever you create a new item in Outlook using this form, it will have the custom design you created.
Note that designing custom forms in Outlook usually requires some knowledge of Outlook form design and the underlying registry entries. If you are not comfortable working with the registry, there are also third-party tools available that can simplify the form design process.
In addition to designing forms from scratch, you can also use templates provided by Outlook. These templates are pre-designed forms that you can customize to fit your needs.
By following the steps outlined above, you can quickly and easily design custom forms in Outlook to enhance your workflow and productivity.
Creating a Template

Outlook forms are a powerful way to customize your emails and add more functionality to your work. Creating a template is an easy way to save time composing the same type of message or meeting request.
Follow these steps to create a template:
- Open Outlook and click on the New Email button.
- In the New Message window, compose your email or meeting request, including the text, formatting, and any items you want to include.
- Click on the File menu and then Save As.
- In the save window, choose a location to save your template, give it a name, and change the Save as type to Outlook Template (*.oft).
- Click Save to save your template.
Your template is now saved and can be accessed from the Choose Form window when composing new emails or meeting requests.
You can also customize your templates by adding fields, form pages, or even customizing the design using HTML and CSS. To do this, you can use Outlook add-ins or create a custom form using the Outlook Form Designer.
Remember that templates created from Outlook forms can only be used within Outlook, as they are saved as an .oft file. If you want to use your template outside of Outlook, you can export it to another file format or copy the contents and paste them into another application.
Templates are a quick and efficient way to compose emails or meeting requests, especially for items you send regularly. They also allow users to work together by sharing templates and ensuring consistency in communication.
In addition to creating templates, you can also create custom shortcut buttons or add-ins to make the process even faster. The possibilities are endless when it comes to customizing Outlook forms to fit your needs.
Make sure to save your templates in a safe location, and always back up your templates in case of any system issues.
| Registry Location for Outlook 2016 and Windows 10: | HKEY_CURRENT_USER\Software\Microsoft\Office\16.0\Outlook\Options |
Creating a template can save you time and ensure consistency in your communication. Whether it’s a quick reply or a more detailed message, using templates can make your workflow more efficient and organized.
How Outlook Forms and Items Work Together
In Outlook, forms and items work together to provide a way for users to compose and read messages, schedule meetings, and file information. A form is a customized window that contains fields, design elements, and commands specific to a particular item type. It is usually created by using form templates or by adding custom commands and fields to the standard Outlook item window.
When a user wants to create a new item, such as a meeting or an email message, they can click on the New button and select the appropriate item type from the list. This will open a new window based on the selected form template or item type. The user can then fill in the required fields, add more information if needed, and click on the Send or Save button to complete the process.
Outlook provides several built-in forms and templates for common item types, such as email messages, appointments, and tasks. These forms can be further customized using the Outlook form designer, which allows users to add or modify fields, change the layout, and define custom actions and behaviors.
In addition to the built-in forms, users can also create their own custom forms using the Outlook form designer. This process involves defining the structure of the form, adding fields and design elements, and specifying the behavior of the form. Custom forms can be used for a variety of purposes, such as collecting specific information from users, automating certain tasks, or providing a more user-friendly interface for entering data.
Outlook forms can also be enhanced with add-ins, which are small software components that extend the functionality of Outlook. Add-ins can provide additional commands, buttons, or fields to the form, integrate with external data sources, or perform custom actions. They can be developed using programming languages such as C# or VB.NET and installed in Outlook as plugins.
When an item is received or opened, Outlook reads the form definition and displays the item in the appropriate form window. The user can then read and interact with the item using the fields and commands defined in the form. Any changes made to the item will be saved in the item itself, not in the form. This allows users to modify the item without affecting the original form design.
In summary, Outlook forms and items work together to provide a flexible and customizable way for users to compose, read, and manage information. Forms can be created using form templates or by adding custom commands and fields to the standard Outlook item window. Custom forms can be further enhanced with add-ins for more advanced functionality. The form definition is read by Outlook when an item is opened, allowing users to interact with the item according to the form design.
Sources

When it comes to creating Outlook forms, there are several sources you can utilize. It’s important to note that some of these sources may require additional steps or customization, so be sure to read the documentation and follow the steps provided by the source.
Templates: Outlook provides a variety of pre-designed form templates that you can use as a starting point. You can access these templates by clicking on the “New Items” dropdown in the Home tab of the Outlook window, and then selecting “More Items” followed by “Choose Form…”. From there, you can select a template and customize it to fit your needs.
User Forms: Outlook also allows you to create your own custom forms using the form designer. This option is usually available under the “Developer” tab in the Outlook ribbon. You can add fields, design the layout, and customize the form to your liking.
Custom Message Forms: If you need to create a custom form for composing a specific type of message, such as a meeting request or a class registration, you can use the Outlook form designer to create a custom message form. This option is also usually available under the “Developer” tab.
Add-ins: Outlook add-ins can extend the functionality of Outlook forms by adding additional commands, features, or integration with other applications. You can find add-ins in the Microsoft AppSource store or from third-party developers.
Registry: For more advanced customization and control over your Outlook forms, you can make changes to the Outlook registry. This is usually only recommended for advanced users or IT administrators, as it can have unintended consequences if not done correctly. Be sure to read the documentation and backup your registry before making any changes.
Text shortcuts: Outlook allows you to create text shortcuts or autotexts that can be used to quickly insert commonly used text or phrases into your forms. This can save time and effort when composing messages.
By using these sources and following the steps provided, you can create custom Outlook forms that work together with your workflow and meet your specific needs.


