

Setting up an official email id is essential for many people in today’s technology-based world. Whether you are an employee, a business owner, or a trainer, having an official email id not only adds professionalism but also serves as a means of communication.
To create an official email id, there are various steps you need to follow. First, make sure you have the correct information about your company’s email server or mail services. If you don’t know this information, kindly reach out to your IT team or the person in charge.
Next, choose a domain name for your email id. This can be your company’s website address or a specific domain that represents your business. For example, if your company’s website is “www.example.com”, your email id can be something like “[email protected]”. Make sure to select a domain that is relevant to your business and easy to remember.
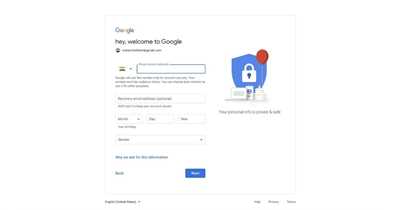
Once you have selected the domain, you can proceed by entering the required information. Fill in the necessary details, such as your name, email id, password, and other relevant information. If there are any additional settings or preferences that need to be set up, follow the instructions provided.
After entering the required information, you may need to verify your account through a follow-up email or by entering a verification code. This step ensures the security of your email account and prevents unauthorized access.
Once your official email id is set up, you can start using it for various purposes. You can send and receive emails, communicate with clients and colleagues, and access online knowledge bases or support services when needed. If you encounter any issues or have any questions, feel free to reach out to the IT team or the respective support channels.
In conclusion, creating an official email id is a common and essential task. By following the above steps, you can set up an email id that represents your organisational identity and helps you communicate effectively with others. Remember to choose a domain that best reflects your business and ensure the correct information is entered to avoid any issues. Thank you for reading!
HOW TO CREATE EMAIL ID BY THE COMPANY NAME FOR Employees
Creating an official email ID by the company name for employees can be done in a few simple steps. Follow the instructions below to set up an official email ID for your employees:
- First, select an email server provider. There are various providers to choose from, so make sure to do some research to find the one that best fits your company’s needs.
- Next, visit the provider’s website and sign up for an account. You will be required to enter some basic information, such as your company name, contact details, and the domain name you want for your email ID.
- After signing up, the provider will automatically set up the email ID for you. You may need to follow some additional steps to configure your settings and make sure everything is set up correctly.
- If you have any issues during the set-up process, contact the provider’s customer support team for assistance. They will be able to help you resolve any problems and ensure that your email ID is set up correctly.
- Once your email ID is set up, you can provide the login details to your employees. They will then be able to access their official company email account.
Creating email IDs by the company name for employees is a common practice in many organisations. It helps to maintain a professional image and provides employees with a dedicated email account for all work-related communication.
By following the steps outlined above, you can easily set up official email IDs for your employees. If you still have any questions or need further assistance, kindly reach out to the customer support team of your chosen email server provider.
Set up manually when you select Other for less common email providers
When setting up your official email ID, you typically have the option to automatically configure your email with popular email providers like Gmail or Outlook. However, if your email provider is not listed among these options, you will need to set up the email manually.
Start by selecting “Other” from the list of email providers when prompted. This will allow you to enter the necessary settings for your email account manually.
First, you will need to enter the email account’s server settings. This includes the incoming and outgoing mail server addresses, as well as the port numbers and security settings. You can usually find this information from your email provider’s website or by contacting their support team.
Next, you will need to enter your email address and password. Make sure to double-check that you have entered the correct information, as any mistakes may cause issues with sending or receiving emails.
If your email account is associated with a specific domain, such as your organization’s domain, you will also need to enter this information in the appropriate field.
Once you have entered all the required information, click “Next” or “Finish” to complete the setup process. Your email client will then attempt to connect to the email server using the settings you provided, and if successful, you will be able to send and receive emails using your official email ID.
If you are having trouble setting up your email manually, there are various online resources and knowledge bases that can provide step-by-step instructions for different email providers. Additionally, you may want to consider consulting with a technology consultant or trainer who can offer guidance and support based on their expertise.
If you still can’t get your email set up manually or have any other questions or concerns, please feel free to contact us. Our team of experts is here to assist you and ensure that you have a smooth email setup process.
Thank you, and we hope you find this information helpful.
If Mail can’t find your account settings automatically
If you are having trouble setting up your official email id on your Mail account automatically, there are a few steps you can follow to manually configure your settings:
- First, make sure you have the correct information for your official email account. This includes the server name, account name, and password. If you are not sure about these details, kindly contact your IT team or the email service provider.
- Once you have the required information, open Mail and go to the “Preferences” menu. From there, select the “Accounts” tab.
- In the Accounts tab, click on the “+” button to add a new account.
- A window will appear where you can select the account type. Choose “Add Other Account” and then click on the “Continue” button.
- On the next screen, enter your full name, email address, and password for your official email account. Then click on the “Sign In” button.
- Mail will now try to automatically detect your account settings. If it is unable to do so, you will see a message saying, “Mail can’t verify the identity of the server”.
- To manually configure your account settings, click on the “Next” button.
- You will be presented with various options to choose from. Select the option that says “IMAP” or “POP” depending on the type of account you have.
- Next, enter the incoming mail server and outgoing mail server information. This information will be provided by your IT team or email service provider.
-
After entering the server information, click on the “Next” button.
-
Mail will then try to verify the account settings and establish a connection. If the settings are correct, you will see a confirmation message saying your account has been set up successfully.
By following the above steps, you can manually set up your official email account on Mail if the automatic process is not working. If you are still experiencing issues, it is recommended to get in touch with your IT team or email service provider for further assistance.
Subject Follow-up on Request for Official Email ID

Dear [Enter Name],
I hope this email finds you well. I am following up on your request for an official email ID for your career at [Enter Company Name].
Having an official email ID is essential for efficient communication within the organisation. It not only denotes professionalism but also allows for better coordination among team members. It is important to note that employees should only use their official email IDs for work-related purposes.
To create an official email ID, please follow the steps below:
- Select an appropriate domain name for your official email, such as [Enter Domain Name]. Having a unique and relevant domain name helps in identifying your email easily.
- Contact the IT team or the designated email administrator in your company to request the creation of your official email ID.
- Provide the required information, such as your full name, designation, and contact details, to the IT team. This information will be used to set up your official email account.
- Once your official email account is created, the IT team will provide you with the login credentials and server settings for accessing your email.
It is important to mention that some email service providers offer organizational email services for businesses. In such cases, your company may have its own email server, or it may use a third-party provider. Make sure to get clarity from your IT team regarding the email services being used by your company.
If you are unfamiliar with the process of setting up an email account, there are many online resources and knowledge bases available that provide step-by-step guides on how to create an official email account. You can also reach out to your company’s IT trainer or contact the IT helpdesk for assistance.
If you have any further questions or require additional information, please feel free to contact us. We are here to help.
Thank you for your attention to this matter. We look forward to seeing you using your official email ID effectively for all work-related communication.
Kindly let us know if you have any updates regarding your request by the 30th of the current month.
Thank you.
Top 10 ways to say “thank you” in an English email
Sending a thoughtful thank-you email is a great way to show appreciation and maintain good relationships with your colleagues, clients, and business partners. Here are the top 10 ways to say “thank you” in an English email:
- Thank you. A simple and straightforward way to express your gratitude. It’s always a good idea to start with a sincere “thank you.”
- I appreciate it. This phrase conveys that you value the effort the person has put into helping you or providing a service.
- Many thanks. A slightly more formal way to say “thank you.” It shows politeness and respect.
- Thanks a lot. This phrase expresses a high level of gratitude and is suitable for situations where you feel extremely thankful.
- Thank you very much. This is a classic way to express gratitude and is appropriate for both formal and informal settings.
- I’m grateful. This phrase implies that you are truly thankful for what the person has done for you.
- That’s very kind of you. Use this phrase when someone has gone above and beyond to help you. It shows appreciation for their generosity.
- I can’t thank you enough. This expression is used when you feel that words alone cannot adequately convey your gratitude.
- Thanks for everything. A comprehensive way to thank someone for their assistance, support, or any other help they have provided.
- I’m deeply grateful. This phrase indicates that your gratitude goes beyond a simple “thank you” and that the person’s actions have had a profound impact on you.
Remember, expressing gratitude is an essential aspect of building strong relationships in the professional world. By showing appreciation, you not only make others feel valued but also create a positive and supportive work environment. So, the next time you want to say “thank you” in an email, choose one of these top 10 ways to convey your gratitude effectively.
ABOUT US
At [Company Name], we understand the need for an official email id for your company. Having a professional email id not only gives a better impression to your clients and customers but also provides a secure email platform for your communication needs.
When you create an official email id, you will need to select a domain name for your email address. This domain name will represent your company or organization and should reflect your brand identity. We offer various domain name options to choose from based on your preferences.
If you don’t know how to create an official email id or find it challenging to set up one, our team of experts is here to help. Our consultants can assist you in selecting the right domain name and guide you through the steps to create your official email id.
Our services are based on the latest technology, and we have a dedicated team of employees who ensure that your email account is set up correctly and without any issues. We also provide follow-up support to resolve any technical problems you may encounter.
On our website, you can find a knowledge base with information about how to create an official email id, set up email settings, and troubleshoot common issues. If you can’t find the answers you’re looking for, please contact our support team, and they will be more than happy to assist you.
We hope that our efficient email services will contribute to the organisational growth and better communication within your company. We believe that having an official email id is crucial for any business in today’s digitally connected world.
Thank you for choosing [Company Name] for your email needs. We look forward to being a part of your company’s success.
| Contact Information: | |
| Email: | [email protected] |
| Phone: | +91-1234567890 |
| Website: | www.company.com |
Sources
When it comes to creating official email IDs, there are various sources you can turn to for assistance. Here are some common ways people can find the required information:
1. Company Website: First, you can check your company’s website to see if there is a knowledge base or any information about creating official email accounts. Many companies provide step-by-step instructions or FAQs on how to set up an email account.
2. IT Department: If you work in a larger organization, reaching out to the IT department or your technology team can be a helpful option. They will have the knowledge and resources to guide you through the process or even create an official email ID for you.
3. Online Services: There are many online service providers that offer email account creation. You can select a reliable provider and follow their steps to create an official email ID. Some popular email service providers include Gmail, Outlook, and Yahoo.
4. Consultants or Trainers: If you are having issues creating an official email ID on your own, you can consult with an IT consultant or an email trainer. They can guide you through the steps or even create the account for you.
5. Contact Employees: If you know someone within your organization who already has an official email ID, you can reach out to them for guidance. They can help you with the steps or direct you to the right person or department to get the process done.
6. Follow-Up with the IT Department: If you have previously requested an official email ID and haven’t received any response or assistance, it’s essential to follow up again. Make sure to communicate your need clearly and provide any required information or documents.
7. Domain Registrar: If your company has its own domain, you may need to go through your domain registrar to create official email accounts. They will ensure that the email IDs are set up correctly and linked to your company’s domain.
8. Career Management Services: If you are a job seeker or currently looking to switch careers, career management services can provide guidance on how to create an official email ID. They can help you understand the requirements and steps involved in the process.
I hope the above sources will help you in creating an official email ID. If you still can’t find the required information or face further issues, it is always better to seek assistance from professionals or the relevant department in your organization.
“Thank you for choosing our services. If you need any further assistance, please feel free to contact us. We are here to help.”


