

If you want to showcase your photos in a unique and creative way, making a polaroid collage is an excellent choice. With this technique, you can turn a collection of photos into a beautiful arrangement of polaroids that will catch everyone’s attention.
So, how do you create a polaroid collage? The first step is to select the photos you want to use. Choose your favorite shots and make sure they have a nice composition and are well-lit. Then, open each photo in Photoshop.
To give your photos a polaroid effect, go to the “Image” menu and select “Image Size”. Set the width to 1 inch and the height to 1.5 inches to mimic the size of a real polaroid. Then, go to the “Filter” menu, choose “Sketch”, and apply the “Halftone Pattern” effect. This will give your photos the iconic dotted texture that polaroids have.
Next, create a new document in Photoshop. Set the dimensions to the size you want your collage to be and choose a background color that complements your photos. Then, use the rectangular marquee tool to create panels for each polaroid. Place the selected photos inside each panel, positioning them as desired.
Turn A Photo Into A Collage Of Polaroids With Photoshop
If you’re feeling creative and want to turn your photos into a unique collage, why not try creating a Polaroid collage? Photoshop offers a variety of tools and effects to help you achieve this. Here’s a step-by-step guide to turning a photo into a collage of Polaroids:
- Open Photoshop and select the photo you want to turn into a collage.
- Go to the “File” menu and choose “New” to create a new document.
- In the dialog box, specify the width, height, and resolution for your collage. Name it something like “Polaroid Collage” and click “OK”.
- Drag and drop your original photo into the new document. Position it in the center.
- In the toolbar, select the “Rectangle” shape tool.
- In the options panel at the top, choose a white fill color and set the stroke to “None”.
- Draw several rectangles of varying sizes and shapes on top of your photo. These will represent the Polaroid frames.
- In the Layers panel, select each rectangle layer one by one and go to the “Layer” menu. Choose “Layer Style” and then “Drop Shadow”. Adjust the settings to add a shadow effect to each frame.
- Once you’ve added drop shadows to all the frames, select the photo layer and go to the “Edit” menu. Choose “Transform” and then “Rotate”. Rotate the photo by a few degrees to add a more realistic effect.
- Create a new layer and place it below the photo layer. Use the “Rectangle” shape tool to draw a rectangle that covers the entire canvas. Fill this rectangle with a color or pattern of your choice to represent the background.
- Add some extra touches to your collage by using the various Photoshop tools and effects. For example, you can use the “Brush” tool to paint some details on each frame or add text.
- Once you’re satisfied with the layout and effects, save your collage as a JPEG or PNG file. You can now print it out and hang it up on your bedroom wall or create a digital version to share online.
So go ahead and unleash your creativity by turning your photos into a collage of Polaroids using Photoshop. It’s a fun and unique way to showcase your favorite memories!
Sources:
- FreePhotoshop.com – www.freephotoshop.com
- PhotoshopTutorials.com – www.photoshoptutorials.com
Step 1: Polaroid collage
Creating a polaroid collage is a fun and creative way to display your favorite photos in your bedroom or any other space. Here’s how to turn your selected photos into a polaroid-style collage:
- First, lay out all the photos you want to use in the desired position on a flat surface. If you’re using digital photos, you can print them out or use an online printing service to get physical copies.
- Take the original shot of each photo and open it in Photoshop or any other photo editing software that you’re comfortable with.
- Using the rectangle shape tool in the toolbar or the menu command (Ctrl+J), create a polaroid frame around each photo.
- Inside the frames, position your photos in the desired layout. You can play with different layering effects and styles to achieve the look you’re going for.
- Once you’re satisfied with the placement of your photos, add any additional effects or text if desired.
- Save the collage as a separate file.
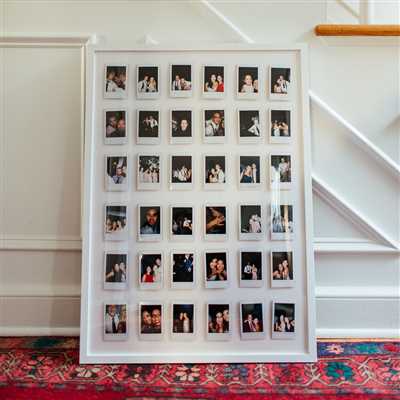
There are several creative ways to display your polaroid collage. One option is to use a clothesline or string and mini clothespins to hang the photos. Another option is to frame the collage or place it on a corkboard or a pegboard.
Now that you have your step 1 polaroid collage ready, you can move on to the next steps to complete your project and create a stunning display of your memories!
Clothesline Style
If you want to add a unique touch to your polaroid collage, you can try the clothesline style. This style replicates the look of hanging polaroid photos on a clothesline, giving your collage a playful and whimsical feel.
To create a clothesline style collage, you’ll need a photo editing tool like Photoshop. Here’s a step-by-step guide to help you achieve this effect:
- Create a new document in Photoshop that is large enough to accommodate your collage.
- Open the photos you want to use in your collage and create individual polaroid frames for each of them. You can find free polaroid frame templates online or create your own using the rectangle shape tool in Photoshop.
- Position the polaroid frames on the canvas in a way that resembles a clothesline. You can use the move tool to drag and drop the frames into place.
- Once the frames are in position, select each polaroid frame layer individually and apply a drop shadow effect to give them a more realistic look. You can find the drop shadow option in the layer panel toolbar.
- If you want to add a creative touch to your collage, you can experiment with different effects for each polaroid photo. For example, you can convert the original photos into black and white or apply a vintage filter to give them an aged look.
- To add a name or caption to each polaroid, use the text tool to insert a text layer above each frame and type the desired text. You can adjust the font, size, and position of the text using the options in the text toolbar.
- Once you’re happy with the layout and effects of your polaroids, you can add a clothesline to complete the look. Create a new layer and draw a line across the canvas using the brush or pencil tool. Make sure the layer is positioned above the polaroid frames.
- If you want to add a playful touch to your clothesline, you can place small clothespin shapes along the line. You can find clothespin shapes online or create your own using the shape tool in Photoshop.
- Lastly, you can add a final touch to your collage by turning your photo into a portrait. Select your entire collage by pressing Ctrl+A (or Command+A on a Mac), then go to Edit > Transform > Rotate 90 degrees clockwise. This will rotate your entire collage to a portrait position.
By following these steps, you can create a unique clothesline style polaroid collage that will add a whimsical and playful touch to your bedroom or any other space.
Polaroid Photo Collage
If you’re looking to create a unique and creative collage to decorate your bedroom or any other space, a polaroid photo collage is a great choice. This style of collage mimics the look of old-fashioned polaroid photos hanging on a clothesline, adding a touch of vintage charm to your space.
To create a polaroid photo collage, you’ll need several polaroid-style frames and your selected photos. Here’s how you can turn your photos into polaroids using Photoshop:
- Open Photoshop and load the original photo you want to turn into a polaroid.
- In the toolbar, go to “Image” > “Image Size” and reduce the dimensions of your photo to a square shape.
- In the toolbar, go to “Layer” > “New” > “Layer Via Copy” to create a duplicate layer of your photo.
- In the Layers panel, double-click on the name of the duplicate layer to rename it as “Polaroid”.
- Use the rectangular marquee tool (shortcut: M) to select the area inside the square shape of your photo.
- In the toolbar, go to “Edit” > “Stroke” to add a stroke effect to the selected area. Choose a color and set the stroke width to create the polaroid frame.
- When you’re happy with the frame, press Ctrl+J (or Command+J on a Mac) to duplicate the frame layer. Repeat this step until you have enough polaroid frames for all your photos.
- Position each polaroid frame on your canvas, leaving some space between them. You can use the Move tool (shortcut: V) to drag and drop the frames into the desired position.
- Once all the frames are in place, use the Rectangle tool (shortcut: U) to create a rectangle shape inside each polaroid frame. This will act as a placeholder for your photos.
- Open each of your selected photos and drag and drop them into the corresponding rectangle shapes on your canvas. Resize and reposition them as necessary.
- Apply any additional effects or filters to your photos to enhance their visual appeal. You can experiment with different styles, such as black and white, sepia, or vintage film looks.
- Finally, step back and admire your creative polaroid photo collage!
With this step-by-step guide, you can create a visually stunning and personalized polaroid photo collage. Have fun experimenting with different layouts and effects until you achieve the desired result. Happy creating!
Sources

Here’s a step-by-step guide on how to make a polaroid collage using Photoshop:
- Photoshop: You’ll need this software to create your polaroid collage. If you don’t have it, you can download it from the official Adobe website.
- Photos: Select the photos you want to include in your polaroid collage. Make sure they are in a high resolution and well-lit.
- Polaroid Frame: Find a polaroid frame template that you like. There are many free options available online, so you can choose the one that fits your style or theme.
- Layout: Open Photoshop and create a new document with the desired dimensions for your polaroid collage. It’s recommended to use a larger canvas so you have enough space to arrange your photos.
- Polaroid Shape: Copy and paste the polaroid frame template onto your canvas. You can use the selection tool to select the rectangular shape of the frame and then create a new layer for each frame.
- Photos Position: Place each photo inside the selected polaroid frame. You can resize and reposition them until they fit well inside the frames. Use the transform command tool to adjust the size and rotation of each photo.
- Layers: Keep each photo and its respective frame on separate layers. This will allow you to make adjustments to each photo individually without affecting the others.
- Effects: Apply creative effects to your photos if you want to add a unique touch to your polaroid collage. You can experiment with filters, textures, or even add handwritten notes or doodles inside the frames.
- Arrange Collage: Arrange the polaroid frames on your canvas in a way that pleases you. You can create a grid-like layout or overlap them for a more dynamic composition.
- Toolbar: Use the toolbar to add text or other graphic elements to your polaroid collage. You can include a title, date, or a small caption for each photo.
- Final Step: Once you’re satisfied with the layout and design of your polaroid collage, save your work and turn it into a print or share it with friends online.
If you’re looking for more inspiration or want to learn additional techniques, here are a few sources you can explore:
- Pinterest: This platform offers a wide range of polaroid collage ideas and tutorials. Browse through different boards to find the style that inspires you.
- YouTube: Many creators share step-by-step tutorials on how to create polaroid collages using Photoshop or other editing tools. Watch their videos to learn new techniques and tips.
- Online Communities: Join online communities and forums where people share their polaroid collage creations. You can ask for feedback, share your work, and get inspired by others.


