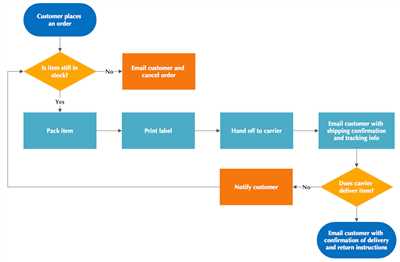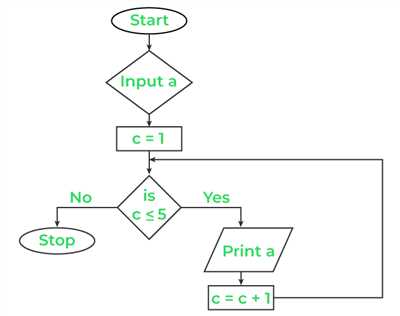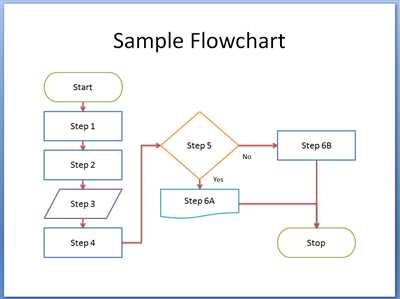
Flowcharts are powerful visual tools that allow you to depict processes, workflows, and information flows using a combination of shapes and symbols. If you’re not familiar with flowcharts or how to create them, don’t worry! In this article, you’ll learn how to make a flowchart using various methods.
There are several software programs and online tools you can use to create a flowchart. One popular option is Microsoft Word, which has built-in shapes and stencil features that make it easy to create your own flowchart. To get started, simply open a new Word document and click on the “Insert” tab. Then, select “Shapes” and choose a shape from the flowchart gallery.
If you prefer a more industrial-strength solution, you can try using Lucidchart, an online tool that is free to use and offers a wide range of shapes and templates. To create a flowchart in Lucidchart, simply sign up for an account and then drag and drop the shapes you need from the shape library. You can also customize the colors and styles to match your own preferences.
Another option is to use whiteboards or physical paper and pens to create a flowchart. This approach can be especially useful when working with a team or during brainstorming sessions. Simply draw the shapes and connect them using arrows or lines to represent the flow of information or work.
When making a flowchart, it’s important to start by defining the purpose and scope of the chart. What process or workflow are you trying to depict? What information do you want to convey? Once you have a clear understanding of what you’re trying to accomplish, you can then start selecting the appropriate shapes and connecting them to create a logical flow.
Remember, flowcharts are a visual representation of a process or workflow, so it’s important to keep them clear and intuitive. Use shapes and symbols that are meaningful and easy to understand. Furthermore, take the time to add text or labels to your flowchart to provide additional context and clarity.
Flowcharts have a long history and have been used in various industries and fields, including computer programming, industrial engineering, and project management. They are a valuable tool for planning, analysis, and communication. So, whether you’re a beginner or an experienced professional, start making your own flowcharts today and see the benefits they can bring to your work!
How to Make a Flowchart in Microsoft Word
If you’re looking to create a flowchart in Microsoft Word, you’re in luck! Word has built-in features that allow you to easily create detailed flowcharts to depict your processes and workflows. Whether you’re an engineer working in an industrial setting or simply need a visual representation of a process, Word provides the tools you need to create a professional-looking flowchart.
To get started, sign into Microsoft Word and open a new document. In the toolbar, click on the “Insert” tab and select “Shapes” from the dropdown menu. This will open a gallery of shapes that can be used for your flowchart. Word offers a variety of shapes, including rectangles, diamonds, ovals, and arrows, among others.
Select a shape from the gallery that best represents the first step of your flowchart. You can also use the search bar to find specific shapes if you have a clear idea of what you’re looking for. Once you’ve selected a shape, click and drag it onto your blank document to place it where you want it to appear.
To connect your shapes and create the flow of your flowchart, you can use arrows or lines. In the “Insert” tab, click on “Shapes” and select the line or arrow shape you want to use. Then, click and drag from the first shape to the next shape to create a connection. Repeat this process for each step in your flowchart until you have connected all of your shapes.
In addition to the basic shapes and lines, Word also offers a variety of stencil and diagramming tools that can enhance your flowchart. For more advanced options, you can use external programs like Lucidchart or Visio to create flowcharts and then import them into Word.
When making a flowchart in Word, it’s important to keep in mind the purpose and audience of your flowchart. Consider what information you want to convey and how best to depict it using the available shapes and methods. You can use different shapes, colors, and fonts to represent different types of processes or to highlight important steps in your workflow.
Once your flowchart is complete, you can save it as a Word document or export it to other file formats, such as PDF or JPEG, depending on your needs. You can also print your flowchart directly from Word.
Whether you’re an experienced computer user or just getting started, Microsoft Word provides a user-friendly interface for creating flowcharts. Take advantage of the free flowchart templates and extensive shape gallery to create professional-looking flowcharts to suit your needs and communicate your ideas effectively.
Getting started with Lucidchart
If you’re looking to create your own flowcharts, Lucidchart is a great tool to help you get started. Lucidchart is a web-based diagramming tool that is used to depict processes, workflows, and flowcharts. Whether you’re an industrial engineer, a programmer, or just someone who needs to create a visual representation of a process or system, Lucidchart has the tools you need to make your flowcharts come to life.
One of the great things about Lucidchart is that it’s web-based, which means you don’t need to download any software or worry about compatibility issues. All you need is a computer with an internet connection, and you’re ready to start creating your flowcharts.
To get started with Lucidchart, simply sign up for a free account on the Lucidchart website. Once you’ve signed up, you can start creating flowcharts right away. Lucidchart offers a variety of templates and shapes to choose from, so you can easily find the ones that best fit your needs. You can also use the drag-and-drop method to select and move shapes around in your flowchart.
If you’re new to flowcharting and aren’t sure where to start, Lucidchart also offers a gallery of pre-made flowcharts that you can use as a starting point. Simply browse through the gallery and select a flowchart that closely resembles what you’re trying to create. You can then customize the flowchart with your own information and shapes.
If you’re already familiar with flowcharting and want to create a flowchart from scratch, Lucidchart has all the tools you need. You can use the shapes and stencils available in Lucidchart’s library to create your flowchart step by step. Lucidchart also has a version history feature, so you can go back and see what changes you made to your flowchart and when.
Lucidchart is also compatible with Microsoft Word, so you can easily insert your flowcharts into your Word documents. Simply export your flowchart from Lucidchart as an image or a PDF file, and then insert it into your Word document as you would any other image.
So, whether you’re new to flowcharting or an experienced user, Lucidchart is a great tool for making your flowcharts. Sign up for a free account today and see how easy it is to get started with Lucidchart!
History

In the past, creating flowcharts was a time-consuming and manual process. You had to use whiteboards or paper to sketch out your flowchart and then take a picture of it. If you were lucky enough to have access to a computer, a basic flowchart template in Microsoft Word or PowerPoint was your best bet. You had to use the built-in stencil shapes to create a flowchart, and it would often end up looking like a mess.
But today, things have changed. With the advent of computer software and workflow diagramming programs, making flowcharts has become much easier and more efficient. You can now create your own flowchart from scratch using a variety of methods and programs. The information flow and processes can be easily depicted with the help of industrial stencils and shapes.
There are many sources of information online to help you get started with flowcharting. Websites like Lucidchart offer free flowchart templates that you can use to create your own flowcharts. You can also sign up for a free trial of their software to see what it’s like to create flowcharts using their drag-and-drop gallery of shapes.
What you’ll find when you start making flowcharts today is that there are many different methods and programs available to assist you in creating your flowchart. Whether you’re using Microsoft Word or a dedicated flowcharting program like Lucidchart, the process is much easier and more intuitive than it used to be. So why not give it a try and see how you can improve your workflow with flowcharts?
See Also
If you’re looking for more information on how to create flowcharts, see the following sources for additional methods and resources:
|
|
With these resources, you’ll have all the information you need to create your own flowchart. From selecting the right shape to dragging and connecting your shapes, these methods can be applied in different software programs and even on physical whiteboards. See also the diagramming tool Lucidchart for a free and easy-to-use version.
When creating a flowchart, it’s important to remember what you’re trying to depict. Flowcharts are used to visually represent processes and workflows, so make sure you understand the steps involved before you start creating your flowchart. By following the tips and techniques outlined in the sources above, you’ll be well on your way to creating clear and effective flowcharts for your work or personal projects.
Create Your Own Flowchart for Free
If you’re looking to create your own flowchart, you’re in luck! There are many free programs and methods you can use to make a flowchart on your computer. One popular option is Microsoft Word, which has a built-in flowchart gallery that you can use to create and customize your flowchart. To get started, simply open a new Word document and select “Flowchart” from the Shapes gallery. A stencil with various shapes for different processes will appear, and you can drag and drop these shapes onto your document to depict the flow of your work or information.
Another popular tool for making flowcharts is Lucidchart, a free online diagramming tool. With Lucidchart, you can create flowcharts and other diagrams with ease. Simply sign up for a free account and then select the “Flowchart” template to start creating your flowchart. Lucidchart offers a wide range of shapes and stencils, making it easy to customize your flowchart to fit your needs.
If you’re more interested in a traditional approach, you can also use whiteboards or pen and paper to create your flowchart. These methods can be especially helpful for brainstorming and getting your ideas down quickly. Once you have your flowchart mapped out, you can then transfer it to a digital format using one of the aforementioned programs or tools.
Flowcharts have a long history and are widely used in various industries. For example, they are commonly used in industrial processes to depict workflows and identify areas for improvement. Flowcharts are also used in computer programming to illustrate the flow of logic in a program. They can be a valuable tool for visualizing complex processes and problem-solving.
So why wait? Get started on creating your own flowchart today using one of the free methods mentioned above. Whether you choose to use Microsoft Word, Lucidchart, or traditional methods, you’ll be well on your way to creating an informative and visually appealing flowchart.
Sources

When it comes to making a flowchart, there are several sources you can use to get started. Whether you prefer a traditional hand-drawn flowchart or a digital version, there are tools available to suit your needs.
Microsoft Word and other word processing programs often have a built-in flowchart tool that allows you to select shapes and drag them onto a whiteboard-like canvas. This is a simple and easy way to create a flowchart, especially if you are already familiar with the program.
If you’re looking for more advanced features and flexibility, you may want to consider using specialized flowchart programs such as Lucidchart. These programs offer a wide range of shapes and templates, as well as the ability to add information and depict complex workflows. They also save you time by automatically organizing and aligning shapes as you add them to the canvas.
Another option is to create a flowchart using industrial stencil sets. These stencil sets often include a variety of shapes and symbols that are commonly used in flowcharting. Simply select the shapes you need and arrange them on a blank piece of paper or whiteboard.
When working on your own computer, you can use diagramming software to create flowcharts. Many of these programs offer similar features to specialized flowchart programs, including drag-and-drop functionality and a wide selection of shapes. Some examples of popular diagramming software include Microsoft Visio and Lucidchart.
No matter which method you choose, it’s important to have a clear understanding of what your flowchart will depict before you start. Consider what information you want to convey and how the flowchart will be used. This will help guide your choices when selecting shapes and creating the flow.
So, whether you’re a beginner just getting started or an experienced flowchart enthusiast, there are plenty of sources available to help you make your own flowcharts. Take a look at the programs and tools mentioned above, and see which one works best for you!


