

Are you looking to add a creative touch to your tumblers? Open up a whole new world of design possibilities with tumbler wraps! These decorative decals are the perfect way to personalize your tumbler, whether you’re making them for yourself or as a unique gift for someone special.
With tumbler wraps, you can easily transform a plain tumbler into a beautiful work of art. From daisies to sublimation designs, there are so many options to choose from. And the best part? You don’t need any fancy equipment to get started. All you need is a tumbler wrap template and some basic supplies.
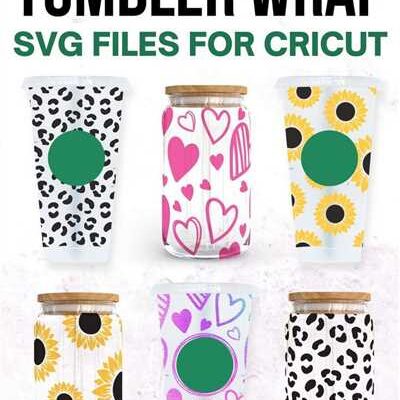
There are many websites where you can find tumbler wrap designs and templates. One popular option is the “20 Designs Tumbler Wrap Bundle.” This bundle includes 20 different designs, including floral patterns, geometric shapes, and text-ready templates. Simply download the digital files and you’re ready to start creating!
Once you have your tumbler wrap template, the next step is to apply it to your tumbler. First, make sure your tumbler is clean and free of any dust or debris. Wipe it down with a cloth or paper towel to ensure a smooth surface.
Next, carefully peel the backing off your tumbler wrap and align it with the top of your tumbler. Slowly and evenly wrap the design around the surface of your tumbler, being mindful of any seams or gaps. Use a smoothing tool or your fingers to press the wrap down and remove any air bubbles or wrinkles.
Trim any excess wrap with scissors to create a seamless look. If you’re adding text to your tumbler wrap, now is the time to do it. Use a vinyl cutter or a steady hand to create your desired text, then apply it to your tumbler. Make sure to press down firmly to ensure that the vinyl adheres well.
Once your tumbler wrap is in place, let it sit for a few minutes to allow the adhesive to fully set. Depending on the brand, this usually takes around 24 hours. After that, your tumbler wrap is complete and ready to use! It’s important to note that most tumbler wraps are not dishwasher or microwave safe, so hand washing is recommended to preserve the design.
With tumbler wraps, the possibilities are endless. Whether you’re a seasoned tumbler maker or just starting out, these decorative decals offer a fun and creative way to personalize your tumblers. So why wait? Start filling up that space on your tumbler with beautiful designs today!
How to Create a Tumbler Wrap Template in Design Space
If you are a maker who loves creating unique and personalized creations, you may have considered making tumbler wraps. Tumbler wraps are a great way to add a custom touch to your tumblers, whether they are for personal use or as gifts. In this tutorial, we will show you how to create a tumbler wrap template in Design Space.
Design Space is a digital design software that can be used to create various designs and templates. It is user-friendly and can be easily accessed through the Cricut machine. To get started, you will need to download and open Design Space on your computer.
Step 1: Create a new project
Once you have Design Space open, create a new project by clicking on the “New Project” button. This will open up a blank canvas where you can start designing your tumbler wrap template.
Step 2: Choose your background
Select a background for your tumbler wrap template. You can choose a solid color, a pattern, or even upload your own image. Make sure the background you choose is seamless and will fill the entire wrap area of your tumbler.
Step 3: Add your designs and text
Add your desired designs and text to the template. You can choose from a variety of pre-made designs available in Design Space, or you can upload your own designs. Arrange them on the template to create your desired layout.
Step 4: Resize and position
Resize and position your designs and text to fit the tumbler wrap template. Keep in mind that different tumblers have different sizes and shapes, so it’s important to adjust the design accordingly. You can use the rulers and grids in Design Space to help you with this process.
Step 5: Add a full-size trim line
Add a full-size trim line to the template. This line will guide you in trimming the excess material once the template is transferred onto the tumbler. Make sure the trim line is positioned correctly and will not interfere with the design.
Step 6: Save and download
Once you are satisfied with your tumbler wrap template, save your project and download it in a compatible format for your machine. This will allow you to easily access and apply the template whenever you need to create a new tumbler wrap.
Creating a tumbler wrap template in Design Space is a fun and creative process that can help you add a personalized touch to your tumblers. Whether you are using vinyl or sublimation transfers, following these steps will ensure that your tumbler wraps turn out beautifully. As always, please make sure to read and follow the instructions provided by your selected materials and machines, including any washing or application instructions.
Daisies 1 Sublimation 20 oz Skinny Tumbler Design Pack – Digital Paper Full Wrap Text-ready Wrap

If you’re a tumbler maker looking for a design pack that will make your creations stand out, the Daisies 1 Sublimation 20 oz Skinny Tumbler Design Pack is just what you need. This bundle includes a collection of high-quality designs that can be easily applied to your tumblers through sublimation.
What makes this design pack special is the full-wrap text-ready wrap included in the pack. With this template, you can create full-size wrap designs that are ready for text customization. The seamless design ensures that your wrap will look smooth and professional once applied to the tumbler.
To use these designs, simply download the pack and open the files in your preferred design software. Once the design is ready, you can print it on sublimation transfer paper or vinyl, depending on your preference. Make sure to fill the entire space of the template to ensure a full coverage wrap.
Next, trim the design to fit your 20 oz skinny tumbler. The tapered shape of the tumbler may require some trimming and adjustments to ensure a perfect fit. Apply the sublimation transfer or vinyl to the surface of the tumbler, making sure to smooth out any air bubbles or wrinkles.
These text-ready designs are perfect for adding names, quotes, or other personalized text to your tumbler creations. The text customization option opens up endless possibilities for creating unique and personalized designs. Use these designs to create one-of-a-kind tumblers that your customers will love.
Please note that sublimation transfers and vinyl decals require special care. Avoid washing the tumbler in a dishwasher or rubbing the design too vigorously. Instead, gently wipe the surface with a soft cloth or sponge to keep the design looking its best for longer.
With the Daisies 1 Sublimation 20 oz Skinny Tumbler Design Pack, you’ll have everything you need to create stunning and personalized tumblers. Whether you’re a seasoned tumbler maker or just starting out, these designs will help take your creations to the next level. Don’t miss out on this opportunity to elevate your tumbler designs with beautiful daisy-themed backgrounds and text-ready wraps.
Step 1: Trimming the Sublimation Design

Before you can apply a tumbler wrap, you’ll need to trim the sublimation design down to the right size. This is an important step to ensure that your design fits perfectly on the tumbler’s surface.
Start by downloading the text-ready sublimation design from your favorite digital creator. There are many online sources where you can find these designs, including template packs and bundles.
Once you have the full-size design downloaded, open it in your preferred design software. If you’re a beginner, there are plenty of video tutorials and guides available to help you navigate the software.
Next, use the trimming tool in your software to remove any excess background or empty space around the design. Be careful not to cut into the design itself. You want to create a seamless decal that will wrap nicely around the tumbler.
If the design includes text or text-ready space, make sure to trim that area as well. You want to have a smooth, clean surface to work with.
As you trim the design, pay attention to any tapered or skinny parts. These areas may be harder to manipulate and apply evenly on the tumbler’s surface.
If you’re working with sublimation transfers, be sure to follow the specific instructions provided by the makers of the transfer paper. This will help ensure that your design transfers properly and looks vibrant on the tumbler.
Once you’ve finished trimming, wipe down the tumbler’s surface to remove any dust or debris. This will help the design adhere smoothly and evenly.
Now you’re ready to move on to the next step and apply the trimmed design to your tumbler!
Transfer the Vinyl Decal to the Tapered Tumbler
Once your vinyl decal is ready, it’s time to transfer it onto your tapered tumbler. Follow these steps to ensure a smooth and seamless transfer:
- Start by cleaning the surface of your tumbler with alcohol wipes. This will remove any dirt or oil, ensuring proper adhesion of the decal.
- Next, trim your vinyl decal to the appropriate size. Make sure it fits the space on your tumbler nicely.
- If you’re using a digital design, open the template in your design software and resize it to fit your tumbler perfectly.
- Now, peel off the backing paper from the vinyl decal. Be careful not to touch the sticky part of the decal with your fingers, as this can affect its adhesion.
- With one hand, hold your tumbler and wrap the vinyl decal around it. Make sure to align the design properly and slowly wrap it around the tumbler, smoothing out any wrinkles or bubbles as you go.
- Continue wrapping until the entire decal is in place. If you’re working with a full-size wrap, you may need to apply heat with a heat gun or hairdryer to help it conform to the shape of the tumbler.
- Once the decal is fully wrapped around the tumbler, use a credit card or a similar object to firmly press down on the decal. This will ensure a secure bond between the decal and the tumbler’s surface.
- Finally, give your tumbler a final wipe down to remove any fingerprints or smudges. Now your tumbler is ready to use!
Remember to follow the washing instructions for your tumbler, as vinyl decals may have specific care requirements. With these steps, you can create beautiful and personalized tumbler wraps using vinyl transfers or sublimation!
Sources: Makers Gonna Learn, Daisies and Dots Creations
Sources
If you’re wondering where to find the resources you need to make tumbler wraps, look no further! These are some great sources to help you create stunning designs:
1. Vinyl suppliers – Vinyl is a popular material for tumbler wraps. Make sure to bundle your vinyl purchase with transfer tapes to make the application process smooth.
2. Digital design websites – There are many websites that offer text-ready and ready-to-apply digital designs specifically for tumbler wraps. Download the designs and customize them to fit your creations.
3. Heat transfer paper – If you’re going for a sublimation or heat press method, make sure to get a pack of heat transfer paper. This will help you transfer your designs seamlessly onto the tumbler’s surface.
4. Templates – To make sure your design fits perfectly on your tumbler, use templates. These templates will guide you through the trimming and application process, ensuring a perfect fit every time.
5. Cleaning wipes – Before applying your tumbler wrap, make sure to wipe the surface clean. Cleaning wipes are a must-have for creating a smooth and background-free space for your design.
6. Decal makers – If you’re more into making your own decals, consider investing in a decal maker. This will help you create custom designs that are perfect for your tumbler wraps.
7. Tapered tumblers – When making tumbler wraps, make sure to choose tumblers that have a tapered shape. This will help your design wrap around the tumbler smoothly without any wrinkles or creases.
8. Guides and tutorials – Not sure how to get started? There are many guides and tutorials available online that walk you through the process of making tumbler wraps. They can help you understand each step and provide tips and tricks along the way.
With these sources at your disposal, you’ll be creating beautiful tumbler wraps in no time!


