

If you want to create a PNG photo with a transparent background, there are several ways to do it. One way is to use a tool like Adobe Illustrator (AI) or a similar graphic design software. With these tools, you will be able to create a PNG file with a transparent background within minutes.
Another way to create a PNG photo with a transparent background is by using a programming language like PHP. PHP has built-in functions that can be used to convert images from one format to another. You can find the documentation for these functions on the official PHP website (php.net).
If you are facing a problem with creating a PNG photo, it could be due to a few reasons. One reason could be the file format or the extension you are using. PNG files should have a .png extension, so make sure you are saving your file with the correct extension.
Another reason why you may be facing a problem is related to the background color of the image. When creating a PNG photo with a transparent background, you need to make sure the background color is set to white or any other color that you want to be transparent. You can adjust the background color using functions like imagecolorallocate() in PHP.
When creating a PNG photo, you should also take into consideration the scaling and dimensions of the image. Make sure to set the width and height of the image within the desired range. You can do this using functions like imagecreate() and imagescale() in PHP.
Here’s a note on the behavior of PNG files: PNG files are compressed image files that support lossless data compression. This means that the file size of a PNG image should be smaller compared to other formats like JPG. However, keep in mind that PNG files can be larger when there is a lot of color information, such as in photographs.
How to convert the AI image file to PNG image files
When working with image files, you may come across the need to convert an AI image file to PNG image files. AI, or Adobe Illustrator, is a vector-based format that is commonly used for creating graphics and artwork. However, there are situations where you might need to convert AI files to PNG, which is a raster-based format that is widely supported and can be easily displayed on various devices and platforms.
To convert an AI image file to PNG, you can use various tools and methods, depending on your specific needs and preferences. Here’s a step-by-step guide on how to convert an AI image file to PNG:
Step 1: Verify that you have the AI image file that you want to convert to PNG. The AI file should contain all the necessary image information, including the color scheme, layers, and artwork.
Step 2: If you don’t have Adobe Illustrator installed on your computer, you can use other image editing software that supports AI file format. One popular tool is Inkscape, which is a free and open-source vector graphics editor.
Step 3: Open the AI image file in the image editing software of your choice. Make sure to choose the correct AI file from your computer.
Step 4: Check the image settings within the software. You should be able to control the image size, background color, and other parameters that will affect the final PNG image file.
Step 5: If you want to preserve transparency in the PNG image file, make sure to set the background color of the AI file to be transparent. This will ensure that the resulting PNG file will have a transparent background.
Step 6: Once you have set all the desired options, you can proceed to export the image as a PNG file. In most image editing software, you can find the exporting options under the “File” menu.
Step 7: Choose the PNG format as the output format for the image. You might also be able to adjust the image quality and other settings depending on the software you’re using.
Step 8: Specify the location where you want to save the PNG image file. Provide a file name and choose a suitable location on your computer’s storage.
Step 9: Click on the “Save” or “Export” button to start the conversion process. The software will convert the AI image file to a PNG image file and save it to the specified location.
Step 10: Once the conversion is complete, you can open the PNG image file using any image viewer or editor. Make sure to verify that the converted file has the correct dimensions, color scheme, and other details that were present in the original AI file.
Note that some AI files might not be easily converted to PNG due to specific features or settings within the file. In such cases, you may need to explore alternative solutions or seek assistance from professional graphic designers or specialized software.
Converting AI image files to PNG can be a straightforward process if you have the right tools and understanding of the process. By following these steps, you can successfully convert AI image files to PNG, ensuring that your images are compatible and accessible across various platforms and devices.
Why should you convert JPG to PNG
There are several reasons why you might want to convert a JPG file to a PNG format. The PNG format offers several benefits over JPG, making it a preferred choice in certain scenarios.
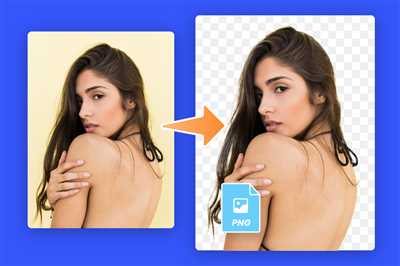
Firstly, PNG files support transparent backgrounds, which means you can remove the background of an image and use it on different backgrounds or include it seamlessly in web design. This can be particularly useful when creating graphics or logos for websites or other digital projects.
Secondly, PNG files are lossless, which means they do not lose quality when saved or compressed. This is different from the JPG format, which uses compression techniques that can result in loss of image quality. If you want to maintain the highest quality for your images, converting them to PNG can be a good option.
Additionally, PNG files support a wide range of colors. The format has a larger color gamut compared to JPG, which is limited to 16 million colors. This can be especially important for graphics or illustrations that require more vibrant and accurate colors.
Furthermore, PNG files are well suited for graphics with simple shapes and sharp edges, such as icons or logos. The format uses lossless compression for these types of images, resulting in crisp, high-resolution graphics without any blurring or artifacts.
In some cases, converting a JPG to a PNG can also help with certain editing tasks. For example, if you need to isolate an object or element from a complex background, the PNG format’s transparency support can make this process easier and more efficient.
Overall, while JPG is a widely used format for photographs and images on the web, there are situations where converting it to PNG can be beneficial. It offers transparency support, lossless compression, a wider color range, and crisp graphics with sharp edges. Consider the specific requirements of your project, and make an informed decision on which format to use.
User Contributed Notes 1 note

When creating a PNG image with a transparent background from a JPG image, you should be aware of a problem you might encounter. The behavior of the image creation tool for this case will depend on how you set the background color.
If you set the background color to white, the resulting PNG image will have a white background. However, if you set the background color to any other color, the resulting PNG image will have a transparent background.
Here’s an example of how you can create a PNG image with a transparent background using PHP:
$jpg_file = 'image.jpg'; |
$image = imagecreatefromjpeg($jpg_file); |
$png_file = 'image.png'; |
$background_color = imagecolorallocate($image, 255, 255, 255); |
imagecolortransparent($image, $background_color); |
imagepng($image, $png_file); |
In this case, the resulting PNG image will have a transparent background because the background color was set to white and then made transparent using the imagecolortransparent() function.
Contributed by user on php.net
Controlling image scaling behavior
When creating a PNG photo, it’s important to understand how the image scaling behavior can be controlled. This is especially relevant when converting an image from another format, such as JPG or AI, to PNG.
By default, when an image is scaled down, the aspect ratio is maintained and the content is centered within the new dimensions. This means that if the original image has a different aspect ratio than the new dimensions, there may be empty space added to the sides or top and bottom of the image.
To control the image scaling behavior, you can use the imagecopyresampled function in PHP, which allows you to specify the exact dimensions and position of the image within the new dimensions. The imagecopyresampled function takes the following parameters: source image, destination image, destination x-coordinate, destination y-coordinate, source x-coordinate, source y-coordinate, destination width, destination height, source width, and source height.
When using the imagecopyresampled function, you can set the destination width and height to be equal to the source width and height, without any scaling. This will ensure that the image is not stretched or distorted in any way. If the destination width and height are smaller than the source width and height, the image will be scaled down accordingly.
It’s important to note that when scaling down an image, the image’s background color may be set to white by default. This can be a problem if the original image has a different background color. To avoid this issue, you can use the imagecolorallocate function to set the desired background color before scaling the image.
Here’s an example of how you can control the image scaling behavior when converting a JPG file to a PNG file in PHP:
| Code | Description |
|---|---|
$sourceImage = imagecreatefromjpeg("image.jpg");
$destinationImage = imagecreatetruecolor($newWidth, $newHeight);
$backgroundColor = imagecolorallocate($destinationImage, 255, 255, 255);
imagefilledrectangle($destinationImage, 0, 0, $newWidth, $newHeight, $backgroundColor);
imagecopyresampled($destinationImage, $sourceImage, 0, 0, 0, 0, $newWidth, $newHeight, $originalWidth, $originalHeight);
imagepng($destinationImage, "image.png");
imagedestroy($sourceImage);
imagedestroy($destinationImage);
|
|
By following this approach, you can have full control over the image scaling behavior when creating a PNG photo. Make sure to adjust the code to fit your specific use case and requirements.
Found a content problem with this page
If you’ve found a content problem with this page, here are a few things you don’t do:
You don’t switch to PNG format when creating a photo. PNG does support transparency, but it often results in larger file sizes compared to JPG. You should only switch to PNG if you need transparency or if JPG format is causing a problem with the background or content of your image.
When creating PNG photos, you will need to use the imagecolorallocate function to set the background color. If you don’t set a background color, the default behavior might be to use a white background. However, here’s a tool you can use to convert JPG files to PNG format while controlling the background color:
Convert JPG to PNG with a specific background color:
A case contributed by php.net user:
Note when using this information the behavior of this code may explode if you are not scaling the image. However this information is using hexdec() for the color so you will need to break up the hexidecimal to find a 1 that will work with this, a 0-255 value. Heres the substr setting up this, a 0-255 value.
If you have found a content problem with this page, it’s important to provide as much information as possible about the issue. Specify the problem you encountered and any error messages or unusual behavior you observed. In addition, you can provide links to other sources or examples that demonstrate the problem.
Sources
- User-contributed notes on the PHP manual page for
imagecreatefromjpeg: This source provides information on how to convert a JPEG image to PNG format using theimagecreatefromjpegfunction. - AI file format documentation: AI files are commonly used in computer graphics. Understanding the AI file format can be helpful when working with AI files and converting them to PNG.
- PHP:
imagecolorallocatefunction documentation: This resource explains how to allocate colors for an image in PHP, which can be useful when setting the background color for a PNG image. - Stack Overflow: When facing a problem while creating a PNG image, Stack Overflow is a valuable resource where you can find solutions to various issues related to image creation.
- PHP Manual: The official PHP Manual provides information on various aspects of image manipulation in PHP, including creating PNG images.
- Online image conversion tools: There are several online tools available that allow you to convert images from one format to another, including JPG to PNG conversion.
Overall, there are various sources you can refer to for information on how to create a PNG image. Whether you are controlling the content, background color, or scaling of the image, these sources will provide you with the necessary information and solutions for your specific case.


