

If you are a business owner or social media influencer, having a Facebook page is a massive advantage in gathering a large audience. But do you know how to get your Facebook page link?
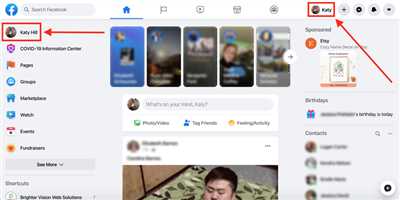
Well, the good news is that it’s quite easy and can be done in just a few simple steps. First, make sure you are logged into your Facebook account. Then, navigate to your Facebook page by clicking on the brand name or page name on the left-hand side of your profile. If you don’t have a Facebook page yet, you can easily create one by clicking on the “Pages” tab on the left-hand side of your profile, then clicking the “+ Create Page” button in the top right corner.
Once you’re on your Facebook page, click on the “Edit Page Info” button located on the left-hand side of the screen. Scroll down until you see the “Page Info” section, and there you will find the “Facebook Page URL” field. This is where you can edit your Facebook page’s URL.
Now, here’s the trickiest part: coming up with a unique and catchy URL for your Facebook page. The URL should be something that represents your brand or the purpose of your page. For example, if your page is about comedy, you could use the word “comedy” in the URL.
After you’ve come up with the perfect URL, enter it in the “Facebook Page URL” field and click the “Save Changes” button. Congratulations! You have just created a unique Facebook page link. It’s important to note that once you have created your Facebook page URL, you cannot change it. So make sure you choose a URL that you’re happy with.
Now, let’s see how you can find your Facebook page link and share it with others. On the left-hand side of your Facebook page, you’ll see a navigation panel. Click on the “About” tab, and there, you will find your Facebook page link displayed under the “Page Info” section. You can copy this link and share it on your other social media platforms like Instagram or Twitter to promote your Facebook page and gain more followers.
Another way to find your Facebook page link is through the desktop version of Facebook. If someone asks you for your Facebook page link and you’re on your desktop, simply go to your Facebook profile, click on the “Pages” tab on the left-hand side, and you’ll see a list of all the pages you manage. Click on the page you want to share, and then copy the URL from your browser’s address bar. Easy!
So, if you want to increase visibility and drive traffic to your Facebook page, make sure you know how to get your Facebook page link. These simple steps will help you create and find your Facebook page link easily, allowing you to connect with your fans, followers, and potential customers.
How To Link Instagram to Your Facebook Page in 4 Easy Steps
If you own a business or a brand, linking your Instagram account to your Facebook page is a great way to increase your visibility and reach a wider audience. By doing so, you can promote your Instagram profile to your Facebook followers and generate more traffic from both platforms. In this article, we will show you how to link your Instagram account to your Facebook page in just four easy steps.
Step 1: Make sure you have a Facebook Page
Before linking your Instagram account to a Facebook page, you need to make sure that you have already created a Facebook page for your business or brand. If you don’t already have one, go to Facebook and create a new page. There are different page types to choose from, so make sure you select the one that best suits your needs.
Step 2: Find your Facebook Page URL
To link your Instagram account to your Facebook page, you’ll need to know the URL of your Facebook page. To find this, go to your Facebook page and look for the URL in the address bar. It will typically be in the format “facebook.com/yourpagename”. Copy this URL as you will need it in the next step.
Step 3: Link your Instagram account to your Facebook page
On your desktop, go to your Instagram account and click on the three horizontal lines in the top-right corner of the screen. Then, click on “Settings” at the bottom of the menu, followed by “Account” and “Linked Accounts”. Here, you’ll see a list of social media accounts that you can link to your Instagram profile.
Click on “Facebook” and a new window will appear. Enter your Facebook Page URL that you copied earlier, and press “Link”. Your Facebook page should now be linked to your Instagram account.
Step 4: Edit the visibility of your linked accounts
After linking your Instagram account to your Facebook page, you have the option to edit the visibility of your posts. By default, your Instagram posts will be shared to your Facebook page with the same visibility settings as your Instagram profile. If you want to change this, go back to the “Linked Accounts” section and click on “Facebook”. You can then choose to have your posts published to your Facebook page, your friends only, or you can even unpublish your Instagram posts from Facebook altogether.
Now you have successfully linked your Instagram account to your Facebook page! From now on, your Instagram posts will also be shared on your Facebook page, allowing you to reach a wider audience and gather more followers. This means more people will be able to find and follow your brand or business, generating more likes and traffic to your websites or any other pages you have.
By following these four simple steps, you can easily link your Instagram and Facebook accounts and enjoy the benefits of having a strong social media presence. Start linking your accounts today and watch your fan base grow!
How to find and copy a Facebook profile URL
Facebook has become one of the most popular platforms for connecting with people from all over the world. Whether you have a personal account or a business page, it’s important to know how to find and copy your Facebook profile URL. Follow these steps to easily generate and share your Facebook profile link:
- Login to your Facebook account using your username and password.
- On the top right corner of the screen, click on the drop-down arrow. This will open a menu with several options.
- Scroll down and click on the “Settings & Privacy” option.
- In the “Settings & Privacy” menu, click on “Settings”.
- In the left sidebar, click on “Your Facebook Information”.
- In the main content area, you will see the “Access Your Information” section. Click on “Download Your Information”.
- You will be taken to a new page called “Download Your Information”. Here, you can select the specific data you want to include in your download. If you only want to download your profile information, make sure to uncheck all the other options.
- Scroll down and click on the “Create File” button to start the download process.
- Facebook will gather your data and create a downloadable file. You will receive a notification when it’s ready.
- Once the file is created, you can download it by clicking on the “Download” button.
- Extract the downloaded file and open the folder called “html”.
- Inside the “html” folder, you will find an index file. Open it with any text editor.
- Search for the word “facebook.com” in the file. You will find your Facebook profile URL next to it.
- Copy the entire URL and paste it wherever you want to share it.
By following these simple steps, you can easily find and copy your Facebook profile URL. This will allow you to share your profile with others, promote your brand or business, and increase your visibility on the platform. You can use this link to promote your Facebook profile on other social media platforms, websites, or even through email marketing. Start gathering more followers and watch your Facebook profile grow!
How to change the Facebook Page URL
If you have a Facebook Page and want to change its URL to make it more memorable or reflective of your brand, you’ll be glad to know that it’s quite an easy process. By default, when you create a Facebook Page, it is assigned a long URL with a string of random numbers. However, with a few simple steps, you can customize it to a URL that includes your page name or any other unique identifier.
Here’s how you can do it:
- First, go to your Facebook Page and click on the “Edit Page” button, usually located in the top-right corner of the page.
- In the left-hand menu, click on “About”.
- Scroll down to the “Username” section and click on the “Create @username” button.
- A pop-up window will appear where you can enter the desired username. Make sure to choose a username that is relevant to your page or brand. For example, if you have a comedy page, you can use something like “FunnyComedy” or “ComedyHub”.
- After entering the username, Facebook will check if it’s available. If it is, you can proceed; if not, you’ll need to try a different username until you find one that is available.
- Once you’ve selected an available username, click on the “Create Username” button to set it as your page’s URL.
- Now, your Facebook Page URL will be updated to include the new username, making it easier to promote and share. For example, if your page was “facebook.com/123456789”, it will now become “facebook.com/FunnyComedy”.
- Remember to inform your followers, fans, and other people who know your page about the URL change, so they can update their bookmarks or links to your page.
With a custom URL, you’ll not only have a more memorable and professional-looking page, but you’ll also have a higher chance of gathering more likes and traffic from users who are more likely to click on a link that includes a familiar word or phrase. This will increase your page’s visibility on social media and other websites, ultimately helping you to promote your brand and reach a larger audience.
So go ahead and follow these simple steps to change your Facebook Page URL, and watch as your page gets a massive boost in visibility!
How to Create a Facebook Page
Creating a Facebook Page is an easy and effective way to promote your brand or business on social media. With Facebook Pages, you can gather likes and followers, generate massive traffic to your websites, and connect with other people who share the same interests. Here’s a step-by-step guide on how to create a Facebook Page:
- First, log in to your Facebook account. If you don’t have one, you can easily create a new one by visiting facebook.com and clicking on the “Create New Account” button.
- Once you’re logged in, click on the drop-down arrow in the top right corner of the screen. This will open a menu. From this menu, click on “Create Page”.
- On the next screen, choose a category for your page. You can select from options like “Business or Brand”, “Community or Public Figure”, or “Entertainment”. Pick the category that best suits your page’s purpose.
- After selecting a category, you’ll need to enter a name for your page. Choose a name that represents your brand or business well. Keep in mind that once you’ve created a page, you can’t change its name, so make sure you’re happy with your choice.
- Next, click on “Create Page @Username”. This will allow you to set a unique username for your page, which will be used to create a custom URL. This URL is what you’ll use to promote your page and share it with others.
- Now it’s time to edit your Facebook Page. Click on the “Edit Page Info” button in the top-right corner. In this section, you can add a description, address, operating hours, and other details about your brand or business. Take some time to make your page look professional and complete.
- Once you’re satisfied with your page’s information and appearance, it’s time to publish it. Click on the “Publish” button, and your Facebook Page will go live for everyone to see.
- After your page is published, you can start promoting it and gathering followers. Share the page’s link on other social media accounts, through emails or messages, or place it on your website. The more visibility your page has, the more likes and followers you’ll get.
- As a page owner, you can also connect your Facebook Page with Instagram. This means that when you publish a post on Instagram, you can choose to share it directly on your Facebook Page as well, allowing you to reach a wider audience.
- Remember, when someone likes your page, they’ll start seeing your posts and updates in their news feed. This is a great opportunity to engage with your fans, answer their questions, share news, or even promote events.
- If you ever need to make changes to your page, simply click on the “Settings” button in the top-right corner. From there, you can edit various aspects of your page, such as its name, username, visibility, and more. Make sure to explore these settings to customize your page to your liking.
- Finally, keep in mind that Facebook Pages allow you to do much more than just share posts. You can create events, host live videos, run ads, and even sell products directly through your page. Take advantage of these features to make the most out of your Facebook Page.
Creating a Facebook Page is a powerful way to connect with your audience, promote your brand, and grow your business. By following these steps, you’ll be on your way to creating a successful Facebook Page in no time.
How to Publish your Facebook Page
Before you can start promoting your Facebook page and gathering likes and followers, there are three important questions you need to ask yourself:
- What is the name of your Facebook page?
- Do you have a username for your Facebook page?
- What is the URL of your Facebook page?
These questions are crucial because they will determine the visibility and accessibility of your page to other Facebook users and people on other social media websites. Once you have the answers to these questions, you’re ready to publish your Facebook page. Here’s how:
|
|

By linking your Facebook page to your profile, you’ll make it easier for people to find your page and like it. This means more traffic and followers for your page.
Now that your Facebook page is published, you can start promoting it. Here are some easy steps to get started:
- Share your page link with your friends, family, and colleagues.
- Post engaging content and encourage your followers to share it.
- Interact with your followers by responding to their comments and messages.
- Promote your page on other social media platforms like Instagram, Twitter, and LinkedIn.
- Consider running Facebook ads to reach a larger audience.
- Collaborate with other Facebook page owners to cross-promote each other’s pages.
- Use hashtags and keywords to improve the discoverability of your page.
By following these steps, you’ll be on your way to creating a successful Facebook page and building a massive fan base. So press that “Publish” button and start generating likes and followers for your brand or business!
Final Word
In conclusion, creating a Facebook page for your business or brand is a great means to generate massive traffic and gather a large number of followers. By linking your Facebook page to your other social media accounts, you can increase its visibility and reach a wider audience. Through the easy steps outlined in this article, you now know how to create a Facebook page, customize its name and URL, and publish posts that will attract people to like and follow your page. By following these steps, you’ll be able to promote your business or brand effectively on Facebook and watch as your number of fans and likes grow.


