

When it comes to signing documents in Excel, there are a few options you can explore. This article will guide you through the process of adding a signature to your Excel worksheet.
If you’re working with Excel 2010 or a more recent version, you can insert a digital signature to your Excel file. This allows you to sign documents with a certificate from a trusted source, such as DigiCert. Once the certificate is obtained, open the Excel file you want to sign and click the “File” tab. From there, click “Info” and then “Protect Workbook.” Select “Add a Digital Signature” and follow the instructions provided.
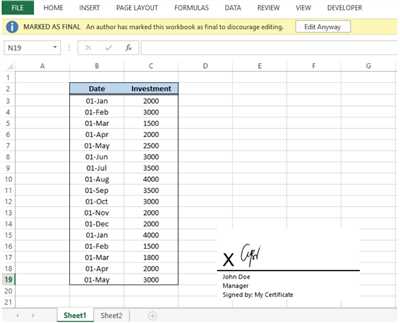
Another option is to add a signature line to your Excel worksheet. This is a suggested feature if you’re sending the document via email or printing it out. To do this, open the Excel file and click where you want the signature to appear. Then, click the “Insert” tab, select “Signature Line” from the “Text” group, and follow the instruction box that appears. You can customize the signature line by clicking on it and selecting “Signature Setup.” This way, you can specify the signers and the title of the signer.
Once the signature line is added, the signer can double-click it to sign the document. A dialog box will appear, allowing them to type their name or select an image of their signature. Clicking “Sign” completes the process. The signers’ full name and the date of signing will appear below the signature line in the document.
If you’re unsure about the signing process or need more information, Microsoft provides a detailed guide on how to add a signature in Excel. Simply search for “Excel add signature” in Office Help and access the relevant article.
Adding a signature to your Excel document can give it a professional touch and make it more official. Whether you choose to insert a digital signature or add a signature line, follow the instructions provided in this article to ensure your document is signed correctly.
How to Insert Signature in Excel
If you’re using Microsoft Excel 2010, you have the option to insert digital signatures in your Excel documents. Adding a signature to your Excel worksheet or workbook can give your work a more professional appearance, as well as provide an added level of security.
Before you can insert a signature, you’ll need to make sure you have a digital certificate from a trusted source, such as Digicert. This certificate will help authenticate your signature and ensure its validity.
To insert a signature in Excel, follow these steps:
- Open the Excel workbook or worksheet that you want to sign.
- Click on the File tab on the Excel ribbon to open the Backstage view.
- In the Backstage view, click on the Info tab.
- Under the Permissions section, click on the Protect Workbook button, then select Add a Digital Signature from the drop-down menu.
- A Add a Digital Signature dialog box will appear. If you already have a certificate, select it from the Suggested Signers box. If not, click on the Get a Digital Certificate link to learn more about obtaining one.
- Click on the Sign button to add the signature to your Excel document.
Once your signature is inserted, it will appear in the document with the title Author Signature. You can choose to sign the workbook or worksheet, depending on your needs.
In addition to adding signatures to Excel documents, you can also sign and send them via email. Just follow the steps above, and when you click on the Sign button, select the Sign and Send as Attachment option. This will create a signed Excel file that you can email to others.
By adding a digital signature to your Excel files, you can ensure that they are secure and tamper-proof. This can be especially important when working with sensitive or important data. So, take the time to learn how to insert a signature in Excel, and make sure your documents are signed and protected.
Sign a Document
If you’re working with Excel 2010 or a later version, you have the option to add a digital signature to your documents. Adding a digital signature can help verify the authenticity and integrity of your Excel file.
To sign a document in Excel, follow the instructions below:
- Open the Excel workbook that you want to sign.
- Click on the “File” button in the top-left corner of the Excel window.
- In the dropdown menu that appears, click on “Info”.
- In the “Permissions” section, click on the “Protect Workbook” button.
- In the dropdown menu that appears, click on “Add a Digital Signature”.
- A dialog box titled “Sign” will appear. Click on the “Sign” button.
- A dialog box titled “Select Certificate” will appear. In this dialog box, you can choose the digital certificate that you want to use for signing the document. If you don’t have a digital certificate, you can click on the “Get a Digital ID” link to learn more about how to obtain one.
- After selecting the appropriate certificate, click on the “OK” button.
- In the dialog box that appears, fill in the requested information about the signer and click on the “OK” button.
- If you’re signing the document for the first time, you may be prompted to create a secure password to protect your certificate. Follow the on-screen instructions to create a password.
- The signer’s name and digital signature will now appear in the document.
- Optional: To add additional signers to the document, repeat the above steps.
- When you’re finished signing the document, click on the “Close” button to close the dialog boxes.
Make sure to save the document after signing it to preserve the digital signature. If you want to send the signed document via email, it’s recommended to save it as a PDF file to ensure that the digital signature remains intact.
Remember that signing a document is an important action, as it confirms your identity as the author and ensures the integrity of the content. If you have any questions or concerns about digital signatures in Microsoft Office, consult the official Office documentation or contact Microsoft support.
Sources:
– Microsoft Office Support: https://support.microsoft.com/en-us/office/
– Digicert: https://www.digicert.com/
Microsoft Office 2010
In Microsoft Office 2010, you can add a digital signature to your Excel workbooks. This feature allows you to certify that the document is from a trusted source and has not been altered since its creation.
To add a signature in Excel 2010, follow these steps:
1. Open the workbook in Microsoft Excel.
2. Click on the “File” tab, located in the upper left-hand corner of the Excel window.
3. From the drop-down menu that appears, click on “Info”.
4. In the “Permissions” section of the Info pane, click on the “Protect Workbook” button.
5. From the drop-down menu, select “Add a Digital Signature”.
6. In the “Sign” dialog box that appears, click on the “Sign” button.
7. In the “Sign” dialog box, you will see a list of suggested signers. If the signer you want to use is not listed, click on the “Select Signer” button.
8. In the “Select Certificate” dialog box, you will see a list of available certificates. Select the certificate you want to use and click on the “OK” button.
9. In the “Sign” dialog box, you can enter a title for the signature if you’d like.
10. Click on the “Sign” button to add the digital signature to the workbook.
11. Click on the “OK” button to close the “Sign” dialog box.
12. Your Excel workbook is now signed and certified.
Remember, adding a digital signature to your Excel workbooks in Microsoft Office 2010 ensures that the document is from a trusted source and has not been altered. This can provide additional security and peace of mind when sharing or sending documents via email or other means.
For more information and step-by-step instructions on how to work with digital signatures in Excel 2010, please refer to the official Microsoft support website or other trusted sources.
Click the Sign button to close the Sign dialog box

When working with documents in Microsoft Excel, there may be situations where you need to add a signature. This can be useful for certificates, signing important files, or even adding a personal touch to your work.
To insert a signature in Excel, you can use the built-in Sign functionality. This allows you to digitally sign your document, ensuring its authenticity and integrity.
To start, open the document or worksheet you want to sign. Then, click on the “Insert” tab in the Office ribbon at the top of the Excel window. Here, you will find the “Signature Line” button in the “Text” group.
Clicking on the “Signature Line” button will open the Sign dialog box. This dialog box allows you to specify the signers for the document. You can add additional instructions, such as the title of the signer or any suggested signers.
Make sure you’re connected to the internet, as Excel will use an online service, such as Digicert, to validate and add the digital signature to your document.
Once you’ve provided all the necessary information, click on the “Sign” button to close the Sign dialog box. The signature line will then appear in your document, indicating where the signature should be placed.
To sign the document, double-click on the signature line. A dialog box will appear, allowing you to choose a digital certificate from your computer’s certificate store. Select the appropriate certificate and click “OK”.
After clicking “OK”, your digital signature will appear in the signature line. You can resize or reposition it if needed.
Once the document has been signed, you can save it and send it via email or any other medium. The signature will remain intact and can be verified by the recipient.
Remember, digitally signing your document adds an extra layer of security and authenticity to your work. It ensures that the document has not been tampered with and that it originated from the specified signer.
That’s all there is to it! With the Sign functionality in Microsoft Excel 2010 and more recent versions, you can easily add digital signatures to your documents.
This article is from the book
If you’re looking for a full instruction on how to add a signature in Excel, this article is from the book “Excel Signatures: A Step-by-Step Guide”. In this post, the author provides detailed information about signing certificates, how to insert a signature box in a worksheet, and more.
Excel Signatures: A Step-by-Step Guide is a Microsoft Office book that covers everything you need to know about signed documents in Excel. It explains how to sign a document using digital signatures, where to find suggested signers, and how to sign documents in Excel 2010 and later versions.
When you open Excel and want to sign a document, make sure you have a digital certificate from a trusted signer such as DigiCert. To begin, click on the “Insert” button in the Excel toolbar and click on the “Signature” option in the drop-down menu that appears.
A dialog box titled “Select a Digicert Certificate” will appear. From here, you can sign the document using the suggested signers or add additional signers by clicking on the “More Signatures” button. Fill in the required information, such as the signer’s name and email, and click “OK”.
Once you’ve added the signature, it will appear in a signature box on the worksheet. You can move the signature to any desired location by clicking and dragging it. If you want to remove the signature, simply right-click on it and select “Remove Signature”.
Before you close the Excel file, make sure to save it to ensure the signature is preserved. When recipients open the file, they will see the signature and can verify its authenticity.
Adding a signature to your Excel documents provides an extra layer of security and ensures that your files are not tampered with. By following the instructions in “Excel Signatures: A Step-by-Step Guide”, you can easily add digital signatures to your Excel files and protect the integrity of your work.
About the book author
The author of this article is a digital signing expert with extensive experience in the field. With an open approach to technology, they have explored various methods and tools to help readers understand how to add a signature in Excel.
They have collaborated with organizations like Digicert and Microsoft to delve into the intricacies of digital signatures. This collaboration has enabled them to provide additional insights and knowledge about the topic.
With a keen understanding of Microsoft Office applications, the author has been able to simplify the process of adding signatures to Excel documents. They have provided step-by-step instructions along with suggested sources for obtaining digital certificates.
In this article, the author explains where to find the “Sign” button in Excel 2010, how to insert a signature box in a worksheet, and the process of signing a document. Detailed instructions are provided to ensure readers are able to successfully add a signature to their Excel documents.
When signing a document, the author suggests being sure to select the correct signer from the “Sign as” drop-down box and choosing a certificate. They also explain how to close the Signatures dialog box and how to verify that the signed signature appears correctly in the document.
This article serves as a comprehensive guide for anyone looking to learn how to add a signature in Excel. The author’s expertise and detailed explanations make this resource invaluable for individuals seeking to utilize digital signatures in their work.
Sources

Here are some suggested sources where you can find additional information on how to insert a signature in Excel:
- Microsoft Office support site: Visit Microsoft’s official support site to find step-by-step instructions on how to add a digital signature to your Excel documents. You can also learn about the different options available for signing your files.
- Excel 2010 Bible: If you’re looking for a comprehensive guide on Excel, this book covers all aspects of the software, including how to sign your documents.
- DigiCert: DigiCert is a trusted provider of digital certificates. Their website has detailed guides on how to digitally sign Excel worksheets using their certificates.
- Excel forums: Participating in Excel forums can prove helpful when you have specific questions or need guidance on signing Excel documents. You can find discussions and posts from experienced Excel users who can offer advice and solutions.
- Online tutorials: Search for online tutorials and videos that provide step-by-step instructions on how to add a signature in Excel. Websites like YouTube often have a wide range of tutorials covering various aspects of Excel.
By clicking on the suggested sources above, you can find detailed instructions on where to find the signature dialog box, how to sign your Excel documents, and more. Make sure to follow the instructions closely to ensure your documents are properly signed and secure.


