

When it comes to branding your handmade clothing items, attaching a custom clothing label is a great way to make them look professional and unique. There are many ways to create and customize clothing labels, and in this tutorial, we will show you how to print clothing labels with ease.
First, you need to decide which materials you will use for your clothing labels. Cotton twill, ribbon, or plain fabrics are some popular choices. You can buy pre-made labels or make your own using fabric sheets. Once you have chosen the materials, you can start designing your labels. You can use heat transfer methods, screen printing, or even embroidery to add your logo or brand name to your labels.
Next, you need to decide how to attach the labels to your clothes. Sewn-in labels, stick-on labels, or iron-on labels are some options to consider. Sewn-in labels are more durable and can last longer, while stick-on or iron-on labels are easier to apply. You can also use a combination of methods, such as sewing the labels on and then securing them with heat.
Before you start the printing process, make sure to clean and prep the materials you will be using. This will ensure that the ink adheres properly and the labels look crisp and professional. If you are printing on fabric sheets, follow the manufacturer’s instructions for printing and ironing. If you are screen printing your labels, make sure to use the appropriate ink and curing process.
Once your labels have been printed, cutting them to the desired size is the next step. You can use scissors or a stamp to create unique shapes for your labels. If you want a more professional look, you can also order custom-cut labels from a shop. Keep in mind that the size of your label should be appropriate for the item it will be attached to. Too big or too small labels can detract from the overall look of your clothes.
In conclusion, printing clothing labels is an easy and creative way to add a personal touch to your handmade clothes. Whether you choose to make your own labels or buy pre-made ones, the process is customizable and allows you to create a unique branding for your clothing items. With the right materials and printing techniques, you can achieve professional-looking labels that will enhance the overall look and value of your clothes.
- Printed Labels
- 9 Other Ways to Make DIY Fabric Labels or Clothing Tags
- 1 Fabric Labels as Tags With Iron-on Transfer Paper from Patchwork Pottery
- 2 Sewn-in Labels from See Kate Sew
- 3 Handmade Labels from Sew Many Ways
- 4 Use a Clothing Ink Stamp from Label Land
- 5 Buy Customized Iron on Clothing Labels
- 6 Tagless Heat Transfer
- 7 Cotton Twill Ribbon Labels from Tiny Curl
- 8 Custom Labels
- 9 Get a Unique and Custom Clothing Label from Etsy
- How to attach fabric without sewing
- 21 How to Iron on labels for clothing
- 22 How to attach stick-on labels
- 23 Labels with Plain Backing
- Clothing LABELS
- Video:
- How to Make Fabric Labels at Home
Printed Labels
When it comes to branding your clothing, labels are always a key component. There are many ways to label your handmade items, but one popular option is printed labels. In this tutorial, we will show you how to make your own printed labels for your clothing or other creative projects.
Printed labels come in a variety of sizes and materials. Some common options include twill tape, cotton, and even paper. They can be sewn-in or attached with glue directly onto your items. One advantage of printed labels is that they can be customized with your own design, which adds a personal touch to your creations.
To make your own printed labels, you will need some materials. Here’s a list of what you’ll need:
- A computer with design software
- Heat transfer paper
- An iron or heat press
- Cotton fabric
- An inkjet printer
- Scissors or a cutting machine
First, start by designing your labels on your computer. You can use software like Adobe Illustrator or even free options like Canva. Make sure to keep your design simple and clean, as it will be printed onto a small label.
Once you have your design ready, print it onto heat transfer paper. Follow the instructions on the paper packaging to ensure you get the best results. After printing, let the paper dry for a few minutes to avoid smudging the ink.
Next, cut out your labels. Use scissors or a cutting machine to get clean edges. Be careful not to curl the paper while cutting, as this can affect the final look of your labels.
Now, it’s time to apply the labels to your clothing or other items. Place the label face-down on the fabric and use an iron or heat press to adhere it. Follow the heat transfer paper instructions for the correct temperature and time.
After applying the label, let it cool down before handling it. This will ensure that the ink sets properly and doesn’t smudge. You can now sew the label onto your item or use fabric glue to attach it.
Printed labels are a great way to add a professional touch to your handmade items. They not only look good, but they also provide care instructions or branding information. Whether you sell your handmade items on Etsy or in a local pottery shop, having your own printed labels is an easy and effective way to showcase your work.
9 Other Ways to Make DIY Fabric Labels or Clothing Tags
If you’re looking for alternative ways to make fabric labels or clothing tags, there are several options that don’t involve traditional printing methods. Whether you want to add a unique touch to your handmade items or customize the branding of your clothing shop, these DIY methods offer a creative and personalized approach.
1. Embroidered Tags: Create tiny tags using embroidery thread and a needle. This process allows for unique designs and a handmade touch.
2. Heat Transfer Labels: Use heat transfer paper to print your labels and attach them to your fabrics with an iron. This method is great for customizing labels with your own designs or logos.
3. Sewn-In Tags: Sew labels directly onto your clothing using twill tape or ribbon. This method ensures that your labels will stay in place even after washing.
4. Stamp Tags: Use fabric-safe ink and stamps to create tags with your own designs. This method adds a handmade touch and allows for a variety of colours and designs.
5. Stick-On Labels: Purchase stick-on labels that can be easily applied to your clothing items. These labels come in a variety of sizes and can be personalized with your own text or logo.
6. Patchwork Labels: Use scrap fabrics to create patchwork labels. Cut out small pieces of fabric and sew them onto a larger fabric backing. This method adds a unique touch to your clothing tags.
7. Pottery or Furniture Tags: If you work with pottery or furniture, consider making custom labels out of clay or wood. These tags can be attached to your finished items with glue or by sewing them on.
8. Screen Printing: Learn how to screen print your own labels using a stencil and fabric-safe ink. This method allows you to create professional-looking labels in large quantities.
9. Tagless Labels: In some cases, a tagless label is the way to go. Instead of attaching a physical label, you can use fabric-safe ink to print your branding information directly onto the fabric.
With these alternative methods, you can customize your clothing tags without the need for traditional printing. Get creative and experiment with different techniques to find the one that works best for your unique style and fabrics.
1 Fabric Labels as Tags With Iron-on Transfer Paper from Patchwork Pottery
If you want to add a unique touch to your handmade clothing items or other customized fabrics, fabric labels are a great way to do it. One popular method to create fabric labels is by using iron-on transfer paper, which allows you to print your own labels at home.
Iron-on transfer paper is a type of special paper that has a heat-activated adhesive on one side. To create fabric labels with iron-on transfer paper, you will need the following materials:
| – | Iron-on transfer paper |
| – | Cotton or other suitable fabrics |
| – | An inkjet printer |
| – | A heatpress or an iron |
| – | Scissors |
Here is how you can create fabric labels using iron-on transfer paper:
- Start by designing your label. You can use a software program like Adobe Photoshop or Microsoft Word to create the design for your labels. Make sure to include the necessary information, such as your brand name or logo.
- Print your design onto the iron-on transfer paper using an inkjet printer. Follow the instructions provided by the manufacturer on how to properly load the paper into your printer.
- Allow the ink on the transfer paper to dry for a few minutes. Once dry, cut out your labels from the paper. You can use scissors or a cutting machine for more precise cuts.
- If necessary, wash the fabric that you will be attaching the labels to. This will ensure that the labels adhere properly and last longer.
- Preheat your heatpress or iron to the appropriate temperature for the fabric you are using.
- Place the fabric label face down on the fabric where you want it to be attached. Make sure to position it correctly and avoid any wrinkles or curling.
- Apply heat and pressure using your heatpress or iron according to the instructions provided by the manufacturer of the transfer paper. Be careful not to overheat or overpress, as this can damage the fabric.
- Allow the fabric to cool down, then carefully peel off the paper backing from the label. The ink from the transfer paper should now be transferred onto the fabric.
- For extra durability, you can sew around the edges of the fabric labels or use fabric glue to secure them.
- Now you have your own fabric labels that can be attached to your handmade clothing items or other customized fabrics!
Fabric labels created with iron-on transfer paper offer a professional and personalized look to your creations. They can also be a great way to brand your products and make them stand out. Whether you sell your handmade items on Etsy or have your own shop, fabric labels can add that extra touch of quality and authenticity.
So, if you’ve always wanted to have your own custom fabric labels for your clothing or other handmade items, give this tutorial a try. You’ll be amazed at the professional finish you can achieve with just a few simple steps!
For more inspiration and ideas on fabric labels and other DIY sewing projects, check out Patchwork Pottery by Kate Land. They offer a wide variety of fabric labels in different sizes and designs, as well as other sewing-related items.
2 Sewn-in Labels from See Kate Sew
When it comes to clothing labels, Sew Kate Sew has got you covered. Whether you’re designing handmade items for your shop, or just want to add a unique touch to an item, sewn-in labels are a great way to go.
There are many ways to create sewn-in labels, but in this tutorial, we’ll learn how to make 2 labels using a simple process from See Kate Sew. These labels are tagless, which means they won’t irritate the wearer’s skin, and they can be customized to fit your brand or style.
Materials needed:
- Fabric – Choose a cotton fabric that matches your item’s design
- Iron-on transfer paper – This will be used to transfer your design to the fabric
- Ink jet printer – Necessary for printing your design on the transfer paper
- Scissors – For cutting out your labels
- Iron – To iron the labels onto the fabric
- Backing paper – This will keep your labels in place while sewing
- Ribbon (optional) – If you want to add a decorative touch to your labels
Step 1: Designing your labels
Using a software program or an online design tool, create your label design. You can include your brand name, logo, or any other information you’d like to convey. Make sure the design fits the label size you want, which is typically around 2″ x 1″.
Step 2: Printing your labels
Print your label design onto the iron-on transfer paper. Make sure to follow the instructions on the transfer paper packaging for best results. Allow the transfer to dry completely before moving on to the next step.
Step 3: Cutting and preparing your labels
Carefully cut out your printed labels using scissors. If you want to add a ribbon, place it on the back side of the label and secure it with fabric glue or by sewing it directly onto the label. This step is optional but can add a nice touch to your labels.
Step 4: Preparing the fabric
If the fabric has been washed, make sure it is clean and free from any lint or wrinkles. Iron the fabric to ensure it is smooth and ready for the label transfer process.
Step 5: Transferring the labels
Place the fabric on a hard, heat-resistant surface. Position the cut-out labels on the fabric, design side down. Make sure they are placed where you want them and not curling up. Cover the labels with the backing paper to keep them in place while sewing.
Step 6: Sewing the labels
Using a sewing machine or hand sewing, sew around the edges of the labels, attaching them securely to the fabric. Take your time and sew as close to the edges as possible for a professional look.
Step 7: Enjoy your customized labels
Once the labels are sewn on, your clothing items are ready to go. They will now have a professional, custom touch that sets them apart from the plain, tagless items. Your branding and creative design will speak directly to your customers.
See Kate Sew offers a variety of sewn-in label options for all your handmade clothing needs. From patchwork labels to printed labels, you can find something that suits your style and branding. Explore their shop on Etsy to discover the perfect labels for your items.
Whether you’re a DIY enthusiast or a small business owner, sewing in your clothing labels is a fun and easy way to add a personal touch to your items. It’s a great way to showcase your creativity and keep your branding consistent across all your products, all while ensuring that your customers always know where their favorite items came from.
3 Handmade Labels from Sew Many Ways
When it comes to clothing, the right label can add a professional touch to your handmade creations. Instead of buying generic tags, why not create your own unique labels? Sew Many Ways offers three different handmade label options that are easy to make and will give your clothing that personalized touch.
- Printed Labels: One option is to print your own labels using transfer paper. Simply design your labels on the computer, print them onto the transfer paper, and then iron them onto twill or cotton fabric. The result is a professional-looking label that can be sewn into your clothes.
- Embroidered Labels: If you prefer a more traditional look, consider creating embroidered labels. You can use a variety of materials like plain cotton or twill fabric. Use an embroidery machine or sew the design by hand. These labels have a beautiful handmade feel and can be attached to your garments by sewing or using fabric glue.
- Ribbon Labels: For a unique touch, try making labels out of ribbon. You can customize the ribbon by printing or sewing your own design onto it. Then, simply sew or glue the ribbon labels onto your clothes. This is a great option for adding branding to your items if you sell on platforms like Etsy.
No matter which method you choose, it’s important to consider the materials you’ll be working with. Make sure to use fabrics that can withstand washing and ironing without curling or fading. Also, take care to clean the back of the labels if they come into contact with heat or glue.
By creating your own clothing labels, you can add a personal touch to your handmade items and make them stand out. Whether you prefer a printed, embroidered, or ribbon label, Sew Many Ways has a tutorial here to guide you through the process. The possibilities are endless, so start customizing your labels today and make your clothes even more special!
4 Use a Clothing Ink Stamp from Label Land
If you want a quick and easy way to label your clothes, a clothing ink stamp from Label Land is a great option. With this DIY tutorial, you’ll learn how to make your own customized clothing labels without the need for iron-on patches or stick-on tags.
Label Land offers a variety of ink stamps that can be used directly on fabric. These ink stamps are specially designed to work on different types of fabrics, including cotton and polyester. They are also washable, so you don’t have to worry about the labels fading or peeling off after being washed.
The process of using a clothing ink stamp is simple. First, make sure the fabric is clean and free of any wrinkles. Place a heat-resistant paper or cutting board inside the clothing item to prevent the ink from bleeding through to the back of the fabric.
Next, place the clothing ink stamp on the desired location and press it down firmly to ensure a good transfer. The ink stamp from Label Land is designed to create a clear and crisp image, so you can showcase your unique branding or logo on your clothes.
Once the ink has dried, your customized clothing label is ready to go. The ink is permanent and will not wash or fade away, so you can be confident that your labels will stay in place for a long time.
This DIY method of printing clothing labels is a great option for those who want a unique and creative way to label their clothes. Whether you’re a small business owner looking to brand your products or an individual looking to customize your handmade items, using a clothing ink stamp from Label Land can help you achieve the look you want.
So, if you’re tired of sew-on or iron-on labels, try using a clothing ink stamp from Label Land. It’s a quick, easy, and affordable way to customize your clothes and make them truly your own!
5 Buy Customized Iron on Clothing Labels
If you’re looking for a way to keep your clothes organized and add a personalized touch, buying customized iron on clothing labels is a great option. These labels are easy to attach and can be customized with your own design or branding. Here are 5 ways you can buy customized iron on clothing labels:
- Through Etsy: Etsy is a popular online marketplace where handmade and creative items are sold. You can find a variety of iron on clothing labels on Etsy, with different sizes, colours, and materials to choose from. Simply search for “iron on clothing labels” and browse through the options.
- From online printing companies: There are many online printing companies that offer customized iron on clothing labels. These companies usually have a user-friendly interface where you can design your label, choose the size, colours, and font, and then place your order. Some popular online printing companies include Vistaprint and StickerYou.
- Through a local sewing or craft store: If you prefer a more hands-on approach, you can visit a local sewing or craft store and ask if they sell iron on clothing labels. They may have a variety of options available, and you can ask for assistance in choosing the right label for your needs.
- From a heat press or screen printing shop: If you have a specific design or logo that you want to use for your clothing labels, you can take it to a heat press or screen printing shop. They can transfer your design onto iron on labels, giving you a unique and professional look.
- Make your own: If you’re feeling crafty, you can make your own iron on clothing labels. All you need is some fabric, iron-on backing, and an iron. You can cut the fabric into small label-sized pieces, sew on the iron-on backing, and then attach the labels to your clothes using the heat from the iron. There are many tutorials available online that can guide you through the process.
No matter where you choose to buy your customized iron on clothing labels, make sure to follow the necessary care instructions. Iron on labels are usually durable, but it’s important to avoid high heat when washing and drying your clothes to keep the labels looking clean and intact.
6 Tagless Heat Transfer
Tagless heat transfer labels offer a convenient and professional way to customize clothing and other fabric items without the need for sewing or attaching tags. These labels are applied using a heat press, which transfers the label directly onto the fabric. With tagless heat transfer labels, you can easily add branding, care instructions, and other information to your clothing or handmade items.
Here are 6 ways to use tagless heat transfer labels:
| # | Method | Description |
|---|---|---|
| 1 | Heat Press | Using a heat press machine, you can apply tagless heat transfer labels to clothing, accessories, and other fabric items. The process involves placing the label onto the item, applying heat and pressure, and the label adheres to the fabric. |
| 2 | Iron-on | If you don’t have a heat press, you can also use an iron to apply the tagless labels. Simply place the label face-down onto the fabric, cover it with a thin cloth, and press the iron on top for a specified amount of time. |
| 3 | Stamp | Creative individuals can even use rubber stamps and ink to create unique tagless labels. Stamp the design onto a heat transfer paper and then follow the instructions for using a heat press or iron to attach the label to the fabric. |
| 4 | Twill | Twill is a popular material for tagless labels due to its durability and variety of colours. These labels can be cut into different sizes and attached to clothing or other fabric items using a heat press or iron. |
| 5 | Custom Printing | If you want to customize your tagless labels even further, you can have them printed with your unique design or logo. Many online shops or printing services offer custom tagless heat transfer labels that can be easily applied using a heat press or iron-on method. |
| 6 | Furniture and Pottery | Tagless heat transfer labels are not only limited to clothing. They can also be used for branding and labeling furniture, pottery, and other items. The labels can be applied in the same way as on fabric items, offering a professional and clean look. |
Tagless heat transfer labels are a versatile and easy way to add branding and necessary information to your clothes, handmade items, or other fabric products. They provide a clean and finished look without the need for sewn-in labels or tags. Whether you use them for your clothing business, Etsy shop, or personal projects, tagless heat transfer labels will give your items a professional and customized touch.
Learn how to print your own tagless heat transfer labels and see the variety of sizes, colours, and materials available. With this DIY tutorial, you can create unique and customized labels for your clothing and other fabric items.
7 Cotton Twill Ribbon Labels from Tiny Curl
If you’re looking to add a unique and customized touch to your clothing items, consider using cotton twill ribbon labels from Tiny Curl. These labels are perfect for sewing, ironing, or sticking directly onto your clothes or other fabrics. With seven different sizes to choose from, you can easily find the perfect label for your needs.
The cotton twill ribbon labels from Tiny Curl are made from high-quality materials that are durable and long-lasting. They can withstand heat from a heat press or an iron, and they can also be sewn-on using a sewing machine or by hand. The labels come with a plain backing that can be easily customized with your own designs or logo.
When it comes to printing on these labels, there are several options to choose from. You can use screen printing, heat transfer printing, or even embroidery to create a unique and professional-looking label. If you prefer a more DIY approach, you can always buy blank labels and use fabric markers or ink stamps to personalize them yourself.
Tiny Curl offers a wide range of cotton twill ribbon labels, including different sizes, materials, and colors. Whether you’re a professional clothing designer or just someone who enjoys sewing as a hobby, you’ll find the perfect label for your project at Tiny Curl.
In addition to clothing, these labels are also great for labeling handmade items such as pottery, furniture, and more. They can be used to keep track of sizes, care instructions, or to simply add a professional touch to your creations.
The process of attaching these labels is simple and straightforward. If you’re using heat transfer labels, simply place the label onto the desired location, cover it with a Teflon sheet, and press it with a heat press for a few seconds. If you’re sewing on the label, make sure to sew it securely to prevent it from coming loose.
One of the advantages of using cotton twill ribbon labels is that they can be washed and cleaned without losing their color or shape. They are also durable enough to withstand the wear and tear of everyday use. So you can rest assured that your labels will look great and stay in place for a long time.
So if you’re in need of high-quality and customizable labels for your clothing or handmade items, look no further than Tiny Curl. With a wide range of options to choose from and a simple customization process, you can create unique and professional-looking labels that will make your clothes and creations stand out.
8 Custom Labels
Embroidered or Screen Printed
When it comes to custom labels, there are many ways to customize your clothing. One popular option is to have your labels embroidered or screen printed onto the fabric.
Embroidered labels are sewn-in labels that are created using a process known as embroidery. This involves using a needle and thread to sew the label directly onto the fabric. Embroidered labels can come in a variety of sizes, colours, and designs, making them a popular choice for those looking to add a unique touch to their clothing.
Screen printed labels, on the other hand, are created using a printing process that involves using ink and a stencil to transfer the design onto the fabric. This process can be done on a variety of fabrics and is a great option for those who want a clean and professional-looking label on their clothing.
Iron-On or Sew-On
Another option for custom labels is to use iron-on or sew-on labels. Iron-on labels are adhesive labels that can be attached to the fabric using heat. To apply the label, simply place it on the desired location on the fabric and use a heat press or an iron to apply heat and pressure to the label. This will activate the glue on the back of the label, causing it to stick to the fabric. Iron-on labels are a quick and easy way to attach labels to clothing, but they may not be as durable as sew-on labels and may need to be reattached after multiple washes.
Sew-on labels, as the name suggests, are labels that are sewn onto the fabric. These labels typically have a backing that can be stitched directly onto the fabric. Sew-on labels are a more durable option than iron-on labels and can withstand multiple washes without losing their adhesive.
Stick-On or Stamp-On
For those who don’t want to sew or iron their labels onto clothing, stick-on or stamp-on labels are a great alternative. Stick-on labels are adhesive labels that can be easily attached to clothing by removing the backing and pressing the label onto the fabric. These labels may not be as durable as sew-on labels and may need to be reattached after multiple washes.
Stamp-on labels, on the other hand, are labels that are applied to the fabric using a stamp and ink. This is a creative and unique way to customize your clothing without the need for sewing or ironing. However, it’s important to note that stamp-on labels may not be as permanent as sew-on or iron-on labels and may need to be re-stamped after multiple washes.
DIY or Buy
When it comes to custom labels, you have the option to DIY or buy pre-made labels. DIY labels allow you to create something unique and personalized, while pre-made labels offer convenience and are ready to use.
If you choose to DIY your labels, there are a few different methods you can use. One option is to create your labels using fabric and sew them onto your clothing. Another option is to use iron-on transfer paper to print your labels and then iron them onto your clothing. You can also purchase fabric ribbon, cut it to size, and attach it to your clothing using glue or stitching.
If you prefer to buy pre-made labels, there are many online shops, such as Etsy, where you can find a wide variety of customizable labels. These labels come in different sizes, colours, and styles, allowing you to find the perfect label for your clothing.
Whether you choose to embroider, screen print, iron-on, sew-on, stick-on, or stamp-on your custom labels, it’s important to follow the care instructions to ensure that your labels stay in place and look their best. Some labels may need to be washed with care or may require special cleaning instructions to keep them looking fresh and vibrant.
In conclusion, custom labels are a great way to add a unique and personalized touch to your clothing. Whether you choose to sew, iron, stick, or stamp your labels, there are many options available to suit your needs and preferences.
9 Get a Unique and Custom Clothing Label from Etsy
If you’re looking for a way to add a special touch to your clothing items, getting a unique and custom clothing label from Etsy is a great option. Etsy is an online marketplace where you can find handmade and unique items, including clothing labels.
There are many sellers on Etsy who offer custom clothing labels in a variety of sizes, materials, and designs. You can choose from sewn-in labels, iron-on labels, or stick-on labels, depending on your preference and the type of fabric you’ll be using.
The process of getting a custom clothing label from Etsy is easy. First, you’ll need to find a seller who offers custom labels. You can do this by searching for “custom clothing labels” or “clothing labels” on the Etsy website. Once you’ve found a shop that offers the labels you like, you can then choose the size, design, and colours of the labels. Some sellers even offer the option to add your own logo or design to the labels.
After you’ve selected the labels you want, you can then place your order. The seller will then take care of the printing process and ship the labels directly to you. Depending on the seller and the quantity of labels you order, the process can take anywhere from a few days to a few weeks.
When you receive your custom clothing labels, it’s important to take care when attaching them to your clothes. If you’ve ordered sewn-in labels, you’ll need to sew them into the clothing item. If you’ve ordered iron-on labels, you can use a heatpress or an iron to attach the labels to the fabric. Make sure to follow the instructions provided by the seller to ensure a secure and long-lasting attachment.
By getting a custom clothing label from Etsy, you can add a professional and personalized touch to your clothes. Whether you’re a small business owner looking to brand your products or an individual wanting to make your clothes look more unique, Etsy offers a wide variety of options for you to choose from. So why wait? Start designing your own custom clothing labels on Etsy today!
How to attach fabric without sewing
When it comes to attaching fabric to clothing without sewing, there are a variety of ways to achieve the desired result. Whether you want to add a customized label or attach a small patchwork item, here are four easy methods:
1. Stick-on backing: One of the easiest ways to attach fabric without sewing is by using stick-on backing. These adhesive materials come in different sizes and are simply ironed or pressed onto the clothing item. They are a popular choice for handmade items on platforms like Etsy, as they are quick to make and easy to attach.
2. Iron-on transfer: Another popular method is using iron-on transfers. This process involves designing and printing your desired label or pattern onto transfer paper, which is then ironed onto the fabric. This method works best with plain fabrics and can withstand multiple washes, keeping the design intact.
3. Glue: If you’re looking for a temporary attachment method, using fabric glue is a great option. This method works well for small items like ribbons or patches. Simply apply a small amount of glue to the fabric and press it firmly onto the desired area of the clothing. Keep in mind that this method may not withstand frequent washing and may require reapplication over time.
4. Heat press: For a more professional and long-lasting attachment, a heat press can be used. This method is commonly used in the printing industry and ensures that the fabric stays put even after multiple washes. The heatpress transfers the ink from a printed design onto the fabric, ensuring a clean and durable attachment.
These methods offer unique ways to attach fabric to clothing without sewing. Whether you’re customizing clothes, adding labels, or creating handmade items, there is a method here that will work for you. Remember to choose the method that suits your materials, the look you want to achieve, and the care your item will require.
21 How to Iron on labels for clothing
If you’re looking for a way to add a professional touch to your clothing items or customize them with a unique label, iron-on labels can be a great solution. Iron-on labels are easy to use and allow you to personalize your clothes with your own branding or a creative design. Here’s how to iron on labels for clothing:
- Clean the surface – Before applying the iron-on label, make sure the surface of the clothing is clean and free from any dirt or wrinkles. This will ensure that the label adheres properly and stays in place.
- Cut the labels – If you are using iron-on labels that come in a sheet, carefully cut out the labels you need. Make sure to leave a small border around the label to prevent it from curling up during the ironing process.
- Heat up the iron – Set your iron to the appropriate heat setting for the fabric you are working with. Check the label on your clothing item for the recommended heat setting.
- Place the label – Position the label on the desired area of the clothing item. Make sure it is straight and centered.
- Iron the label – Place a thin piece of cotton or a plain piece of paper over the label to protect it from direct heat. Then, slowly iron over the label, applying firm pressure. Move the iron around the label for about 8 to 10 seconds to make sure the entire label adheres to the fabric.
- Let it cool – After ironing, allow the label to cool down completely before touching or moving the clothing item. This will ensure that the label has properly adhered to the fabric.
- Check the adherence – Once the label has cooled down, gently try to peel it off from the fabric. If it comes off easily, you may need to repeat the ironing process and apply more pressure.
- Wash and care – If the label has adhered properly, you can wash and care for the clothing item as usual. Iron-on labels are designed to withstand normal washing and drying cycles without coming off.
- Customize with other methods – Iron-on labels are not the only option for labeling clothing items. There are many other ways to customize your clothes, such as using sewn-in tags, stick-on labels, or even screen printing or embroidery. Explore different options to find the one that suits your preferences and needs.
- Buy iron-on labels – If you’re not into DIY or don’t have the time to make your own labels, you can easily buy iron-on labels online or from a craft shop. There are many options available, including different sizes, colors, and customized designs.
Iron-on labels provide a quick and easy way to add a professional touch to your clothing items or customize them with a unique label. Whether you’re a handmade shop owner on Etsy or just want to personalize your own clothes, iron-on labels can help you achieve the look you want.
22 How to attach stick-on labels
Attaching stick-on labels to your clothing items is a quick and easy way to customize and brand your handmade or DIY creations. Whether you want to add a label with your brand name, care instructions, or a unique design, stick-on labels can be a great option.
Here are 5 steps to attach stick-on labels:
- Clean the surface: Before applying stick-on labels, make sure the surface of the fabric or item is clean and free from lint or dust. This will ensure that the label adheres properly.
- Position the label: Decide where you want to place the stick-on label. You can either attach it to the back of the item, on the inside seam, or directly on the front for a more visible look.
- Peel and stick: Peel off the backing of the stick-on label and carefully place it on the desired spot. Press down firmly to ensure it sticks properly.
- Heat press (optional): If you want to make the stick-on label more secure, you can use a heat press to set it in place. Follow the instructions provided with the stick-on label to determine the necessary heat and duration.
- Follow care instructions: Once the stick-on label is attached, make sure to follow the care instructions provided with the label. Some stick-on labels may require special care, such as avoiding high heat or dry cleaning.
Stick-on labels offer a variety of designs and customization options, from plain tags to custom-printed labels featuring your own logo or artwork. They are a great alternative to sewn-in labels and can easily be applied by hand, saving you time and effort.
If you are looking for stick-on labels for your clothing items, there are many online platforms, such as Etsy, where you can find a wide variety of options. You can also consider designing and printing your own stick-on labels using materials like cotton or twill and inkjet or iron-on transfer sheets.
So, whether you are a creative DIYer, a handmade clothing brand, or someone who wants to customize their clothes, stick-on labels are a simple and versatile solution for adding a professional touch to your items.
23 Labels with Plain Backing
When it comes to printing clothing labels, there are many options available. One popular choice is to use plain backing labels, which offer a clean and simple look. In this tutorial, we will guide you through the process of making 23 labels with a plain backing.
To start, you will need the necessary materials. You can buy plain backing labels from a shop or online, or you can make them yourself using cotton fabric or ribbon. If you choose to make your own labels, you will need a variety of fabrics and colours to customize the look of your labels.
Once you have your materials, the next step is to decide on the size and shape of your labels. You can use a cutting tool or a stamp to create unique shapes for your labels. Alternatively, you can choose a standard shape such as a rectangle or a circle.
Next, you will need to print your design onto the plain backing. There are a few different methods you can use for this step. One option is to use an inkjet printer to directly print your design onto the fabric. Another option is to use a heat transfer process, where you print your design onto special transfer paper and then use a heat press to transfer the design onto the fabric.
If you prefer a handmade look, you can also consider using embroidery to sew your design onto the fabric. This method can be more time-consuming, but it allows for more creativity and personalization.
Once your design is printed or sewn onto the plain backing, the next step is to sew or iron the labels onto your clothing items. If you are using sewn-in labels, you will need to sew them onto the clothing by hand or using a sewing machine. If you are using iron-on labels, you can simply use a heat press or an iron to attach them to the fabric.
After your labels are attached, it is important to take care of them properly to ensure they stay in good condition. You should always follow the care instructions on the label, but in general, it is best to hand wash or use a gentle cycle when washing your clothes with labels attached. Avoid using bleach or harsh detergents, as they can cause the label to curl or fade.
Overall, printing clothing labels with a plain backing can be an easy and affordable way to add branding to your clothes. Whether you choose to buy pre-made labels or make your own, there are endless possibilities for customization. So take some time to explore different fabrics, colours, and design options, and see what works best for you!
| 1 | 2 | 3 | 4 |
| 5 | 6 | 7 | 8 |
| 9 | 21 | 22 | 23 |
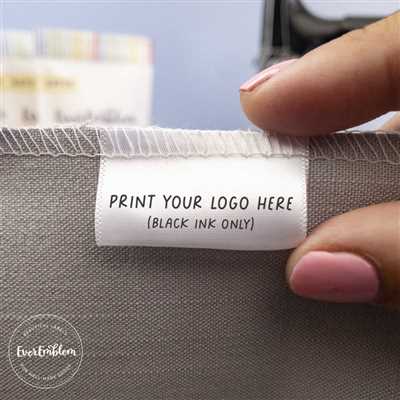
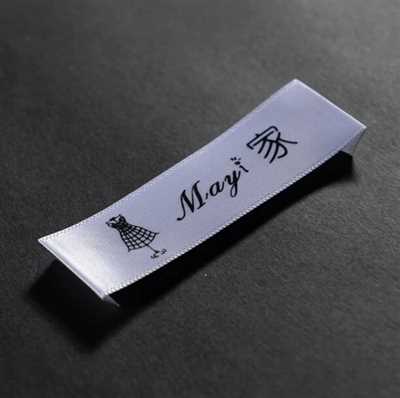
Here are a few examples of what your labels could look like:
 |  |  |
Clothing LABELS
When it comes to clothing, labels are an essential part of the design and functionality. Custom clothing labels can be made from a variety of materials, including cotton, fabrics, and even pottery. They come in different sizes, colours, and designs, allowing you to customize your clothing and give them a unique touch.
There are various methods for printing clothing labels. One popular option is screen printing, where ink is directly applied to the fabric. Another option is heat transfer, where a design is printed on a special paper and then transferred to the fabric using heat and pressure.
If you prefer a more handmade approach, you can opt for embroidered labels. These tiny pieces of patchwork are stitched onto the fabric, giving your clothes a classic and elegant look. To attach the labels, you can use glue or sew them on.
For those who want to make their labels at home, there are DIY tutorials available online. You can purchase iron-on transfer paper or stick-on labels that can be easily applied to your clothing. It is important to follow the instructions carefully and properly clean and prepare the fabric before applying the labels.
When designing clothing labels, it is necessary to consider the care instructions for the garments. Some labels may require special care, such as hand washing or avoiding direct heat. Others may be tagless, eliminating the need for a separate label. Make sure to include any necessary care instructions on your labels.
If you are selling your clothing items or using them for branding purposes, having custom labels is a great way to promote your brand. You can include your logo, shop name, or other relevant information on the labels. Many online platforms, such as Etsy, offer custom label printing services where you can upload your design and customize the size and shape of the labels.
Custom clothing labels have been used for centuries to mark ownership, identify the manufacturer, or simply add a touch of elegance to the garments. Whether you choose to buy pre-made labels or make your own, they are a must-have accessory for any clothing item.
| Method | Advantages | Disadvantages |
|---|---|---|
| Screen Printing | – Suitable for large quantities – Durable and long-lasting – Can print multiple colours | – Requires specialized equipment – Higher setup costs – Limited to flat fabrics |
| Heat Transfer | – Easy to customize – Can be used on various fabrics – Suitable for small quantities | – May peel or crack over time – Limited colours and details – Requires a heat press |
| Embroidered Labels | – Classic and elegant look – Durable and long-lasting – Can be sewn or glued on | – Time-consuming to make – Limited colour options – Not suitable for delicate fabrics |
| DIY Stick-on Labels | – Easy to apply – No sewing required – Can be removed or repositioned | – May not withstand washing – Limited design options – Not as durable as other methods |
As you can see, there are many ways to print clothing labels, each with its own advantages and disadvantages. Depending on your needs, budget, and design preferences, you can choose the method that works best for you. Whether you are a professional clothing designer or a hobbyist, adding custom labels to your garments can take your work to the next level.


