

Printing your own labels can be an easy and cost-effective solution for many users. Whether you’re a small business owner, an office worker, or just someone who wants to organize their home, being able to print labels on demand has many benefits. In this article, we will guide you through the steps on how to print your own labels using a standard inkjet printer.
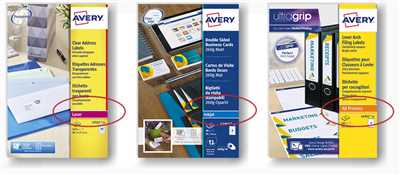
The first step is to choose the right material for your labels. There are various options available, such as standard label sheets or specialized label materials. Depending on your specific needs and preferences, you can choose between different sizes, designs, and materials. It’s important to read the instructions provided by the label manufacturer to ensure compatibility with your printer.
Once you have the right label material, the next step is to design your labels. There are many tools and software available that can help you create custom label designs. You can also choose from pre-designed templates, which makes the process even easier. If you want to add your own images or logos, make sure they are saved in a compatible format, such as JPEG or PNG.
Before you start printing, it’s essential to check your printer settings. Ensure that the paper path is clear and that there are no jams or alignment issues. Some printers have specific settings for label printing, so make sure to adjust the settings accordingly. If your printer has a manual feed option, you may need to choose that instead of the standard paper tray. Additionally, you should check whether the inkjet cartridges have enough ink for the printing job.
Once you’re ready to print, open the label design file or template on your computer and enter the necessary information. Make sure to proofread the text to avoid any spelling or formatting errors. When everything looks good, click the “Print” button, and your labels will start printing. It’s important to remember that not all printers can print to the edge of the label, so there may be a small margin around the printed area.
After the labels are printed, check them for any issues, such as smudging or misalignment. If you encounter any problems, there are troubleshooting steps you can follow, such as adjusting the printer settings or cleaning the printer heads. If you continue to experience issues, there are online resources and customer service options available to help you resolve the problem.
Printing your own labels gives you the flexibility to create professional-looking labels for your various needs. Whether it’s for shipping, organizing your office, or labeling products, being able to generate your own labels can save you time and money. Additionally, many label manufacturers offer discounted prices for bulk orders, making it even more cost-effective.
In conclusion, printing your own labels is a convenient and efficient way to meet your labeling needs. By following the instructions provided by your label manufacturer, checking your printer settings, and troubleshooting any issues that arise, you can create high-quality labels that are tailored to your specific requirements.
How to print your own shipping labels
When it comes to shipping your products, having a custom label can make a big difference. Creating your own shipping labels allows you to have more control over the design and ensures that your package stands out from the rest. In this tutorial, we will go over the steps on how to print your own shipping labels using tools you already have in your office.
Before we dive into the process, let’s take a look at what you’ll need:
- A good quality printer (laser or inkjet) that can handle labels
- Label paper or sheets
- Design templates or free software
- Measurement tools
Once you have all the necessary tools, you can start the process. Here are the steps to follow:
- Open the design software or template you’ll be using to create your label. If you don’t have one, there are many free options available online that you can utilize.
- Create your label by adding text, images, and any other information that you want to include. Be sure to align everything properly for a professional look.
- Before printing, make sure to feed a single sheet of label paper into your printer to ensure it won’t jam during the printing process.
- Click on the “Print” button and select the appropriate printer and paper settings. If you’re using a template, there may be a specific option for label printing.
- Review the label preview to make sure everything looks as expected. Check for alignment issues, text or image cutoffs, and any other problems that may affect the final result.
- Once you’ve made all necessary adjustments, click on the “Print” button again to generate the final label.
Having a custom shipping label not only looks professional but also helps your customer identify your package more easily. However, there are a few things you should keep in mind:
- Make sure the label material is compatible with your printer. Some printers work better with certain label materials than others.
- If you’re using an inkjet printer, be aware that the ink may smudge when it comes into contact with moisture.
- Check your printer’s manual for any specific setup and troubleshooting instructions for label printing.
Printing your own shipping labels is a simple process that can save you time and money. By following the steps outlined in this tutorial, you’ll be able to create professional-looking labels that will impress your customers and make your shipping process much more efficient.
What You Will Create
In this tutorial, you will learn how to generate and print your own labels using your printer. This process is quick, easy, and cost-effective, making it the perfect solution for anyone who wants to create custom labels without having to go through a professional printing service.
When it comes to printing labels, there are a few key steps you’ll need to follow. First, you’ll need to choose the right printer for your needs. While inkjet printers are generally more affordable, they may not be the best choice if you plan on printing a large volume of labels. Laser printers, on the other hand, offer higher-quality printing and are less likely to cause paper jams.
Once you have your printer set up and the correct settings in place, you can start creating your labels. There are several tools and software available that can help you generate the outlines and alignment for your labels. Some printers even come with pre-made label templates that you can use as a starting point.
When creating your labels, you’ll want to make sure that you have the correct measurements for your label sheets. This will ensure that your labels align properly and fit within the designated printing area. If you’re unsure about the measurements, you can always check the instructions provided by your printer or consult the manufacturer’s website.
Once you have your labels ready, you can start printing. It’s a good idea to do a test print on a single sheet of paper before moving on to the actual label sheets. This will allow you to check for any alignment issues or jams that may occur during the printing process.
When everything looks good, you can load your label sheets into the printer and hit the print button. Make sure to adjust the settings on your printer to ensure the best print quality. If you’re printing a large batch of labels, you may also want to consider printing them in smaller batches to avoid any jams or other issues.
Once your labels are printed, you’ll be ready to use them for shipping, organizing, or any other purpose you had in mind. The great thing about printing your own labels is that you have full control over the design and can create labels that perfectly match your needs.
Whether you’re a small business owner looking to save on label printing costs or a customer looking for discounted shipping labels, learning how to print your own labels can be a valuable skill. By following the steps outlined in this tutorial, you’ll be able to generate professional-looking labels right from the comfort of your own home or office.
Want more
Once you’ve printed your own labels and have gotten the hang of it, you might be interested in taking your label printing to the next level. There are several options you can explore to create custom label designs that are unique to your brand or product.
If you’re comfortable with working on a computer, there are various software tools available to help you create stunning label designs. These tools typically provide you with templates that you can customize with your own text, images, and other design elements. You can also adjust the settings to ensure that your labels will fit perfectly on the material you’re using. Some of these tools even offer discounted rates for their users, so it’s worth checking them out.
If you’re more comfortable working with your hands, you can explore the world of letterpress printing. This traditional printing method involves manually setting metal or wooden type and then using a printing press to transfer the design onto the label. Letterpress printing creates a unique tactile effect that can add a special touch to your labels.
Another option to consider is using a laser printer. Laser printers can produce high-quality, professional-looking labels, and they’re typically faster than inkjet printers. They also don’t have issues with ink smudging or running, which can be a problem with inkjet printers. Laser printers are a great option if you’re looking to print a large volume of labels in a short amount of time.
If you’re ready to dive into the world of label printing but don’t want to invest in a dedicated label printer just yet, you can still print your labels using a standard printer. There are many tutorials and instructions available online that can guide you through the process of creating and printing your own labels using a regular office printer. You’ll need to make sure you choose the right materials and adjust the printer settings accordingly, but it’s definitely a viable solution if you’re just starting out.
Before you enter the world of label printing, it’s important to know what you’re looking for and what tools are available to you. By learning more about the different printers and techniques, you’ll be better prepared to find the solution that works best for you. Whether you’re using a dedicated label printer, a regular office printer, or even a letterpress, there are endless possibilities for creating beautiful, custom labels that will make your product stand out.
So, if you’re ready to take the next step in your label printing journey, there’s no time like the present. Start exploring your options, learn how to create your own designs, and get ready to embark on a new creative adventure.
Printer Troubleshooting
Printing your own labels can be an easy and cost-effective way to customize your documents. However, using your own printer can sometimes come with its own set of challenges. If you’re having trouble printing your own labels, there are a few troubleshooting steps you can try to resolve the issue.
1. Check for any printer jams: Before printing your labels, make sure there are no paper jams or feed issues in your printer. Open your printer and inspect it for any jammed paper. Clear any jams before proceeding with your label printing.
2. Adjust your printer alignment: If your labels are not printing in the correct position, you may need to adjust your printer alignment settings. Check your printer’s user manual or online instructions for guidance on how to adjust the alignment of the labels.
3. Use the correct label templates: Make sure you are using the correct label templates for your printer. Different printers may have different templates, so ensure you have selected the right one before trying to print your labels.
4. Check the quality of your labels: If your labels are not printing clearly or are smudged, check the quality of your label sheets. Low-quality or damaged label sheets may not feed properly or smudge during the printing process. Ensure that your label sheets are in good condition before attempting to print.
5. Generate high-resolution images: If your labels include images, make sure they are of high resolution. Low-resolution images may appear pixelated or blurry when printed. Always use high-quality images for the best print results.
6. Ensure the file path is correct: If you are printing labels from a file, make sure the file path is correct. Double-check that the file is saved in the right location and that there are no typos or errors in the file path.
7. Contact customer service for assistance: If you’ve tried all the troubleshooting steps above and are still experiencing issues, reach out to the printer manufacturer’s customer service for further help. They may be able to provide a solution or offer additional instructions specific to your printer model.
By following these troubleshooting steps, you’ll be well-equipped to resolve any printing issues you encounter when trying to print your own labels. With a little patience and some adjustments, you’ll soon have your own custom labels ready for use.
Alignment Issues

When it comes to printing your own labels, alignment issues can be a common problem that many users face. It can be frustrating to spend time and effort creating the perfect label design, only to have it not line up correctly when printed.
There are several factors that can contribute to alignment issues. One common problem is that the labels may not be feeding correctly through the printer. This can happen if the printer settings are not adjusted properly or if the paper or material used for the labels is not compatible with the printer type. For example, inkjet printers and laser printers may have different settings and requirements for label printing.
To troubleshoot alignment issues, it’s a good idea to check the printer settings and make sure they are set correctly for the type of labels you’re using. You should also check the paper or material to make sure it is the right size and weight for your printer. Some labels may have outlines or images to guide the printing process, so be sure to check those as well.
If you’re printing labels from a template or design tool, make sure that you choose a standard label layout that is supported by your printer. Different printers may have different options for label alignment, so choose the one that best suits your needs. If you’re using your own design or a custom layout, be sure to double-check the alignment before printing.
Another possible solution to alignment issues is to generate a test page or print a single label before printing a large batch. This will allow you to see if there are any alignment issues and make adjustments before wasting materials and time. Some printing software or label manufacturers may also provide instructions or tutorials on how to properly set up and print labels, so make sure to check those as well.
If you’ve followed all the steps and are still experiencing alignment issues, there may be an issue with your printer or the label sheets themselves. In this case, it’s best to contact the customer service for your printer or label manufacturer for further assistance. They may be able to provide a solution or offer a discounted or free replacement for the labels.
Overall, alignment issues can be frustrating, but with some troubleshooting and attention to detail, you can ensure that your labels are printed correctly and look professional. Don’t let alignment problems hamper the success of your shipping, product labeling, or other label printing needs. Take the time to check the settings, align the labels properly, and generate a test print to confirm the alignment. With the right tools and instructions, you’ll be able to create professional-looking labels without any alignment issues.
Text Images Outlines
When it comes to printing your own labels, one of the key considerations is how to handle text, images, and outlines in your design. Here, we will provide instructions on using different tools and techniques to ensure that your labels look professional and aesthetically appealing.
Whether you are a beginner or an experienced user, learning how to create custom labels can be easy and hassle-free. There are various tools available, both offline and online, that offer templates and nocode options for users to choose from. This means you don’t need to have graphic design skills to create your own labels.
If you’re looking for discounted options, many online platforms offer free label templates that you can customize to suit your needs. For example, if you have a coffee product and want to print labels for your coffee bags, you can simply search for “coffee label templates” and choose the one that best fits your requirements.
Once you have chosen a template, you can open it in a design software or use an online platform that supports label customization. From there, you can add your own text, images, and outlines to make your labels stand out.
When it comes to printing, you should consider whether you have a laser or inkjet printer, as the settings and paper feed can vary. Laser printers are typically faster and work well for text-heavy documents, while inkjet printers can produce high-quality images.
Before you print, make sure to check your alignment and adjust the settings accordingly. This will help avoid any issues such as jamming or misalignment. You may also want to check the printer’s troubleshooting guide for specific instructions on label printing.
When it comes to the actual labels, there are standard label sizes available, such as letter size or 4×6 inches for shipping labels. These sizes are commonly used, and there are templates readily available for them. However, if you want to create labels of a different size or shape, you can use tools that allow you to generate custom label sheets based on your measurements.
Text, images, and outlines play a crucial role in creating eye-catching labels. The combination of well-designed text and images can help convey your message effectively. Outlines can also give your labels a professional finish.
So, whether you’re a business owner looking to print product labels or an individual working on a fun DIY project, understanding how to handle text, images, and outlines in your label design is essential. By following the steps outlined above and being mindful of the printer setup and alignment, you’ll be able to create beautiful labels in no time!
Paper Jams

One common problem that users may encounter when printing their own labels is paper jams. Paper jams can occur when the printer has difficulty feeding the label material through the printer correctly. This can happen for a variety of reasons, including issues with the printer settings, alignment problems, or using the wrong type of paper.
If you’re having trouble with paper jams, there are a few troubleshooting steps you can take to try and resolve the issue:
- Check the printer settings: Make sure that the printer settings are configured correctly for the label material you’re using. Different printers may have different settings, so it’s important to check the printer’s user manual or instructions for guidance.
- Use the right paper: Ensure that you’re using the correct type of paper for your labels. Some printers may have specific requirements for the type and weight of paper that can be used. Using the wrong type of paper can result in paper jams.
- Check the alignment: Make sure that the labels are properly aligned in the paper tray. If the labels are not aligned correctly, they may get stuck and cause a paper jam. Adjust the paper guides in the tray to ensure that the labels are properly positioned.
- Clean the printer: Paper jams can also be caused by dirt or debris inside the printer. Clean the printer thoroughly, removing any paper scraps or dust that may be causing the problem. Follow the manufacturer’s instructions for cleaning the printer.
- Adjust the printer feed: If the labels are consistently jamming in the same spot, you may need to adjust the printer’s feed mechanism. Consult the printer’s user manual or instructions for information on how to adjust the feed mechanism.
If you’ve tried these troubleshooting steps and are still experiencing paper jams, it may be helpful to contact customer service for further assistance. They can provide additional guidance and help you troubleshoot the issue.
Remember, preventing paper jams is always better than dealing with them after they occur. Taking the time to set up your printer correctly, use the right paper and settings, and follow any instructions or templates provided can help prevent paper jams and ensure a smooth printing process for your own labels.
Sources
When it comes to printing your own labels, there are several sources you can turn to for help and guidance. Let’s take a look at some of the best resources available:
1. Online Printing Services
If you don’t have a printer or want professional-looking labels, online printing services are a good option. Many companies offer discounted rates for bulk printing, and you can easily upload your own design file or create custom labels using their nocode tools. Just make sure to check their file setup guidelines and printing options before submitting your order.
2. Office Supply Stores
If you have a printer and want to do it yourself, office supply stores are a great resource. They typically have a variety of label paper options, both full sheets and pre-cut labels. You can also find ready-to-use label templates and other design tools to help you create your own labels.
3. Troubleshooting Guides
If you’re having issues with your printer or labels jamming, there are plenty of troubleshooting guides available online. Users forums and tutorial videos can provide step-by-step instructions on how to fix common problems and get your labels printing smoothly.
4. Manufacturer Websites
If you’re using a specific brand of label paper or printer, it’s always a good idea to check the manufacturer’s website for setup guides, alignment tips, and recommended settings. They may also offer free templates and downloadable tools to make the printing process easier.
5. Customer Service
If you’ve tried everything and still can’t get your labels to print correctly, don’t hesitate to contact the customer service department of your printer or label paper manufacturer. They can help troubleshoot the issue and provide guidance on how to resolve it.
By exploring these sources, you’ll be well-equipped to tackle the process of printing your own labels.


