

In the world of 3D modeling and design, the ability to save and display projects in a 3D format is becoming a standard. One popular software for creating 3D models is Navisworks, which offers a range of graphic tools and features. However, when it comes to sharing and presenting these models, a traditional flat representation may not be enough. This is where 3D PDFs come in handy.
By exporting your 3D assembly directly to a PDF format, you can view and interact with the model just like you would with any other PDF file. The difference is that the 3D PDF contains all the applied settings, views, and annotations you have created in Navisworks. This allows you to save and share your projects in a universal format, without the need for any additional plugins or software.
To create a 3D PDF from Navisworks, follow these simple steps. First, open your project in Navisworks and configure the view settings to show the model as you want it to appear in the PDF. Then, go to the “File” menu and select the “Export” option. In the dialog box that appears, choose “Adobe PDF” as the format and click “Save”.
If you are using Solidworks, the process is much the same. Simply right-click on the part or assembly you want to export, select “Save As”, and choose “Adobe PDF” as the file type. Make sure to define the settings and options for the PDF conversion, such as the appearance, texture, and lighting between the 3D model and the 2D PDF representation.
In addition to Navisworks and Solidworks, other software applications like SketchUp also support exporting 3D models to PDF. By choosing the right options and settings, you can create PDFs that display your models in the same way as they appear within the original software.
It’s important to note that there are some limitations to using 3D PDFs. For example, not all PDF editors support the viewing and manipulation of 3D models. In some cases, the 3D model may appear as a static image or may not be visible at all. However, for basic viewing and comparison purposes, 3D PDFs can be a useful tool.
In conclusion, creating 3D PDFs allows you to share and present your 3D models in a format that is accessible to anyone with a PDF reader. Whether you are working with Navisworks, Solidworks, or other 3D modeling software, exporting to PDF is a simple and effective way to make your models portable and viewable by others. So, next time you need to showcase your 3D designs, consider saving them as PDFs and take advantage of the convenience and versatility they offer.
- Creating a 3D PDF
- To create a 3D PDF from SOLIDWORKS
- Part 2 Comparison Between Normal PDF and 3D PDF
- Other Software
- Boxshot
- Origami
- Export Options When it comes to creating 3D PDFs, there are several export options available to you. The choice of which option to use depends on the software you are using and the specific requirements of your project. If you are working with SolidWorks, for example, you can export your 3D model as a 3D PDF by selecting “Save As” from the File menu, then choosing the PDF format. From there, you can configure the export settings to define how the model will be displayed in the PDF. In some applications, like Navisworks or SketchUp, you may have plugins or extensions that allow you to directly export your 3D model as a PDF without any additional steps. These plugins will have their own settings and options that you can configure to make sure the exported PDF meets your requirements. It’s important to note that there may be some limitations or differences between exporting a 3D model directly to a PDF and saving it as a separate file format first. For example, when exporting directly, the PDF may not support certain features or textures that are present in the original model. When exporting a 3D model to a PDF, you can choose which views of the model to include in the PDF. This can be helpful if you only want to show certain angles or sections of the model. You can also define the scale, orientation, and other settings to make sure the model is displayed accurately in the PDF. Once the export settings are applied, the 3D PDF can be saved to your desired location. From there, it can be opened using any PDF viewer or editor, such as Adobe Acrobat. When opened, the 3D model will appear in the center of the window, and you can navigate around it using the mouse or keyboard shortcuts. Another option for creating 3D PDFs is to use dedicated software like Origami or Boxshot. These tools offer more advanced features and options for creating interactive and dynamic 3D PDFs. However, they may require additional setup and configuration compared to standard PDF export options. In summary, there are multiple ways to export a 3D model to a PDF, depending on the software you are using and the specific requirements of your project. Whether you choose to export directly from the application or save the model as a separate file format first, make sure to carefully configure the export options to achieve the desired result. Limitations When working with 3D PDFs, there are certain limitations that should be taken into consideration. These limitations are related to the software used to create the 3D PDF, as well as the application in which the PDF is being viewed. Software Limitations: – Not all software applications support the creation of 3D PDFs. Some applications may have limitations on the types of 3D models that can be applied or the information that can be included in the PDF format. – Some software applications may not have a direct option to export or save a 3D model in PDF format. In such cases, the 3D model may need to be saved in a different format and then be converted to 3D PDF using a separate software or tool. – The settings and options available for configuring the 3D PDF may vary between different software applications. This means that the same 3D model saved as a 3D PDF using one software may appear differently when opened with another software. Viewing Limitations: – Not all PDF viewers or plugins support the viewing and displaying of 3D content. Some viewers may only support 2D content and not have the capability to display the 3D models and graphics. – The way the 3D models are displayed within the PDF viewer may be limited. Some viewers may only allow basic interaction with the 3D models, such as rotating or zooming in and out, without being able to select different parts or define assembly relationships. – The level of detail and quality of the 3D models may vary between different PDF viewers. Some viewers may not be able to display the 3D models with the same level of accuracy and detail as the original software used to create the models. Format Limitations: – 3D PDFs created from different software applications may not be fully compatible with each other. This means that some features or functionalities may be lost or not properly displayed when exporting or opening a 3D PDF created in one software in another software. – The use of textures and other graphic elements in 3D PDFs may be limited. Some software applications may not support the exporting of textures or may not display them properly within the PDF viewer. – The size and complexity of the 3D models can also be a limitation when creating 3D PDFs. Very large or complex models may not be suitable for exporting as 3D PDFs, as they may cause performance issues or result in very large file sizes. Note: It is important to check the limitations and compatibility of the software and PDF viewer being used before creating and distributing 3D PDFs. Different software applications and viewers may have different capabilities and restrictions. Sources When it comes to creating 3D PDFs, there are several sources and tools you can use. Here are some of the options: 1. PDF Editors: There are various PDF editors available that can be used to create 3D PDFs. These editors allow you to add 3D models to your PDFs and customize the settings accordingly. Adobe Acrobat, for example, has a 3D toolbar that allows you to insert 3D models into your PDF files. 2. 3D Modeling Software: Software like SketchUp, SolidWorks, and Revit can also be used to export 3D models to the PDF format. These 3D modeling software tools have options to save or export your models as PDFs, which can then be opened in a PDF reader or editor. They offer various settings and configurations to ensure your 3D models are displayed correctly in the PDF. 3. Plugins and Extensions: Some software applications may require plugins or extensions to export 3D models to the PDF format. For example, Navisworks, a popular 3D model review software, has a PDF export plugin that allows you to save your models as 3D PDFs. 4. Other Graphic Software: Besides dedicated 3D modeling tools, other graphic software like Photoshop or Illustrator can also be used to create 3D PDFs. These applications offer tools to work with 3D models and can export them to the PDF format with the appropriate settings. It is important to note that the capabilities and limitations of each tool may differ. Some tools may offer more advanced features for 3D PDF creation, while others may have more basic functionality. It is recommended to compare the options available and choose the one that best suits your needs. 5. Origami 3D PDF: Origami 3D PDF is a plugin for Adobe Acrobat that allows you to create interactive 3D PDFs. It offers advanced features such as animations, texture mapping, and hyperlinking. With Origami 3D PDF, you can define interactive elements within your 3D models and create engaging presentations. Remember that when creating 3D PDFs, you need to ensure that the 3D models are saved in a format that is compatible with the PDF. Also, keep in mind that the file size of your 3D models can affect the performance of the PDF. If the file size is too large, it may result in slow loading or an extreme increase in the PDF size. To export a 3D model to a PDF, you typically need to follow these steps: 1. Open the 3D model in the software application. 2. Configure the settings for the PDF export. This may include selecting the view and defining the texture mapping options. 3. Click on the “Export” or “Save as PDF” option, which is usually found in the File menu. 4. Choose the location where you want to save the PDF file. 5. The export dialog or window will appear, allowing you to further configure the settings for the PDF. 6. Click “Save” to start the exporting process. Once the export is complete, you can open the PDF file with a PDF reader or editor. The 3D model should appear in the same assembly and view as it was saved. In summary, there are several tools and software available for creating 3D PDFs. These sources include PDF editors, 3D modeling software, plugins and extensions, and other graphic software. It is essential to choose the right tool based on your requirements and the features you need for your 3D PDFs. Videos: How to create a 3D PDF with Visual Components 4.0
- Limitations
- Sources
- Videos:
- How to create a 3D PDF with Visual Components 4.0
Creating a 3D PDF
Creating a 3D PDF allows you to display a three-dimensional graphic in a portable document format (PDF). This can be useful for various purposes, such as showcasing a design, demonstrating an assembly process, or sharing a 3D model with others.
There are several software applications that can be used to create a 3D PDF. Some of the popular ones include Adobe Acrobat, SolidWorks, Revit, SketchUp, and Boxshot. Each of these applications has its own set of plugins and options for exporting a 3D model to the PDF format.
To create a 3D PDF, you first need to have a 3D model saved in a compatible format, such as OBJ, STL, or U3D. Then, the model can be directly imported or opened within the chosen software application.
After the model is opened, you can configure the settings for the 3D PDF. This includes selecting the view that will appear in the PDF, defining the texture and lighting options, and setting any other display preferences.
Once the settings are defined, the 3D model can be saved as a PDF file. In Adobe Acrobat, for example, you can click on “File” and then “Save As” to save the PDF. In other software applications, similar options may be available for saving the PDF file.
It is important to note that there are some limitations when creating a 3D PDF. For example, the file size of the PDF can be much larger compared to a traditional PDF without a 3D model. Additionally, not all PDF viewers support the display of 3D content, so it may be necessary for the recipient of the PDF to have the required software or plugins installed.
In conclusion, creating a 3D PDF allows you to share and showcase 3D models in a universal format that can be viewed within a standard PDF viewer. By following the steps outlined above, you can easily create a 3D PDF from various software applications and configure the settings to fit your needs.
| Benefits of Creating a 3D PDF |
| – Displaying a three-dimensional graphic |
| – Portable and universal format |
| – Compatible with standard PDF viewers |
| – Share and showcase 3D models |
| – Can be used for various purposes |
Creating a 3D PDF offers a new way to present and share your 3D models or designs. With the right software and settings, you can create stunning visual representations that can be easily accessed and viewed by others.
To create a 3D PDF from SOLIDWORKS
To create a 3D PDF from SOLIDWORKS, you can use the built-in functionality and options within the software. By exporting your SOLIDWORKS files as 3D PDFs, you can create interactive documents that can be opened and viewed with Adobe Acrobat or other PDF readers.
To start, open the assembly or part file you want to save as a 3D PDF in SOLIDWORKS. Then, go to the “File” menu and select “Save As.” In the dialog box that appears, choose the PDF format from the drop-down menu.
Next, you’ll need to define the settings for the 3D PDF. In the “Save As” dialog box, click on the “Options” button. This will open the “Export Options” window, where you can configure various parameters for the PDF, such as the view, graphics, and textures.
Within the “Export Options” window, you can select the desired view for the 3D PDF. You can choose to export the current view, the selected view, or all views. You can also define the orientation and scale of the 3D model within the PDF.
In addition, you can apply settings for graphic quality, such as shading and transparency. You can also choose whether to include textures and appearances in the 3D PDF.
Once you have defined the settings, click “OK” to close the “Export Options” window and return to the “Save As” dialog box. You can then select the location and name for the 3D PDF, and click “Save” to create the file.
It’s worth noting that SOLIDWORKS uses Universal 3D (U3D) format to export 3D models to PDF. This format is widely supported and can be opened with Adobe Acrobat or other PDF readers that have 3D viewing capabilities.
By creating 3D PDFs from SOLIDWORKS, you can share your designs with others who may not have access to SOLIDWORKS software. 3D PDFs are a great way to communicate complex assembly instructions, visualizations, or comparisons with other designs.
While creating 3D PDFs directly from SOLIDWORKS is a convenient and straightforward process, there are some limitations to be aware of. For example, the level of detail in the exported 3D model may not be as high as in the original SOLIDWORKS file, especially for complex models with extreme geometry or textures.
Furthermore, it’s worth mentioning that there are other software applications available that offer more advanced options for creating 3D PDFs. Programs like Adobe Acrobat Pro, Sketchup, and Navisworks have additional features and plugins that allow for more control and customization in creating 3D PDFs. However, for basic 3D PDF creation from SOLIDWORKS, the built-in functionality is often sufficient.
In conclusion, to create a 3D PDF from SOLIDWORKS, you can use the standard export options and settings within the software. By saving your assembly or part as a 3D PDF, you can share and display your designs in a universal format that can be opened with Adobe Acrobat or other PDF readers.
Part 2 Comparison Between Normal PDF and 3D PDF
When it comes to creating a 3D PDF, there are several differences and advantages over a normal PDF. Let’s compare these two formats to understand their unique features.
| Features | Normal PDF | 3D PDF |
|---|---|---|
| Format | Defines 2D documents | Defines 3D objects and animations |
| Opening | Can be opened in any PDF viewer | Can be opened directly in a 3D viewer or a PDF viewer with 3D support |
| Origami and other extreme folding layouts | Not possible | Can be visualized with interactive assembly instructions and folding animations |
| Center of Gravity Dialog | Not available | Provides detailed information about the center of gravity |
| Creating 3D PDF from SolidWorks | Requires third-party plugins or software | Can be created directly within SolidWorks with a Universal 3D or BoxShot plugin |
| Appearance Settings | Simple settings for exporting | Advanced appearance settings like texture, lighting, and transparency can be applied |
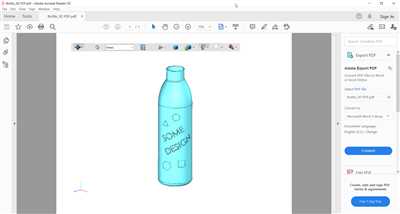
| Opening in Adobe Acrobat Pro | 3D models appear as static images | 3D models can be rotated, zoomed, and interacted with |
| Exporting from Revit | 3D views need to be converted to 2D graphics | 3D views can be directly saved as 3D PDFs |
| Navigation within a 3D PDF | Not possible | Users can navigate through the 3D environment and switch between different views |
| Compatibility | Works well across different devices and platforms | Works with software that supports 3D PDFs |
| Limitations | No support for 3D objects | Can display and interact with 3D models and animations |
As we can see, the 3D PDF format offers much more than the traditional normal PDF. It allows for the creation and display of 3D objects and animations, provides advanced appearance settings, and offers interactive navigation within the 3D environment.
Note that to create a 3D PDF, you will need a 3D graphic editor like SolidWorks, SketchUp, or Revit. It is important to configure the export settings correctly to ensure that the 3D elements are saved in the PDF file. Furthermore, not all PDF viewers support 3D PDFs, so it is advisable to use a viewer that has 3D support, such as Adobe Acrobat Pro or Navisworks.
Other Software
In addition to the previously mentioned software and methods, there are other applications and tools available for creating 3D PDFs. Here are some examples:
- SketchUp: SketchUp allows you to save 3D models as PDFs directly from its interface. To do this, go to “File” and select “Export” or press Ctrl+O, then choose the PDF format from the options.
- Revit: Revit has the capability to export 3D PDFs. To do this, go to “File” and select “Export” or press Ctrl+E, then choose the PDF format from the options.
- Navisworks: Navisworks can save 3D models as PDFs. To do this, go to “File” and select “Export” or press Ctrl+E, then choose the PDF format from the options.
- Solidworks: Solidworks has a feature called “3D PDFs” that allows you to create 3D PDFs directly from the application. To export a 3D PDF, go to “File” and select “Save As” or press Ctrl+S, then choose the PDF format from the options.
- Boxshot: Boxshot is a 3D product packaging editor that can export 3D models as PDFs. To do this, click on the “Export” button within the application and select the PDF format from the dialog box.
- Universal 3D: Universal 3D is a 3D graphics application that allows you to export 3D models as PDFs. To do this, go to “File” and select “Export” or press Ctrl+E, then choose the PDF format from the options.
- Origami: Origami is a 3D modeling application that can save 3D models as PDFs. To do this, go to “File” and select “Save As” or press Ctrl+S, then choose the PDF format from the options.
It’s worth noting that while these applications offer the ability to create 3D PDFs, there may be limitations and differences in the way the 3D models are displayed and configured. Some applications may require plugins or additional settings to be applied in order to correctly export 3D models as PDFs, while others may have more streamlined and direct options.
When comparing these software options to Adobe Acrobat Pro, it’s important to consider the specific requirements and features needed for your 3D PDFs. Each application may have its own strengths and limitations, so it’s a good idea to explore and test different options to find the one that best suits your needs.
Boxshot
Boxshot is a software application that allows you to create 3D PDFs. Unlike traditional PDFs, 3D PDFs can save and display 3D information, allowing you to view and interact with 3D models directly from within the PDF file. Boxshot can be used to create 3D PDFs from a variety of sources, including SolidWorks, SketchUp, Revit, and Navisworks.
When creating a 3D PDF in Boxshot, you have the ability to define the settings and options for displaying the 3D model. You can configure the lighting, texture, and graphic options, as well as define how the model is displayed in the center of the page. In addition, you can apply 3D part options, such as assembly, explode, and control the display options with the Boxshot Origami Editor.
Boxshot also supports plugins, which can be used to enhance the functionality of the application. For example, the Adobe Universal 3D plugin allows you to open and view 3D models directly in Adobe Acrobat without the need for any additional software. This makes it much easier to share and view 3D models with others who may not have the same software installed.
It’s important to note that while 3D PDFs offer many advantages over traditional 2D PDFs, there are some limitations to consider. For example, 3D PDFs can be larger in file size than normal PDFs, and not all PDF viewers support the 3D format. Additionally, creating 3D PDFs requires the proper software and plugins, and there may be some compatibility issues between different software applications and versions. So if you’re looking to save and share 3D models in PDF format, Boxshot can be a great option, but it’s important to consider these factors before getting started.
Origami
Origami is the art of paper folding. It originated in Japan and involves folding paper into various shapes and forms. In recent years, the concept of origami has been applied to the digital world as well, allowing users to create 3D models within a PDF format.
With the right software and plugins, users can create and configure 3D models in programs such as SketchUp, Revit, and SolidWorks. These models can then be exported to a PDF format, creating an interactive 3D experience.
When a 3D PDF file is opened, the user can manipulate the model within the PDF viewer. They can rotate, zoom in or out, and view the model from different angles. This allows for easier visualization and understanding of complex designs.
One of the advantages of using a 3D PDF format is that it is a universal file format, meaning it can be opened and viewed on any device with a PDF viewer. This makes it easier to share and distribute 3D models without the need for special software or plugins.
It’s important to note that there are some limitations to using 3D PDFs. The level of interactivity and functionality may vary between different PDF viewers, and not all viewers support 3D PDFs. Additionally, the texture and graphic information of the 3D model may not appear as detailed or realistic as in the original software.
In summary, origami in the context of 3D PDFs allows users to create and share interactive 3D models within a standard file format. It provides a convenient way to display and share 3D designs without the need for specialized software.
Export Options
When it comes to creating 3D PDFs, there are several export options available to you. The choice of which option to use depends on the software you are using and the specific requirements of your project.
If you are working with SolidWorks, for example, you can export your 3D model as a 3D PDF by selecting “Save As” from the File menu, then choosing the PDF format. From there, you can configure the export settings to define how the model will be displayed in the PDF.
In some applications, like Navisworks or SketchUp, you may have plugins or extensions that allow you to directly export your 3D model as a PDF without any additional steps. These plugins will have their own settings and options that you can configure to make sure the exported PDF meets your requirements.
It’s important to note that there may be some limitations or differences between exporting a 3D model directly to a PDF and saving it as a separate file format first. For example, when exporting directly, the PDF may not support certain features or textures that are present in the original model.
When exporting a 3D model to a PDF, you can choose which views of the model to include in the PDF. This can be helpful if you only want to show certain angles or sections of the model. You can also define the scale, orientation, and other settings to make sure the model is displayed accurately in the PDF.
Once the export settings are applied, the 3D PDF can be saved to your desired location. From there, it can be opened using any PDF viewer or editor, such as Adobe Acrobat. When opened, the 3D model will appear in the center of the window, and you can navigate around it using the mouse or keyboard shortcuts.
Another option for creating 3D PDFs is to use dedicated software like Origami or Boxshot. These tools offer more advanced features and options for creating interactive and dynamic 3D PDFs. However, they may require additional setup and configuration compared to standard PDF export options.
In summary, there are multiple ways to export a 3D model to a PDF, depending on the software you are using and the specific requirements of your project. Whether you choose to export directly from the application or save the model as a separate file format first, make sure to carefully configure the export options to achieve the desired result.
Limitations
When working with 3D PDFs, there are certain limitations that should be taken into consideration. These limitations are related to the software used to create the 3D PDF, as well as the application in which the PDF is being viewed.
Software Limitations:
– Not all software applications support the creation of 3D PDFs. Some applications may have limitations on the types of 3D models that can be applied or the information that can be included in the PDF format.
– Some software applications may not have a direct option to export or save a 3D model in PDF format. In such cases, the 3D model may need to be saved in a different format and then be converted to 3D PDF using a separate software or tool.
– The settings and options available for configuring the 3D PDF may vary between different software applications. This means that the same 3D model saved as a 3D PDF using one software may appear differently when opened with another software.
Viewing Limitations:
– Not all PDF viewers or plugins support the viewing and displaying of 3D content. Some viewers may only support 2D content and not have the capability to display the 3D models and graphics.
– The way the 3D models are displayed within the PDF viewer may be limited. Some viewers may only allow basic interaction with the 3D models, such as rotating or zooming in and out, without being able to select different parts or define assembly relationships.
– The level of detail and quality of the 3D models may vary between different PDF viewers. Some viewers may not be able to display the 3D models with the same level of accuracy and detail as the original software used to create the models.
Format Limitations:
– 3D PDFs created from different software applications may not be fully compatible with each other. This means that some features or functionalities may be lost or not properly displayed when exporting or opening a 3D PDF created in one software in another software.
– The use of textures and other graphic elements in 3D PDFs may be limited. Some software applications may not support the exporting of textures or may not display them properly within the PDF viewer.
– The size and complexity of the 3D models can also be a limitation when creating 3D PDFs. Very large or complex models may not be suitable for exporting as 3D PDFs, as they may cause performance issues or result in very large file sizes.
Note: It is important to check the limitations and compatibility of the software and PDF viewer being used before creating and distributing 3D PDFs. Different software applications and viewers may have different capabilities and restrictions.
Sources
When it comes to creating 3D PDFs, there are several sources and tools you can use. Here are some of the options:
1. PDF Editors: There are various PDF editors available that can be used to create 3D PDFs. These editors allow you to add 3D models to your PDFs and customize the settings accordingly. Adobe Acrobat, for example, has a 3D toolbar that allows you to insert 3D models into your PDF files.
2. 3D Modeling Software: Software like SketchUp, SolidWorks, and Revit can also be used to export 3D models to the PDF format. These 3D modeling software tools have options to save or export your models as PDFs, which can then be opened in a PDF reader or editor. They offer various settings and configurations to ensure your 3D models are displayed correctly in the PDF.
3. Plugins and Extensions: Some software applications may require plugins or extensions to export 3D models to the PDF format. For example, Navisworks, a popular 3D model review software, has a PDF export plugin that allows you to save your models as 3D PDFs.
4. Other Graphic Software: Besides dedicated 3D modeling tools, other graphic software like Photoshop or Illustrator can also be used to create 3D PDFs. These applications offer tools to work with 3D models and can export them to the PDF format with the appropriate settings.
It is important to note that the capabilities and limitations of each tool may differ. Some tools may offer more advanced features for 3D PDF creation, while others may have more basic functionality. It is recommended to compare the options available and choose the one that best suits your needs.
5. Origami 3D PDF: Origami 3D PDF is a plugin for Adobe Acrobat that allows you to create interactive 3D PDFs. It offers advanced features such as animations, texture mapping, and hyperlinking. With Origami 3D PDF, you can define interactive elements within your 3D models and create engaging presentations.
Remember that when creating 3D PDFs, you need to ensure that the 3D models are saved in a format that is compatible with the PDF. Also, keep in mind that the file size of your 3D models can affect the performance of the PDF. If the file size is too large, it may result in slow loading or an extreme increase in the PDF size.
To export a 3D model to a PDF, you typically need to follow these steps:
1. Open the 3D model in the software application.
2. Configure the settings for the PDF export. This may include selecting the view and defining the texture mapping options.
3. Click on the “Export” or “Save as PDF” option, which is usually found in the File menu.
4. Choose the location where you want to save the PDF file.
5. The export dialog or window will appear, allowing you to further configure the settings for the PDF.
6. Click “Save” to start the exporting process.
Once the export is complete, you can open the PDF file with a PDF reader or editor. The 3D model should appear in the same assembly and view as it was saved.
In summary, there are several tools and software available for creating 3D PDFs. These sources include PDF editors, 3D modeling software, plugins and extensions, and other graphic software. It is essential to choose the right tool based on your requirements and the features you need for your 3D PDFs.


