

Google Forms is a powerful tool for creating surveys, quizzes, and collecting data. Whether you want to gather feedback from customers or conduct a survey for a research project, Google Forms has got you covered. In this guide, we will walk you through the step-by-step process of creating and customizing your own Google Form.
The first step is to open Google Forms, which is part of the Google Workspace. If you don’t have a Google account, you can easily create one for free. Once you’re logged in, you can find Google Forms by clicking on the “Apps” button in the top-right corner of your screen. From there, scroll down and click on “Forms”.
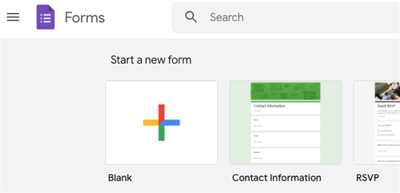
After opening Google Forms, you will be taken to the home page where you can see all the forms you’ve created or the ones that have been shared with you. To create a new form, click on the “+ Blank” button on the top-left corner of the page.
Now it’s time to give your form a title. Click on the “Untitled form” field and enter a descriptive title that summarizes the purpose of your form. You can also add a short description to provide more context to your respondents. Once you’re done, click on the “Next” button to move to the next step.
The next step is to start adding questions to your form. You can choose from a variety of question types, including multiple-choice, short answer, and scale. To add a question, click on the “+ Add question” button. You can also modify the question settings by clicking on the three dots next to each question.
Once you’ve added all the questions you want, you can rearrange them by clicking and dragging the question cards. You can also shuffle the order of the questions by clicking on the “Shuffle questions” button. To preview how your form will look like to respondents, click on the “Preview” button. This will open a new window where you can see a live preview of your form.
After you’ve finished creating and previewing your form, it’s time to choose a theme. Google Forms offers a variety of themes that you can apply to your form to make it visually appealing. To select a theme, click on the “Theme” button on the top-right corner of the page and choose a theme from the list.
Now that your form is ready, you can start sharing it with others. Google Forms provides you with a link that you can send to people to fill out the form. You can find the link by clicking on the “Send” button on the top-right corner of the page. You can also choose to send the form via email or embed it in a website. Google Forms automatically saves all the responses, which you can access by clicking on the “Responses” tab.
That’s it! You’ve now learned how to start Google Forms and create your own survey or questionnaire. With Google Forms, you have a powerful tool at your disposal to gather information and feedback from your customers, colleagues, or anyone else. So go ahead and start creating your first Google Form today!
- How to Use Google Forms
- Step 1: Start a New Form
- Step 2: Customize the Form Title and Description
- Step 3: Add Questions to Your Form
- Step 4: Customize the Form Theme
- Step 5: Send and Share Your Form
- Step 6: Collect and View Responses
- How to make a survey using Google Forms
- Step 1: Create a new Google Form
- Step 2 Name your Google Form survey
- Step 3 Fill in the questions for your survey
- Step 4: Choose how people will answer your questions
- Step 5: Customize the theme
- Step 6 Preview your survey
- Step 7: Send your survey out
- Step 8 Observe the results
- Close Google Form Automatically
- Explore topics related to technology
- Sources
How to Use Google Forms
Google Forms is a powerful tool that allows you to create and distribute surveys, questionnaires, and other types of forms to gather information from your customers, colleagues, or anyone else. In this guide, we will walk you through the step-by-step process of using Google Forms to create a form, customize it to your liking, and view the results.
Step 1: Start a New Form
To start using Google Forms, go to forms.google.com and then click on the “Blank” form option. You will be taken to a new form workspace.
Step 2: Customize the Form Title and Description
The first thing you should do is give your form a title. Click on the “Untitled form” field at the top of the page and enter a descriptive title for your form. You can also add a description to provide more information about the purpose of the form.
Step 3: Add Questions to Your Form
To add a question, click on the “+ Add question” button on the right-hand side of the page. You can choose from a variety of question types, including multiple choice, short answer, and more. Select the one that best suits your needs, fill in the question prompt, and select the response options or specify if it’s a required question.
Step 4: Customize the Form Theme
Google Forms provides different themes to choose from to customize the look and feel of your form. You can select a theme that matches your brand or personal preferences. To do this, click on the “Theme” button located at the top right of the page and choose the theme that you like.
Step 5: Send and Share Your Form
Once your form is ready, you can distribute it to your audience. There are several options available for sharing your form. You can send the form link via email, embed it on a website, or share it through social media platforms. Click on the “Send” button located at the top right of the page to explore these options.
Step 6: Collect and View Responses
As people start filling out your form, you can observe the responses in real-time. Google Forms automatically collects and organizes the data for you. To view the responses, click on the “Responses” tab at the top of the page. There, you can see a summary of the responses, create charts to visualize the data, and even export the responses to a spreadsheet for further analysis.
With these step-by-step instructions, you are now ready to start using Google Forms to create surveys, questionnaires, and other types of forms. Whether it’s for customer satisfaction surveys, product feedback, or any other purpose, Google Forms makes it easy to gather and analyze valuable information.
How to make a survey using Google Forms
To start creating a survey using Google Forms, follow these simple steps:
- Open Google Forms by clicking on the “Forms” option in your Google Account homepage.
- In the top right-hand corner, click on the “+” button to create a new form.
- Choose a title for your survey and add a description that explains what the survey is about.
- Select a theme for your survey by clicking on the “Theme” option. Google Forms offers a variety of pre-made themes, or you can customize the look and feel of your survey by selecting different colors and fonts.
- Add questions to your survey by clicking on the “+” button in the toolbar. You can also import questions from other forms or surveys.
- Customize the settings of your survey, such as whether or not respondents are required to answer certain questions or if they can only provide one response per person.
- Preview your survey to see how it looks and make any necessary adjustments.
- Once you’re ready, click on the “Send” button to send your survey to customers or respondents. You can choose to send the survey via email, share a link to the survey, or embed the survey on a webpage.
Google Forms makes it easy to create surveys on any topic. Whether you’re conducting customer satisfaction surveys, gathering feedback on a product, or just want to gather information on a particular topic, Google Forms provides the tools you need to create professional-looking surveys quickly and easily.
Step 1: Create a new Google Form
To start creating a Google Form, you need to have a Google account. If you don’t have one, you can easily create a new account by going to https://accounts.google.com/signup and following the step-by-step guide provided there.
Once you have your Google account, follow the instructions below to create a new Google Form:
- Go to https://forms.google.com. This is the official website for Google Forms.
- If you are not already signed in to your Google account, you will be prompted to sign in. Enter your email address and password, then click on the “Next” button.
- After signing in, you will be redirected to the Google Forms homepage. Click on the “+ Blank” button, located in the top-left corner, to create a new form.
- The newly created form will open in a new tab. By default, the form will be given a generic title of “Untitled form.” Click on the title to change it to something more descriptive, like “Customer Satisfaction Survey” or “Product Feedback Form.”
- You can customize the form by adding different types of questions. To add a question, click on the “+ Add question” button. You can choose from various question types, such as multiple choice, short answer, paragraph, linear scale, date, and more. Select the question type that best suits your needs.
- For each question, you can provide a title and a description. The title is the main question that you want your respondents to answer, while the description provides additional context or instructions. Make sure to write clear and concise questions that are easy to understand.
- In the settings options, you can choose how respondents answer the question, whether it is required or optional, and even add answer validation if needed. Experiment with the different settings to make sure your form collects the data you want.
- If you want to customize the look and feel of your form, you can select a theme by clicking on the “Theme” button. There are many pre-designed themes available, or you can choose to create your own custom theme.
- Once you’ve finished creating and customizing your form, click on the “Send” button to share it with others. Google Forms provides multiple options for sharing your form, including sending it via email, sharing a link, or embedding it on a website.
- All the responses to your form will be automatically collected and stored in a Google Sheets spreadsheet. You can view the responses by clicking on the “Responses” tab in the form editor. This makes it easy to analyze the data and make informed decisions based on the results.
That’s it! You’ve successfully created a new Google Form. Now you can start sharing it with others and collecting responses. Google Forms is a powerful tool that can be used for a wide range of purposes, so feel free to explore its features and experiment with different question types and settings. Good luck!
Step 2 Name your Google Form survey
Now that you’re ready to create your Google Form, it’s time to give it a name and a description. This is important because it helps you and your customers identify what the survey is about. Here’s how:
- Click on the “Untitled Form” at the top left corner of the page. This will open a small window where you can enter the title and description of your survey. Type in a name that describes the purpose of your survey.
- You can also add a description if you want to provide more information for your customers. This can help them understand what the survey is for and what kind of feedback you’re looking for.
- In this step-by-step guide, we’ll use the example of a customer satisfaction survey for a product. So, you can enter a title like “Customer Satisfaction Survey” and a description like “Please take a few moments to fill out this survey and let us know about your experience with our product.”
- Once you’ve entered the title and description, click on the right-hand side arrows to move to the next step.
By naming your survey, you make it easier to organize and search for later. It also helps to provide a clear direction to your customers about what the survey is about. Now, let’s move on to Step 3: Add questions to your form.
Step 3 Fill in the questions for your survey
In this step, you will create the questions that will be included in your survey. Google Forms provides you with a user-friendly interface to easily add and customize different types of questions.
To begin, open your Google Forms workspace by clicking here. If you don’t have a Google account, you will need to create a new one. Once you’re in the workspace, you can start adding your questions.
Google Forms offers a variety of question types, including multiple-choice, checkbox, short answer, and scale. You can choose the question type that best suits your needs. For example, if you want to gather customer satisfaction data, you could use a scale question where respondents rate their satisfaction on a scale of 1 to 5.
To add a new question, click on the “+” button in the right-hand menu. A new question will appear, and you can choose the type of question you want to add from the options available. You can also duplicate questions, shuffle the order of the questions, or delete questions as needed.
Once you have added a question, you can modify its title, add answer options, and choose the required format. Google Forms provides you with the flexibility to customize your questions to fit your survey goals.
It’s always a good idea to preview your survey before sending it out to customers or respondents. You can do this by clicking on the “Preview” button at the top-right corner of the workspace. This way, you can observe how the form looks and make any necessary changes or improvements.
Google Forms also offers the option to import questions from other forms or surveys you’ve created. This can be helpful if you want to reuse questions or include similar questions in multiple surveys.
Once you’re ready with the questions, you can move on to the next step to customize the theme of your survey.
Step 4: Choose how people will answer your questions
Once you have added all the questions you want to ask in your Google Form, you need to decide how people will respond to them. Google Forms provides many different options for answering questions, ensuring that you can gather the information you need.
To select the answer type for each question, follow these step-by-step instructions:
- Open the Google Form you’ve created by going to forms.google.com.
- In your workspace, you will see a list of all the questions you’ve added. Click on the question you want to select an answer type for.
- A short description of the question will appear, along with options to edit, duplicate, or delete the question. To select an answer type, click on the small arrow next to “Multiple choice” or any other existing answer type.
- A drop-down menu will appear with different answer type options, such as multiple choice, checkbox, text, date, and more. Select the answer type that best suits your needs.
- Depending on the answer type you select, additional options will appear. For example, if you choose “Multiple choice,” you can enter answer choices for respondents to select from.
- You can also use other features like adding images or descriptions for each question. Simply click on the corresponding icons or links to include them in your form.
- Once you’ve selected the answer type and made any necessary adjustments, click on the “Done” button to save your changes.
It’s important to choose the right answer type for each question to ensure that you receive the desired information from your customers or survey respondents. Different question types offer various ways to gather data, such as multiple choice options, text boxes, or date selectors.
By selecting the most appropriate answer types for your questions, you can customize your form to fit your specific needs and make it easy for respondents to provide you with the information you’re looking for.
After you’ve set up the answer types for your questions, you can preview your form to see how it will look to respondents. Click on the “Preview” button on the top-right corner of the page to open a new tab with a preview of your form.
If everything looks good, you’re ready to move on to the next step. If you want to make any further changes, simply go back to the form editor and adjust the settings as needed.
Remember, Google Forms offers a variety of options and settings to help you create surveys or customer satisfaction forms that meet your unique requirements. Take some time to explore the different features and see what works best for your needs.
Now that you know how to choose answer types for your questions, you’re ready to move on to the next step: Step 5: Send your form and collect responses.
Step 5: Customize the theme

After you have chosen the basic design for your Google Form, it’s time to customize the theme to make it your own. By changing the theme, you can create a unique and visually appealing form that is tailored to your specific needs. Here’s how you can customize the theme:
- Click on the “Customize” button in the top right corner of the form workspace. This will open up the customization options.
- In the customization options, you will see different tabs such as “Theme”, “Background”, “Header”, “Questions”, and “Responses”. You can customize each of these tabs to modify the appearance of your form.
- Theme: In the “Theme” tab, you can choose from a variety of pre-designed themes or import your own custom theme. By selecting a theme, you can change the color scheme and font style of your form to match your brand or personal preferences.
- Background: The “Background” tab allows you to set a background image or color for your form. You can choose from Google’s default images or upload your own image.
- Header: In the “Header” tab, you can customize the title and description of your form. This is the text that will appear at the top of your form and provide a brief overview of what the form is about.
- Questions: The “Questions” tab allows you to modify the format and layout of your questions. You can choose from options like multiple choice, checkboxes, short answer, and more. You can also add new questions or delete existing ones.
- Responses: In the “Responses” tab, you can customize how the responses to your form are displayed. You can choose to show a summary of responses on the form’s homepage or wait until the form is closed before showing the results. You can also set up an email notification to be sent to you every time someone fills out the form.
- Preview your customized form by clicking the “Preview” button. This will allow you to see how your form looks before you share it with others.
- Once you are satisfied with your customization, click on the “Send” button to get the link to your form. You can then share this link with customers, colleagues, or anyone else you want to fill out the form.
Customizing the theme of your Google Form is a crucial step in creating a professional and user-friendly survey or feedback form. By following these step-by-step instructions, you can modify the design and layout of your form to make it visually appealing and easy to navigate for your respondents.
Step 6 Preview your survey
After you have created your survey, it’s important to preview it before sending it out to your customers. This will allow you to observe how the survey looks and make any necessary changes or customizations.
To preview your survey in Google Forms, follow these step-by-step instructions:
- Go to formsgoogle.com and select the form you want to preview.
- Click on the “Preview” button located at the top right-hand corner of the page.
- A new tab will open with a preview of your survey. Take the time to carefully go through each question and answer option to ensure everything is in order.
- If you would like to make any changes, you can do so by clicking the “Close” button on the top right-hand corner of the preview tab. This will take you back to the editing page where you can make the necessary modifications.
- Once you are satisfied with how your survey looks, go back to the preview tab and click on the “Close” button again to close the preview and return to the editing page.
- You can also preview the survey by clicking on the “Preview” link located right under the form title on the editing page.
- When previewing the survey, you can navigate through the questions using the arrow buttons located at the bottom right-hand corner of the preview window.
- To see how the survey will look with real responses, click on the “Send” button at the top right-hand corner of the editing page and choose the “Send via email” option. You can then enter your own email address to receive a test email with a link to the survey.
- Previewing your survey is important to ensure that everything is set up correctly and that it looks appealing to your customers. It is always a good idea to get feedback from others as well to see if they find it easy to navigate and fill out.
By previewing your survey, you can make any necessary adjustments to ensure that it is user-friendly and provides a positive experience for your customers. This step-by-step process is crucial in creating effective surveys that yield the most useful responses.
Step 7: Send your survey out

Once you’ve created your survey using Google Forms, you’re ready to send it out to your respondents. Here are the steps:
Select your survey
In your Google Forms workspace, choose the survey you want to send out. If you have many surveys, use the search bar or scroll through the list to find the survey you want to work on.
Customize your survey
If you want to customize your survey, you can do that before sending it out. Click on the title of the survey to open the customization options. You can change the theme, add an image, or customize the description to make it more appealing to your respondents.
Select the send options
Once your survey looks the way you want it to, click on the “Send” button at the top right of the page. This will open a panel with different send options for your survey.
Email your survey
If you want to send your survey via email, select the “Email” option. You can enter the email addresses of your respondents and customize the email message. You can also choose to send the survey as a link or as an attachment. Keep in mind that if you choose to send it as a link, your respondents will need to have access to the internet to complete the survey.
Get a link to your survey
If you want to get a link to your survey that you can share with your respondents yourself, select the “Get a link” option. This will give you a unique URL that you can copy and paste to send in an email or share on social media.
Observe responses in real-time
When you send out your survey, you can observe the responses in real-time. Every time someone completes your survey, the results will be automatically added to your responses. You can view the responses by clicking on the “Responses” tab in your Google Forms workspace.
Duplicate your survey
If you want to send out multiple copies of the same survey, you can duplicate it. Click on the “More” menu (represented by three dots) next to the send button and select “Duplicate.” This will create an identical copy of your survey that you can send out separately.
Preview your survey
Before sending out your survey, it’s always a good idea to preview it to make sure everything looks as expected. You can do this by clicking on the “Preview” button at the top right of the page. This will show you how your survey will appear to your respondents.
That’s it! You’ve successfully learned how to send your survey out using Google Forms. Now you can gather valuable feedback, conduct surveys, and measure customer satisfaction with ease.
Step 8 Observe the results
Once you have created and customized your Google Form, it’s time to start collecting responses. After sharing your form with others, you can sit back and observe the results as they come in. Here is how you can do it:
- Go to the homepage of Google Forms and select the form you want to view the responses for.
- In the form workspace, click on the “Responses” tab at the top of the page.
- Here, you will see a summary of the responses received so far. You can see how many people have responded, the date and time of each response, and a link to view the individual responses.
- You can also use the options here to view responses in different formats, like in a spreadsheet format or as a summary chart.
- If you want to preview how the form looks like to respondents, you can click on the “Preview” button, which will show you a live preview of the form.
- If you have set up an email notification for new responses, you will receive an email every time someone submits a response.
- If you want to go back and make any changes to your form, you can do so by selecting the “Edit” button. Remember that any modifications you make to the form will only apply to new responses and will not affect the ones that have already been submitted.
- By observing the responses, you can gather valuable insights and analyze the data to draw conclusions.
Observing the results is a crucial step in utilizing Google Forms effectively. It allows you to see patterns, trends, and gather meaningful data on the topic or questions that you are interested in. Whether you are doing surveys, collecting feedback, or conducting polls, analyzing the responses will help you make informed decisions or understand the needs and preferences of your audience better.
Close Google Form Automatically
If you want to close your Google Form automatically after a certain number of responses or a specific date and time, there is a simple process to follow. By default, Google Forms are always open for responses until manually closed by the form owner. However, there may be situations where you want to limit the number of responses or set a specific deadline for collecting responses.
To close your Google Form automatically, follow these steps:
- Open your Google Form. If you don’t have one ready, create a new form by clicking on the “+ New” button in your Google Workspace or by going to docs.google.com/forms.
- Fill in the necessary details for your form such as the title, description, and any questions you want to include. You can also customize the theme, format, and settings of your form according to your preferences.
- Once you have everything set up, click on the “Responses” tab at the top of the form builder.
- On the “Responses” tab, you will see a small gear icon representing the settings. Click on it to open the settings menu.
- In the settings menu, you will find the option to limit the number of responses or set a closing date and time for your form. Select the option that suits your requirement.
- If you choose to limit the number of responses, enter the desired number in the “Limit each user to” field. By default, there is no limit per user, so you can input any value you want. Once the specified number of responses is reached, the form will automatically close for each user.
- If you choose to set a closing date and time, click on the calendar icon next to the “Collect responses until” field. Select the date and time when you want the form to close. After the specified date and time, the form will no longer accept responses.
- Once you have selected your preferred option, click on the “Save” button to apply the changes.
By following these steps, you can easily close your Google Form automatically based on the number of responses or a specific date and time. This feature comes in handy when you only want a limited number of responses or need to collect responses within a specific timeframe.
Explore topics related to technology
When it comes to technology, there are many different themes and subjects to explore. Whether you are interested in learning about the latest advancements in artificial intelligence or want to dive into the world of web development, there is something for everyone. Here are some topics to consider:
- 1. Google Forms: Learn how to create forms using Google Forms. Follow a step-by-step guide on how to start and fill out a form, select different question types, and customize the appearance to match your needs.
- 2. Customer surveys: Discover how to create and send customer surveys to gather feedback and improve your products or services. Find out how to design effective survey questions and analyze the results to make informed decisions.
- 3. Technology trends: Stay up to date with the latest technology trends, such as artificial intelligence, blockchain, or virtual reality. Explore how these technologies are shaping various industries and what the future holds.
- 4. Technology in different cultures: Learn about how technology is used in different cultures around the world. From the tech-savvy culture in China to the rapid advancements in Silicon Valley, discover the role technology plays in various societies.
- 5. Tech tips and tricks: Find useful tips and tricks to improve your technology skills. Learn how to troubleshoot common issues, optimize your devices, or streamline your workflow using various tools and software.
- 6. Tech terminology: Familiarize yourself with the terminology commonly used in the technology industry. From programming languages to hardware components, understanding these terms will help you navigate the tech world with ease.
- 7. Tech news and updates: Stay informed about the latest news and updates in the technology industry. Follow reputable sources to get insights into new product launches, software updates, and industry trends.
By exploring these topics, you can deepen your understanding of technology and its impact on various aspects of our lives. Whether you are a tech enthusiast or just curious about the latest advancements, there is always something new to learn!
Sources
When it comes to using Google Forms, there are several sources you can refer to for information and help. Whether you prefer step-by-step guides or video tutorials, these sources will provide you with the knowledge you need to get started and make the most out of Google Forms.
-
Google Forms Help Center: The official Google Forms Help Center is a great place to start. It covers everything from creating a form to analyzing the results. You can find answers to frequently asked questions and explore different features and options.
-
Google Forms Support Page: On the Google Forms Support page, you will find helpful resources and articles related to various topics concerning Google Forms. It provides detailed information on how to use different functionalities and customize your forms to suit your needs.
-
Google Forms Community: The Google Forms Community is a platform where users can connect and share their experiences and knowledge. It’s a great place to ask questions and learn from other users who have already mastered Google Forms.
-
Online Tutorials and Guides: There are many online tutorials and guides available that walk you through the process of creating and using Google Forms. Websites like NDSU’s Google Forms Guide provide step-by-step instructions, tips, and tricks for creating effective surveys and forms.
By exploring these sources, you will gain a better understanding of Google Forms and how to utilize its features. Whether you’re using it for customer satisfaction surveys, collecting feedback, or anything else, these sources will provide you with the necessary knowledge to create and distribute your forms effectively.


