

Are you a content creator on YouTube? Then you’re probably familiar with the importance of having eye-catching and professional-looking artwork for your channel. A well-designed YouTube banner can not only attract more viewers but also give your channel a polished and stylized look that sets it apart from the rest. If you’re wondering how to create the best YouTube banner for your channel, we’re here to help. In this guide, we’ll take you through the process of creating and uploading a custom YouTube banner, step by step. So let’s dive in and give your channel the attention it deserves!
The first step in creating your YouTube banner is selecting the right size and position. YouTube banners are displayed at the top of your channel page, so it’s important to choose the correct dimensions. The recommended size for YouTube banners is 2560 pixels wide by 1440 pixels tall. You can also choose to add a safe area of 2048 pixels wide by 1152 pixels tall, which indicates the space that will be visible on all devices, including mobile. Keep in mind that the position of the banner may vary depending on the screen size and device, so it’s essential to consider how your banner will look on different platforms.
Once you have determined the size and position of your YouTube banner, it’s time to open your favorite image editing software. There are many options available, from professional tools like Adobe Photoshop to free alternatives like GIMP. Choose the software that you’re most comfortable with and open a new document with the dimensions of your YouTube banner. This will be the canvas on which you’ll create your artwork.
Now that your canvas is ready, it’s time to let your creativity shine! Add images, text, and graphics that represent your channel’s theme or content. Give careful consideration to the colors, fonts, and overall design to ensure that your banner reflects your brand. Remember, your YouTube banner serves as an advertisement for your channel, so make sure it looks professional and visually appealing.
Once you’re happy with your YouTube banner design, it’s time to save your masterpiece. Click on the “Save” option in your chosen image editing software and select a file format that supports transparency, such as PNG. This will preserve the quality of your banner and allow it to blend seamlessly with the background of your channel page.
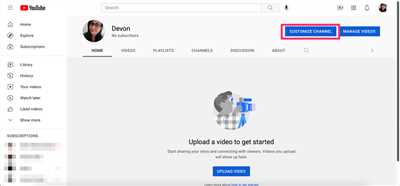
With your YouTube banner successfully created and saved, it’s time to upload it to your channel. Open YouTube in your browser and sign in to your account. Navigate to your channel’s homepage, click on the “Customize Channel” button, and then select the “Customize Channel Art” option. You will be prompted to upload a new image, so click on the “Upload” button and select the YouTube banner file you saved earlier. Once the upload is complete, you can adjust the position and size of your banner using the provided tools.
Now that you know how to create and upload a YouTube banner, it’s time to give your channel a fresh new look. Put your artistic skills to use and design a banner that reflects your brand and captures the attention of viewers. Remember, a well-designed banner can make a world of difference in attracting new subscribers and keeping them engaged with your content. So don’t underestimate the power of a great YouTube banner!
How to size and upload a YouTube banner to give your channel custom art

Having a custom banner for your YouTube channel can give it a professional and personalized touch. In this guide, we will walk you through the steps of how to size and upload a YouTube banner to give your channel custom art.
- First, you need to create your banner. There are many sources available online where you can find free or paid banners that fit the YouTube banner size requirements. LinkedIn, for example, offers a variety of pre-designed banners that you can choose from.
- Once you have found a banner that you like, you will need to resize it to fit the YouTube banner dimensions. The ideal size for a YouTube banner is 2560 pixels wide and 1440 pixels tall. You can use an image editing software like Photoshop or an online tool like Canva to resize your banner.
- After resizing your banner, save it in a format that YouTube supports, such as JPEG, PNG, or GIF.
- Next, go to your YouTube channel. Click on the user icon in the top right corner and select “YouTube Studio” from the dropdown menu.
- In the YouTube Studio, click on “Customization” in the left sidebar and then select “Basic Info” from the dropdown menu.
- Scroll down to the “Customize the layout of your channel” section and click on the pencil icon next to the “Banner” section.
- A popup window will appear. Click on the “Edit” button to open the banner editor.
- In the banner editor, click on the “Upload” button to upload your resized banner image.
- Once the upload is complete, you can position your banner by clicking and dragging it to the desired location.
- If you want to add some stylized text or images to your banner, you can do so by clicking on the respective options in the banner editor.
- When you’re happy with the changes, click on the “Save” button to apply the new banner to your channel.
- Keep in mind that your banner may look different on different devices. YouTube indicates the safe area for your banner, which is the part of the banner that will be visible on all devices. Make sure that your important content is within this safe area.
- After uploading your banner, check how it looks on both desktop and mobile devices to ensure that it is displayed correctly.
Following these steps will help you upload a custom YouTube banner that reflects your channel’s style and gives it a professional look. Carefully select or create an art that represents your brand or the theme of your videos, and make sure to check how it appears on different devices to ensure the best viewing experience for your viewers.
Best YouTube banner size
When it comes to creating a YouTube banner, the size is an important factor to consider. The size of the banner indicates how it will appear on different devices and screens. If the size is too small, it may not give the desired impact, and if it’s too large, it may not be fully visible on certain devices.
The best YouTube banner size is 2560 x 1440 pixels. This size ensures that your banner will look great on all devices, including desktop and mobile. YouTube allows you to upload banners of larger sizes, but it will automatically be resized to fit the channel’s art area.
If you’re creating a new banner, you can use various tools and software to help you design it. There are online tools like Canva and Adobe Spark that provide pre-made templates, giving you the ability to customize your banner according to your channel’s theme and branding.
When uploading your banner, make sure to add a stylized image or artwork that represents your channel. This will help create a visually appealing and unique advertisement for your channel.
To upload a custom banner, open your YouTube channel and click on the Edit icon. Select the “Customize channel” option. On the left-hand side, click on the “Layout” tab, then click on the “Add channel art” link. Carefully select the image you want to use as your banner and click “Open”. You can then position the image to your liking and click “Select” to upload.
Keep in mind that the positioning of your banner will vary on different devices. To ensure that important parts of your banner aren’t cut off, be sure to carefully position the image within the provided guide. You can preview how your banner will look on desktop and mobile before uploading.
In conclusion, the best YouTube banner size is 2560 x 1440 pixels. By following these guidelines and taking care in selecting and positioning your banner image, you can create an eye-catching banner that will help give your channel a professional and inviting look.
How to Add the New Banner to Your YouTube Channel

Adding a new banner to your YouTube channel is a great way to give your entire channel a fresh and customized look. The banner, also known as the channel art, will be displayed at the top of your channel’s page and can help to attract more viewers to your videos.
To add the new banner to your YouTube channel, follow these simple steps:
- First, open your YouTube channel and click on the “Customize Channel” button. This button is indicated by an icon that looks like a paintbrush.
- Once you’re in the customization menu, click on the “Channel Art” tab. This will open a new window where you can upload your banner.
- Click on the “Select a photo from your computer” button to choose an image for your banner. Make sure that the image you select is the right size for YouTube banners.
- After selecting the image, you will have the ability to position the banner on your channel. You can drag and drop the image to adjust its position.
- Once you’re satisfied with the position of your banner, click on the “Save” button to upload it to your channel.
It’s important to note that YouTube banners have different sizes for desktop and mobile devices. When uploading your banner, YouTube will automatically adjust its size to fit both types of screens.
If you want the best results, it’s recommended to create different versions of your banner for desktop and mobile. This will ensure that your banner looks great no matter what device your viewers are using.
Here’s a tip: avoid using banners that are too busy or cluttered. A clean and simple design will work best for channel art, as it will not distract your viewers from your videos.
By following these steps, you will be able to add the new banner to your YouTube channel and give it a fresh and professional look. So go ahead and customize your channel, and watch as your new banner attracts more viewers to your vlog or advertisement!
Sources
When it comes to creating a YouTube banner, there are a few sources you can use to find the perfect image for your channel. First, you can search for images on websites like Google Images or Shutterstock. These websites have a wide variety of options and you can filter your search to find an image that matches your style and theme.
If you’re looking for custom artwork, you can hire a graphic designer or illustrator to create a personalized banner for your channel. Websites like Fiverr or Upwork are great resources to find talented artists who can help bring your vision to life.
Another option is to use stock images or templates available on websites like Canva or Adobe Spark. These platforms provide a range of pre-made designs that you can customize with your own text and images. They have tools and features to help you position and stylize your banner to give it a professional look.
If you want to link your banner to other social media platforms, such as LinkedIn or your vlog’s website, you can use the “Edit Links” section on your YouTube channel’s homepage. This will allow you to add custom links to your banner, giving viewers the ability to click and navigate to these other platforms.
When uploading your banner, it’s important to consider the size and dimensions required. YouTube recommends a size of 2560 x 1440 pixels, with a maximum file size of 6MB. Be sure to select an image that does not get cut off or distorted when viewed on different devices, such as mobile phones or tablets.
Here’s a step-by-step guide on how to upload and add a banner to your YouTube channel:
- First, open your YouTube channel and click on the “Customize Channel” option.
- Then, click on the “Add channel art” button.
- Select the image you want to use as your banner from your computer or from the sources mentioned above.
- Position and adjust the image to your liking using the tools provided.
- Once you’re happy with the placement, click “Select” to upload the image.
- The uploading process may take a few moments, and a progress bar will indicate how much of the upload is complete.
- After the upload is complete, you will be able to see a preview of how your banner will look on different devices.
- Take care to ensure that important parts of your banner, such as text or logos, are not covered by profile pictures or advertisements.
- Finally, click “Done” to save your changes and make your new banner live on your channel.
These sources and steps will help you create and upload a YouTube banner that represents your channel and gives it a professional and stylized look.


