

If you want to visualize the flow of a process or a system, creating a flowchart is a great way to do it. A flowchart is a visual representation of a sequence of steps or actions, which can be used to explain a complex process in a clear and easy-to-understand way. In this article, we will guide you through the steps needed to draw a flowchart, from the basic rules and principles to the advanced techniques.
Before you start creating your flowchart, there are a few things you need to know. First, you’ll need a good flowchart maker or software. There are many options available online, such as Gliffy, Lucidchart, and Microsoft Office Visio. Choose the one that best suits your needs and budget.
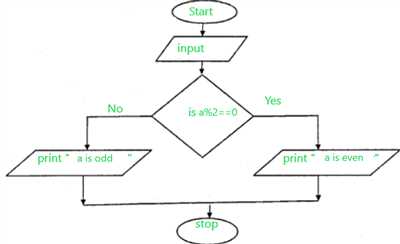
Next, you should have a clear understanding of the flowchart symbols and their meanings. Flowchart symbols are shapes that represent different types of activities or processes. For example, the rectangle shape is used to represent a process or an action, the diamond shape is used to represent a decision or a branching point, and the oval shape is used to represent the start or end of a flowchart.
Once you have the necessary tools and knowledge, you can start creating your flowchart. Begin by placing the first process or action at the top left of the page. From there, draw arrows to connect each step in the process. Use different shapes and colors to represent different types of activities or processes. This will make your flowchart more visually appealing and easier to follow.
As you create your flowchart, be sure to add a title or a statement that describes the process or system you are illustrating. This will help the reader understand the purpose of the flowchart. Also, include any necessary input or output data that may be required to complete each step in the process.
In the next section of this article, we will show you an example flowchart and explain each step in detail. We will use the Mermaid flowchart syntax, which is a popular choice for creating flowcharts. Mermaid is a simple and easy-to-learn language that allows you to create professional-looking flowcharts without the need for any special software or design skills. Below is an example flowchart that shows the process of designing a floor plan for a park:
- Flowcharting Tutorial Create Flowcharts Online With Gliffy
- Table of Contents
- How to draw flowcharts
- Software for drawing professional-look flowchart
- Examples of Flowcharts, Org Charts, and More →
- Building Floor Plan Example
- Org Chart Example
- Building Drawing Software for Design Office Layout Plan →
- Samples of Flowchart →
- How To use House Electrical Plan Software →
- Flow Chart Symbols →
- Restaurant Floor Plans Samples →
- Org Chart Diagram →
- Business process Flow Chart – Event-Driven Process chain EPC diagrams →
- Video:
- Introduction to Creating Flowcharts
Flowcharting Tutorial Create Flowcharts Online With Gliffy
Creating flowcharts can be an essential process in many businesses and organizations. Flowcharts help to understand and document the flow of processes, activities, and inputs, making it easy to follow and explain. In this tutorial, we will show you how to create professional-looking flowcharts using Gliffy, an online diagramming tool.
Gliffy provides a user-friendly interface that allows you to draw flowcharts with ease. You can start by dragging and dropping shapes onto the canvas to represent your processes, actions, or inputs. Gliffy offers a wide range of shapes to choose from, such as rectangles, diamonds, and arrows. You can also customize the color, size, and layout of these shapes to fit your needs.
For example, let’s say you are designing a flowchart for a restaurant. You can use shapes to represent processes like taking orders, preparing food, and serving customers. Arrows can be used to show the flow of these processes, such as when an order is received, the kitchen starts preparing the food, and the food is served to the customer. You can also use diamonds to represent decision points, such as when a customer wants to order a specific dish or request a modification.
Once you have placed the shapes on the canvas, you can connect them using lines or arrows to represent the flow of the processes. Gliffy provides an intuitive interface for connecting shapes, and you can easily adjust the position and style of the connectors to make your flowchart clear and easy to understand.
In addition to shapes and connectors, Gliffy also offers inline text editing, so you can add labels, descriptions, or explanations to your flowchart. This is especially helpful when you need to provide more detail or clarify certain points.
Gliffy also allows you to save your flowcharts as images or PDFs, making it easy to share them with others or embed them in documents or presentations. You can also collaborate with others by inviting them to contribute to your flowchart or by sharing a link to your work.
In conclusion, Gliffy is a powerful tool for creating flowcharts. Whether you are building electrical diagrams, floor plans, or business process flows, Gliffy provides all the necessary features to help you create professional-looking flowcharts quickly and easily. So, go ahead and give it a try!
Table of Contents
In this article, we will jump into the following topics:
- The plan: how to draw a flowchart
- The best diagramming tools to help you
- The helpful chain of flowchart symbols
- The layout and config for a professional-look
- The general rules for flowcharting
- A tutorial on drawing flowcharts in RFFlow
- Office flowchart examples for various processes
- Event-driven flowcharts for decision management
- Understanding flowcharts in electrical engineering
- The use of flowcharts in the restaurant business flow
- Using flowcharts for user flow and document understanding
- Flowchart libraries and examples for different industries
- Drawing flowcharts with colored shapes and symbols
- The creation of flowcharts using inline mermaid
- The flowchart maker with templates and samples
- Flowchart examples for a floor plan of an office
- Flowchart examples for the design of furniture
- Flowchart examples for an electrical circuit diagram
- Some clear examples for drawing floor plan diagrams
- The process of drawing flowcharts in a business environment
Throughout this article, we will provide step-by-step instructions, tips, and tricks to help you draw flowcharts effectively.
How to draw flowcharts
Flowcharts are visual representations of the flow of a process or system, often used in business and management. They are useful for representing algorithms, decision making, and workflow. Drawing a flowchart can help you document, understand, and communicate complex processes or systems.
Here are the steps to draw a flowchart:
- Identify the process or system you want to represent in the flowchart. It could be anything, such as a business process, a management flow, or a restaurant ordering system.
- Think about the main steps or actions involved in the process. Write them down in a list. These steps will be represented as shapes in the flowchart.
- Decide on the appropriate flowcharting shapes to represent each step or action. There are different shapes you can use, such as rectangles for processes, diamonds for decisions, and circles for connectors.
- Draw the flowchart using a flowcharting software or by hand. If using software, you can find many options online, such as RFFlow, which provides pre-made shapes and templates. If drawing by hand, use a pencil to draw the shapes and then draw arrows to connect them.
- Add detail to the flowchart as needed. You can include any additional information, such as data inputs, decision statements, or specific actions to be taken.
- Use colors and labels to enhance the flowchart. Colored shapes or lines can help differentiate different sections or branches of the flowchart.
- Save your flowchart for future reference or to share with others. You can save it as a digital file or print it out if needed.
When drawing a flowchart, it’s important to follow a logical flow from left to right or top to bottom. This helps ensure that the flowchart is easy to read and understand. However, there may be cases where a different flow direction is more appropriate, especially for complex processes.
Flowcharts can be a valuable tool for visualizing and understanding processes or systems. They can be used to document existing processes, design new processes, or communicate process flows to others. Whether you are working on a basic business flow or a detailed algorithm, flowcharting can help you organize your thoughts and create clear and concise diagrams.
Below is an example of a flowchart that shows the process of ordering food at a restaurant:
| Start | Customer enters the restaurant |
| Process | Customer is seated |
| Process | Waiter takes the order |
| Decision | Is the item available? |
| Process | Prepare the food |
| Process | Serve the food |
| End | The customer enjoys the meal |
In this example, the flowchart starts with the customer entering the restaurant and ends with the customer enjoying the meal. Each step is represented by a shape in the flowchart, and arrows show the flow of the process.
Flowcharts can be as simple or as complex as needed, depending on the level of detail required. They can also be used in various industries and fields, such as software development, electrical engineering, or building construction. Whatever the case may be, flowcharts are a helpful tool for understanding and visually representing processes.
Software for drawing professional-look flowchart
When it comes to creating flowcharts, having the right software can make all the difference. There are many options available that can help you quickly and easily create professional-looking flowcharts, whether you are a beginner or an experienced user.
One popular choice is flowcharting software, which allows you to write out the process steps and visually represent them with flowchart symbols. This software often includes features that make it easy to create and edit flowcharts, such as drag-and-drop functionality and predefined flowchart symbols.
Microsoft Office also provides software that includes flowcharting capabilities. Programs like Microsoft Visio allow you to create flowcharts using general flowchart symbols, along with other chart types like organizational charts and process diagrams. These programs often provide templates and stencils to help you get started quickly.
In addition to dedicated flowcharting software, there are also online tools available that allow you to create flowcharts without needing to download or install anything. These tools often provide a user-friendly interface and a wide range of flowchart symbols and templates to choose from.
When creating a flowchart, there are some rules and best practices to keep in mind. Flowcharts should be clear and easy to follow, with each step and decision clearly labeled. It is important to use the appropriate flowchart symbols for each action or statement, such as a circle for a start or end point, a rectangle for a process or action, and a diamond for a decision point.
Flowcharts often include arrows to indicate the flow of the process. These arrows can be either straight lines or curved lines, depending on the desired visual effect. Arrows can also be used to show jumps or references to another page or section of the flowchart. Additionally, it is common to use different line types or colors to differentiate between different types of activities or flow paths.
When using flowcharting software, you can create flowcharts by dragging and dropping symbols onto the canvas and connecting them with arrows or lines. The software will usually provide tools to help you align and format the flowchart elements, as well as add text or other details to the diagram.
For example, let’s say you are designing a flowchart for a building construction project. You can start by using a rectangle to represent the floor plans and then use different symbols and line types to represent the various activities and decisions that must be made during the construction process.
In conclusion, there are many software options available to help you create professional-looking flowcharts. Whether you choose dedicated flowcharting software, Microsoft Office programs, or online tools, the key is to find a software that meets your needs and provides the necessary features and ease of use to help you create clear and effective flowcharts.
Examples of Flowcharts, Org Charts, and More →
Flowcharts are an excellent way to visually represent the flow of a process, action, or activities. They help teams understand and explain complex processes in a clear and easy-to-understand manner. Whether you need to create a flowchart for a business plan, document a software design, or simply draw a flowchart for a general understanding, these examples will jump-start your flowcharting process.
In the sections that follow, we will list several examples of flowcharts and org charts that you can use as a helpful guide when creating your own. From simple flowcharts to more complex diagrams such as the EPC (Event-driven Process Chain), you will find a variety of examples to suit your needs.
Building Floor Plan Example
One example of a flowchart is a building floor plan. This type of flowchart is often used in architecture, engineering, and office layout design. It shows the flow of activities and processes related to the creation of a floor plan for a building. The flowchart is created using shapes and symbols such as rectangles, circles, and arrows to represent different actions or statements.
To draw a building floor plan flowchart, you can use flowcharting software or simply draw it manually on paper. If you are using software, you can find pre-made shapes and symbols in a stencil, then drag and drop them onto the page. If you prefer to draw it manually, you can use a ruler and a pencil to create the shapes and lines needed.
Here is a simplified example of a building floor plan flowchart:
- Start by drawing a square shape to represent the building’s entrance.
- Connect the entrance shape to a rectangular shape representing the main lobby.
- From the lobby, draw lines to represent different areas of the building, such as offices, conference rooms, and restrooms.
- Label each shape with text to indicate the purpose of each area.
- Use colored shapes or numbers to indicate the flow of movement through the building.
- Add any necessary notes or additional details to clarify the flowchart.
- End the flowchart with an end or exit shape to represent the end of the building layout.
By following these steps and using the appropriate shapes and symbols, you can create a clear and easy-to-understand flowchart of a building floor plan.
Org Chart Example
An org chart, or organizational chart, is another type of flowchart that represents the hierarchical structure of an organization. It shows the relationships and reporting lines between different departments, teams, and individuals within an organization. Org charts are commonly used in business settings to visualize the chain of command and understand the overall structure of the organization.
Creating an org chart is similar to creating other flowcharts, but with specific shapes and rules to follow. Here is an example of how to create an org chart:
- Start with a rectangular shape at the top of the page to represent the CEO or head of the organization.
- From the CEO shape, draw lines downwards to represent different departments or teams within the organization.
- For each department or team, add rectangular shapes to represent individual employees or team leaders.
- Connect the employees or team leaders to the respective departments or teams using lines or arrows.
- Label each shape with the name and title of the employee or team leader.
- Use different colors or shading to indicate different levels of the hierarchy.
- Add any additional details or notes as needed to clarify the org chart.
- End the org chart with a clear indication of the overall structure and reporting lines.
By following these steps and using the appropriate shapes and symbols, you can create a visually appealing and informative org chart to represent the structure of any organization.
Flowcharts and org charts are just a few examples of the many types of flowcharts you can create. Whether you need to represent processes, algorithms, or any other kind of flow, flowcharts are a powerful tool for visualizing and understanding complex information. With the help of flowcharting software and the right approach, you can create clear and effective flowcharts that will be helpful for teams and individuals alike.
Building Drawing Software for Design Office Layout Plan →

Building drawing software is an essential tool for creating detailed office layout plans. Whether you’re an architect, interior designer, project manager, or someone looking to redesign their office space, having the right software can make the design process much easier and more efficient.
One popular option for creating office layout plans is Gliffy. Gliffy is an online diagramming tool that allows users to create clear and detailed flowcharts, diagrams, and other visual representations. With Gliffy, you can easily develop a layout plan by placing furniture, equipment, and other elements on a virtual canvas.
Gliffy comes with a variety of pre-built templates and samples, including office layout plans, which can serve as a starting point for your design. You can also use Gliffy’s extensive library of shapes, symbols, and stencils to add detail and clarity to your design.
When creating an office layout plan, it’s important to consider the flow of the space. This means thinking about how people will move through the office, where they will enter and exit, and where key points of interaction will occur. A good office layout plan should facilitate productivity and collaboration by creating clear paths and designated areas for different activities.
In addition to designing the physical layout of the office, building drawing software can also be used to document electrical and management systems. For example, you can use the software to create diagrams of the electrical wiring or document the implementation of management rules and algorithms.
During the design process, building drawing software can help you make important decisions and visualize the impact of different choices. For example, you can use the software to create multiple versions of your layout and compare them side by side. This can be especially helpful for larger projects, such as designing a restaurant or a shopping mall.
Whether you’re a professional designer or someone looking to redesign their office space, using building drawing software can save you time and effort. With the right software, you can create detailed and professional office layout plans that not only look good on paper but also facilitate productivity and collaboration in the real world.
So, if you’re looking to design an office layout plan, consider using building drawing software such as Gliffy. With its user-friendly interface, extensive library of shapes and symbols, and helpful templates, Gliffy can help you create a clear and detailed flowchart that represents your vision for the office space. Don’t wait any longer – start designing your dream office layout plan today!
Samples of Flowchart →
Flowcharts are a helpful tool for designers, programmers, and anyone looking to visualize a process or plan. They can be used to explain complex concepts, outline a series of actions, or map out the flow of information. In this article, we will provide some samples of flowcharts to help you better understand how to draw them.
One common type of flowchart is a basic flowchart, which uses simple shapes such as circles, squares, and diamonds to represent different actions or activities. For example, a flowchart can be used to document the steps involved in creating a new document, designing a website, or planning a project.
Another type of flowchart is an electrical flowchart, which is often used to diagram the flow of electricity through different components or systems. These flowcharts typically include symbols for various electrical components, such as resistors, capacitors, and switches.
In addition to these basic flowcharts, there are also more specialized types of flowcharts that can be used for specific purposes. For example, an EPC (event-driven process chain) flowchart is often used to model and analyze business processes, while a data flow diagram can be used to show how data moves through different parts of a system.
Flowchart software can be a useful tool for creating professional-looking flowcharts. There are many online tools and software libraries available that provide pre-made flowchart stencils and templates, which can be easily customized to meet your specific needs.
Below are some samples of flowcharts that you can use as a starting point for your own flowchart designs:
- House Floor Plan Flowchart: This flowchart demonstrates the steps involved in designing a floor plan for a house. It includes actions such as measuring the space, drawing the layout, and selecting furniture.
- Restaurant Ordering Process Flowchart: This flowchart outlines the steps involved in taking and delivering customer orders in a restaurant. It includes actions such as taking the order, entering it into the system, and delivering the food.
- Office Document Approval Flowchart: This flowchart shows the process for approving and reviewing documents in an office setting. It includes actions such as creating the document, sending it for review, and final approval.
- Park Layout Flowchart: This flowchart demonstrates the steps involved in designing the layout of a park. It includes actions such as selecting the location, planning the features, and organizing the layout.
These samples should give you a better understanding of how flowcharts can be used to visually represent different processes or plans.
In conclusion, flowcharts are a powerful tool for visualizing information and can be used in a variety of contexts. Whether you are designing a website, planning a project, or documenting a business process, flowcharts can help you create clear and concise diagrams that are easy to understand. So, why wait? Start drawing your own flowcharts today!
How To use House Electrical Plan Software →
If you are planning to design the electrical plan for your house, using a house electrical plan software can greatly simplify the process. In this section of the article, we will explain how to use such software to create professional-looking electrical plans for your house.
1. Start by downloading and installing a house electrical plan software, such as Gliffy or Lucidchart. These software tools are easy to use and provide a wide range of symbols and templates specifically designed for creating electrical plans.
2. Once the software is installed, open a new page or document to begin your electrical plan. The software usually provides a blank canvas or a pre-designed template for you to work with.
3. Familiarize yourself with the symbols and shapes available in the software. These symbols represent various electrical components and can be easily dragged and dropped onto the canvas to create your electrical plan.
4. To create a professional-looking electrical plan, it is important to use proper flowcharting symbols and follow a logical flow. Start by adding the main electrical panel and then connect it to the various electrical outlets and switches throughout the house.
5. Use different colors or line styles to represent different types of electrical connections or circuits. This will make it easier to understand and follow the electrical plan.
6. Use text labels to provide additional information or clarify certain components or connections in the electrical plan. These labels can help others understand your plan and can be especially helpful if you need to explain the plan to an electrician or contractor.
7. As you work on your electrical plan, regularly save your progress to avoid losing any work. The software usually has a “Save” button or a auto-save feature.
8. Once your electrical plan is complete, review it for accuracy and clarity. Make sure all the connections and components are properly represented and labeled.
9. Finally, save your completed electrical plan as a PDF or a high-resolution image file. This will allow you to easily print or share your plan with others.
By following this step-by-step tutorial, you can create a detailed and professional-looking electrical plan for your house using house electrical plan software. Whether you are planning to do the electrical work yourself or seeking professional help, having a clear and detailed plan is essential for ensuring a successful electrical installation.
Flow Chart Symbols →
In the field of process engineering, flow charts are used to represent the steps and activities involved in a process or system. These charts provide a visual representation of the flow of information or materials, making it easier to understand and explain complex processes.
There are various symbols that are commonly used in flow charts to represent different activities or actions. Here are some of the most commonly used flow chart symbols:
- Start/End – Represents the start or end of a process or system. This symbol is usually represented by a circle.
- Process – Represents a specific action or activity that takes place within the process. This symbol is usually represented by a rectangle.
- Decision – Represents a decision that needs to be made within the process. This symbol is usually represented by a diamond.
- Input/Output – Represents the input or output of data or information within the process. This symbol is usually represented by a parallelogram.
- Connector – Represents a connection or link between different sections of the flow chart. This symbol is usually represented by a circle with a cross or plus sign.
- Manual Input – Represents manual input or data entry within the process. This symbol is usually represented by a hexagon.
- Document – Represents a document or report within the process. This symbol is usually represented by a rectangle with a wave-like top.
- Off-page Connector – Represents a connection or link to another flow chart or page within the document. This symbol is usually represented by a circle with a page symbol inside.
Flow chart symbols can be easily created and used with various software programs or online tools. Some of the best flow chart software include RFFlow, Gliffy, and Mermaid. These software tools offer a wide range of symbols and features to create professional-looking flow charts.
Flow charts can be used in various industries and fields, such as business, engineering, and even in day-to-day activities. For example, a flow chart can be used to plan the layout of a restaurant or office, to explain the steps of a cooking recipe, or even to represent the flow of traffic in a park.
In conclusion, flow charts are a useful tool for creating clear and easy-to-understand diagrams. They represent processes and activities in a visual way, making it easier to follow and analyze. By using the correct flow chart symbols, you can create flow charts that are accurate, detailed, and can be used to communicate and document various processes.
Restaurant Floor Plans Samples →
If you’re in the restaurant business, having a clear and well-designed floor plan is essential. A restaurant floor plan not only helps you maximize your space and organize your layout, but it also creates a better dining experience for your customers. In this article, we’ll explain how to draw a flowchart for restaurant floor plans and provide some examples to help you get started.
There are different software solutions available for drawing flowcharts, such as Gliffy, Org charts, and other diagramming tools. You must choose the one that best suits your needs. In this article, we will follow the example of using Gliffy, which is an online diagramming tool that is easy to use and provides a wide range of stencils and libraries for drawing flowcharts.
To start, you need to create a new document in Gliffy and choose the flowchart template. Once you have your blank canvas, you can start drawing your restaurant floor plan. First, you should outline the main areas of your restaurant, such as the dining area, kitchen, bar, and restrooms. You can use shapes and lines to represent these areas and connect them with arrows to show the flow of customers and staff.
Next, you can add more detail to your floor plan by including tables, chairs, and other furniture. Depending on the size of your restaurant, you may also want to indicate the location of service stations, cash registers, and storage areas. You can use different colored shapes and numbers to represent these items.
It’s especially important to consider the flow of customers and staff within your restaurant. For example, you should make sure that there is enough space for customers to move around comfortably and that there are clear paths for waitstaff to bring the food from the kitchen to the tables. You can use arrows and labels to indicate the direction and purpose of these pathways.
In addition to the physical layout of your restaurant, you can also use a flowchart to show the flow of processes and decisions within your business. For instance, you can create a flowchart to illustrate how orders are taken and processed, how food is prepared and served, and how payments are handled. This can be especially helpful for training new employees and ensuring that everyone follows the same procedures.
When drawing your flowchart, it’s important to keep it clear and easy to follow. Use short and concise text to describe each step or decision, and make sure that the flow lines are easy to trace. You can use different shapes and symbols to represent different types of steps (e.g., a rectangle for a process, a diamond for a decision), and you can use colors and shading to highlight important points.
In conclusion, creating a professional-looking flowchart for your restaurant floor plans is a crucial step in the design and management of your business. It will help you visualize the flow of customers and staff, ensure efficient processes, and provide a better dining experience for your customers. Following the examples and tips provided in this article, you can create clear and detailed flowcharts that will serve as invaluable documents for your restaurant.
Org Chart Diagram →
The org chart diagram is a visual representation of an organizational structure. It shows the hierarchical relationships and the reporting lines between individuals or teams within an organization. This type of diagram is commonly used in business management to help understand the organization’s structure, roles, and responsibilities.
Creating an org chart diagram can be done using various methods, but the most common way is by using software or online tools. There are many software programs available that provide built-in org chart templates and libraries of symbols to make the process easier. Some popular software tools for org chart creation include Gliffy, RFFlow, and Microsoft Office applications such as Word and PowerPoint.
When creating an org chart diagram, it is important to have a clear plan in place. Determine the goals for the diagram and what information needs to be included. This will help in selecting the best software or tools to use and ensure that the diagram will effectively communicate the desired message.
A basic org chart typically consists of boxes or circles to represent individuals or teams, connected by lines to show the reporting relationships. Different symbols are used to represent different roles or positions within the organization. For example, a rectangle may represent a manager, while a circle may represent an individual contributor.
- Start by selecting the appropriate software or online tool for creating your org chart diagram.
- Choose the type of org chart you want to create, such as a hierarchical chart, matrix chart, or flat organizational structure chart.
- Use the software’s libraries or stencils to select the symbols and shapes needed to represent individuals, teams, and other elements in your org chart.
- Arrange the symbols on the page to represent the structure of your organization, making sure to include all relevant positions and reporting relationships.
- Add text or labels to each symbol to provide additional details, such as job titles or responsibilities.
- Use lines or arrows to connect the symbols and show the reporting relationships.
- Review and refine your org chart diagram, making adjustments as needed to improve clarity and readability.
- Save the org chart diagram as a document or image file, depending on your needs.
In addition to creating org chart diagrams, flowcharting can also be used to represent various business processes, decision-making rules, algorithms, event-driven process chains (EPC), and more.
Overall, org chart diagrams are a helpful tool for visualizing and understanding an organization’s structure and can be used in a variety of contexts, from business management to software development and even in personal settings such as planning a house move or organizing a team for a project.
Business process Flow Chart – Event-Driven Process chain EPC diagrams →
Flowcharts are a helpful tool for visualizing and documenting business processes. They allow users to understand the flow of a process, the decisions made at each step, and the actions taken as a result. In this article, we will discuss how to draw flowcharts using event-driven process chain (EPC) diagrams, which are a type of flowchart commonly used in business process management.
EPC diagrams, also known as EPC flowcharts, are a visual representation of a business process. They are used to plan, document, and analyze processes in organizations. EPC diagrams show the sequence of events and actions that occur during a process, as well as the decisions that need to be made. They can be used to create a detailed plan for a new process or to analyze and improve an existing process.
To create an EPC diagram, you will need software that supports EPC diagrams. There are many options available, including online diagram makers like Gliffy and Lucidchart, as well as software specifically designed for process management, like ARIS and Signavio. These tools provide a user-friendly interface for drawing EPC diagrams and offer features like drag-and-drop functionality, predefined shapes and symbols, and the ability to add text and labels to your diagram.
When creating an EPC diagram, it is important to follow a good layout and organization. Start by creating a start/stop shape, which represents the beginning and end of the process. Then, use flow arrows to connect different shapes and actions. Use rectangles to represent activities or tasks, diamonds to represent decisions, and circles to represent events. You can also use other shapes and symbols as needed.
To make your EPC diagram easier to understand, use colors and labels to provide additional information. For example, you can use different colors to represent different teams or departments involved in the process, or to highlight critical actions or decisions. You can also use labels to provide more detail about a specific event or action.
It is also important to create a professional-looking EPC diagram by using a consistent style and design. This can help users better understand the diagram and make it easier to follow. Use the same font and font size throughout the diagram, and ensure that all text is clear and legible. You can also use different line styles to differentiate between different types of actions or decisions.
During the creation of your EPC diagram, it may be helpful to refer to related documents or templates. For example, you may have a process document or a business plan that provides more information about a specific event or action. You can use these documents to help you create a more accurate and detailed EPC diagram.
In summary, EPC diagrams are a useful tool for visualizing and documenting business processes. They can help teams and organizations understand the flow of a process, the decisions made at each step, and the actions taken as a result. By following the guidelines and tips outlined in this article, you can create a professional-looking EPC diagram that effectively communicates your process.


