

If you are wondering how to build a React website, you have come to the right place. React has gained immense popularity due to its powerful ecosystem and flexibility. Whether you are a new developer or an experienced one, building a website with React can be a rewarding experience.
Before we dive into the step-by-step guide, let’s break down where to start. React is a JavaScript library for building user interfaces, and it is based on a component-based architecture. This means that you can break your UI into reusable components and manage their state and props easily. React also has a vast ecosystem of libraries, tools, and frameworks that can help you build feature-rich and interactive websites.
However, for this tutorial, we will focus on building a simple React-powered website without any additional tools or frameworks. This will allow you to get a better feel of how React works and understand its core concepts.
Step 1: Set up your development environment:
- Install Node.js if you haven’t already.
- Create a new project folder for your React website.
- Open the project folder in your preferred code editor.
Step 2: Initialize a new React project:
Open your terminal or command prompt and navigate to your project folder. Run the following command to initialize a new React project:
npx create-react-app my-react-app
This command will create a new React project with all the required toolchains and configurations.
Step 3: Run your React app:
Navigate to the project folder in your terminal or command prompt and run the following command:
cd my-react-app
npm start
This will start a development server and open your React app in your default web browser. Any changes you make to your project files will automatically be reflected in the browser.
Now you have a basic React website up and running! You can start experimenting with components, adding new features, and building your website.
Remember, this is just the beginning of your React journey. There are many more advanced topics and techniques to explore, such as setting up a full-stack React app, creating server-only components, and optimizing performance with code splitting and lazy loading.
Don’t be overwhelmed by the vast amount of information and tools available. Take it one step at a time, and don’t hesitate to reach out to the React community for help and guidance. Happy coding!
Add React to a Website
If you’re still building websites with static HTML, CSS, and JavaScript, it’s time to level up your development process. By adding React to your website, you can build dynamic and interactive user interfaces that are more efficient and enjoyable to use.
First, you’ll need to install the required toolchains. React relies on several tools like Babel and Webpack to bundle and minify scripts, so make sure you have these installed. You can also use create-react-app, a starter template that sets up all the necessary tools and configurations for you.
Once you have React installed, you can start building your app. With React, you create reusable components using JavaScript, and these components can be combined to create the whole UI of your website. React also provides a virtual DOM, which allows you to make efficient updates to your interface without reloading the entire page.
If you’re comfortable with React and want to take your development skills to the next level, you can also try using Next.js or Gatsby. These frameworks leverage the power of React to create full-stack websites with server-side rendering and routing capabilities.
When it comes to deploying your React website, there are multiple options. You can use a service like Vercel or Netlify, which provide easy-to-use deployment platforms specifically designed for React projects. These platforms handle the build process and automatically generate a production-ready bundle of your website.
Another option is to deploy your React website on your own server. This gives you more flexibility and control over the deployment process, but requires more technical knowledge and setup. You’ll need to configure your server to serve the React app and make sure all the necessary dependencies are installed.
One important thing to note is that React is just a frontend library. It doesn’t come with a backend, so you’ll need to set up your own backend or use existing APIs to fetch and update data. There are many backend frameworks and tools available, so you can choose the one that best fits your project’s requirements.
By adding React to your website, you can create fast and responsive user interfaces that work seamlessly across different browsers and devices. React’s component-based architecture and powerful tooling make it a popular choice for building modern web applications.
Create a New React App
To start building a React website, you need to create a new React app. React provides a set of tooling that makes it easy to create interactive user interfaces.
There are two popular options for creating a new React app: Create React App and Next.js. Create React App is a fast and easy way to create a new React app without any configuration. Next.js, on the other hand, provides a more advanced and flexible architecture for building React websites, including server-side rendering and a full-stack development experience.
To create a new React app with Create React App, you can run the following command in your terminal:
npx create-react-app my-app |
This will create a new directory called my-app with all the necessary files and dependencies to start building your React app. It will also create a sample src/App.js file with a default “Welcome to React” message.
If you prefer to use Next.js, you can install it globally using the following command:
npm install -g next |
Next.js provides a fast and efficient server-only rendering architecture for React apps. However, if you are building a smaller project or don’t need server-side rendering, Create React App can be a great choice.
Once you have Create React App or Next.js installed, you can start the development server by running the following command in the project directory:
npm start |
This will start a development server that watches for changes in your JavaScript files and automatically reloads the app in your browser. You can access your app by navigating to http://localhost:3000 in your browser.
Now you can start building your React-powered app! Feel free to add new components, modify the existing ones, and customize the app to suit your needs. React provides a flexible and production-ready ecosystem for building web apps, so you have the flexibility to create apps with parallel development, hot module replacement, tree shaking, and more.
If you’re not comfortable with React or need some help with the installation process, there are plenty of online tutorials, documentation, and community resources available that can guide you through the process.
One thing to note is that Create React App and Next.js have slightly different project architectures. Create React App is more focused on creating single-page apps, while Next.js is designed for server-side rendering and building full-stack web applications. Choose the one that best fits your project requirements and familiarity.
If you decide to switch from Create React App to Next.js or vice versa, you can easily remove the unnecessary files and start fresh with the desired framework. Just make sure to keep a backup of your code before making any changes.
Now you’re ready to start building your React app! Happy coding!
Step 3: How to Run your React Project
After setting up your React project and creating the necessary files and components, the next step is to run your project and see it in action. In this step, we’ll go through the process of running your React project.
To run your React project, you need to have Node.js installed on your computer. If you don’t have it yet, you can download and install it from the official Node.js website.
Once you have Node.js installed, you can run your React project by following these steps:
- Open your project’s terminal or command prompt.
- Navigate to the root folder of your React project.
- Type the following command to run the project:
npm startThis command runs a server-only file that knows how to run your React project. It creates a fast and comfortable development environment, so you can start working on your project without any additional setup. When you run this command, it will open your project in a new browser tab, showing the project running.
If there are any errors or issues with your project, you will see them in the terminal or command prompt. You can fix them and then run the command again.
During development, you might also want to use additional tools and scripts. For example, if you have a file called like_button.js in your project, you can use a tool like Babel to transpile it to JavaScript that the browser understands. Next.js is another tool that provides tooling and routing for React projects. You can refer to their documentation for more information on how to use these tools.
It’s important to note that these tools are optional and you can add them to your project based on your needs. The default React setup with npm start is enough to get you started.
When you’re ready to deploy your React project, you can use tools like Babel and minify your files to optimize your project for production. There are also frameworks like Next.js that provide a fully-featured ecosystem for creating and deploying React apps.
With React, you have the flexibility to create different components and remove or generate new ones as needed. You don’t have to follow a specific implementation pattern or use all the available libraries. However, it’s recommended to structure your project in a way that is easy to maintain and understand.
By following the steps mentioned above, you should now know how to run your React project and get started with building your web application.
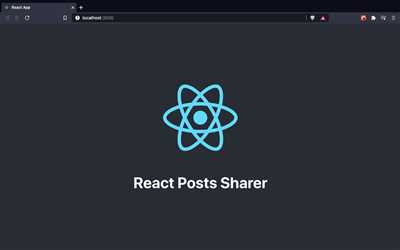
React Posts Sharer
If you’re just getting started with React, note that there are a lot of tooling options available to you. React is a powerful JavaScript library for building interactive user interfaces. With React, you can create fast and flexible websites, and it also makes deploying and managing applications easier. In this step-by-step guide, we’ll show you how to build a React-powered “Posts Sharer” tool.
First, you’ll need to have React installed. If you don’t have React installed, make sure to visit the official React website and follow the installation steps provided in the documentation. You’ll also need to have Node.js and npm installed on your machine.
Next, open a new terminal window and navigate to the directory where you want to create your React app. Once you’re in the desired directory, run the following command to generate a new React app:
npx create-react-app react-posts-sharer
This command will create a new directory called “react-posts-sharer” with all the necessary files and dependencies for your React app. Once the command completes, navigate into the newly created directory:
cd react-posts-sharer
Inside the “src” directory, you’ll find a file called “App.js”. Open this file in your preferred code editor.
Remove all the existing code in “App.js” and replace it with the following:
{`import React from 'react';
import './App.css';
function App() {
return (
React Posts Sharer
);
}
export default App;`}
This code snippet creates a simple React component that renders an h1 element with the text “React Posts Sharer” and a button labeled “Share Post”.
The next step is to add some CSS styling to the component. Create a new file called “App.css” in the same directory as “App.js”. In “App.css”, add the following CSS code:
{`.App {
text-align: center;
}
.App-logo {
height: 40vmin;
pointer-events: none;
}
button {
background-color: #61dafb;
color: white;
font-size: 1rem;
padding: 0.5rem 1rem;
border: none;
border-radius: 3px;
cursor: pointer;
}`}
This CSS code styles the component by centering the text, setting the height and other properties of the logo, and styling the button with a background color, font size, and padding.
Now that we have our component and CSS styling set up, we can run the React development server to see our “Posts Sharer” tool in action. In the terminal, run the following command:
npm start
This command will start the React development server and open your app in the default web browser. You should see the “React Posts Sharer” heading and the “Share Post” button rendered in the browser.
You can now start building the rest of your “Posts Sharer” tool by adding functionality such as input fields, posting logic, and data fetching from a server. You can also explore the React ecosystem and use additional libraries and frameworks like Next.js or Gatsby for more advanced features.
Remember to regularly save your changes and test your app by refreshing the browser. The React development server has a built-in code watcher that automatically detects changes and updates the app in real-time.
Once you’re satisfied with your “Posts Sharer” tool, it’s time to deploy it. There are different ways to deploy a React app, but one common method is to use hosting platforms like Netlify or Vercel. These platforms provide easy-to-use interfaces for deploying React apps with just a few clicks. Simply follow the instructions provided by the hosting platform of your choice to deploy your app.
That’s it! You now know how to create a React-powered “Posts Sharer” tool from scratch. Have fun exploring the full potential of React and building amazing web applications!
Sources
When building a React website, there are several sources you can turn to for guidance and help:
1. Official Documentation: The official React documentation is a valuable resource for learning about React’s core concepts, APIs, and best practices. It provides detailed information about creating and managing React components, handling state and props, and much more.
2. Online tutorials and courses: There are numerous online tutorials and courses available that provide step-by-step guidance on building React websites. Websites like Udemy, Coursera, and Codecademy offer comprehensive courses for beginners and advanced developers alike.
3. Framework-specific documentation: If you are using a specific React framework like Next.js or Gatsby, referring to their official documentation can be extremely helpful. These frameworks provide additional features and functionality that can enhance your React website development experience.
4. Community forums and discussion boards: Participating in online forums and discussion boards dedicated to React development can provide answers to specific questions and help troubleshoot issues. Websites like Stack Overflow and Reddit have active communities of React developers who are willing to share their knowledge and expertise.
5. Open-source projects and code samples: Exploring open-source React projects and code samples can give you insights into different implementation approaches and best practices. Websites like GitHub and CodePen have a vast collection of React projects that you can study and learn from.
6. Development tools and libraries: There are various tools and libraries available that can make your React website development process more efficient and productive. Tools like create-react-app, babel, and webpack help with setting up the development environment, compiling code, and bundling assets.
7. Video tutorials and screencasts: Video tutorials and screencasts can be a great way to learn React, as they provide a visual demonstration of code examples and concepts. Websites like YouTube and Egghead.io offer a wide range of React video tutorials and screencasts.
8. Online platforms and communities: Joining online communities and platforms like Reactiflux, Discord, and Dev.to allows you to connect with other React developers, ask questions, and share your knowledge and experiences.
Note: It’s important to choose reliable sources and verify the information you find. Always cross-reference multiple sources to ensure accuracy and currency.


