

If you love strawberries and want to enjoy their delicious taste even when they are out of season, preserving them is the way to go. Making strawberry preserves is a sure way to capture the intense flavor and nutrition of this juicy fruit. By using a simple method that has been perfected in Japan, you can create your very own strawberry preserves that will last for months.
To begin, make sure you have fresh strawberries that are ripe and flavorful. Immediately wash and hull the strawberries, then slice them into smaller pieces. In a heated pot, combine the sliced strawberries with sugar and a small amount of citric acid to enhance the fruit’s natural flavors.
The mixture needs to cook for about 15 mins, stirring occasionally, until it thickens and gets a jam-like consistency. While the preserves are cooking, prepare your canner and two-piece lids. Once the preserves are ready, carefully pour it into the sterilized jars, leaving a small amount of headspace at the top. Seal the jars tightly with the lids and place them in the canner for processing.
Process the jars in the canner for about 10-15 mins, making sure they are fully submerged in boiling water. This will ensure the preservation of the preserves and eliminate any potential bacteria. After the processing time is up, carefully remove the jars from the canner and let them cool completely. The lids should pop down and create a tight seal, ensuring the quality and longevity of your strawberry preserves.
Now you can enjoy your homemade strawberry preserves on toast, waffles, or even as a topping for ice cream. The preserves can also be used as a filling for pastries and cakes, adding a burst of strawberry flavor to any dessert. With this simple method, you can make your very own strawberry preserves and enjoy the taste of summer all year round.
- Intense Strawberry Preserves
- The Secret Ingredient
- The Cooking Process
- Canning and Preserving
- Making Jams and Jellies
- Strawberry Preserves
- Method
- Cooking the Mixture After the resting time, place the pot on the stove over medium heat. Stir occasionally to prevent the mixture from sticking to the bottom of the pot. Cook the mixture for about 20 minutes or until it thickens. After 20 minutes, test the thickness of the preserves by placing a small amount on a chilled plate. If it holds its shape and doesn’t immediately spread, it is ready. If it’s still too runny, continue cooking for a few more minutes. Preserving the Preserves While the preserves are cooking, prepare the canner by filling it with water and bringing it to a boil. This will sterilize the jars and ensure a safe preserving process. Once the preserves are ready, immediately transfer them to the sterilized jars one at a time. Fill the jars, leaving a quarter-inch of headspace between the preserves and the lid. Use a clean, damp cloth to wipe any drips or spills from the jar rims. Place the lids on the jars and tighten the bands securely. Carefully place the jars in the canner, ensuring they are completely submerged in water. Boil the jars for 10 minutes to process the preserves. After the processing time is up, carefully remove the jars from the canner and let them cool on a towel-lined surface for 12 to 24 hours. During this time, the preserves will seal and set, creating a tight vacuum seal. Once the jars have cooled, check the seals by pressing down on the center of the lids. If the lids do not pop back, they are sealed properly. If any jars did not seal, refrigerate them and consume them within a few weeks. Your strawberry preserves are now ready to enjoy! They can be spread on toast, used as a filling for pastries, or even enjoyed on their own. Store the sealed jars in a cool, dark place for up to a year. Video: Home-made Strawberry Jam Recipe | Fresh Strawberry Jam with basic ingredients | Chef Sanjyot Keer
- After the resting time, place the pot on the stove over medium heat. Stir occasionally to prevent the mixture from sticking to the bottom of the pot. Cook the mixture for about 20 minutes or until it thickens. After 20 minutes, test the thickness of the preserves by placing a small amount on a chilled plate. If it holds its shape and doesn’t immediately spread, it is ready. If it’s still too runny, continue cooking for a few more minutes. Preserving the Preserves While the preserves are cooking, prepare the canner by filling it with water and bringing it to a boil. This will sterilize the jars and ensure a safe preserving process. Once the preserves are ready, immediately transfer them to the sterilized jars one at a time. Fill the jars, leaving a quarter-inch of headspace between the preserves and the lid. Use a clean, damp cloth to wipe any drips or spills from the jar rims. Place the lids on the jars and tighten the bands securely. Carefully place the jars in the canner, ensuring they are completely submerged in water. Boil the jars for 10 minutes to process the preserves. After the processing time is up, carefully remove the jars from the canner and let them cool on a towel-lined surface for 12 to 24 hours. During this time, the preserves will seal and set, creating a tight vacuum seal. Once the jars have cooled, check the seals by pressing down on the center of the lids. If the lids do not pop back, they are sealed properly. If any jars did not seal, refrigerate them and consume them within a few weeks. Your strawberry preserves are now ready to enjoy! They can be spread on toast, used as a filling for pastries, or even enjoyed on their own. Store the sealed jars in a cool, dark place for up to a year. Video: Home-made Strawberry Jam Recipe | Fresh Strawberry Jam with basic ingredients | Chef Sanjyot Keer
- Preserving the Preserves
- Video:
- Home-made Strawberry Jam Recipe | Fresh Strawberry Jam with basic ingredients | Chef Sanjyot Keer
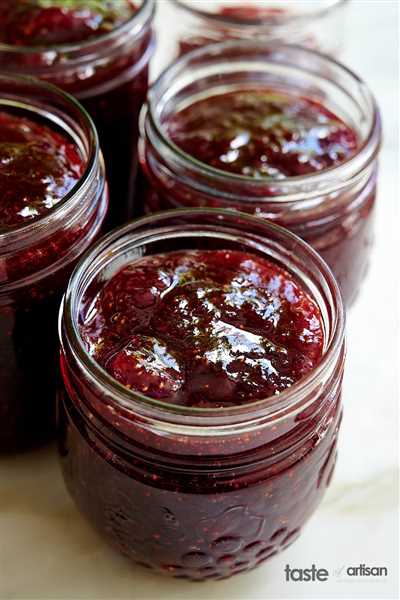
Intense Strawberry Preserves
If you’re a fan of intense and flavorful strawberry preserves, then this recipe is for you! Unlike traditional jams and jellies, which can sometimes taste a bit bland, these preserves pack a punch of strawberry goodness in every bite.
The Secret Ingredient
The key to making intense strawberry preserves is to use a combination of both fresh strawberries and strawberry juice. The juice adds an extra boost of flavor and intensifies the natural sweetness of the fruit. To extract the juice, simply blend fresh strawberries and strain the mixture to remove any seeds or pulp.
This method is commonly used in Japan when making preserves, as it brings out the best in the fruit.
The Cooking Process
To make these intense preserves, start by combining the strawberry juice, fresh strawberries, sugar, and a touch of citric acid in a large pot. The citric acid helps to preserve the vibrant color of the strawberries, giving the preserves an appetizing appearance.
Bring the mixture to a boil over medium heat, stirring frequently. Once it reaches a rolling boil, reduce the heat and simmer for 10-15 minutes, until the strawberries are soft and the mixture has thickened slightly.
Tip: Be sure to stir the mixture constantly to prevent it from sticking to the bottom of the pot and burning.
Canning and Preserving
Once the intense strawberry preserves are ready, they need to be preserved to ensure their long shelf life. Follow these steps to properly can your preserves:
- Fill a large canner or stockpot with water and place it on the stove to heat.
- Place your jars and lids in a separate pot, cover them with water, and simmer for 10 minutes. This will sanitize the jars and ensure a proper seal.
- Using tongs, carefully remove the jars and lids from the hot water and let them dry on a clean kitchen towel.
- Fill each jar with the hot strawberry preserves, leaving about 1/4 inch of space at the top.
- Wipe the rims of the jars with a clean, damp cloth to remove any residue.
- Place a lid on each jar and tighten the ring.
- Using tongs, place the jars in the canner, making sure they are fully submerged in the boiling water.
- Process the jars in the boiling water for 10 minutes. This will create a vacuum seal and ensure the safety of your preserves.
- After the time is up, carefully remove the jars from the canner and let them cool on a kitchen towel. You should hear a satisfying “pop” as the lids seal.
- Allow the jars to cool completely before storing them in a cool, dark place. The intense strawberry preserves will keep for up to a year.
Now that you know the secrets behind making intense strawberry preserves, you can enjoy the bold flavor and nutrition of fresh strawberries all year round. Spread them on toast, swirl them into yogurt, or use them as a filling for pastries – the possibilities are endless!
Making Jams and Jellies
When it comes to preserving fruit, making jams and jellies is a popular method. Jams and jellies are sweet spreads made by boiling fruit with sugar. The main difference between the two is the consistency: jellies are clear and firm, while jams are thick and chunky.
To make jams and jellies, the fruit is first heated and then mixed with sugar. The mixture is then boiled until it reaches the desired thickness. Citric acid is often added to enhance the flavor and act as a natural preservative. The sugar acts as a preservative as well, preventing the growth of bacteria and mold.
One important thing to note is that jams and jellies are very high in sugar. While fruit itself is nutritious, the added sugar can make them less healthy. If you’re looking for a healthier option, you can try using less sugar or opting for low-sugar options.
To ensure that your jams and jellies set properly, it’s important to use the right amount of sugar and cook them for the recommended time. This usually involves boiling the mixture for a few minutes until it reaches the gel point. The gel point is the temperature at which the mixture begins to thicken and set into a gel-like consistency.
Once the jam or jelly has reached the desired consistency, it can be immediately poured into sterilized jars and sealed. Some recipes may also call for processing the filled jars in a canner for a certain amount of time to ensure proper preservation.
Jams and jellies can be made with a variety of fruits, but strawberry preserves are especially popular. Strawberries are a delicious and versatile fruit that pairs well with many flavors. The intense sweetness and vibrant color of strawberries make them a favorite choice for making jams and jellies.
In Japan, there is a traditional method of making jams called the “two-piece canner method.” This method involves heating the fruit and sugar mixture in a two-piece canner until it reaches the desired consistency. This method is more time-consuming but it allows for a more intense flavor and a longer shelf life.
Strawberry Preserves
When it comes to preserving your fresh strawberries, making strawberry preserves is a great method. Preserves are a sweet and intense way to enjoy the delicious flavor of strawberries all year round. Here is a simple recipe to help you make your own strawberry preserves!
First, gather your ingredients. You will need:
| – 2 pounds of fresh strawberries |
| – 4 cups of sugar |
| – 1 tablespoon of citric acid or lemon juice |
Next, wash and hull your strawberries. Then, using a canner, heat your sugar and citric acid or lemon juice together, stirring until the sugar is dissolved.
Add the strawberries to the sugar mixture and let them sit for 20-30 minutes. This will help draw out the natural juices from the strawberries.
After the 20-30 minutes, bring the strawberry mixture to a boil over medium heat. Cook for about 20 minutes, stirring occasionally, until the mixture thickens and reaches the desired consistency.
Once your strawberry preserves have thickened, remove the mixture from heat and immediately pour it into sterilized jars. Make sure to leave about 1/4 inch of headspace at the top of each jar.
Seal the jars with two-piece lids and process them in a water bath canner for 10 minutes. This will ensure that your preserves are properly preserved and safe to eat.
After the processing time is up, remove the jars from the canner and let them cool completely. Check the seals on the jars to make sure they are tight and secure.
Now you have your delicious homemade strawberry preserves! They can be enjoyed on toast, biscuits, or even as a topping for ice cream. The intense strawberry flavor and nutrition will be preserved for you to enjoy long after strawberry season is over.
Remember to store your strawberry preserves in a cool, dark place until opened. Once opened, they should be refrigerated and consumed within two weeks. That’s it! Now you can enjoy the taste of summer strawberries any time of the year.
Method
To make strawberry preserves, you will need a two-piece canner. Start by washing and hulling the strawberries. Then, cut them into smaller pieces for easier cooking.
In a large pot, combine the strawberries, sugar, and citric acid. The citric acid helps preserve the vibrant red color of the strawberries. Stir the mixture well and let it sit for 30 minutes to allow the flavors to meld together.
Cooking the Mixture
After the resting time, place the pot on the stove over medium heat. Stir occasionally to prevent the mixture from sticking to the bottom of the pot. Cook the mixture for about 20 minutes or until it thickens.
After 20 minutes, test the thickness of the preserves by placing a small amount on a chilled plate. If it holds its shape and doesn’t immediately spread, it is ready. If it’s still too runny, continue cooking for a few more minutes.
Preserving the Preserves
While the preserves are cooking, prepare the canner by filling it with water and bringing it to a boil. This will sterilize the jars and ensure a safe preserving process.
Once the preserves are ready, immediately transfer them to the sterilized jars one at a time. Fill the jars, leaving a quarter-inch of headspace between the preserves and the lid. Use a clean, damp cloth to wipe any drips or spills from the jar rims.
Place the lids on the jars and tighten the bands securely. Carefully place the jars in the canner, ensuring they are completely submerged in water. Boil the jars for 10 minutes to process the preserves.
After the processing time is up, carefully remove the jars from the canner and let them cool on a towel-lined surface for 12 to 24 hours. During this time, the preserves will seal and set, creating a tight vacuum seal.
Once the jars have cooled, check the seals by pressing down on the center of the lids. If the lids do not pop back, they are sealed properly. If any jars did not seal, refrigerate them and consume them within a few weeks.
Your strawberry preserves are now ready to enjoy! They can be spread on toast, used as a filling for pastries, or even enjoyed on their own. Store the sealed jars in a cool, dark place for up to a year.


