

Photography is a fascinating hobby that allows you to capture moments and stories through the lens of your camera. Whether you want to choose it as a profession or simply enjoy taking pictures, learning the basics is essential. In this guide, we will write a manual for beginners who are just starting out on their photography journey. So, if you have a digital camera and the passion to create beautiful images, this is the right place for you to begin.
First and foremost, familiarize yourself with the camera’s functions and settings. Learn how to adjust the shutter speed, aperture, and ISO to get the desired effect in your photographs. A good starting point for beginners is to shoot in automatic mode, where the camera does most of the work for you. As you become more comfortable with the camera, you can gradually switch to manual mode and have full control over your shots.
When it comes to choosing a topic to photograph, there are endless possibilities. Some beginners may find it helpful to focus on one specific genre, such as portraits or landscapes. However, don’t be afraid to explore different subjects and experiment with various styles. The most important thing is to shoot what you love and what inspires you.
While the brand and type of camera you use are important, they shouldn’t be the sole focus. A good photograph can be taken with any camera, as long as you understand the fundamentals of composition, lighting, and storytelling. Remember, it’s not the gear that makes a great photographer, but rather the skill and creativity behind the lens.
One principle that many photographers swear by is the “rule of thirds.” According to this guideline, you should imagine breaking an image into nine equal parts by placing two horizontal and two vertical lines. The points where these lines intersect are the perfect spots to place your subject or other important elements of the scene. This technique helps create a balanced and visually appealing composition.
Another important aspect of photography is understanding light. Different lighting conditions can drastically impact the mood and atmosphere of a photograph. For example, shooting in bright daylight will give you vivid and well-lit images, while shooting during the golden hour (the hour after sunrise and before sunset) can add a warm and magical glow to your pictures. Experiment with different lighting situations to see the effect it has on your photos.
Lastly, always remember to have fun and never stop learning. Photography is a journey that takes time and practice to master. Seek inspiration from other photographers, take classes or workshops, and challenge yourself to try new techniques. Don’t be discouraged if your photos don’t turn out as expected at the beginning. With persistence and dedication, you will gradually improve and become a skilled photographer.
In summary, if you’re a beginner looking to start doing photography, don’t let the technical aspects overwhelm you. Focus on learning the basics, experimenting with different subjects and styles, and most importantly, enjoying the process. With practice and patience, you’ll soon be capturing stunning images that tell your own unique story.
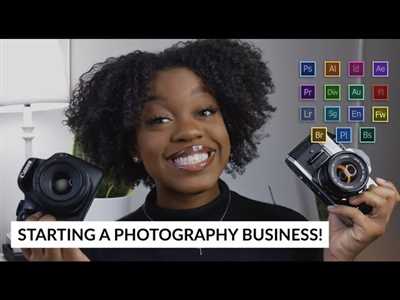
How to Start a Photography Business

Starting a photography business can be a thrilling and rewarding venture. Whether you have been captivated by the art of photography for years or you are just beginning to develop an interest in it, turning your hobby into a profession can open up a whole new world of opportunities. Here are a few essential steps to take when starting your own photography business.
1. Determine your niche: The first step in starting a photography business is to determine your niche. Are you interested in portrait photography, sports photography, photojournalism, or something else? Your chosen niche will determine the type of camera and equipment you’ll need, as well as the specific skills you’ll need to develop.
2. Invest in the right equipment: Choosing the right camera and equipment is crucial for any photographer, especially when starting a business. Decide whether you want to go for a digital or a film camera, and consider factors such as weight, focus capabilities, shutter speed, ISO range, and more. For beginners, a digital camera is often easier to work with and less expensive in the long run.
3. Learn the basics: Familiarize yourself with the fundamentals of photography. Understand concepts such as aperture, shutter speed, ISO, and white balance. Learn about composition, lighting techniques, and how to create a captivating photo. Taking photography classes or reading books about the subject can greatly assist in your learning process.
4. Practice, practice, practice: The saying “practice makes perfect” couldn’t be more true for photographers. Dedicate time to practice taking photos in different settings and conditions. Challenge yourself by experimenting with different modes and settings on your camera. The more you practice, the better you will become.
5. Create a portfolio: Building a strong portfolio is essential for a photographer starting a business. Your portfolio should showcase your best and most captivating work to attract potential clients. Display a diverse range of photos that highlight your unique style and skills.
6. Develop a business plan: A solid business plan will guide you through the process of starting your photography business. Determine your target audience, set your pricing, and establish a marketing strategy. Consider the financial aspects, such as the costs of equipment, insurance, and other business expenses.
7. Network and market yourself: Take advantage of social media platforms and professional networking events to connect with potential clients and other photographers. Create a website or a blog to showcase your work and reach a broader audience. Collaborate with other professionals in the industry to expand your network.
8. Continuously learn and improve: Photography is a constantly evolving field. Stay up-to-date with the latest trends and technologies in the industry. Attend workshops, seminars, and conferences to enhance your skills and stay inspired. Remember, learning should be an ongoing process.
Summary: Starting a photography business can be an exciting and challenging journey. It requires determination, a strong work ethic, and a passion for the art of photography. By following these steps and continuously striving to improve your skills, you can turn your hobby into a successful profession.
Write a photography business plan
When you decide to start a photography business, it’s important to have a solid plan in place. A photography business plan will help guide you in the right direction and ensure that you stay focused on your goals. Here are some key steps to consider when creating your plan:
| 1. Define your photography niche: Decide what type of photography you want to focus on. There are many different genres, such as landscape, portrait, photojournalism, or even monochrome. Choose the one that you are most passionate about and want to specialize in. |
| 2. Determine your target audience: Identify who your potential clients are and what kind of photography services they are looking for. This will help you tailor your marketing efforts and create a strong brand that resonates with your target audience. |
| 3. Research your competition: Study other photographers in your niche and analyze their work, pricing, and marketing strategies. This will give you a better understanding of what works and what doesn’t, and help you differentiate yourself from the competition. |
| 4. Set your pricing: Determine how much you should charge for your photography services. Consider factors like your experience, equipment costs, and the local market. It’s important to find a balance between being competitive and ensuring that you are compensated fairly for your work. |
| 5. Create a marketing strategy: Outline how you plan to market and promote your photography business. This could include creating a website, using social media, attending networking events, or collaborating with other industry professionals. A well-thought-out marketing strategy will help you reach your target audience and attract new clients. |
| 6. Plan your finances: Consider the financial aspect of starting a photography business. Determine how much money you will need to invest in equipment, marketing, and other operating expenses. Create a budget and plan your finances accordingly to ensure that you have a sustainable business. |
| 7. Develop a portfolio: Build a strong portfolio that showcases your best work and highlights your unique style and capabilities. This will be essential for attracting clients and demonstrating your skills as a professional photographer. |
| 8. Learn and improve: Continuous learning is important in the photography industry. Stay updated with the latest trends, techniques, and equipment. Attend workshops, read books, and practice regularly to hone your skills and improve as a photographer. |
Remember, starting a photography business is not just about taking great photos. It’s about understanding the industry, identifying your target audience, and creating a strong brand. A well-thought-out business plan will help you navigate the challenges and make your journey as a professional photographer a successful one.
2 What is Aperture in Photography
When starting in photography, one of the first things you need to learn is how to control the camera’s aperture. Aperture is one of the three main components of exposure, along with shutter speed and ISO. It determines the amount of light that enters the camera and affects the depth of field in an image.
The aperture is defined by an f-stop number, such as f/1.8 or f/16. The lower the f-stop number, the wider the aperture and the more light is allowed to enter the camera. This is useful for shooting in low-light conditions or when you want to create a blurred background effect, also known as bokeh. On the other hand, a higher f-stop number means a narrower aperture, allowing less light to enter the camera and resulting in a larger depth of field where more of the scene is in focus.
Aperture also has an impact on the amount of noise in a photo. When shooting with a wide open aperture, more light is captured by the camera sensor, resulting in a brighter image. This means you can use a lower ISO setting, which reduces the amount of digital noise. On the other hand, if you shoot with a narrow aperture, less light reaches the sensor, requiring a higher ISO setting, which can introduce more noise into the image.
Choosing the right aperture depends on the type of photography you want to pursue. If you’re shooting landscapes or portraits, you might want to use a narrower aperture (higher f-stop number) to ensure everything in the frame is in focus. For sports or action shots, a wider aperture (lower f-stop number) can help you freeze motion while keeping the subject in focus.
It’s also worth noting that the aperture you choose can have a creative impact on your photos. A wide open aperture can create a shallow depth of field, isolating the subject from the background and creating a dreamy effect. On the other hand, a narrow aperture can render everything in focus, which is useful for landscape or architectural photography.
Many photographers shoot in aperture priority mode, where they set the desired aperture and let the camera choose the appropriate shutter speed for a correct exposure. However, if you want full control over your photos, you can switch to manual mode and adjust both the aperture and shutter speed yourself.
In summary, aperture plays a crucial role in photography. It helps to determine how much light enters the camera, affects the depth of field, and can even impact the noise in your images. Understanding aperture and knowing how to choose the right one for each situation will greatly improve your photography skills as a beginner.
Exposure
Exposure is a fundamental concept in photography. It refers to the amount of light that reaches the camera’s image sensor when you take a photo. Understanding exposure is crucial for all photographers, whether you’re a beginner or a seasoned professional.
When you shoot a photograph, the camera’s aperture, shutter speed, and ISO settings all work together to control the exposure. Aperture determines how much light is allowed through the lens, while shutter speed determines how long the sensor is exposed to light. ISO determines the sensitivity of the sensor to light.
Choosing the right exposure settings depends on the subject and the story you want to tell in your photograph. For example, shooting in manual mode gives you full control over the exposure settings, allowing you to create the exact image you envision. On the other hand, shooting in aperture priority or shutter priority mode can help you quickly capture a moment without worrying about the exposure settings.
When it comes to exposure, there’s a saying among photographers: “Expose for the highlights, develop for the shadows.” This means that you should adjust the settings to properly expose the brightest parts of the image, and then adjust the editing in post-processing to recover details in the darker areas.
Underexposure and overexposure are two common exposure mistakes to avoid. Underexposure happens when the image is too dark, and overexposure occurs when the image is too bright. To avoid these mistakes, you can use the camera’s built-in light meter or histogram to help you determine the correct exposure.
Exposure also affects the overall look and feel of your photos. A correctly exposed image typically has a balanced distribution of tones, with details in both the highlights and shadows. However, intentionally overexposing or underexposing a photo can create a specific mood or artistic effect.
In digital photography, exposure affects the amount of noise in the image. Higher ISO settings tend to produce more noise, while lower ISO settings result in less noise. Additionally, long exposures can introduce noise due to the sensor heating up during the exposure.
Exposure is a topic that photographers continue to learn about and experiment with throughout their careers. It’s a crucial aspect of capturing light and telling a story through images. So, whether you’re just starting out or have been shooting for years, understanding exposure will greatly enhance your photography skills.
There are many resources available to help you dive deeper into the world of exposure. From online tutorials to workshops and books, you’ll find a wealth of information to expand your knowledge and skills as a photographer. So grab your camera, choose a subject, and start experimenting with exposure to capture stunning photographs!
1 Aperture

Aperture is one of the most important concepts that photographers need to understand when starting with photography. It helps determine the amount of light that enters the camera and impacts the depth of field in a photograph.
For beginners, learning about aperture can seem quite overwhelming, but it’s essential to grasp this concept as it plays a crucial role in creating beautiful and captivating images.
Aperture is represented by an “f-stop” value, such as f/2.8 or f/16. The lower the f-stop value, the larger the aperture, and the more light enters the camera. On the other hand, a higher f-stop value means a smaller aperture and less light.
Aperture is also responsible for the depth of field. A wider aperture (lower f-stop value) creates a shallow depth of field, resulting in a blurred background and a focused subject. On the contrary, a narrower aperture (higher f-stop value) creates a deep depth of field, where both the foreground and background are in focus.
Understanding aperture will help photographers determine the overall look and feel of their images. If you want a portrait with a blurred background, you would choose a wider aperture. For landscape photography, on the other hand, you would often want a deep depth of field, which can be achieved by using a narrower aperture.
Aperture is also closely related to lenses. Different lenses have different maximum aperture values, so if you want to achieve a wide aperture, you might need to invest in a lens with a larger maximum aperture.
Summary:
| Aperture (f-stop value) | Impact |
| Low (e.g., f/2.8) | Large aperture, more light, shallow depth of field |
| High (e.g., f/16) | Small aperture, less light, deep depth of field |
Knowing how to choose the right aperture for each shot is crucial, and it comes with practice and experience. However, as a beginner, you can start by using the aperture priority mode on your camera, often denoted by “A” or “Av” mode. This mode allows you to set the aperture while the camera determines the appropriate exposure settings.
Aperture is just one aspect of exposure, which is the overall brightness of a photograph. Other factors, such as shutter speed and ISO, also play a role in determining the exposure. Understanding the relationship between these three variables will greatly enhance your photography skills.
Photography is a hobby that can easily turn into a profession. While it can be an expensive journey, it’s crucial to first focus on learning the basics and practicing with the equipment you have. You don’t need a professional camera to start taking great photos; it’s more about knowing how to use it effectively.
There are many resources available online that can help you learn photography for free, such as tutorials, articles, and websites like Unsplash where you can find inspiration and free high-quality images for reference.
In conclusion, aperture is a fundamental concept in photography that every beginner needs to understand. It determines the amount of light entering the camera and affects the depth of field. Knowing how to choose the right aperture for your desired shot will greatly improve your photography skills and help you achieve the desired artistic effect.
2 Shutter Speed
Shutter speed is an important setting that every beginner photographer should learn about. It determines how long the camera’s shutter stays open when taking a photo.
Shutter speed is measured in seconds or fractions of a second, such as 1/1000th or 1/30th. A fast shutter speed, like 1/1000th of a second, freezes the motion in the photo, making it ideal for sports photography or capturing fast-moving subjects. On the other hand, a slow shutter speed, like 1/30th of a second, allows more light into the camera and can give a sense of motion to the photo.
The choice of shutter speed depends on what you want to achieve in your photograph. If you want to freeze the action, choose a faster shutter speed. If you want to show motion or create light trails, choose a slower shutter speed. Experimenting with different shutter speeds will give you a better understanding of how it can impact your photos.
When shooting in manual mode, you have full control over the shutter speed. However, if you are just starting out or prefer a more automated approach, you can choose the shutter priority mode, denoted by “S” or “Tv” on your camera’s dial. In this mode, you set the desired shutter speed, and the camera will automatically adjust the other settings, like aperture and ISO, to achieve a proper exposure.
It’s worth mentioning that a slower shutter speed can also introduce camera shake if the camera is not stable. To overcome this, you can use a tripod or increase your camera’s ISO to compensate for the lack of light without slowing down the shutter too much.
There are also some specialized techniques you can try with shutter speed, such as panning, where you move the camera to follow a moving subject, or long exposures, where you keep the shutter open for several seconds or even minutes to capture things like star trails or light painting.
In summary, shutter speed is a crucial setting in photography that allows you to control the amount of light and motion in your photos. Understanding how it works and when to use different shutter speeds will greatly improve your photography skills, whether you’re a hobbyist or aspiring to become a professional photographer.
3 ISO
ISO is an important setting in photography that determines the sensitivity of your camera’s image sensor to light. Choosing the right ISO setting can make it easier to capture the desired shot in various lighting conditions.
The ISO scale typically ranges from 100 to 6400 or even higher on some cameras. A lower ISO, such as 100, is ideal for shooting in bright conditions or when using a tripod. On the other hand, a higher ISO, like 6400, is useful in low-light situations or when you want to freeze motion.
However, increasing the ISO can introduce noise or grain into your photos, so finding the right balance is crucial. While some cameras handle high ISO settings better than others, noise reduction can often be applied in post-processing to minimize its appearance.
For beginners starting in photography, it’s recommended to keep the ISO as low as possible to maintain image quality, especially if you’re shooting in well-lit environments. As you gain experience and learn to balance ISO with other exposure settings like aperture and shutter speed, you can experiment with higher ISO values.
It’s worth noting that different camera brands may have slightly different ISO performance, so you may need to adjust your settings accordingly. This is where reading the camera’s manual or attending photography classes can help.
Summary:
- ISO determines the sensor’s sensitivity to light.
- A lower ISO is suitable for bright conditions or when using a tripod.
- A higher ISO is useful in low-light situations or freezing motion.
- Higher ISO can introduce noise or grain in photos.
- Beginners should start with a lower ISO and gradually learn to balance it with other settings.
- Camera brands may have different ISO performance, so adjust settings accordingly.
Remember, the most important thing is to get out there and start taking photos! Whether it’s as a hobby or for business, photography is a journey of learning and self-expression. As the photojournalist Robert Capa once said, “If your photographs aren’t good enough, you’re not close enough.” So get close, focus on your subject, and capture the story you want to tell.
Photo Credits: Kara Öz Yıldırım on Unsplash
Exposure Summary
In photography, exposure refers to the amount of light that reaches the camera’s image sensor when taking a photograph. It is one of the most important aspects of photography that beginners must learn to master. The right exposure can make or break a photo, and it plays a significant role in determining the overall quality and impact of the image.
When taking a photo, the camera’s exposure is determined by three main factors: aperture, shutter speed, and ISO. Aperture controls the amount of light that enters the camera through the lens, while shutter speed determines how long the camera’s sensor is exposed to that light. ISO, on the other hand, measures the camera sensor’s sensitivity to light.
Choosing the right settings for aperture, shutter speed, and ISO depends on what type of photo you want to take. For example, if you’re capturing a fast-moving subject like sports, you’ll need a high shutter speed to freeze the action. On the other hand, if you’re photographing a portrait, you might want a wider aperture to create a beautiful background blur.
It’s important to note that different cameras may have different exposure modes, such as full manual mode, aperture priority mode, shutter priority mode, or program mode. For beginners, starting with the camera’s automatic or semi-automatic modes can be easier, as these modes allow the camera to choose the appropriate settings for the current lighting conditions.
In the world of digital photography, the concept of exposure remains the same as with film cameras. However, the advantage of digital cameras is the ability to instantly review the photo you just took and make adjustments as needed. This immediate feedback makes the learning process easier and more convenient for beginners.
While there are many sources and guides available for learning about exposure, it’s important to always practice and experiment with different settings to truly understand how they impact your photos. Don’t be afraid to make mistakes and learn from them.
In conclusion, exposure is a fundamental aspect of photography and plays a vital role in creating visually appealing images. Understanding how aperture, shutter speed, and ISO work together to control exposure is crucial for every beginner’s journey into photography. So grab your camera, start taking pictures, and explore the possibilities that exposure settings can bring to your photography!
A beginner’s guide to photography: Where do I start
Photography is an exciting and rewarding hobby that allows you to capture moments and create art. If you’re just starting out, it can be overwhelming to know where to begin. In this guide, we will cover the basics of photography and provide you with some tips to help you get started on your photography journey.
1. Get to know your camera
The first step in photography is to familiarize yourself with your camera. Whether you’re using a digital or film camera, learning how it works and how to navigate its settings is key. Take some time to read the user manual and experiment with the different modes and functions.
2. Understand the exposure triangle
One of the most important concepts in photography is the exposure triangle, which consists of three elements: aperture, shutter speed, and ISO. These three settings determine how much light enters the camera and can impact the quality and mood of your photographs.
3. Start with the basics
As a beginner, it’s best to start with simple subjects and techniques. Practice shooting in different lighting conditions and learn how to compose your shots. Experiment with different angles and perspectives to create interesting compositions.
4. Learn about composition
Composition is all about how you arrange the elements in your photograph. Pay attention to the rule of thirds, leading lines, and the use of negative space. Take the time to study and analyze other photographers’ work to gain inspiration and ideas.
5. Experiment with different genres
There are many different genres of photography to explore, such as landscapes, portraits, street photography, and wildlife photography. Try out different styles to find what interests you the most and allows you to express your creativity.
6. Invest in good lenses
While the camera body is important, the lenses you use can have a significant impact on the quality of your photographs. Invest in good lenses that suit your photography style and needs.
7. Practice regularly
Like any skill, photography requires practice to improve. Make it a habit to take your camera with you wherever you go and capture moments that catch your eye. The more you practice, the better you will become.
8. Learn from others
There are many resources available for learning photography, such as online tutorials, photography books, and workshops. Surround yourself with other photographers and learn from their experiences and techniques.
9. Edit your photos
Editing plays an important role in photography. Learn how to edit your photos using software programs like Adobe Lightroom or Photoshop. Experiment with different editing styles and find your own unique editing process.
10. Have fun!
Photography is meant to be enjoyable and a way to express your creativity. Don’t be too hard on yourself and remember to have fun while learning and capturing memorable moments.
Remember, everyone starts somewhere, and with time and practice, you will continue to improve as a photographer. So grab your camera and start capturing the world through your lens!
Image sources: pexels.com, unsplash.com


